The ImageMagick commands: magick input.jpg -quality 80 output.webp for WebP and magick input.jpg -quality 60 output.avif for AVIF (AVIF’s quality scale is more aggressive, so 55 – 65 is roughly a visual match for a JPEG/WebP 80).
For a whole folder:
# WebP, all JPEGs in the current folder
for f in *.jpg; do magick "$f" -quality 80 "${f%.jpg}.webp"; done

# AVIF, with the slower/smaller encoder setting
for f in *.jpg; do magick "$f" -quality 60 -define heic:speed=2 "${f%.jpg}.avif"; done
Add -strip only if you actually want the metadata gone (see the metadata note further down), and check magick -list format | grep -iE "avif|webp" first to confirm your build can write both formats. The rest of this guide covers installation, the encoder settings that matter, and a hot-folder script that keeps the original when the new file comes out bigger.
Next-generation formats like AVIF and WebP have effectively won the web image format wars.
They deliver significantly smaller file sizes without visible quality loss, and for a photography-heavy site, the page speed difference is real. But converting an existing archive — or automating conversion of new files as they come in — requires a tool that doesn’t choke on large batches.
That’s where ImageMagick shines. Running silently in the terminal, it can process large batches systematically in the background without rendering previews or holding everything in memory. It can also be scripted on a schedule and automated. And it gives you precise control over the encoding parameters — including the encoding speed setting that has the biggest impact on file size at a given quality level.
A note for Lightroom Classic users
Adobe added native AVIF and WebP export support directly to Lightroom Classic and Camera Raw — both formats are now available in the Format dropdown of the standard Export dialog. If your workflow lives entirely inside Lightroom and you’re exporting new files rather than converting an existing archive, you may not need a standalone tool at all.
But for bulk-converting an existing archive of JPEGs, or setting up an automated hot folder for web assets, a dedicated tool is still the practical choice.
This guide focuses purely on macOS. The core ImageMagick commands work identically on Windows or Linux, but the automated folder scripts are Mac-specific.
Why not use macOS sips?
macOS can open AVIF files natively, but Apple hasn’t enabled AVIF writing in the built-insipscommand. It also lacks the encoding controls needed to optimize compression properly. For this particular task, ImageMagick is the right tool.
Checking for AVIF and WebP support
ImageMagick requires compiled support for AVIF and WebP via external libraries. If you’re running an older installation, it may be missing one or both. I’m assuming Homebrew and ImageMagick are already installed — if not, here’s the installation guide.
Verify your installation
magick -list format | grep -iE "AVIF|WEBP"You should see both formats listed with rw (read/write) capabilities:
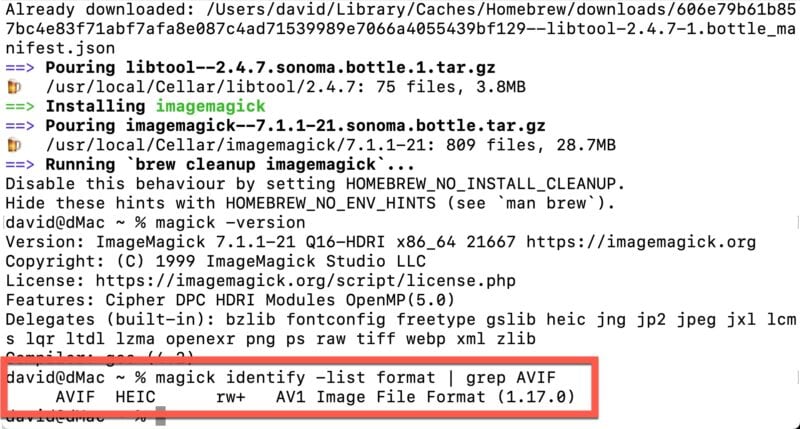
If either format is missing, update ImageMagick via Homebrew:
brew update && brew upgrade imagemagickThen re-run the check to confirm.
Converting images with ImageMagick
Single file conversion
The basic command — ImageMagick determines the output format from the file extension:
magick input.jpg output.avif
magick input.jpg output.webp
Batch conversion
Convert every JPEG in the current folder, saving new files alongside the originals without overwriting them:
for file in *.jpg; do magick "$file" "${file%.*}.avif"; doneChange .avif to .webp for WebP output.
Output to a subfolder
To keep optimized web files separate from master JPEGs:
mkdir -p Optimized_Web
for file in *.jpg; do magick "$file" "Optimized_Web/${file%.*}.avif"; done
Controlling compression
Quality setting
The -quality flag controls compression on a 0 — 100 scale (higher = larger file, better quality). AVIF generally tolerates more aggressive compression than WebP — quality settings around 60 are a reasonable starting point for AVIF on typical photography, while WebP usually needs 75 or higher to maintain equivalent detail. The right setting depends heavily on your image content, so it’s worth testing on a representative sample before running a large batch.
magick input.jpg -quality 60 output.avif
magick input.jpg -quality 75 output.webp
Encoding speed
Encoding speed has a meaningful impact on file size. Slower encoding gives the compression algorithm more time to find better solutions, which produces smaller files at the same quality level. The tradeoff is processing time — noticeably slower on large batches, but worth it for files that will live on a website permanently.
- AVIF:
-define avif:speed=1— scale is 0 to 10, lower is slower and produces better compression. - WebP:
-define webp:method=6— scale is 0 to 6, higher is slower and produces better compression.
Stripping metadata
For web output, stripping metadata and the embedded color profile saves a few kilobytes per file — negligible individually, but it adds up across a large portfolio. Modern browsers assume sRGB when no color profile is present, so for sRGB images this is safe.
magick input.jpg -strip output.avifSee the metadata stripping guide for more on this, including when you might want to preserve the color profile.
Automating conversions with built-in quality control
Combining ImageMagick with macOS Folder Actions creates a hot folder — drop a JPEG in, get an optimized AVIF or WebP out, automatically.
There’s one practical wrinkle worth building around: depending on image content, an encoded AVIF or WebP occasionally ends up larger than the original JPEG. Serving a larger file defeats the purpose entirely. The script below handles this automatically — if the new file is smaller, it moves the original JPEG to the Trash. If the new file is larger, it moves it to a Bloated_Files subfolder for manual review and leaves the original untouched.
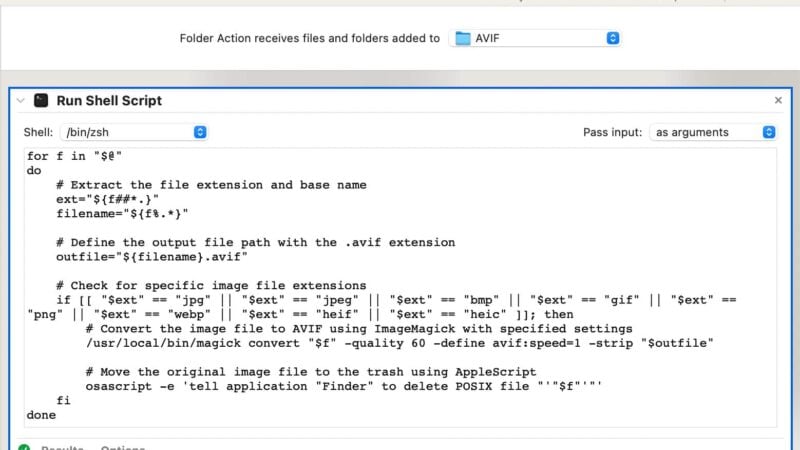
In Automator, create a new Folder Action and assign it to your chosen folder. Add a Run Shell Script action, set Shell to /bin/zsh and Pass input to as arguments, then paste the following:
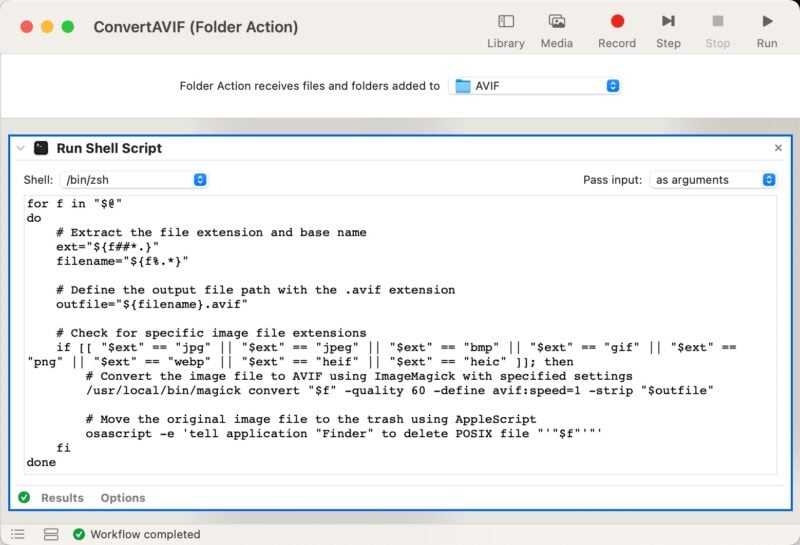
Set TARGET_FORMAT on line 4 to either "avif" or "webp" — the script handles the rest automatically, including format-specific encoding settings.
export PATH="/opt/homebrew/bin:/usr/local/bin:$PATH"

# Type "avif" or "webp" below to choose your desired output
TARGET_FORMAT="avif"

for f in "$@"
do
    # Extract the file extension and force it to lowercase
    ext="${f##*.}"
    ext_lower="${ext:l}"

    # Check for valid incoming image formats
    if [[ "$ext_lower" == "jpg" || "$ext_lower" == "jpeg" || "$ext_lower" == "bmp" || "$ext_lower" == "gif" || "$ext_lower" == "png" || "$ext_lower" == "webp" || "$ext_lower" == "heif" || "$ext_lower" == "heic" || "$ext_lower" == "avif" ]]; then

        # Skip if the file is already the target format
        if [[ "$ext_lower" == "$TARGET_FORMAT" ]]; then
            continue
        fi

        # Extract the base filename and directory path
        filename="${f%.*}"
        outfile="${filename}.${TARGET_FORMAT}"
        parent_dir=$(dirname "$f")

        # Apply optimized encoding settings based on chosen format
        if [[ "$TARGET_FORMAT" == "avif" ]]; then
            magick "$f" -quality 60 -define avif:speed=1 -strip "$outfile"
        else
            magick "$f" -quality 75 -define webp:method=6 -strip "$outfile"
        fi

        # Compare file sizes (macOS stat command)
        size_orig=$(stat -f%z "$f")
        size_new=$(stat -f%z "$outfile")

        if [[ "$size_new" -ge "$size_orig" ]]; then
            # New file is larger — isolate it and keep the original
            larger_dir="$parent_dir/Bloated_Files"
            mkdir -p "$larger_dir"
            mv "$outfile" "$larger_dir/"
        else
            # New file is smaller — move original to Trash
            mv "$f" ~/.Trash/
        fi
    fi
done
Note that mv "$f" ~/.Trash/ moves the original to the Trash rather than permanently deleting it — so if anything goes wrong, originals are recoverable until you empty the Trash.
Alternative: Right-click Quick Action
A hot folder works well for incoming web assets. But sometimes it’s more convenient to select files right where they are and convert them in place. A macOS Quick Action adds the same conversion directly to the right-click menu.


The setup is nearly identical to the Folder Action:
- Open Automator and create a new Quick Action.
- Set “Workflow receives current” to image files in Finder.
- Add a Run Shell Script action. Set Shell to
/bin/zshand Pass input toas arguments. - Paste the same script from above.
- Save as “Convert to AVIF” (or WebP).
Right-click any image or selection of images anywhere on your Mac and the Quick Action appears in the context menu. The conversion and size-validation script runs silently in the background.
Common questions
Why is my AVIF larger than the JPEG?
It happens with already-heavily-compressed JPEGs or very detailed images; lower the quality value a little, use a slower speed setting, or keep the JPEG — the script below does that comparison for you automatically.
WebP or AVIF?
AVIF compresses better and supports 10-bit; WebP has marginally broader support in older software. For a website today, AVIF with a JPEG fallback; WebP if your stack can’t serve AVIF yet — details in my AVIF guide.
Does ImageMagick keep my EXIF and copyright metadata?
Yes unless you pass -strip. Many optimizers strip by default; ImageMagick doesn’t.


