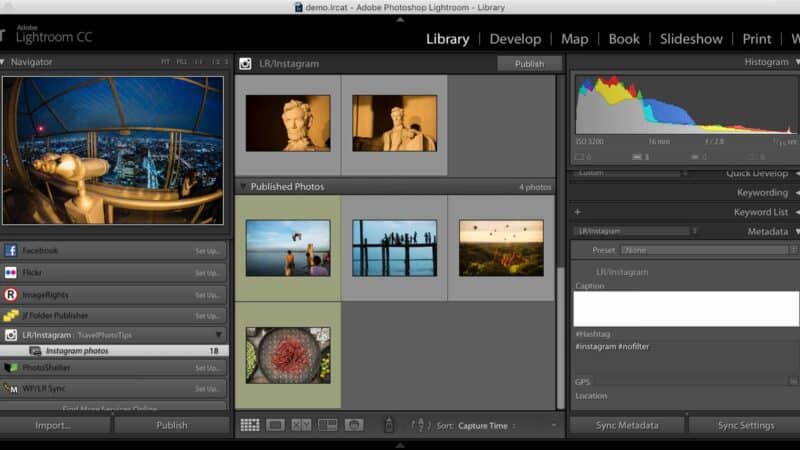
UPDATE: LR/Instagram appears to have been abandoned, and it is no longer a viable way to post directly to Instagram.
The developers’ note on their website says: “Service Note: Instagram has updated their protocol and currently plugin does not work. We are investigating the issue and the plugin will be updated when a fix is available.”
That note has been there at least a few years now with no update, so I don’t expect it will ever be revived. I’m leaving this post here as a legacy reference.
There are several different ways to post to Instagram from a desktop or laptop computer. And thanks to this plugin, it’s even possible directly from Lightroom. It’s called LR/Instagram. It’s shareware–a license is $10.
Features of the LR/Instagram plugin for Lightroom
Build Captions Using Lightroom Metadata. You can use tokens from Lightroom’s extensive metadata to automatically build Instagram captions.
Hashtag Panel. The plugin adds a new metadata panel where you can add hashtags. These are used exclusively by the LR/Instagram plugin, so you don’t risk polluting your keywords or captions panels with hashtags that won’t work in other places.
Crop & Pad. Instagram is no longer locked into the square–you can now post rectangular images–but there are still limits on the aspect ratio. It has to be between 4:5 and 1.91.1. The most common type of aspect ratio that falls outside of that is a narrow panorama. With this feature you can have the plugin automatically pad the edges if necessary to make it conform to Instagram’s requirements.
Multiple Accounts. Many of us have multiple Instagram accounts. Maybe you’re managing social media marketing for a business or clients. Or maybe you just have separate ones for work and personal. I have separate ones for my main travel photo account and one with a narrow focus on Washington DC’s cherry blossoms, for example.
With this plugin you don’t need to switch between accounts, as such. You simply create a different publish service for each account. That greatly reduces the risk of accidentally posting to the wrong account.
Multiple Images. You can post multiple images at once. Each will appear as a separate post.
Edit Metadata in Lightroom. Even after a photo is posted, you can edit the metadata and republish to update on the Instagram site.
Limitations
No Filters. You don’t have access to Instagram’s built-in filters. Of course, since you’re using Lightroom, you have access to Lightroom’s infinitely more powerful editing options and filters before you upload.
No Re-cropping. As with the absence of filters, this isn’t really a limitation, as such–more a different way of doing things. Basically, you don’t have the option of cropping to square as part of the actual upload process. You can, of course, use Lightroom’s vastly more flexible cropping tools before you hit the publish button.
But a related feature that is built into the LR/Instagram plugin is the ability to pad the sides of an image. I have more details on it below.
No In-photo Tagging. You can tag people in the caption field, but you can’t tag them on the photo itself like you can with the Instagram app.
No Scheduling. There are apps that do scheduling, like Gramblr, but Instagram generally frowns on scheduling–at least, in an automated way–so this plugin isn’t unusual in not offering scheduling. But it’s something to be aware of, nevertheless.
No Multi-image Posts. You can upload multiple images at once, but each image will post as its own single post. There’s no support for the new Instagram feature of using multiple images in a single post.
How to use LR/Instagram
Installing LR/Instagram
It installs just like any other plugin. Download the plugin file, copy it to wherever you’re saving your Lightroom plugins, and open the Plugin Manager from within Lightroom. Use the Add button to select the new plugin, and then make sure it’s enabled.
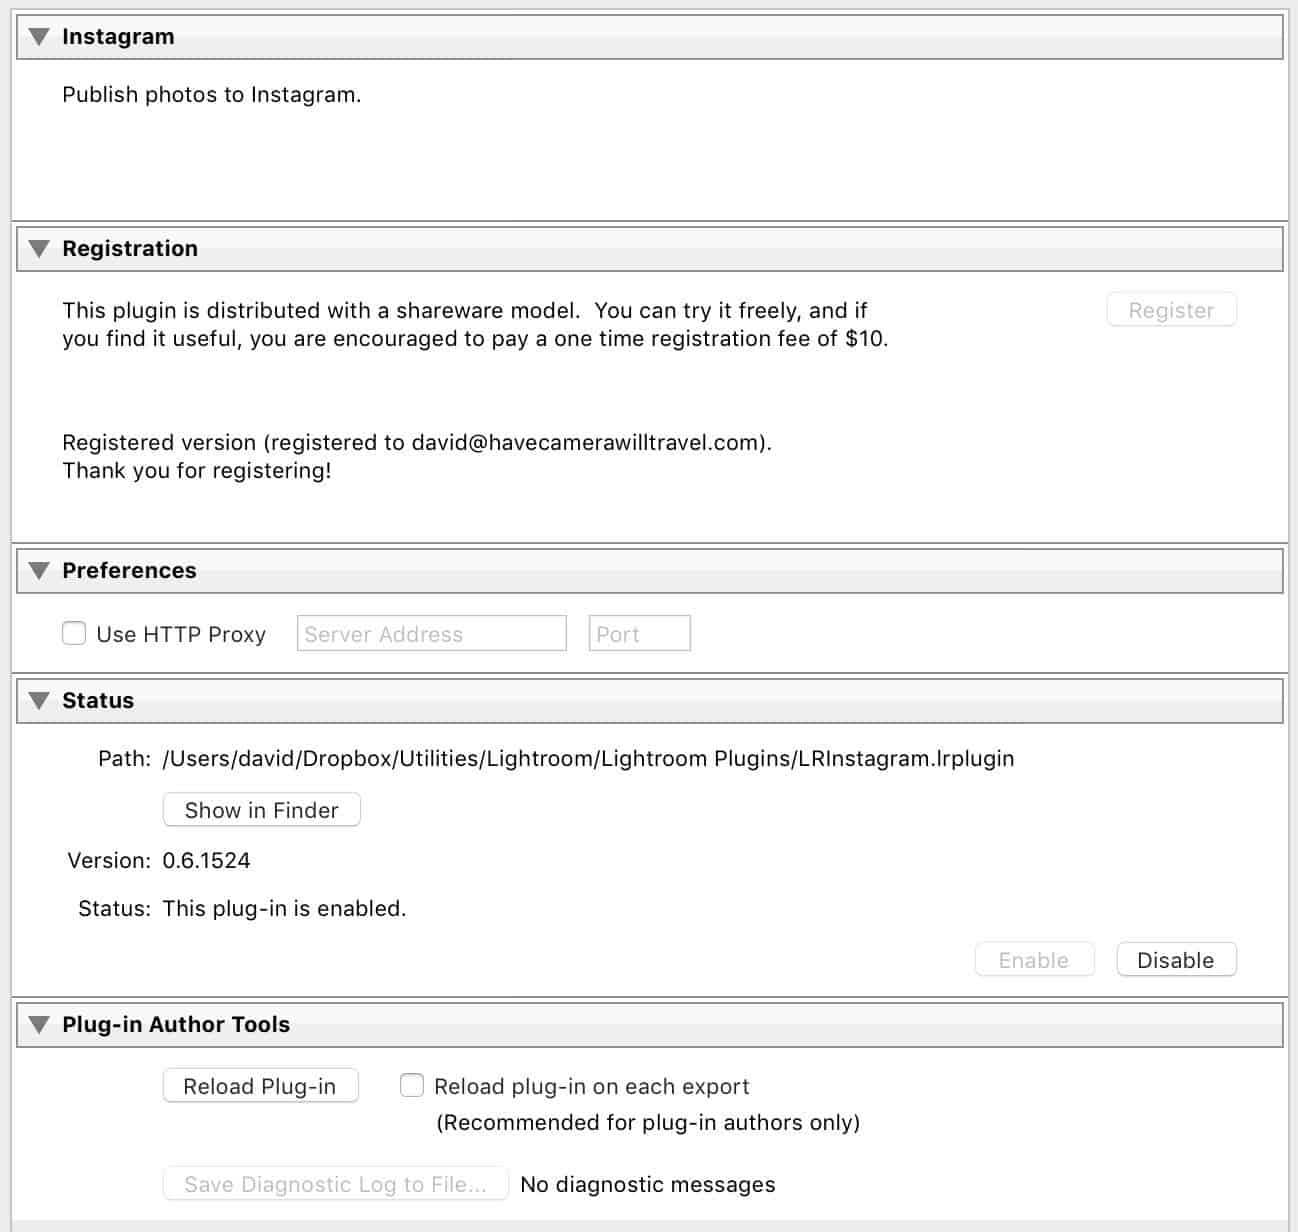
If you decide to buy a license for the plugin, you enter the registration details here in the Plugin Manager.
The one panel that’s a little different with this one is the option to use an HTTP Proxy. You’d use that if you’re on a network that is otherwise blocking access to social media sites like Instagram. In most cases, you probably don’t need to enter anything there and can leave it off (the default).
Creating the LR/Instagram settings
Creating and setting up the LR/Instagram Publish Service is just like any other publish service. Create a new instance by clicking on the + icon at the top right of the Publish Services panel in the library module and choose to Go to Publishing Manager.
Just under the list of Publish Services at left, click on the Add button.


In the popup, choose the type of publish service from the drop-down menu–in this case you want LR/Instagram.
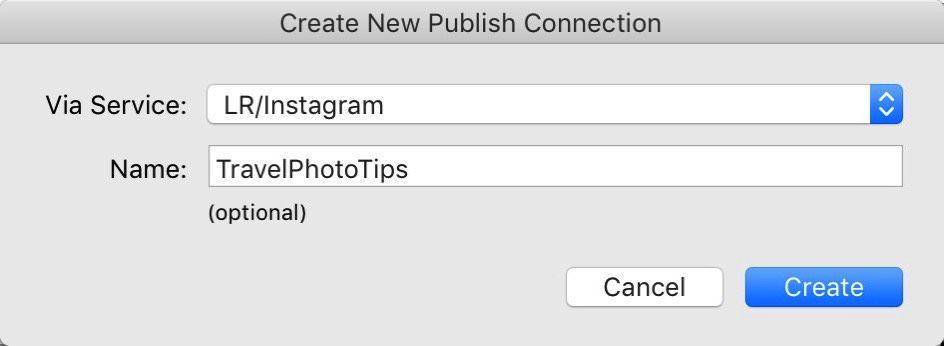
Then give the publish service a name (you can change it later, if you want).
If you’re only setting up one instance, it really doesn’t matter what you enter here. But if you’re working with multiple Instagram accounts, it makes sense to put the account names in here to differentiate them.
Configuring the LR/Instagram settings
As with any other Lightroom publish service, you have to configure some options when you first create the publish service.
You can go back and edit these later, if you wish, by right-clicking on the publish service’s name and choosing Edit Settings.
Some publish services have a bunch of option panels. This one only has a few.
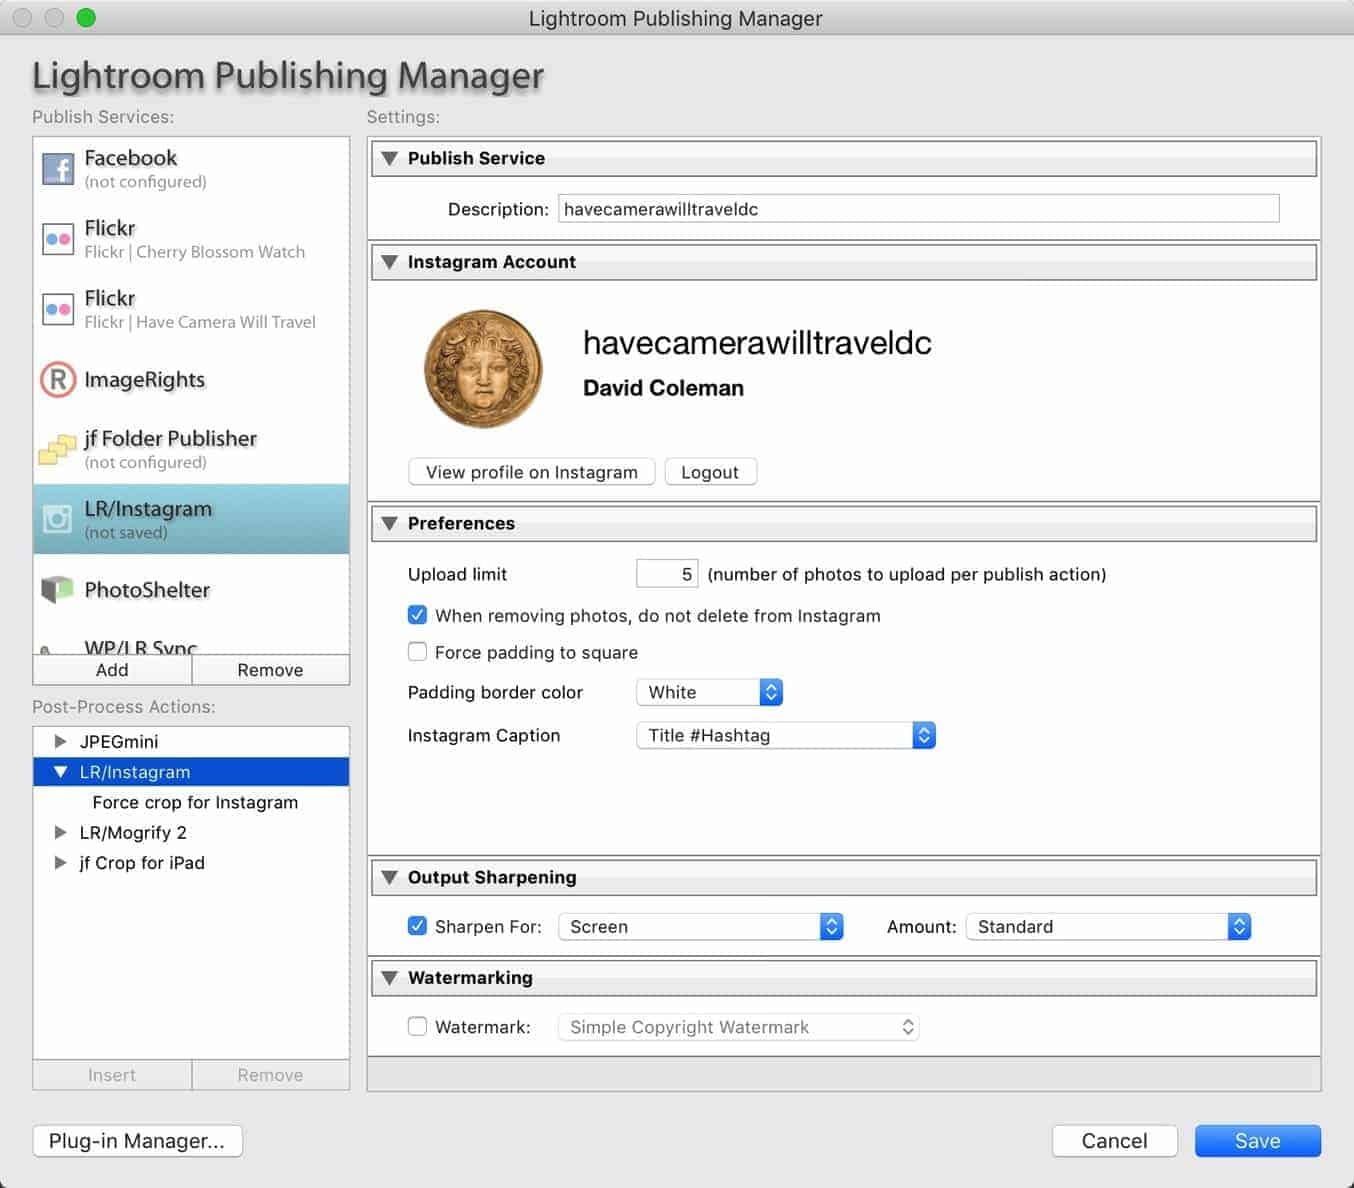
The next panel is for logging into Instagram. Add your Instagram username and password. It will then authenticate the login information.
Once you’ve entered your credentials and are logged in, it shows something like the screenshot above, with your Instagram username, your real name, and it’ll pull your profile picture.
Tip: If you’re working with multiple Instagram accounts, make sure to enter the login credentials that correspond to the account you want this publish service to use.
The next panel is where the real options are.
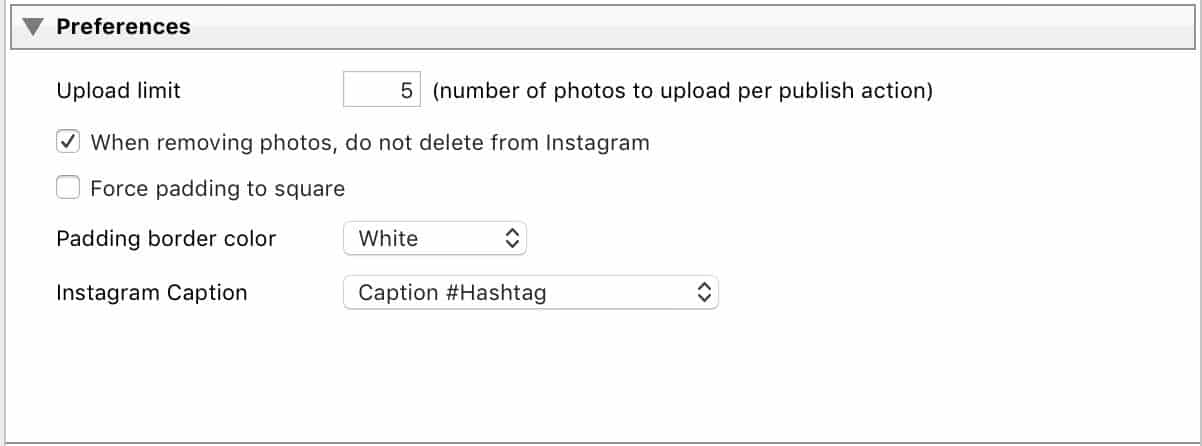
The top one limits the number of photos that can be included with a single publish action. There are two reasons this might come in handy. One is to prevent your account from flooding your followers’ feeds with new photos. The other is that it reduces the risk of triggering Instagram’s anti-spam defenses. The default is 5–that’s a good place to start.
The next option is for controlling how the plugin deals with images you might delete from Lightroom. You can choose whether or not the images will remain on Instagram.
The force padding to square option is a way for dealing with rectangular images. You can now post rectangular images to Instagram, but if you still prefer the square layout, you can use an option in the plugin to pad the sides to fill out the square. Check the box to enable the option and then choose the color that you’d like to use for the padding border.
The final option controls the metadata that’s included as the Instagram caption. You can choose one of the existing templates or create your own. The title and caption fields are the standard Lightroom fields corresponding to Title and Description. LR/Instagram creates its own Caption field and then automatically populates it with the information from the Lightroom Description field, but you can also edit it independently, so you can edit the Caption field without messing up the original Description field. The Hashtag field is a special field that’s installed with the LR/Instagram plugin.
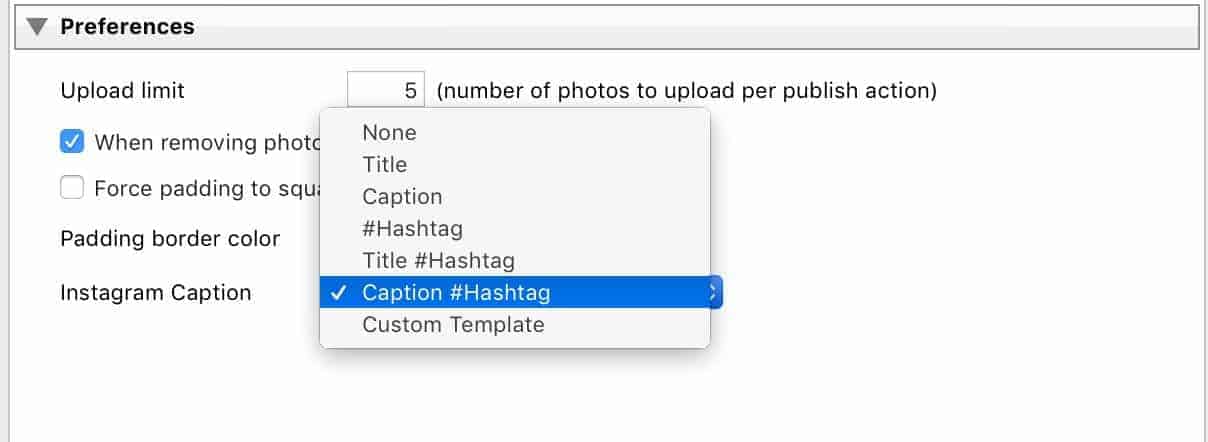
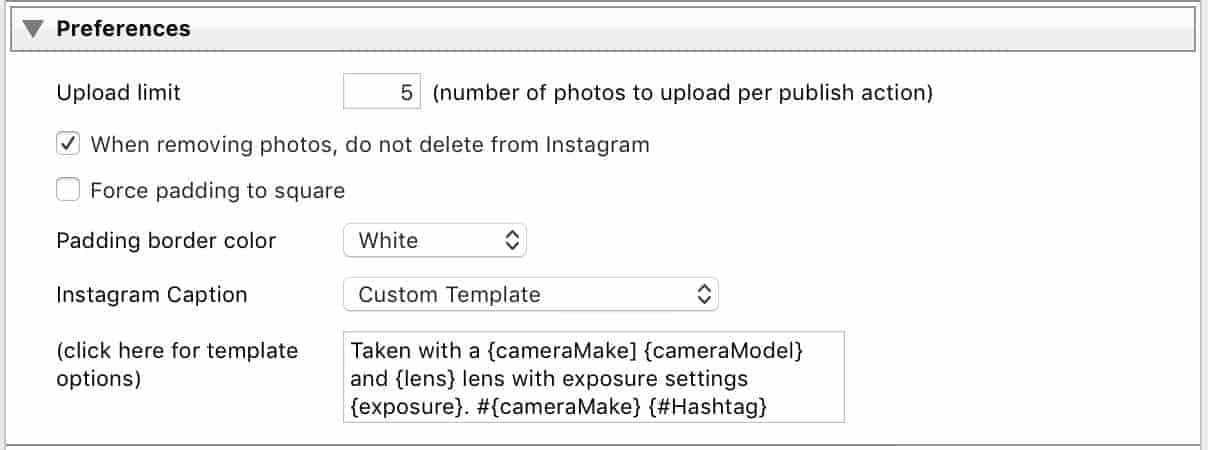
Of course, one of the many powerful aspects of Lightroom is that you can draw on a huge variety of metadata for all sorts of things. With this plugin, you can build a Custom Template that draws on that information. Maybe you want to include the data and time in the Instagram caption. Or the camera model and exposure settings. Or the location and GPS information. You can find the full list of available tokens here.
Here’s a quick example that builds a caption automatically by pulling in the camera, lens, and exposure information and generates a hashtag based on the camera brand.
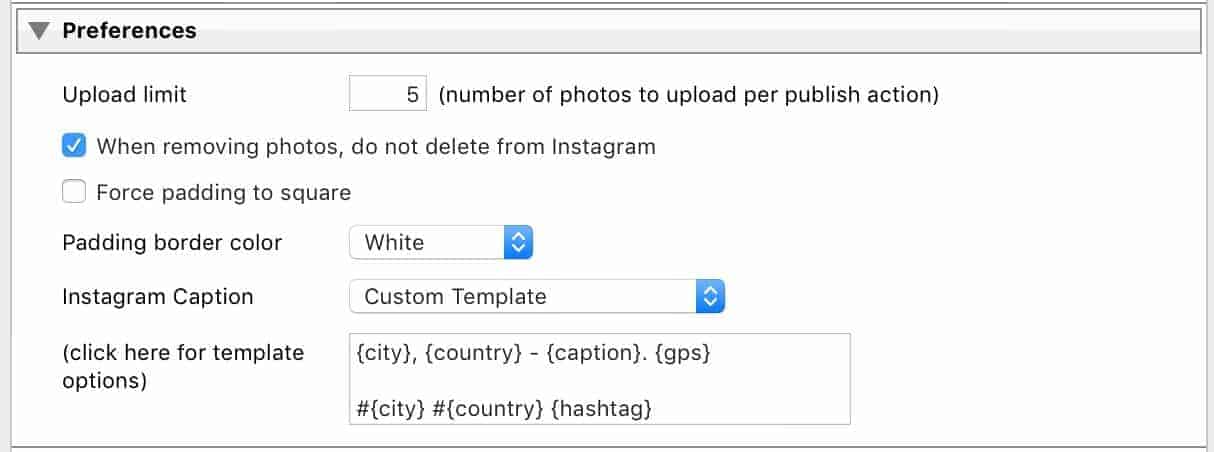
Here’s a different version that adds a location byline to the beginning of the caption, adds GPS coordinates if they’re available, and creates hashtags for the city and country.
The final two options are familiar Lightroom ones: whether to apply sharpening and whether to add a watermark. Do not, however, that if you’re applying a watermark as well as using the force padding to square option you can end up with some undesirable results.
Publishing with LR/Instagram
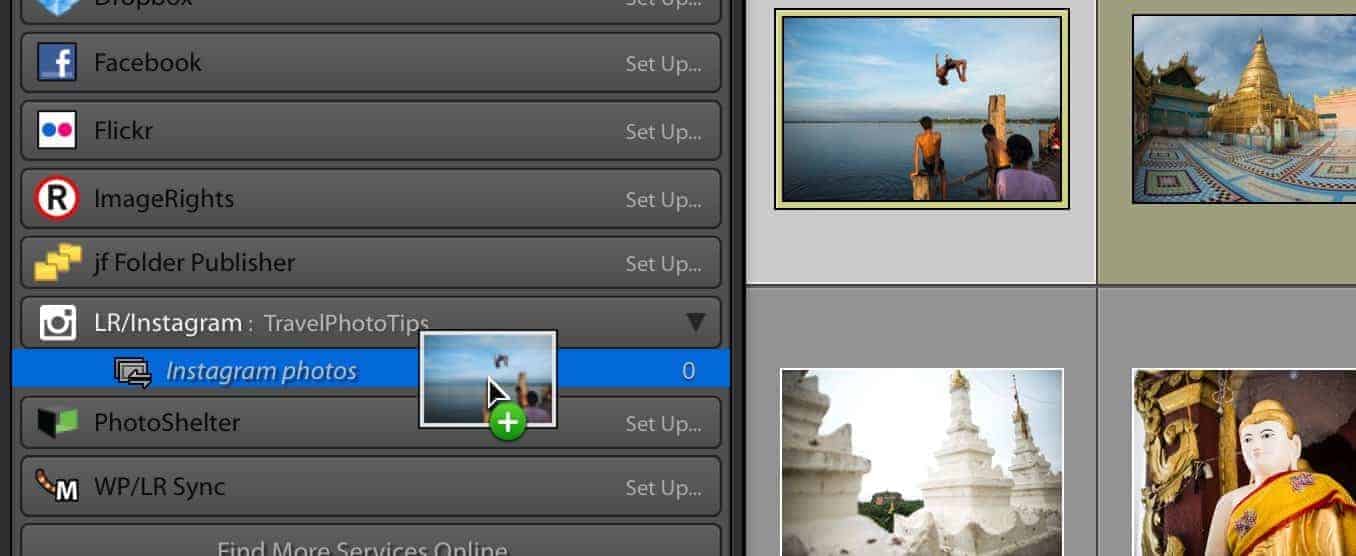
The publish process is fundamentally the same as any other Lightroom publish service. Drag the photos you want to use from the Library onto the “Instagram photos” collection in the publish service panel.
Then click on the publish service’s collection and customize the metadata you want to use. To enable these metadata fields, use the drop-down menu in the metadata panel at right to select LR/Instagram.
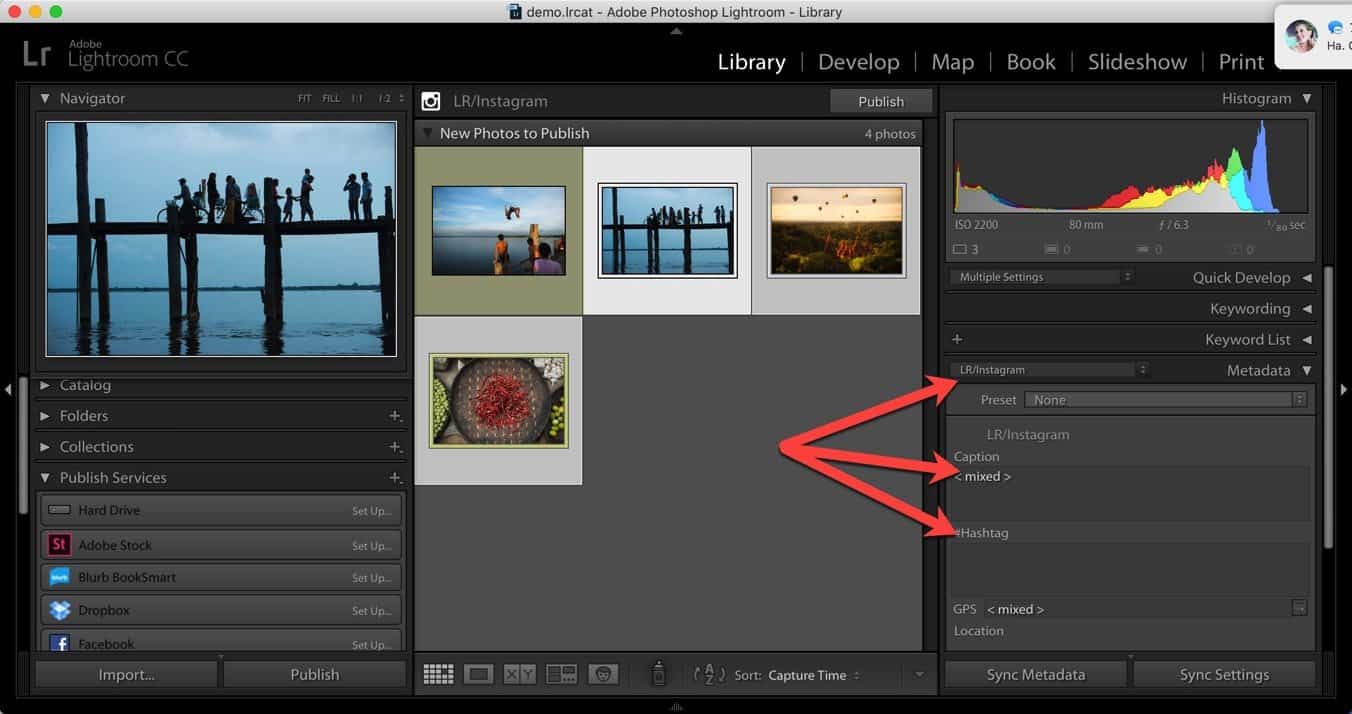
Bear in mind that how the information in these fields is used when posting depends on how you’ve set up the caption builder in the publish service’s settings (see above).
Once you’re happy with the photos and the metadata, hit the Publish button at top right.
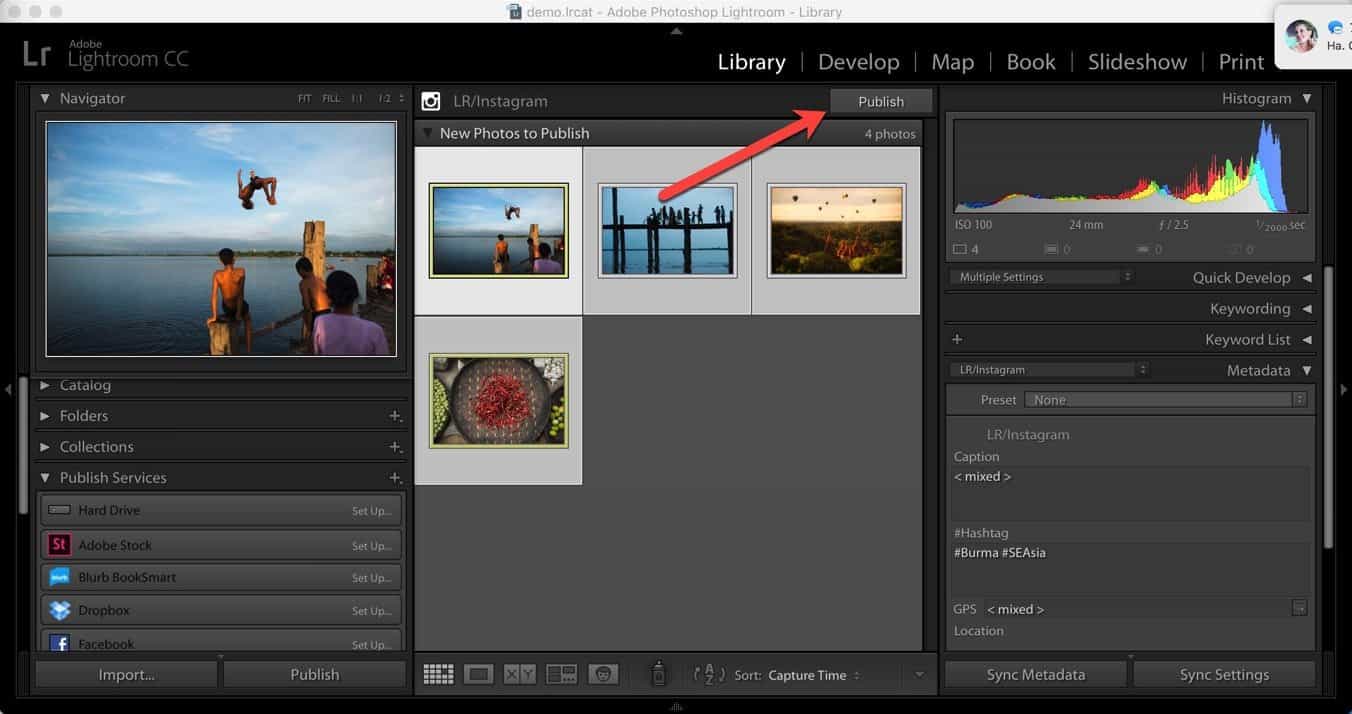
The photos will then be uploaded directly to Instagram. Each photo will be posted as a separate post, and they’ll all post immediately.
Updating captions
Even after you’ve published the photos to Instagram, you can edit the captions within Lightroom and have them updated on Instagram. To do that, edit the caption or hashtag fields in the metadata panel. That alone won’t automatically trigger the republish action, so you’ll need to then right-click on the thumbnails and select Mark to Republish. Then you’ll have to hit the Publish button again.
Worth noting
This plugin is still pretty young, and the developers are still adding new features. The guide above uses v. 0.6.1524. If you’re using a newer version, it’s possible that more features might have been added since.
Where to get it
It can be downloaded directly from the developer’s website. (UPDATE: The developers appear to have abandoned this plugin, and it’s no longer a viable way to upload images directly to Instagram.)
Related
I’ve put together a separate guide for an alternative way of creating square photos for posting on Instagram. That method builds it into the export process, so it’s not directly compatible with the LR/Instagram publish service (unless you re-import the export photos, that is).


