
When stitching panoramas, even subtle brightness variations near the edges of the frame can produce ugly banding at the seams. It’s most noticeable with skies or other large areas of smooth, even tone — exactly the kind of content that draws the eye and where the problem is hardest to hide.
Most lenses vignette to some degree when shooting wide open — the corners and edges darken slightly compared to the center of the frame. As a creative effect on a single image, a subtle vignette can actually be appealing. It has a slightly retro quality, draws the eye toward the center of the frame, and we’ve been trained to associate it with the look of fast prime lenses.
But it’s a real problem when stitching images together into a panorama. The whole point of stitching is that the seams disappear. Vignetting actively works against that — the darker edges of each frame show up as evenly spaced bands across the final image, betraying exactly where each frame begins and ends.
Editing tools like Lightroom, Capture One, and DxO have lens correction tools that can help — some automated, some manual, and newer lenses often have correction profiles built directly into the firmware. But these are rarely perfect, and even slight residual vignetting can cause visible banding at the seams.
A Real Example
Here’s one I ran into recently while shooting at Washington DC’s cherry blossoms at the Tidal Basin. This wasn’t a planned panorama — it was opportunistic. I saw the shot, took a quick sweep of frames, and wasn’t being particularly deliberate about settings.
The lens was a Nikon Z 105mm ƒ/2.8 VR S on a Nikon Z8 — a modern lens with optical correction profiles built into the firmware. And yet if you look closely at the sky, you can see these slightly darker ridges at regular intervals across the frame. I’ve marked them with arrows. They’re the stitching seams, made visible by residual lens vignetting that the firmware profiles didn’t fully eliminate.
It’s subtle, but it’s a dealbreaker for a print or client delivery. For a social media post it might slide by, but it’s not something I’d sell.
And it’s surprisingly hard to fix cleanly after the fact. The instinct is to reach for Photoshop’s healing or patching tools, but in my experience that usually just trades one problem for another. The better fixes all happen before you stitch.
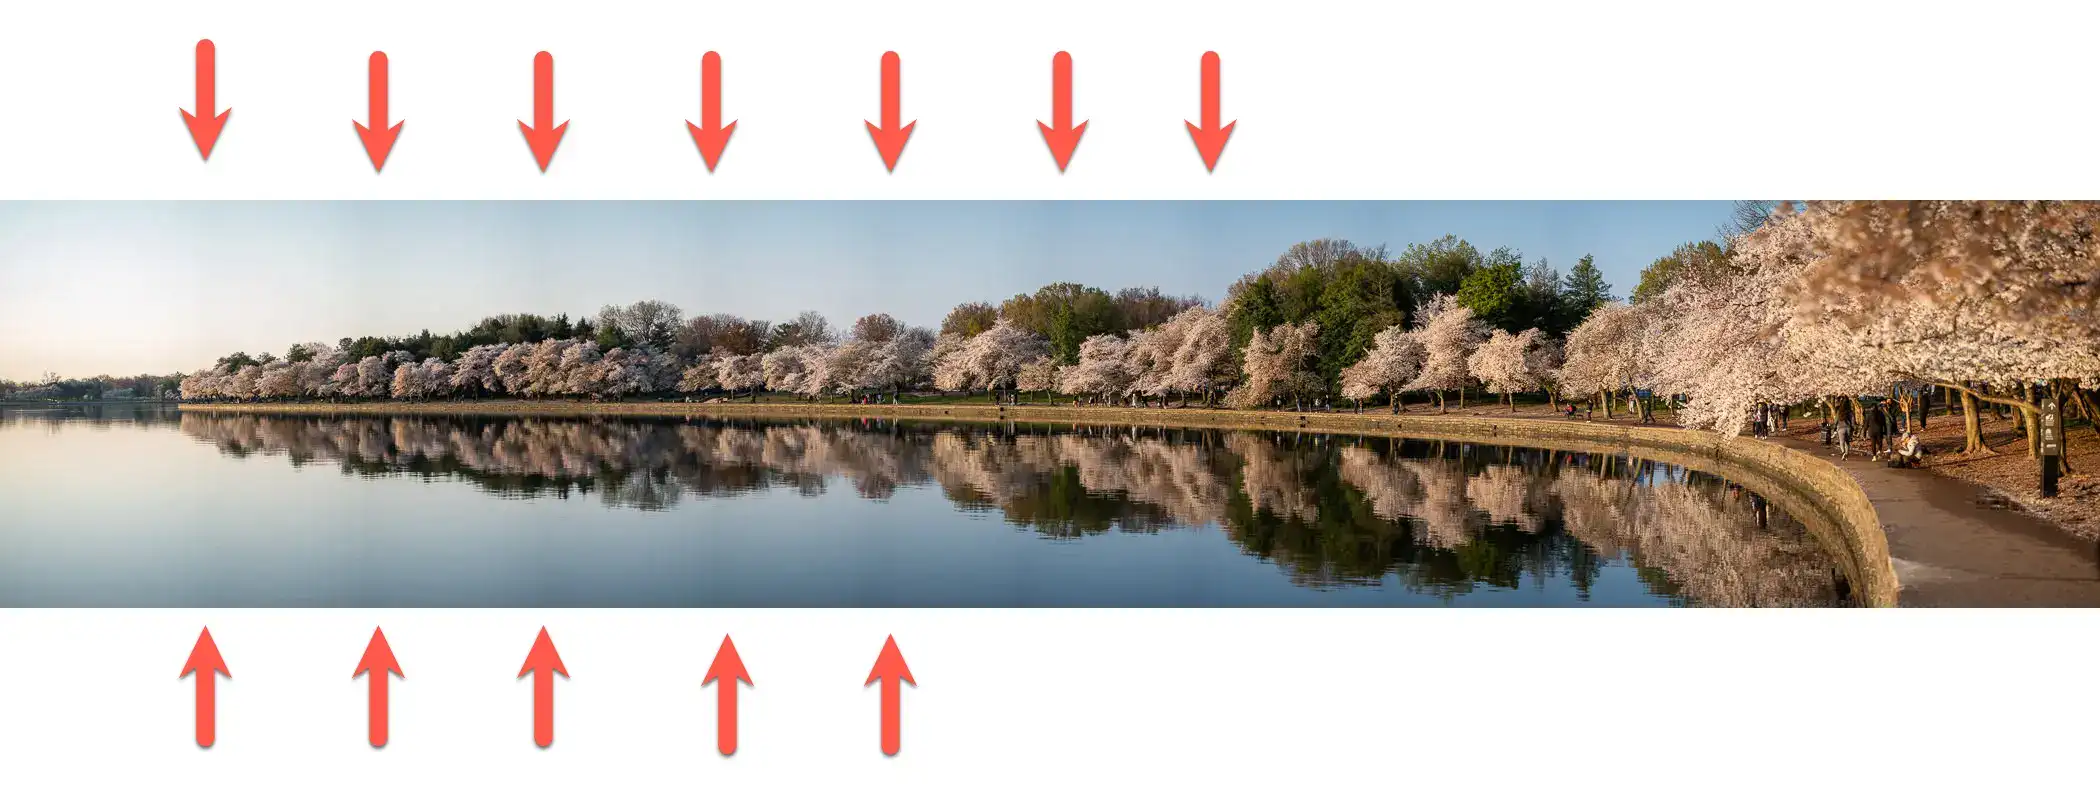
The image at the top of this page is a cropped section of this panorama, with brightness and contrast pushed to make the banding more obvious as an illustration.
Solutions
Preventing It in Camera
The cleanest solution is avoiding the problem at capture. There are a few ways to do that.
1. Stop Down
Lens vignetting is worst wide open and typically improves significantly as you stop down. Even two or three stops can make a substantial difference. The test panel below — from a lens review I did some time ago — shows the effect clearly: vignetting is obvious at the largest apertures and largely gone by around ƒ/11.
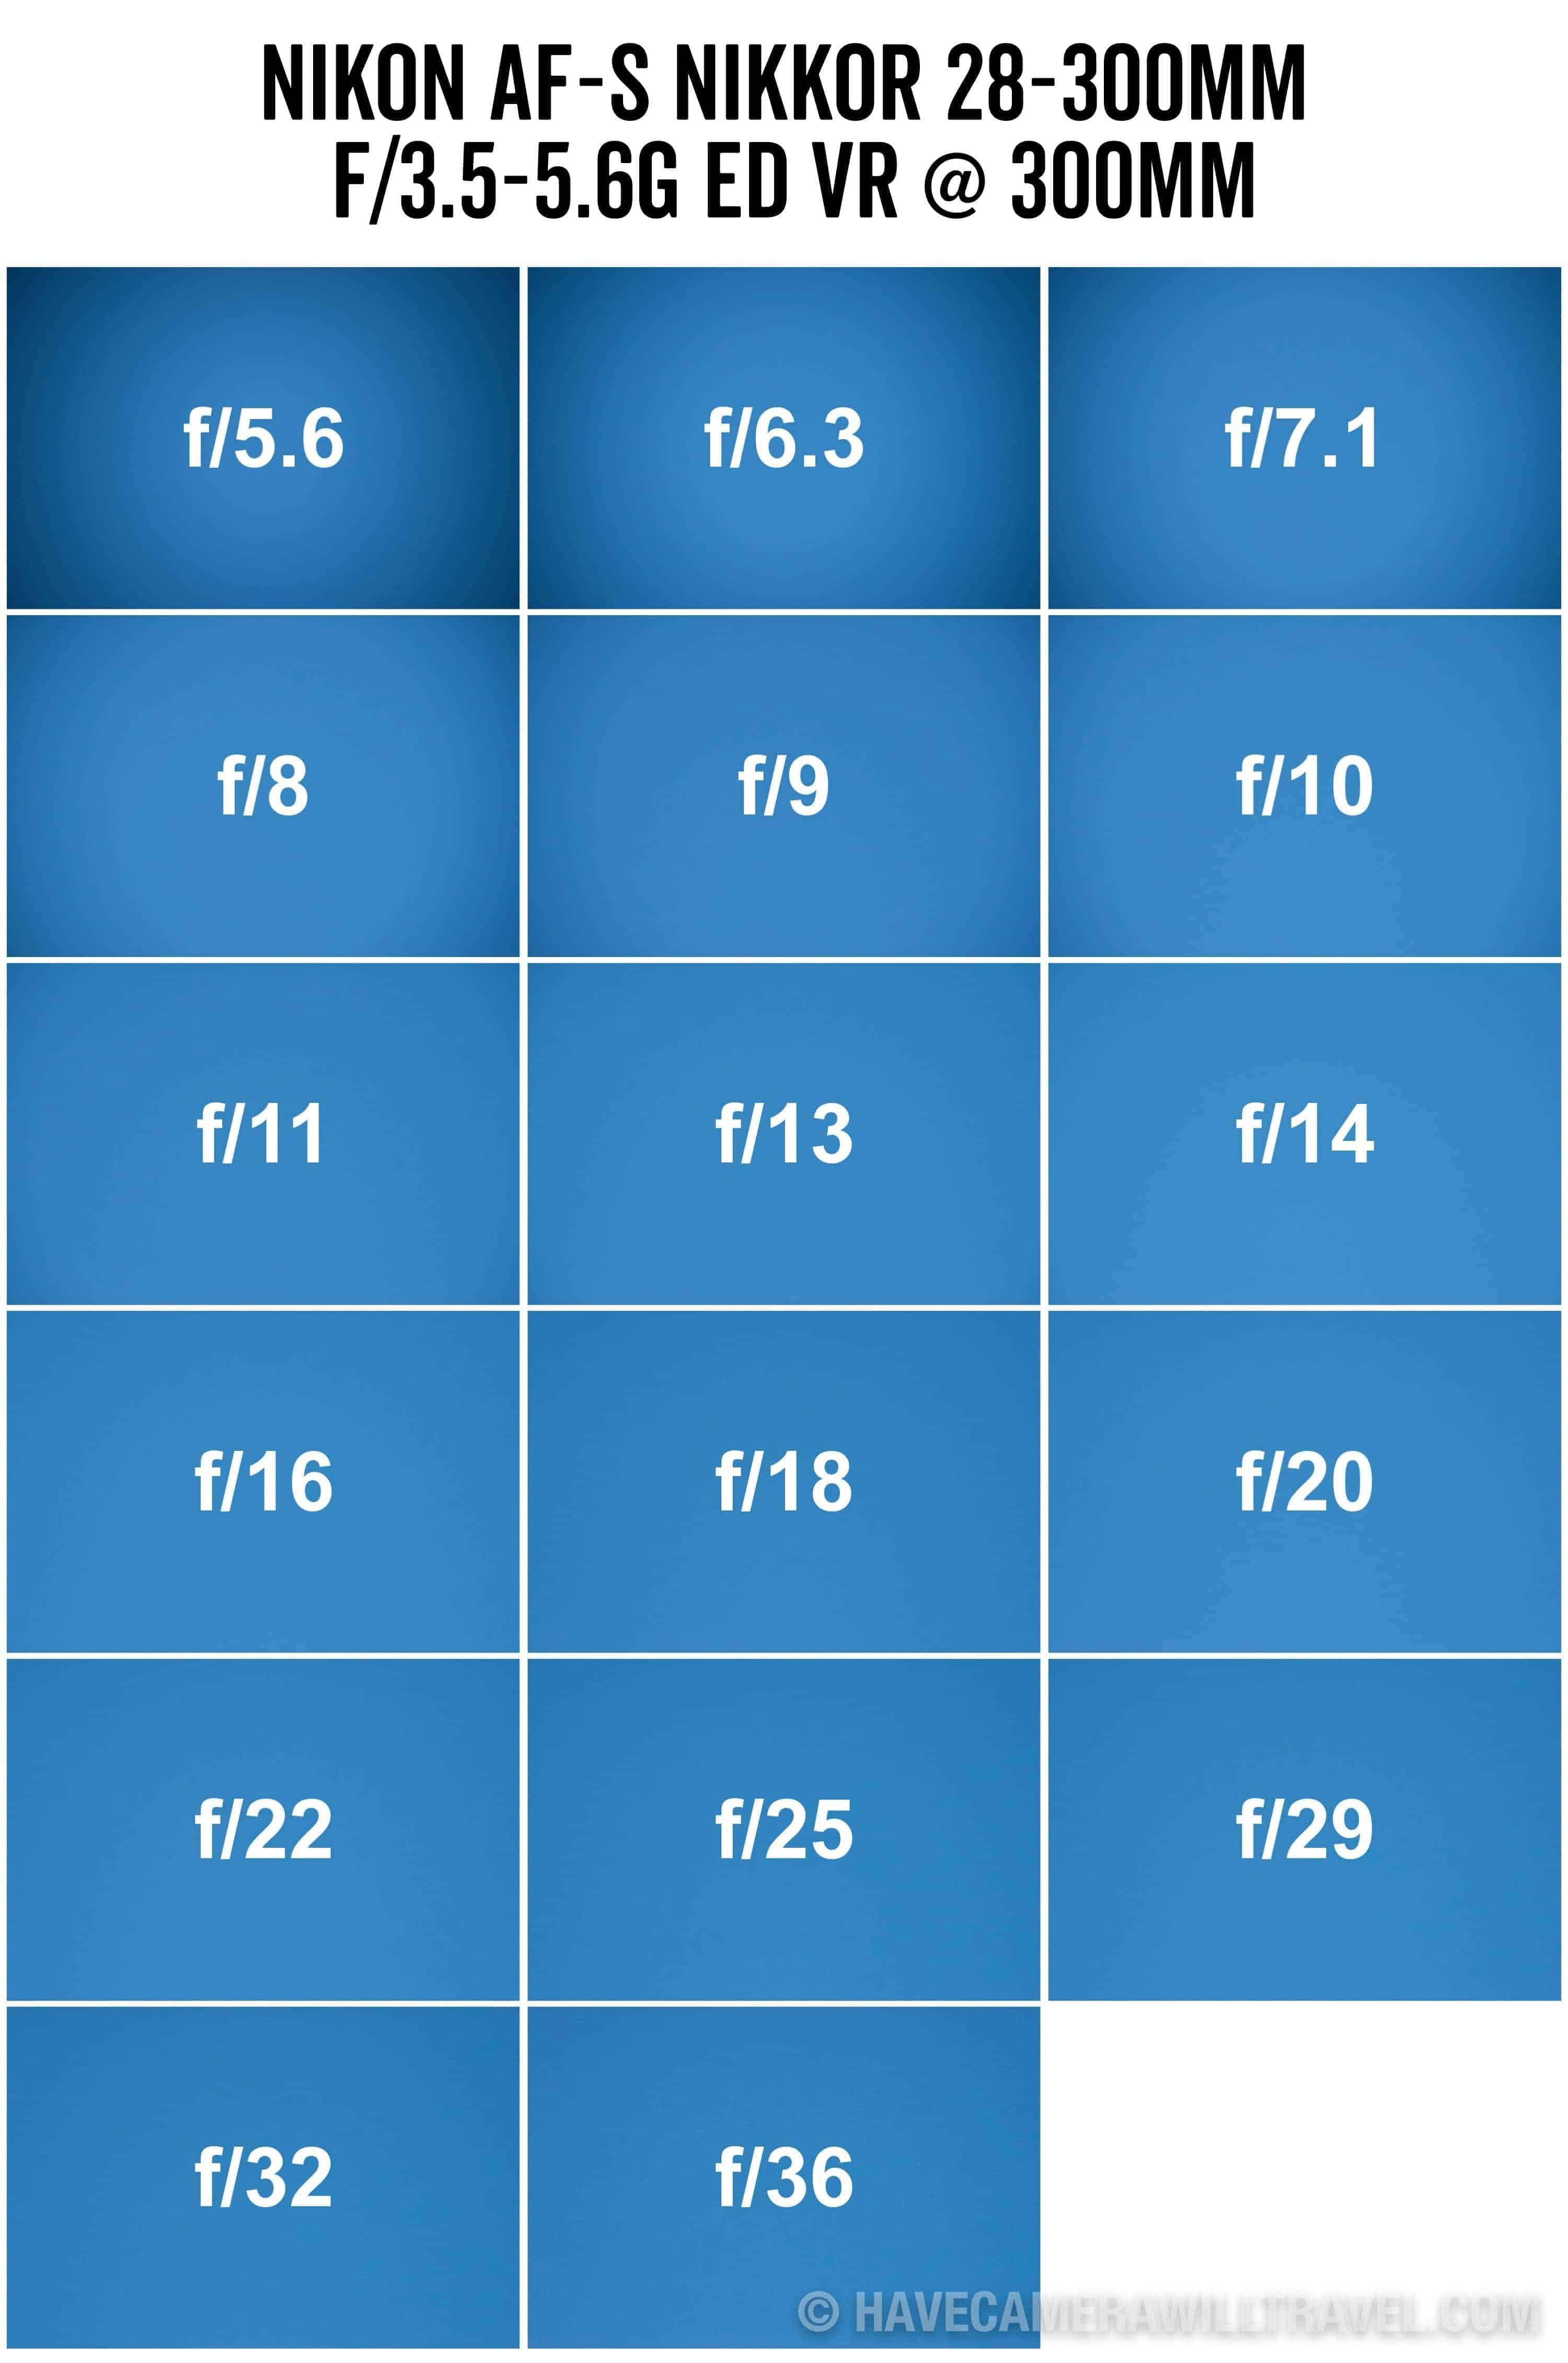
For the cherry blossom panorama, I was shooting wide open because that’s where I’d been for the non-panorama shots immediately beforehand. Since this was an opportunistic grab, I didn’t think to adjust — which is exactly when these problems happen.
If you’re shooting with a lens that vignettes heavily even stopped down, or you’re in conditions where a smaller aperture isn’t practical, there’s another option: switch your full-frame camera to APS-C crop mode (DX on Nikon bodies). This is essentially in-camera cropping — it cuts off the corners and edges of the frame where vignetting is worst. The useful side effect is that you retain the in-viewfinder framing reference, which helps ensure you’re shooting enough overlap between frames for the stitching algorithm to work.
2. Back Off Maximum Zoom
Zoom lenses — particularly telephoto zooms — tend to vignette most at their longest focal length. Pulling back slightly from maximum zoom can help, often without meaningfully changing your composition.
Fixing It in Post-Processing
If the photos are already taken, the options narrow considerably — but they do exist. The key is to apply corrections to the individual frames before stitching, not after. Once the seams are baked into the composite, smoothing them out convincingly is very difficult.
Lens Profile Corrections
Apply your image editor’s lens profile corrections to the individual source files before handing them to the stitcher. Lightroom Classic, Capture One, and others all have this — look in the Lens Corrections or Optics panel.
The caveat is that these corrections are rarely perfect. Some profiles slightly overcorrect, leaving lighter bands where you had darker ones. It takes trial and error — apply the correction, stitch, evaluate, adjust. The manual vignetting slider gives you finer control than the automated profile alone.
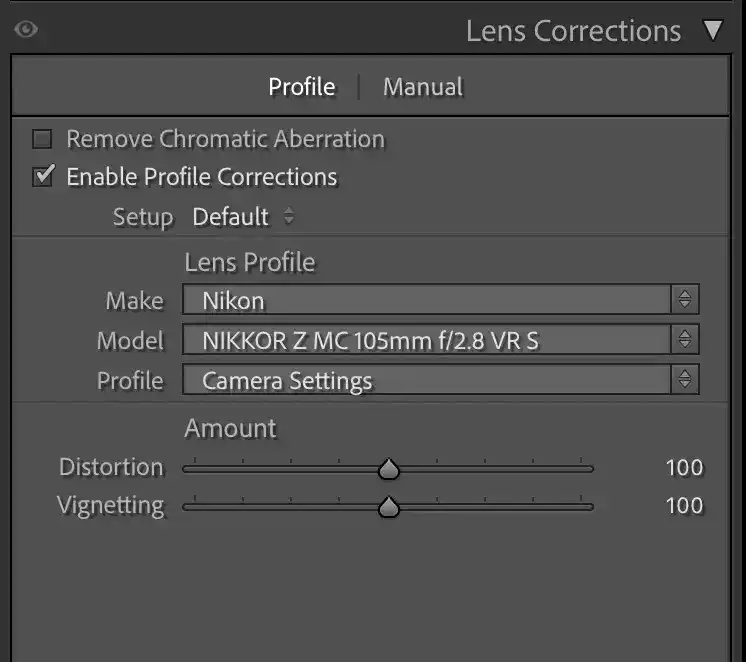
For the cherry blossom images, Lightroom’s lens corrections — including the lens’s own firmware profiles — were already applied and still weren’t enough to eliminate the banding.
DxO PureRAW
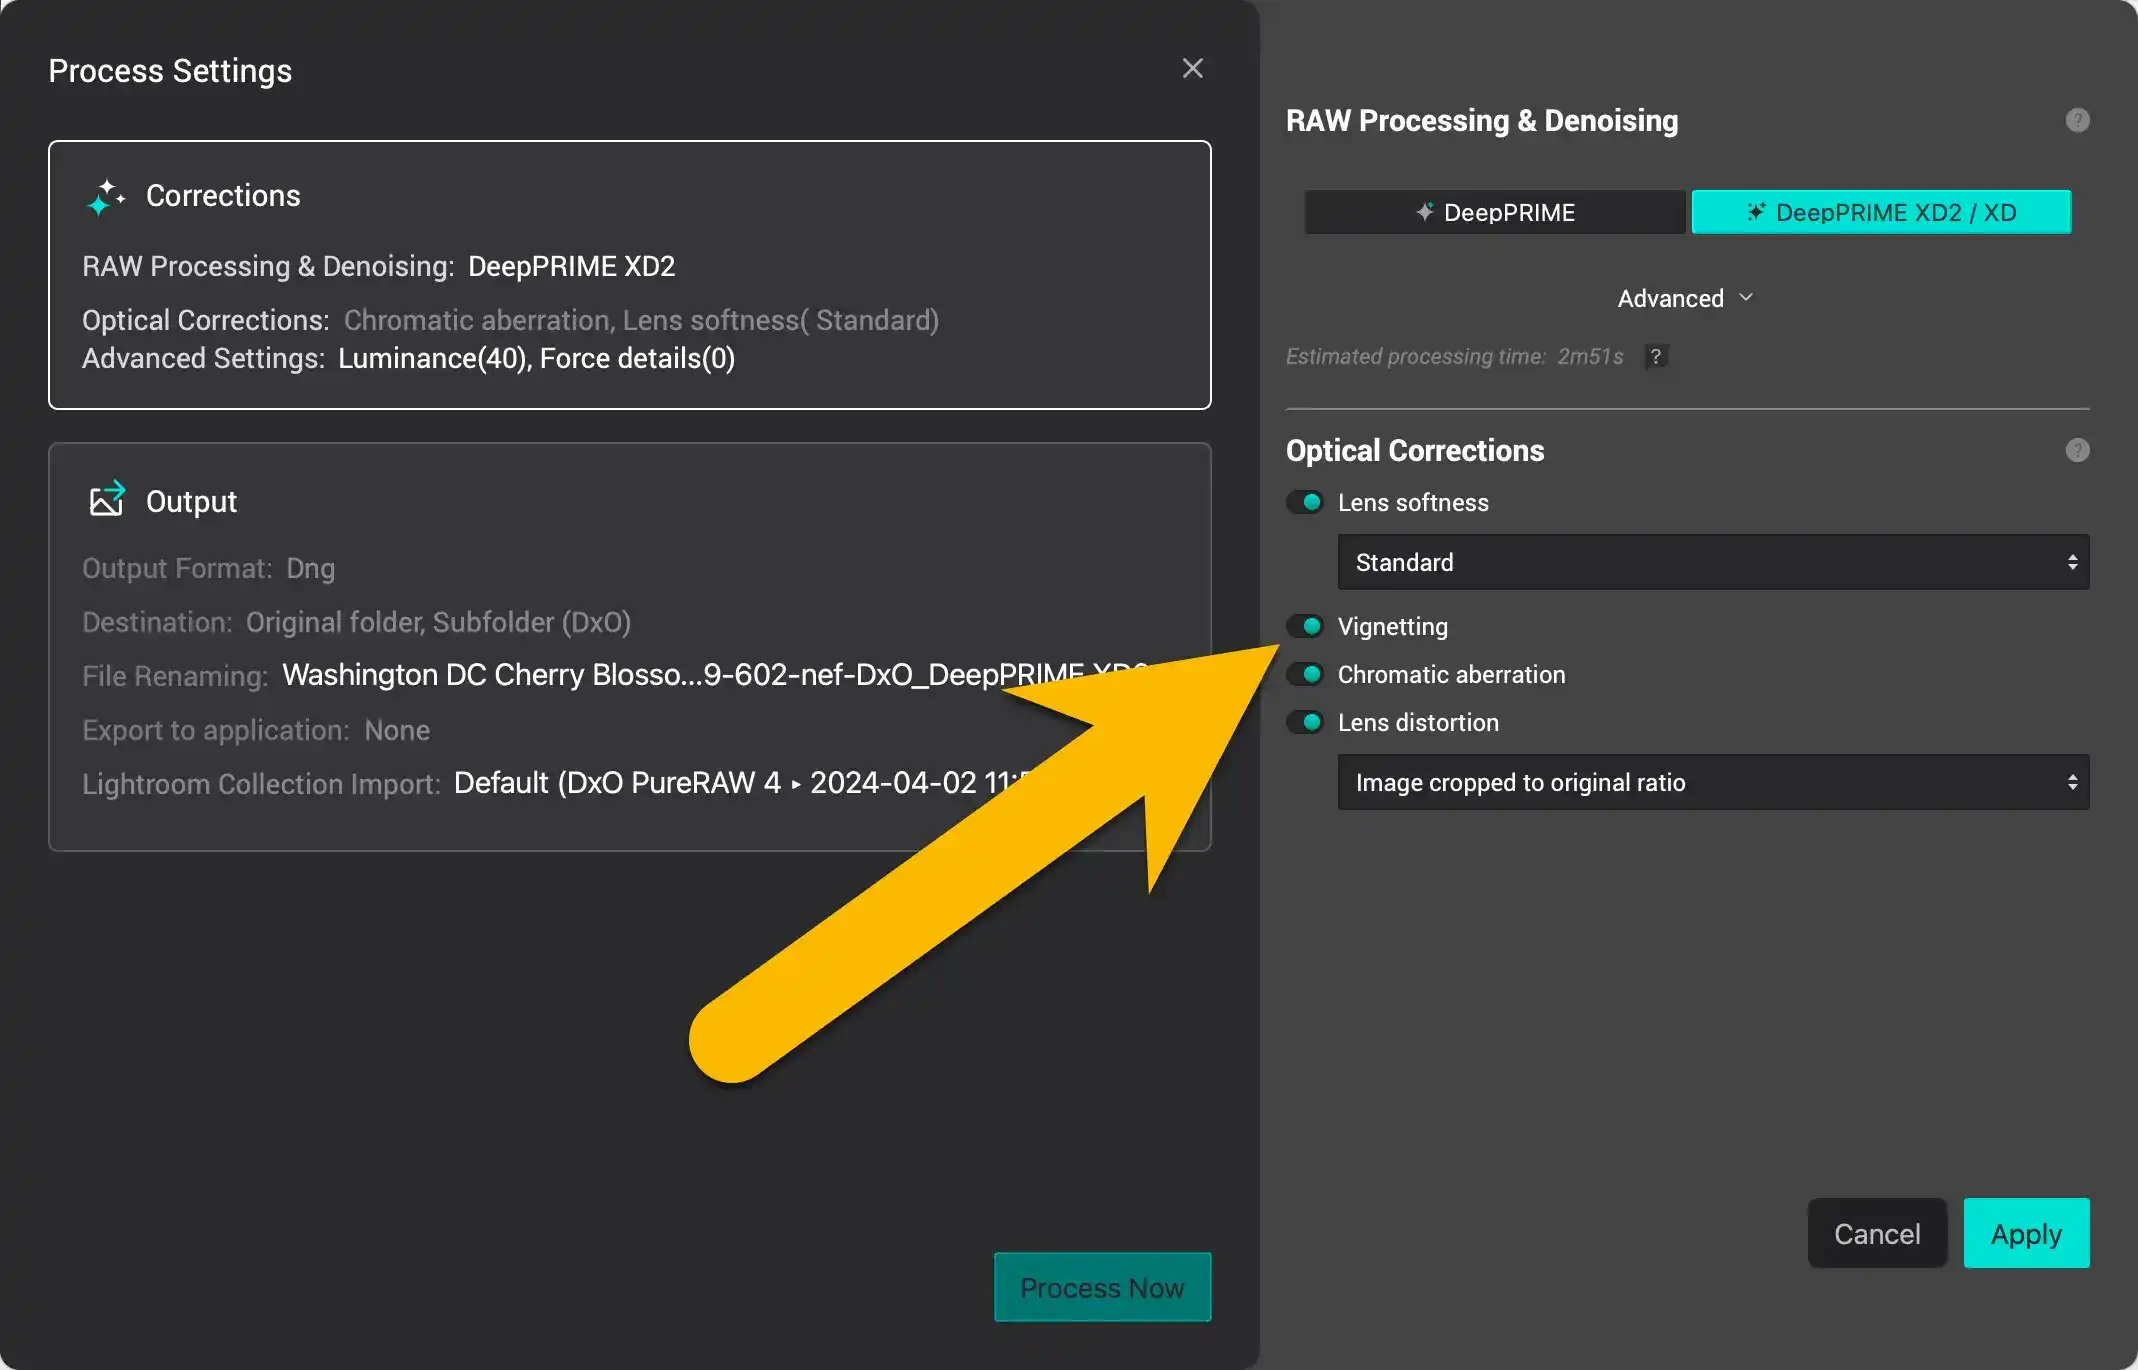
When Lightroom’s corrections aren’t sufficient, DxO’s lens profiles are worth trying. DxO is well known for the quality of its optical correction data, and in my experience its profiles tend to handle vignetting more thoroughly than the corrections built into Lightroom.


Running the individual source files through DxO PureRAW (use the current version) and then stitching the processed output produced a noticeably cleaner result with the same images. I made no other changes — same stitching settings in Lightroom’s panorama merger, same everything — and the sky banding was essentially gone.
PTGui
PTGui is a dedicated panorama stitching application — more capable and more complex than Lightroom’s built-in stitcher, and not free. But it has an Optimizer feature that handles lens vignetting as part of the stitching process itself, and in my experience it works well straight out of the box without needing to pre-process the source files.
PTGui also supports custom vignetting curves for more precise control, though that’s a deeper rabbit hole than this post warrants. For most situations, the default optimizer settings get you where you need to be.
Crop the Source Frames
A last resort, and it only works if you have generous overlap between frames. Cropping the source images to remove the worst-affected edges and corners before stitching can help — but you need to leave enough overlap that the stitching algorithm still has usable alignment data to work with. It’s worth trying if other options have failed, but it’s a fairly blunt instrument.
The Final Result
Here’s the final version — processed through DxO PureRAW before stitching. The sky is clean even after pushing the contrast, which is when these kinds of problems show up most clearly.



