There are several options when it comes to panorama stitching software. One of the best is Hugin. It’s free and open source. There are versions for Windows, Mac, and Linux. And while it’s quite straightforward to use the basic, default options, there’s a lot of power under the hood if you decide to go digging.1
While I typically use PTGUI Pro (and have been for a while now, since 2005), which based on the same underlying stitching engine, Hugin is a cheaper option (i.e., it’s free) that probably makes more sense for many users.
So here’s a quick and basic walk-thru of how Hugin works. I’m focusing here on the basics. As in, the very basics. So I’m going to keep things simple. There are many ways to tweak the results or compile spherical or other projection images, and I hope to cover some of those separately. But for now, I’m going to take a straightforward series of JPG images and output them as a simple stitched rectilinear panorama.
About the Images
This sequence of images of Sydney Harbour at night was shot using a tripod and with the camera in full manual mode. There’s not much in the foreground, so there was no real need to use a dedicated panorama head. They were originally shot in RAW, but for this example, I’m exporting them as JPGs in Lightroom with the sRGB color profile.2 Each measures 2848 by 4288 pixels. (For very high-quality jobs, I’d normally export them as 16-bit TIFF files with the ProPhoto RGB color profile.)
One thing I have wanted to test is how well the automatic alignment works. As a simple hurdle, I’ve exported the images in reverse order. That is, captured from right to left. You can see the results of that in the Load Images step below.

Using Hugin
For this guide, I’m using the simplest of Hugin’s interfaces, which is known, oddly enough, as Simple. You can switch between the interfaces with the menu item Interface, with options for Simple, Advanced, and Expert. Each progressively offers more fine-tuned controls.
Hugin takes a step-by-step approach, so you generally want to move from left to right with the tools at the top of the window.
Before you start using Hugin, you’ll want to get your images ready for use. If you have your camera set to save JPG or TIFF files, you can use those directly out of the camera (Hugin won’t import RAW files). But in a lot of cases, you’ll probably get better results if you first edit the images at least a little in something like Lightroom. Just make sure that any exposure or cropping changes are applied across all of the images; if you have one or two images with different exposure than the others, there’s a high risk of uneven lighting in the stitched panorama.
Load Images
The first thing to do is to load your images in Hugin. You can load them all together by selecting multiple images.
In this case, I’ve deliberately exported to the images in a backward sequence, so it looks scrambled when I’ve first ingested the images.

In this example, it automatically detects that the images were shot with a 48mm focal length and that it was shot with a camera using a cropped APS-C sensor (that’s the 1.5x in the focal length multiplier field).
Align the Images
So long as you’re working with images that are reasonably cleanly shot–as in, there’s not much movement in the nodal point between them–I find that the automatic alignment tool works well. It’s just a case of hitting the Align button and letting it do its thing.
You’ll get a popup screen with a bunch of code as its processing, and then you should see the newly aligned image in the window and a brief report at the top right detailing the number of control points that have been used as the mean error after optimization.

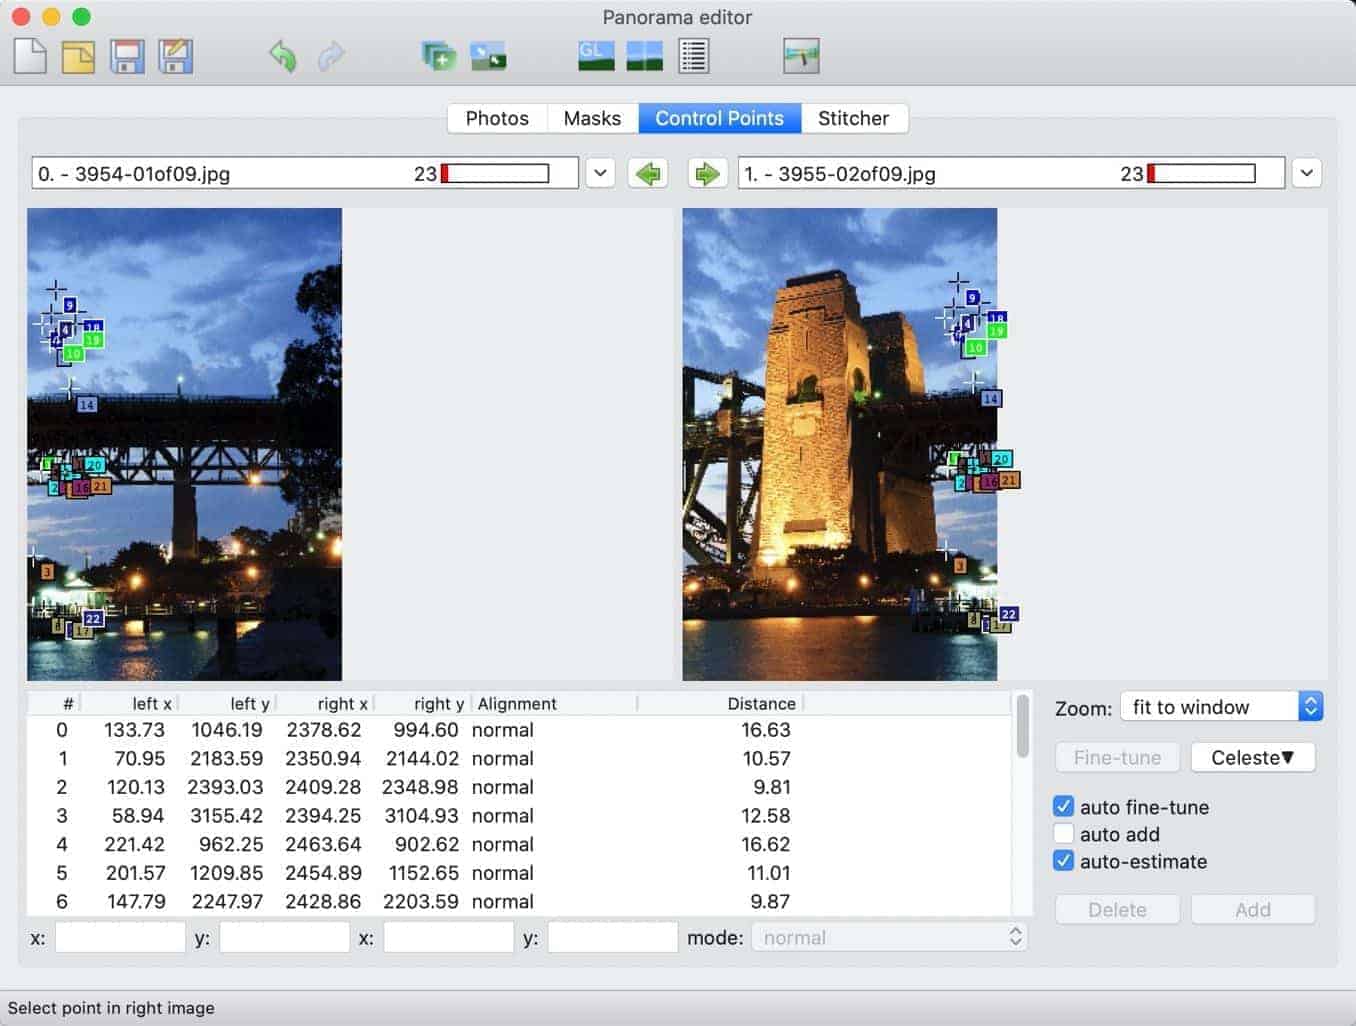
If the automatic alignment hasn’t worked very well on your set of images, it is possible to manually override the control points. Go to View > Panorama Editor, and then click on the Control Points tab. The finer details of how to use this are beyond the scope of this post, but the gist is that you want to match up specific points in one image with the same visual point on its adjacent images. You can find more details here.

Create Panorama
The final step is to actually stitch the final image. For that, use the Create Panorama button. Even in the simple interface, you have some settings you can control here. They include the dimensions of the stitched file, the file format of the stitched panorama, and the amount of compression. In this example, I’ve left it at the original dimensions but changed the file format to JPG (from TIFF).

For a straightforward, simple panorama, you’ll want to use the “Exposure corrected, low dynamic range” option. The others are for exposure blending, or HDR, where each image has versions at different exposures (i.e., a more complicated system than I’m using here).
You’ll then need to specify a filename and place to save the stitched panorama. Hugin then calls up its own batch processor to actually run the stitching.
The final step is to crop the image to eliminate the unused space around the image. I used Photoshop, but you can use any image editor for this.


More Advanced Controls
That’s the very basic workflow for creating a simple panorama with Hugin. There are many ways you can tweak this workflow, from masking out unwanted or problematic areas, manually aligning control points, changing the projection, and specifying which algorithms are used to do the processing. I’ll try to cover some of those in a separate post, but if you want to access those advanced features, go to Interface and choose Advanced or Expert.
Best Practices
There are some things you can do to maximize your chances of getting good results in your panoramas.
Shooting
- While panorama stitching software is getting better and better at smoothing out inconsistencies between images, compiling panoramas generally works much better if you start with consistent images. That means using the same exposure, focus, and zoom settings for all the shots in the sequence.
- Shoot each image with a 20%-30% overlap with the images next to it. That will give plenty of opportunity to find reliable control points to match up.
- Ideally, all of the images should be taken rotated around a single, fixed nodal point. In practice, that’s really only possible with a dedicated panorama head. Failing that, a tripod or other fixed point provides a good rotation point. Handheld can also work, but you might run into trouble with wide-angle lenses and with subjects close to the camera.
- In most cases, avoid using a polarizer filter.
Editing
- In keeping with the theme of consistency across all of the ingredient images, make sure that any post-processing edits you do in Lightroom or other image editing app are applied across all the images in the sequence.
- Another handy tip if you’re using something like Lightroom or DxO PhotoLab is to apply the lens profile vignetting fixes before you export the photos.
More to Explore
If you enjoyed this post, you might also find these of interest:
- Shooting Panoramas with the Nikon Zf: In Praise of Opportunistic Panoramas
- Why Not to Use a Polarizer Filter When Shooting Panoramas
- Shooting Panoramas with the Sony RX100 VII
- How to Post Seamless Panoramas on Instagram
- Photo Stitching Software for Making Panoramas
- How to Shoot a Panorama with the Nikon D3400


