TL;DR
- Regular photos: resize to 2048 pixels on the long edge, sRGB, JPEG at quality 80 to 90. Facebook won’t show anything larger.
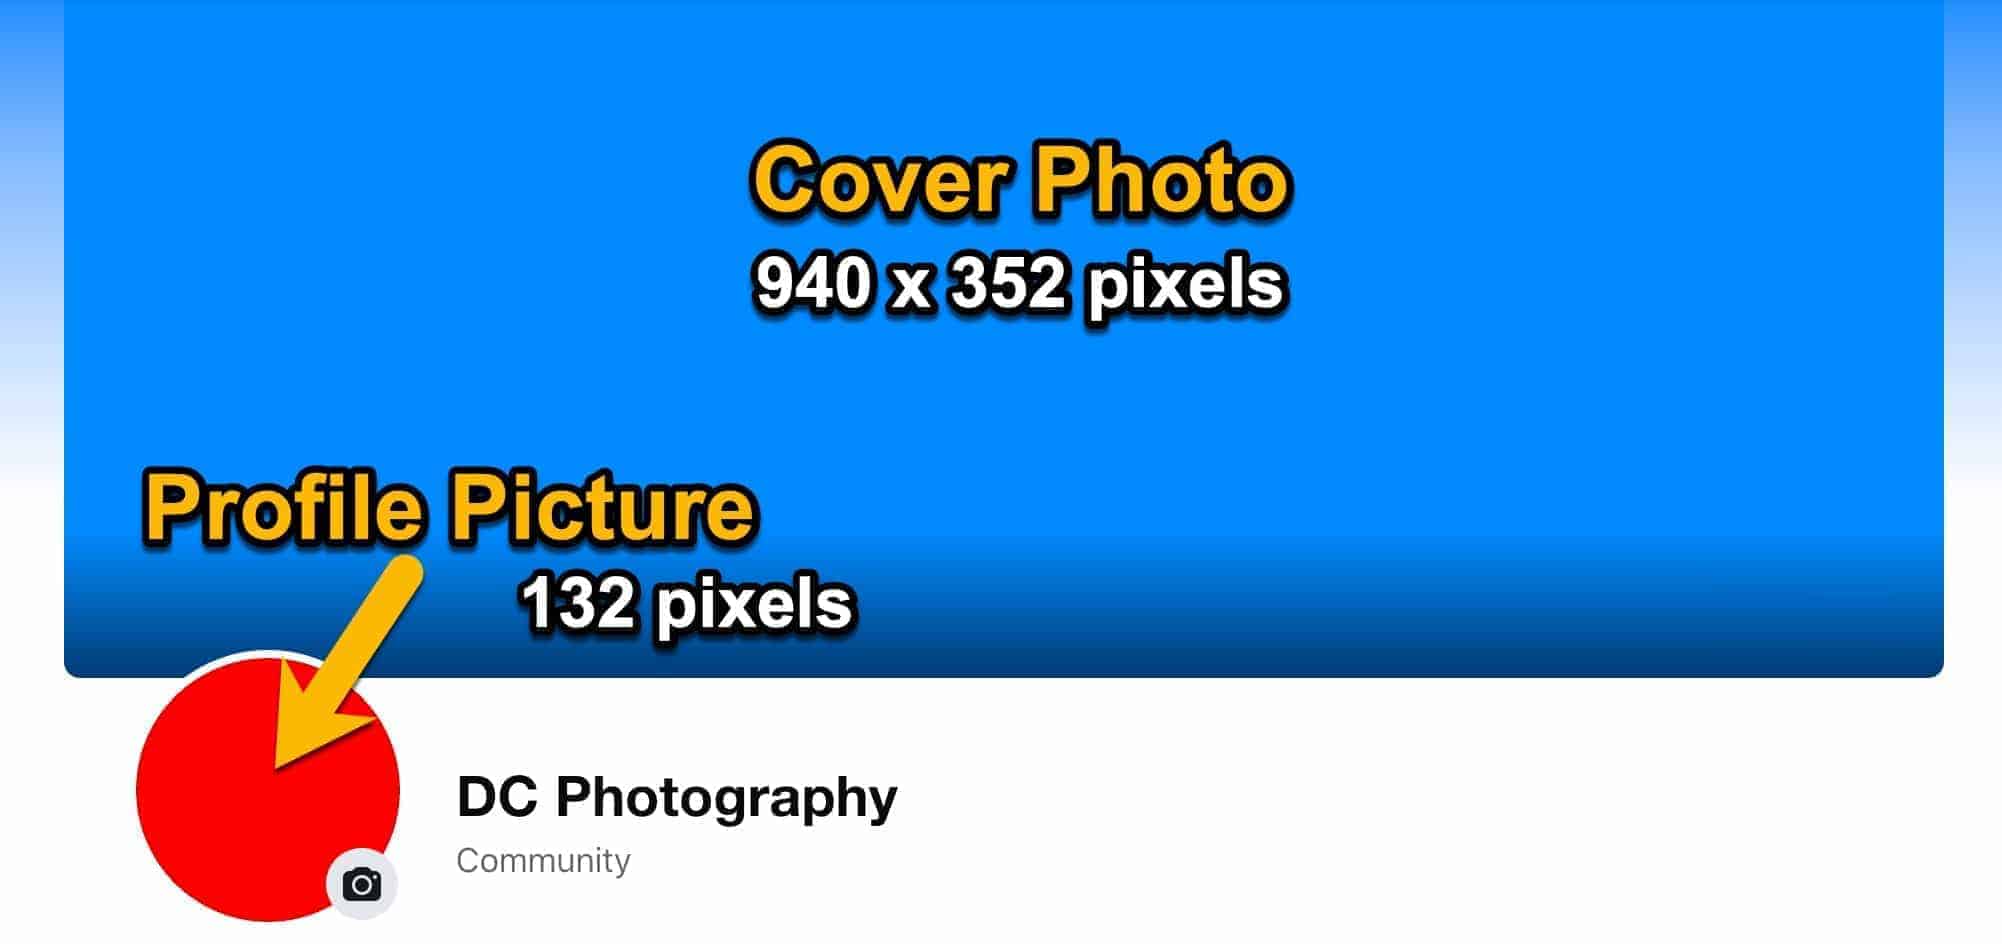
- Cover photo: displays at 820 by 312 on desktop and 640 by 360 on phones. Upload at least 1640 by 624 and keep the subject in the middle.
- Profile picture: shown as a small circle (170 pixels on desktop). Upload a square at least 320 pixels; I use 1000.
- Link previews: 1200 by 630 pixels (1.91:1). This is set on your website, not in Facebook.
- Event covers: cropped to 16:9. Upload 1920 by 1080.
- Group covers: 1640 by 856 (1.91:1).
- Stories and Reels: 1080 by 1920 (9:16).
- Facebook recompresses everything and strips all metadata, including your copyright. The old “under 99KB” trick no longer works.
If you’ve put real effort into a photo, it’s a letdown to watch Facebook turn it to mush. Soft detail, blotchy skies, a cover photo that looks fine on your screen and fuzzy on everyone else’s.
Some of that is unavoidable. Facebook resizes and recompresses everything you upload, and it has its own ideas about how each kind of image is displayed. But a lot of it is avoidable if you know what size to send it and where the traps are.
This guide is written for photographers who want their photos to look as good as they can on Facebook, not for social media managers laying out ad campaigns. Which means I focus on the things that matter most for that: regular photo posts, albums, and the cover and profile images that frame your page.
Facebook changes things without warning, so I revisit this guide regularly. The screenshots and measurements below are from the current desktop and mobile versions. If you see different behavior, let me know and I’ll take another look.
Jump To:
- The most important setting: photo size before you upload
- Facebook cover photo size
- Facebook profile picture size
- Shared link previews
- Photos in the feed
- Posting several photos at once
- Event cover photos
- Group cover photos
- Stories and Reels
- What Facebook does to your photos
- Facebook strips your metadata
- Facebook photo sizes cheat sheet
The Most Important Setting: Photo Size Before You Upload
Before getting into cover photos and layouts, here’s the thing that makes the biggest difference for regular photos.
Facebook stores photos at a maximum of 2048 pixels on the long edge. Upload something bigger and it gets resized down to that. Upload something much smaller and it gets scaled up on larger screens, which never looks good.
So the sweet spot is to do the resizing yourself. Export at 2048 pixels on the long edge, in the sRGB color space, as a JPEG at a quality setting of around 80 to 90. Add a modest amount of output sharpening for screen. That gives Facebook a clean file to work from, and its recompression has less to chew on.
If you use Lightroom, you can save that as an export preset and forget about it. If you’re wondering what the quality slider actually does, I’ve tested it in Lightroom’s JPEG export quality settings.
Two more things worth doing. First, if you post from the Facebook mobile app, turn on the HD upload option. It’s in Settings & privacy > Settings > Media. Without it, the app sends a smaller version of your photo. Second, if you’re uploading a set of photos, put them in an album rather than a plain post. Album photos open in the viewer at full size; photos in a multi-image post get cropped into a grid (more on that below).
Facebook Cover Photo Size
Recommendation: upload a cover photo at least 1640 pixels wide by 624 pixels tall, with the subject in the middle of the frame.
The cover photo is the wide panoramic image at the top of a profile or Page. Facebook’s own numbers are that it displays at 820 by 312 pixels on desktop and 640 by 360 pixels on phones, and it must be at least 400 by 150.
Those two display sizes are different shapes. The desktop version is a wide strip (about 2.6:1), while the phone version is closer to 16:9. Facebook handles that by showing the full height of your image on phones and trimming the sides. Going by Facebook’s own numbers, roughly the outer 15 percent on each side disappears on a phone. So keep anything important toward the center.

Uploading at double the desktop size (1640 by 624 or larger) matters for two reasons. One is high-resolution screens, which show a plain 820-pixel image soft. The other is that Facebook’s compression is noticeably gentler on a larger upload. I’ve tested that separately in how to get sharper Facebook cover photos.
Facebook’s help pages also say a cover photo “loads fastest” as an sRGB JPEG under 100KB, and suggest PNG for covers with text or a logo. The first is about speed, not quality. The second didn’t hold up in my tests. Both are covered in that same post.
A few display quirks to know about:
There’s a band of graduated shading along the bottom of the cover. It’s an overlay on top of your image, so don’t put anything important in that bottom strip.

Facebook samples the colors from the outer edge of your image and uses them to tint the blank area behind the cover. If you have a border or a strong color at the edges, that’s what gets picked up.

The bottom corners are slightly rounded. It’s subtle, and you can’t turn it off, but it can clip a stroke line or frame that runs right to the edge.

And the profile picture overlaps the bottom left of the cover by a sliver.

Changing Your Cover Photo
If you’re setting up a new profile or Page, click Add Cover Photo in the space where the cover will go. To replace an existing one, view your profile or Page while logged in and click the Edit button at the bottom right of the cover.

That opens a menu where you choose the new photo, or reposition or remove the existing one.

What Kinds of Photos Work as Covers
Panoramas are the natural fit. Wide crops of regular photos also work well, as long as the subject survives the cropping on phones. And there’s nothing stopping you from assembling several photos into a single collage in your editing software and uploading that as one image.


Cover Slideshows
Pages have had the option of a slideshow of up to five cover images instead of a single photo. It’s in the same menu as the regular cover photo.

You can also let Facebook choose which photos to show, based on what’s performing well on your Page. That’s a switch at the top right of the slideshow editor.

Visitors move through the slideshow with the arrows at each side. It doesn’t advance on its own, and the images show in a fixed order. In practice, that means most visitors only ever see the first image, so treat the first slide as your real cover photo.

Cover videos, which Facebook offered to Pages for a few years, were dropped in 2021. If you had one, it now shows as a still frame. Facebook has been trimming these cover extras over time, so if the slideshow option isn’t in your menu, that’s probably why.
Facebook Profile Picture Size
Recommendation: upload a square image at least 320 pixels on a side. I use 1000 pixels so it stays sharp wherever Facebook reuses it.
The profile picture sits at the bottom left of the cover and is cropped to a circle. It displays small: Facebook gives 170 by 170 pixels on desktop and 128 by 128 on phones for a Page, and a similar size for personal profiles.

You don’t need to make the image circular yourself. Upload a normal square or rectangular photo and Facebook crops it to a circle when it displays it. When you upload, you can drag the framing around and zoom in, as long as the image is larger than the minimum. There’s a thin white ring around the circle that you can’t remove.
The same picture is scaled down to about 40 pixels next to your name on posts and comments. That’s the version most people see most often, which is a good argument for a simple, tight crop. A face or a bold shape works; a small figure in a landscape turns into a dot.

Shared Link Previews
When you share a link, Facebook shows a preview image pulled from that web page. The preview is a wide rectangle, and the current recommendation from Facebook’s developer documentation is an image of 1200 by 630 pixels (a 1.91:1 ratio), with 600 by 315 as the minimum to get the large preview.

You can’t choose a different preview image from inside Facebook anymore. The image is set by the website being shared, through the “og:image” tag in the page’s code. If you’re sharing links to your own photography site, that’s where to fix it. On WordPress, SEO plugins handle it, and you can set a specific social image per post. If you’re sharing someone else’s page, you get whatever they set.
What you can still do is add extra photos to a link post, alongside the preview rather than instead of it.

Photos in the Feed
The size and shape of the thumbnail Facebook shows in the feed depends on the orientation of the photo and how many you’re posting at once. These are my measurements from the desktop site.
Single Photo
A single photo is fitted into a box up to 500 pixels wide and up to 750 pixels tall. A vertical photo in a 3:2 ratio fills the whole box, so if you want the most screen space in the feed, vertical wins.

A horizontal photo is scaled to 500 pixels wide and keeps its full shape, with nothing cropped.

The same goes for a very wide panorama. It’s shown at 500 pixels wide, so it ends up as a thin strip. Panoramas are better served by the cover photo slot, or by clicking through to the full-size view.

A square is shown at 500 by 500.

Whatever the thumbnail, clicking on the photo opens the full-size version, up to that 2048-pixel maximum. That’s the view worth optimizing for if you care about the photo itself.
Posting Several Photos at Once
When you post two or more photos together, Facebook arranges them in a grid. The layout is decided by the first photo, which I’ll call the primary image. It’s the one that displays first in the upload dialog, and it also displays larger in some of the layouts.
The primary image’s orientation, not the others’, sets the layout. Three photos with a square primary image get a different grid than three photos with a horizontal one. To choose which photo is primary, drag it to the first position in the upload dialog.
Here’s an example with an orange square and a green vertical rectangle. With the square first:

it posts like this:

Swap them so the vertical rectangle is first:

and you get this:

The non-primary photos get cropped to fit their cells, so don’t count on their edges surviving. If the crops matter to you, post the photos as an album instead, where each opens at full size.
Here are the layouts for each combination.
2 Photos, Horizontal Primary
The two stack vertically, each 500 pixels wide by roughly 250 tall, with a thin white line between them.

2 Photos, Vertical Primary

2 Photos, Square Primary

3 Photos, Horizontal Primary

Because the primary image sets the layout, you can mix orientations among the other photos and the grid stays the same.
3 Photos, Vertical Primary

3 Photos, Square Primary

4 Photos, Horizontal Primary

4 Photos, Vertical Primary

4 Photos, Square Primary

5 or More Photos, Horizontal Primary
The first five are arranged in a mosaic. If there are more than five, the last cell gets a “+” overlay showing how many more there are.

5 or More Photos, Vertical or Square Primary
Vertical and square primaries produce the same grid.

Event Cover Photos
Whatever shape you upload as an event cover, it gets cropped to 16:9. Upload a 1920 by 1080 pixel image and you’ll get the whole thing. Facebook doesn’t publish a recommended size for event covers, and you can’t adjust the crop after the photo has been added, so get it right before you upload.
On the main event page it’s displayed quite small, so if there’s text on it, keep the text large.

Group Cover Photos
Groups use a different shape again. Facebook’s recommendation is 1640 by 856 pixels, a 1.91:1 ratio. As with regular covers, phones show less of the sides, so keep the subject central.
Stories and Reels
Stories and Reels are vertical and full-screen on phones: 1080 by 1920 pixels, a 9:16 ratio. A horizontal photo posted as a Story gets letterboxed with a blurred fill, which is rarely flattering. If you want a photo to work as a Story, crop it vertically yourself.
What Facebook Does to Your Photos
Facebook compresses every image you upload. It has good reasons (speed, bandwidth, storage), but the compression is one-size-fits-all, and it doesn’t treat every photo kindly. Smooth gradients, skies, and images heavy in reds and oranges tend to show it most. Photos in the gallery viewer generally fare better than cover photos and profile pictures.
For years the advice, including on this page, was to keep files under 99KB so Facebook would leave them untouched. That loophole is closed. Uploading a PNG used to sidestep the compression too, and it no longer does. I’ve tested both in the post on sharper Facebook cover photos.
What does help is giving Facebook a good file to start with: 2048 pixels on the long edge for regular photos, double the display size for cover photos, sRGB, JPEG quality 80 to 90, and no heavy sharpening. Compression artifacts pile up, so a file that’s already been squeezed hard looks worse after Facebook squeezes it again.
Facebook Strips Your Metadata
One thing photographers should know: Facebook removes all the metadata from your photos when you upload them. That includes the camera and lens information, GPS location, keywords, captions, and your copyright and contact details. Anyone who saves your photo from Facebook gets a file with none of that attached.
There’s no setting to keep it. If credit matters to you, the only things that survive are a visible watermark (Lightroom can add one on export) or a caption in the post itself. Keep the full copyright details in your master files regardless; I go through that in adding copyright metadata in Lightroom.
Facebook Photo Sizes Cheat Sheet
| Image | Upload this | How it displays | Notes |
|---|---|---|---|
| Regular photo | 2048 px on the long edge, sRGB JPEG | Up to 2048 px in the viewer | Feed thumbnail is up to 500 by 750 px |
| Cover photo (profile or Page) | 1640 by 624 px or larger | 820 by 312 desktop, 640 by 360 phone | Phones trim the sides; keep the subject central |
| Profile picture | Square, 320 px minimum (I use 1000) | 170 px circle on desktop, 128 on phone, 40 px in the feed | Cropped to a circle automatically |
| Link preview | 1200 by 630 px (1.91:1) | Wide card | Set with og:image on the website, not in Facebook |
| Multi-photo post | Any; first photo sets the layout | Grid at 500 px wide | Non-primary photos are cropped |
| Event cover | 1920 by 1080 px | Cropped to 16:9 | Can’t be recropped after upload |
| Group cover | 1640 by 856 px (1.91:1) | Wide banner | Keep the subject central |
| Stories and Reels | 1080 by 1920 px (9:16) | Full-screen vertical | Crop vertically yourself |


