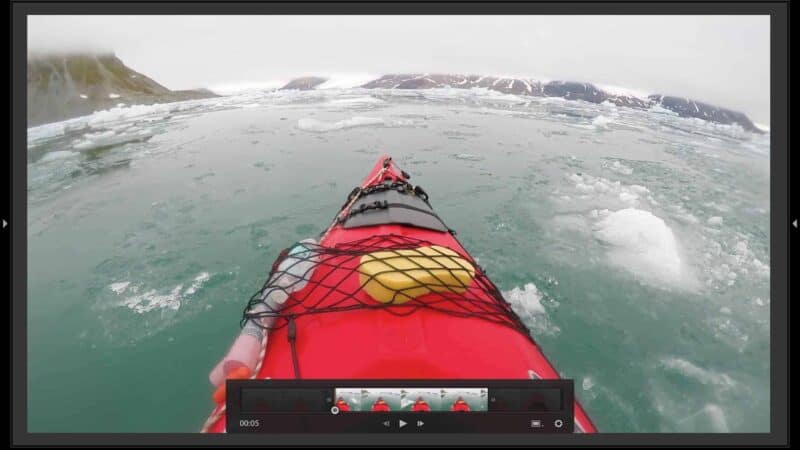
Lightroom doesn’t have many editing tools when working with video files. Its focus is squarely on still images, with some basic video functionality tacked on more as an afterthought. But it does have the ability to trim the beginning or end of video clips.
It’s worth being clear about which Lightroom this applies to, because there are two of them. In the cloud-based Lightroom desktop app, Adobe added real video editing in the June 2022 release — you can trim clips and run the same editing sliders and presets you’d use on a photo. Lightroom Classic is the one with the bare-bones setup: video lives only in the Library module, you can apply presets and Quick Develop tweaks there, and a clip won’t open in the Develop module at all. Everything below is the Classic method.
While you can’t then join the clips as you can with more conventional video editing software, it can be useful if you’re just trying to quickly share a single clip.
There are some common situations where it comes in handy. You can pull out a short snippet from a longer clip. It also allows you to remove the messy part at the beginning and end where you’re composing the shot or turning the camera off.
It’s not difficult to do, and because it uses the same interface as most video editing software, it will be intuitive if you’ve used other video editing apps. But accessing the tool isn’t necessarily self-evident unless you know where to look for it.
Lightroom Classic’s trim video tool
First, open your video clip in single-item mode in the Library module.
NB: If you try to do it in the Develop module, you’ll get an error message. It only works in the Library module.
You’ll see the playback bar at the bottom of the video with a play button and a playhead. At the far right of that you’ll see the timecode and then two small icons. You want the one at far right — the settings cog wheel.
The other icon, the one that looks like a small frame, is Capture Frame. Click it and Lightroom saves a JPG of whatever frame the playhead is sitting on into the same folder as the video. It’s the usual way to get a still out of a clip in Lightroom Classic, and unlike the video itself, that JPG can go straight into the Develop module.
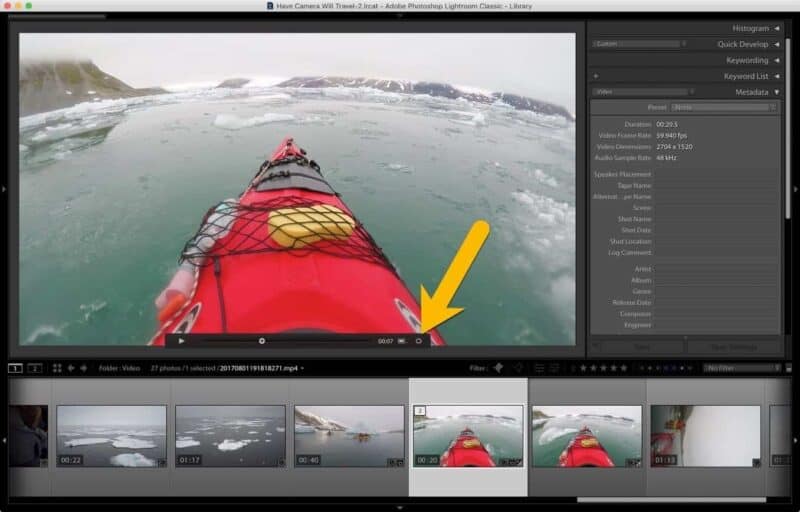
When you click on that, the playback console will expand a little, showing a thumbnail timeline of the video clip and a couple of extra frame advance buttons.
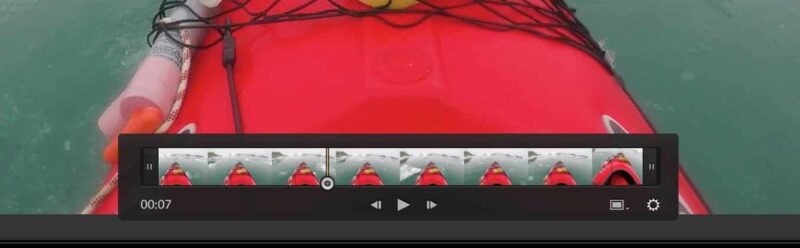
But the parts you want are at each end of that visual timeline. There are two small handles there, one for the start of the clip and one for the end.
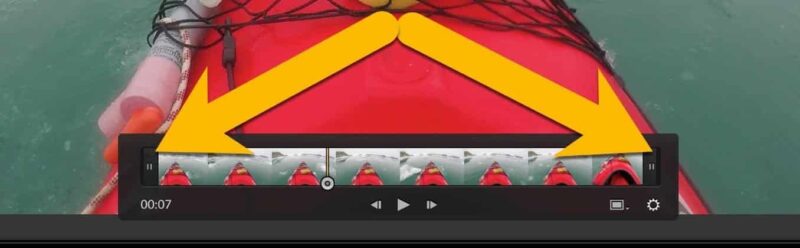
What you want to do is drag the handles to set new start points and end points for the clip.
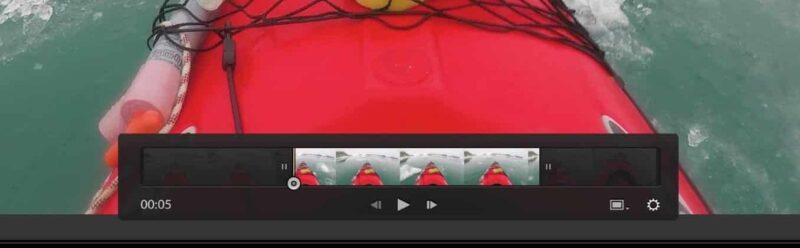
That’s about all there is to it.
As with nearly everything in Lightroom, this is a non-destructive process, so it’s not actually cutting the original file. To see its effects, you’ll need to export the video file, making sure to select either DPX or H.264, both of which render a new version of the video.
If you select the Original option, the resulting video will be, well, the original and won’t be trimmed.


