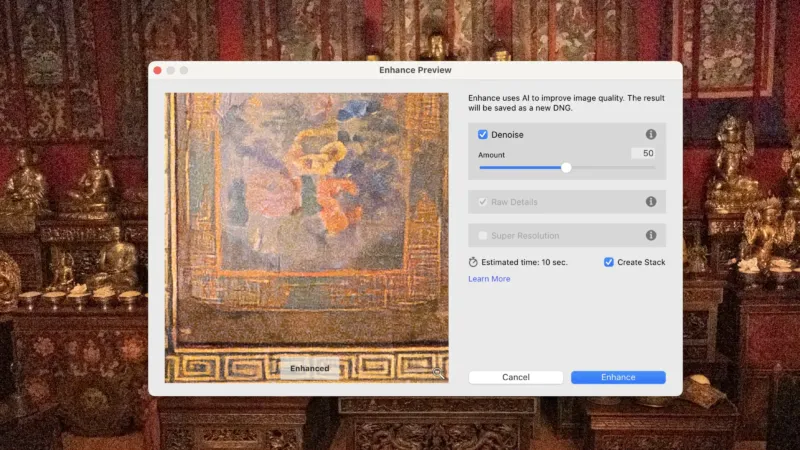
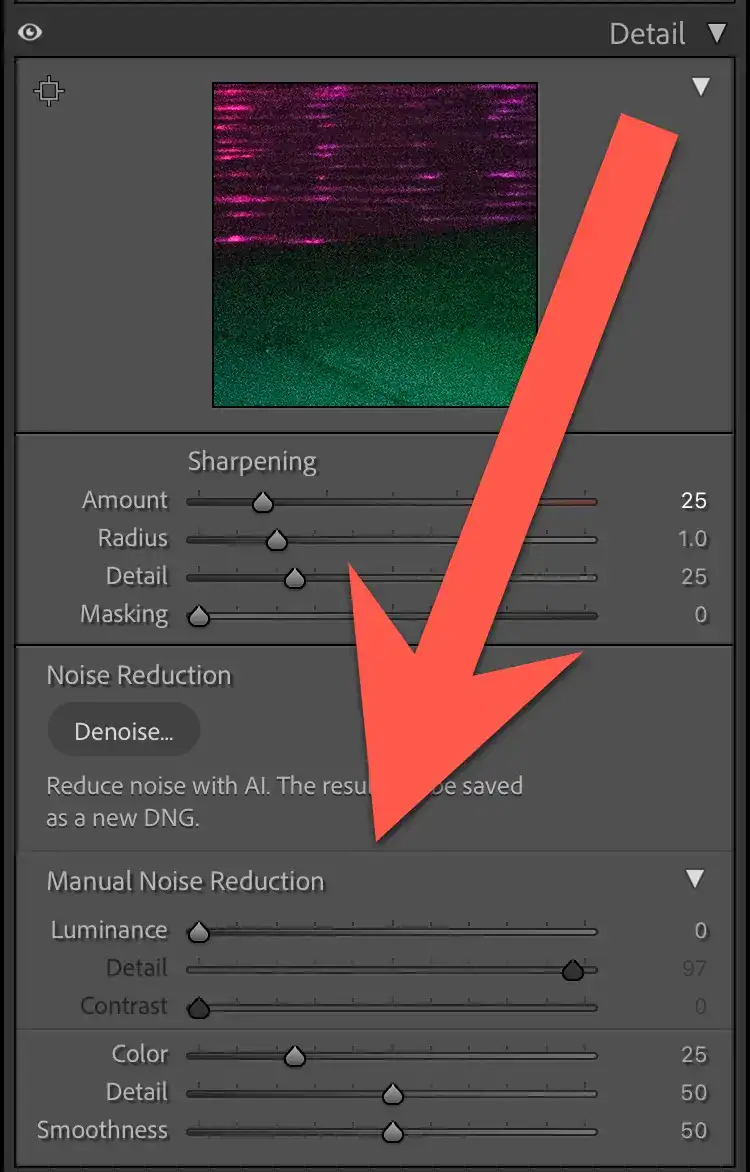
The quick version: in Lightroom Classic, open the Develop module, scroll to the Detail panel, and click Denoise. One slider — start at the default 50, and pull it back to around 35–40 if faces start to look waxy — then Enhance. Lightroom builds a new, cleaner DNG stacked next to your original. It works on RAW files only; if Denoise is grayed out you’re on a JPEG, TIFF, or an unsupported RAW, and the Manual Noise Reduction sliders in the same panel are the tool instead.
How to reduce noise in Lightroom Classic: Step by step
- Select the photo (or several) in the Develop module.
- Open the Detail panel and click Denoise. Do this before your other edits — it’s the one exception to working top-to-bottom through the panels, because it changes what the later adjustments act on.
- Set the Amount. 50 is the default and a good starting point; I usually end up at 35–40, and rarely go higher than 50. Drag inside the preview square to check a face or a detailed area at 100%.
- Click Enhance. Processing takes a few seconds to a minute per image depending on your computer; the result is a new DNG, stacked with the original if you’ve left that option on.
- Edit the DNG as normal. If you’re not happy, the original is untouched — reprocess at a different amount, or fall back to the manual sliders.
| Denoise (AI) | Manual Noise Reduction | |
|---|---|---|
| Works on | RAW files from Bayer and X-Trans sensors | Any file: RAW, JPEG, TIFF, PSD |
| Control | One Amount slider | Luminance, Detail, Contrast; Color, Detail, Smoothness |
| Quality | Far better at high ISO; keeps detail | Fine for light cleanup; waxy if pushed |
| Output | New DNG alongside the original | Applied to the existing file’s develop settings |
| Speed | Seconds to a minute per image | Instant |
| Use it when | RAW and the noise is obvious | JPEGs, unsupported RAWs, or a light touch |
Lightroom Classic has two categories of tools for dealing with image noise.
The newest is the most impressive and the one worth trying first–but only if you’re shooting RAW. It’s simply called Denoise, and you launch it with a simple button.
The other is a manual approach that uses traditional tools, and it works on all types of image files. It’s now called Manual Noise Reduction.
Both are in the Detail panel of the Develop module.
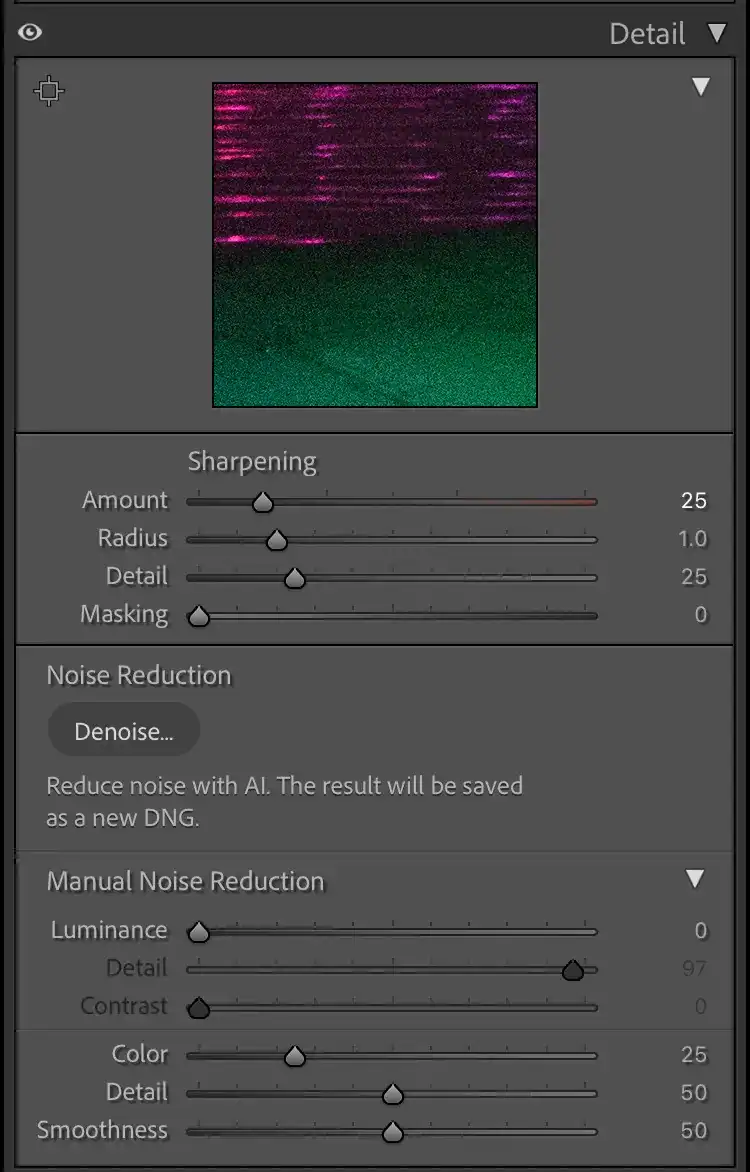
Denoise
You can find this in the Develop module under the Details.
This is a relatively new tool in Lightroom. It was added quietly without much fuss, and it has gotten better since then.
It uses AI (or, more pedantically, machine learning) to analyze each image and apply sophisticated denoising algorithms to it. Noise Ninja used to do something along those lines a nearly two decades ago, but Lightroom’s version takes it up several notches.
Crucially, Denoise only works with (most) RAW files. The tool will be grayed out if you try to use it on other image file types or a type of RAW file that isn’t supported by the Denoise algorithms.
And if you are working with RAW files, it’s the best place to start. I’d strongly recommend starting with these rather than the manual noise reduction sliders. And if you’re only used to the traditional type of noise reduction sliders, the effects of the Enhance tool (and other third-party options like DxO PureRAW) can seem a bit like magic.
Denoise doesn’t affect the underlying image data so much as how Lightroom is rendering the information in the RAW file. It uses machine learning to apply more advanced processing to the data and essentially make better decisions at what it should look like.
And there’s a crucial difference in how this tool works compared to most of the other sliders and tools in Lightroom’s Develop module. Iin this case, it actually creates a whole new copy of the RAW file, this time as a DNG file. It will be stacked with the original (if you’ve selected that option), but the original file will remain untouched.
Using the AI Denoise tool
It couldn’t be much simpler to use. Which is good for keep things intuitive, but it’s not so good if you prefer more granular control.
There’s a single slider. The default is 50, or halfway. I find that to be a good starting point, and when I do adjust it, it’s usually to dial it down a bit to around 35 or 40. I very rarely go higher than 50. But ultimately it’s a matter of personal preference, and you get a real-time fragment of the image to preview at 100%. You can change which part of the image is used for the preview by clicking and dragging in the preview square.
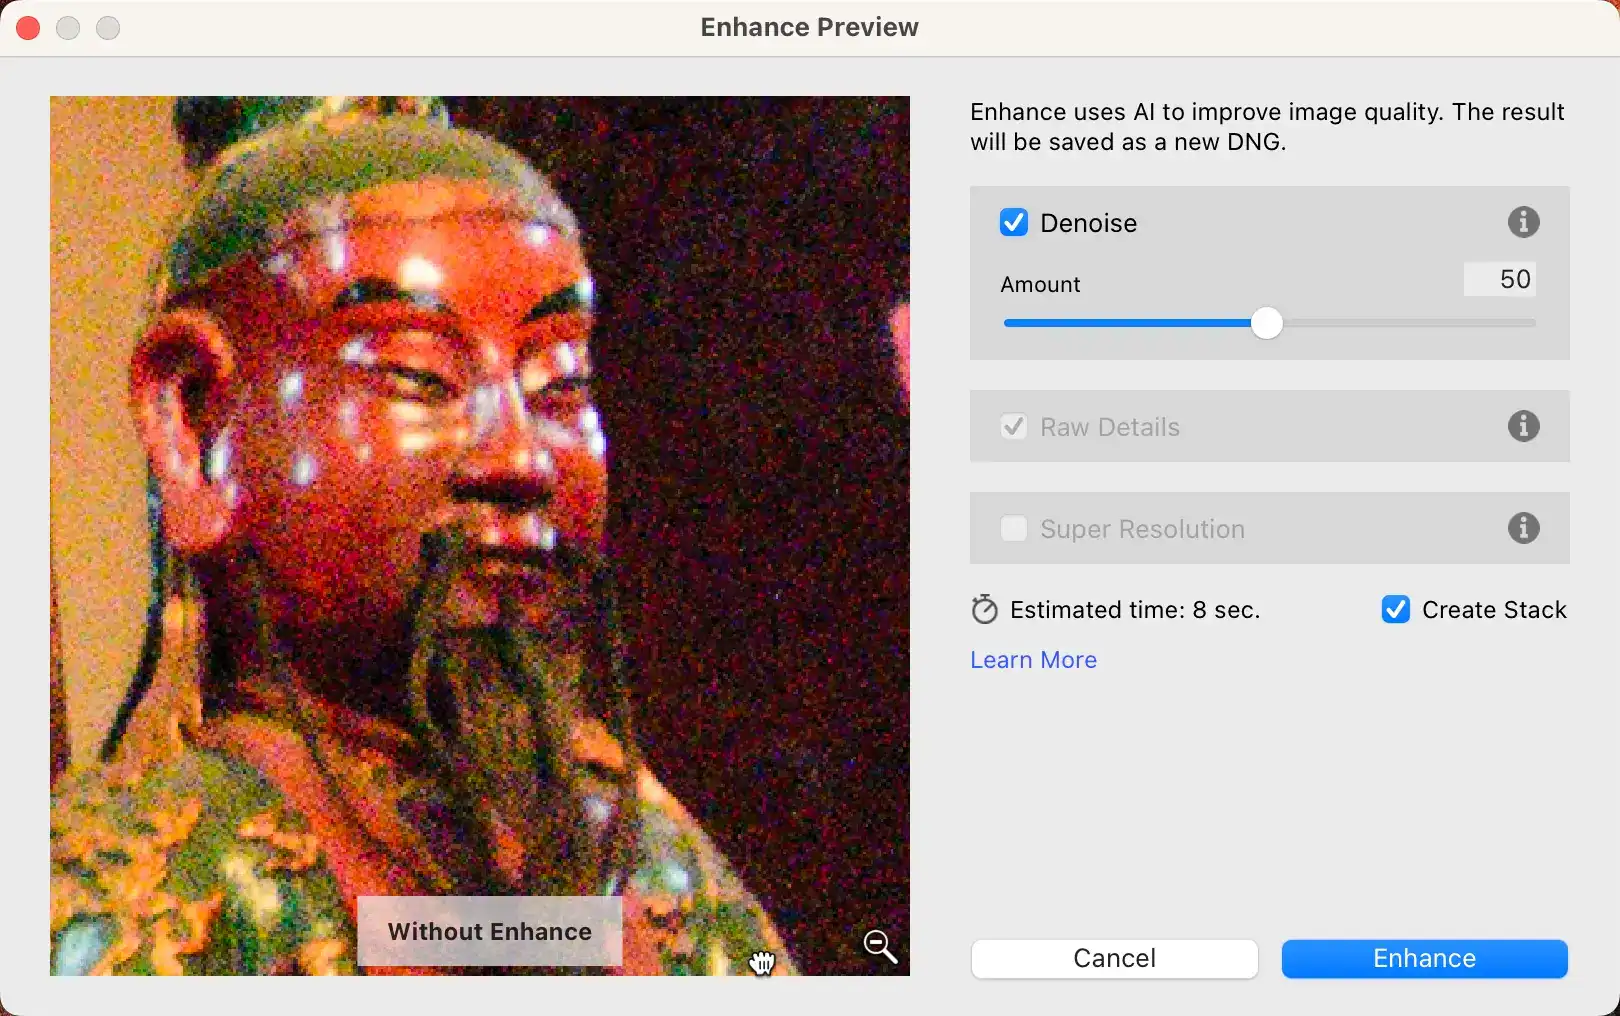
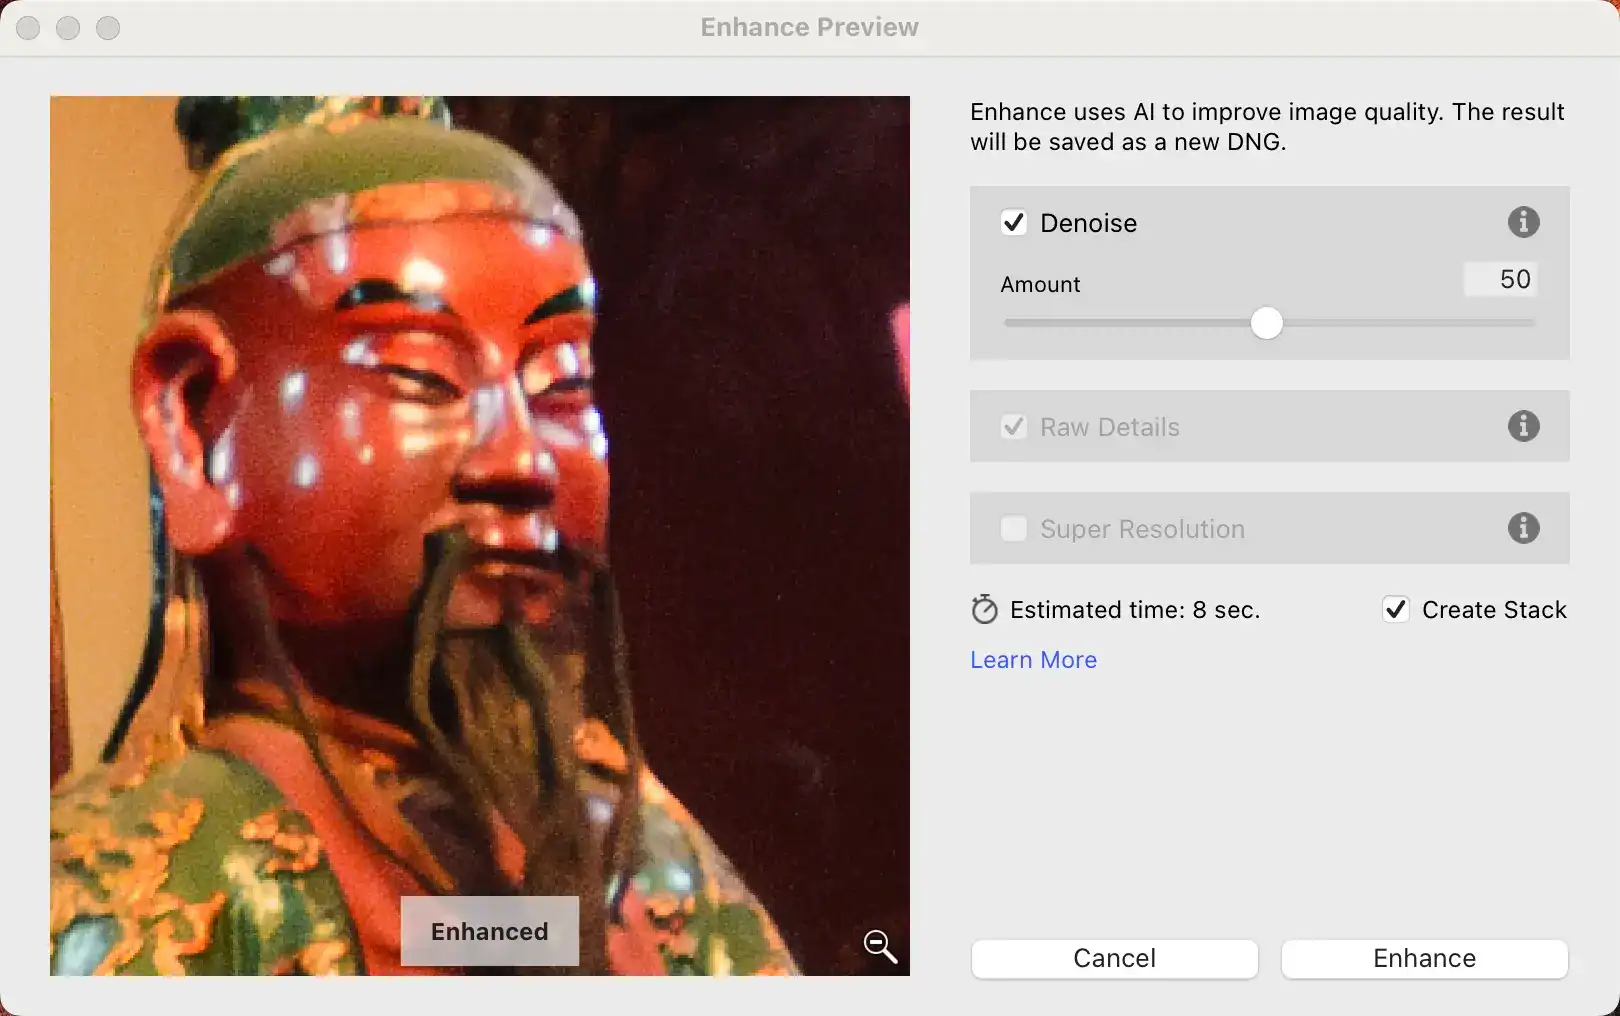
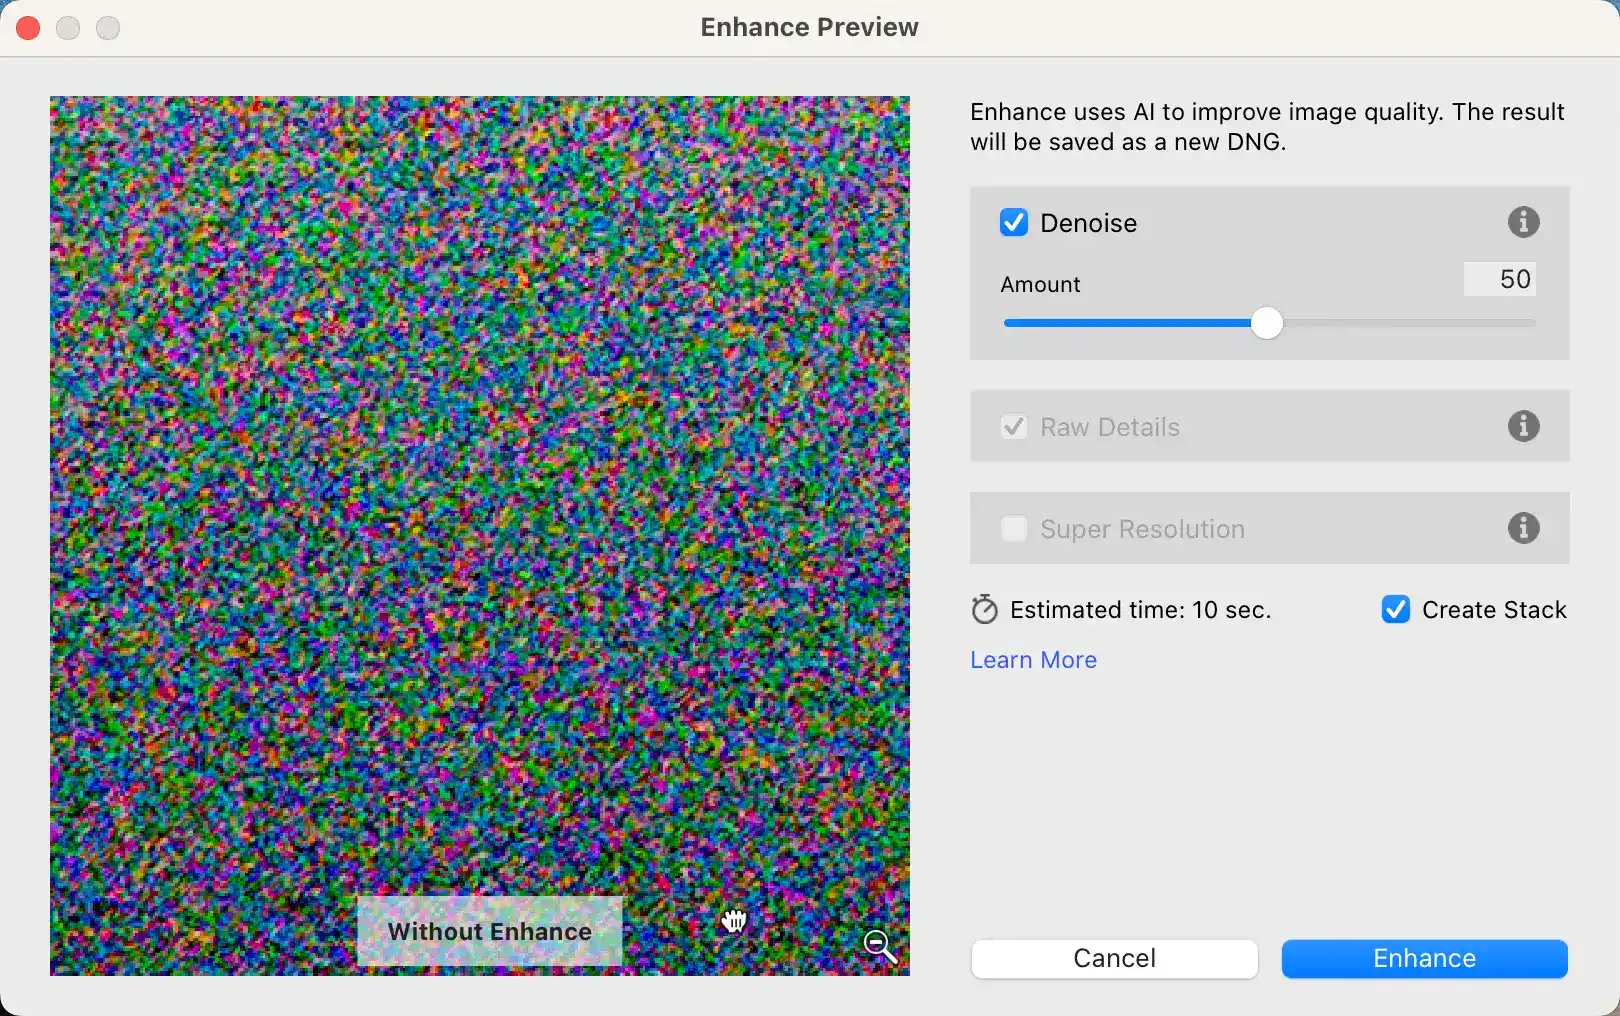
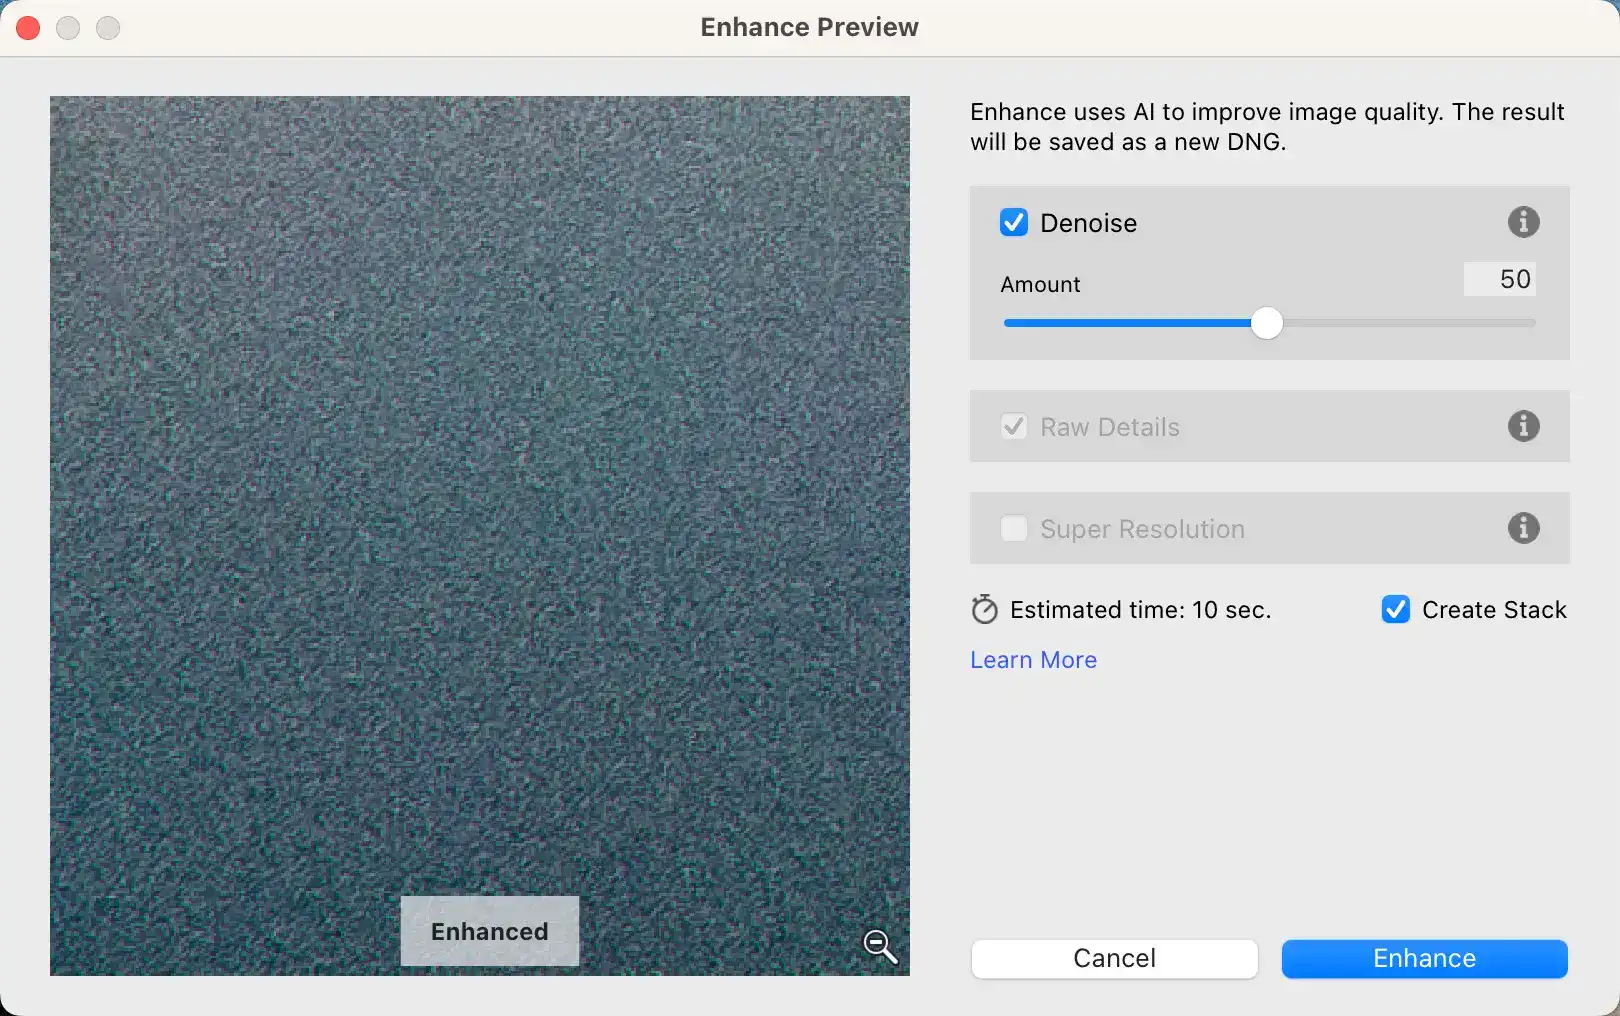
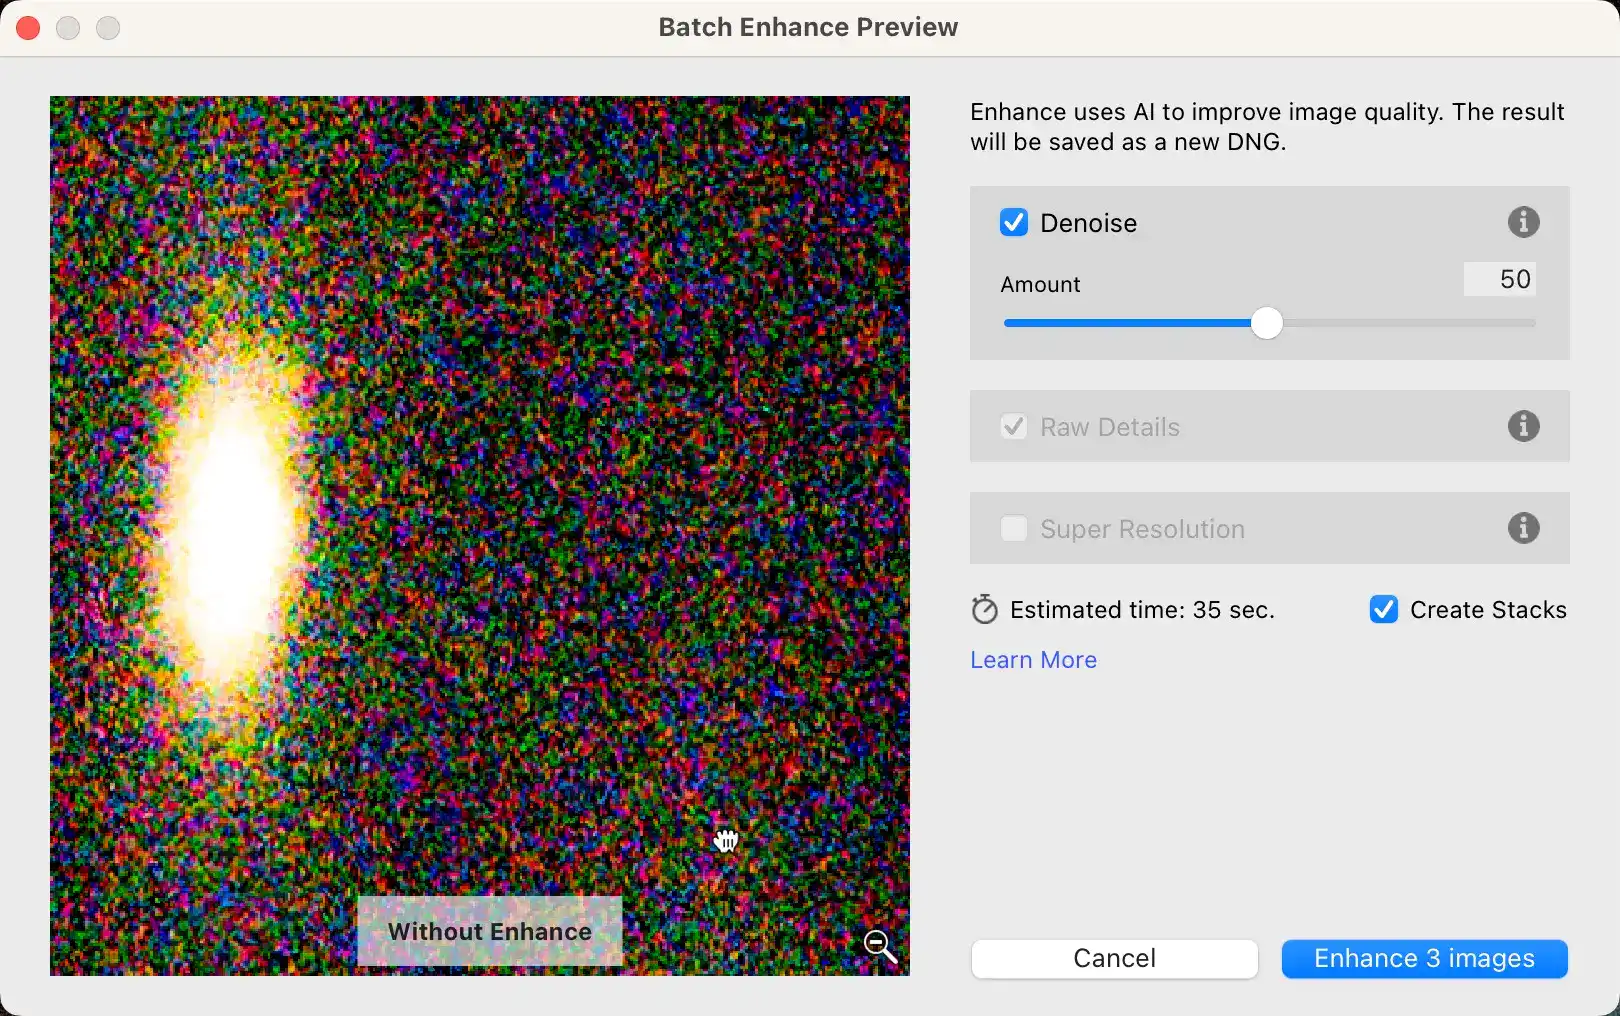
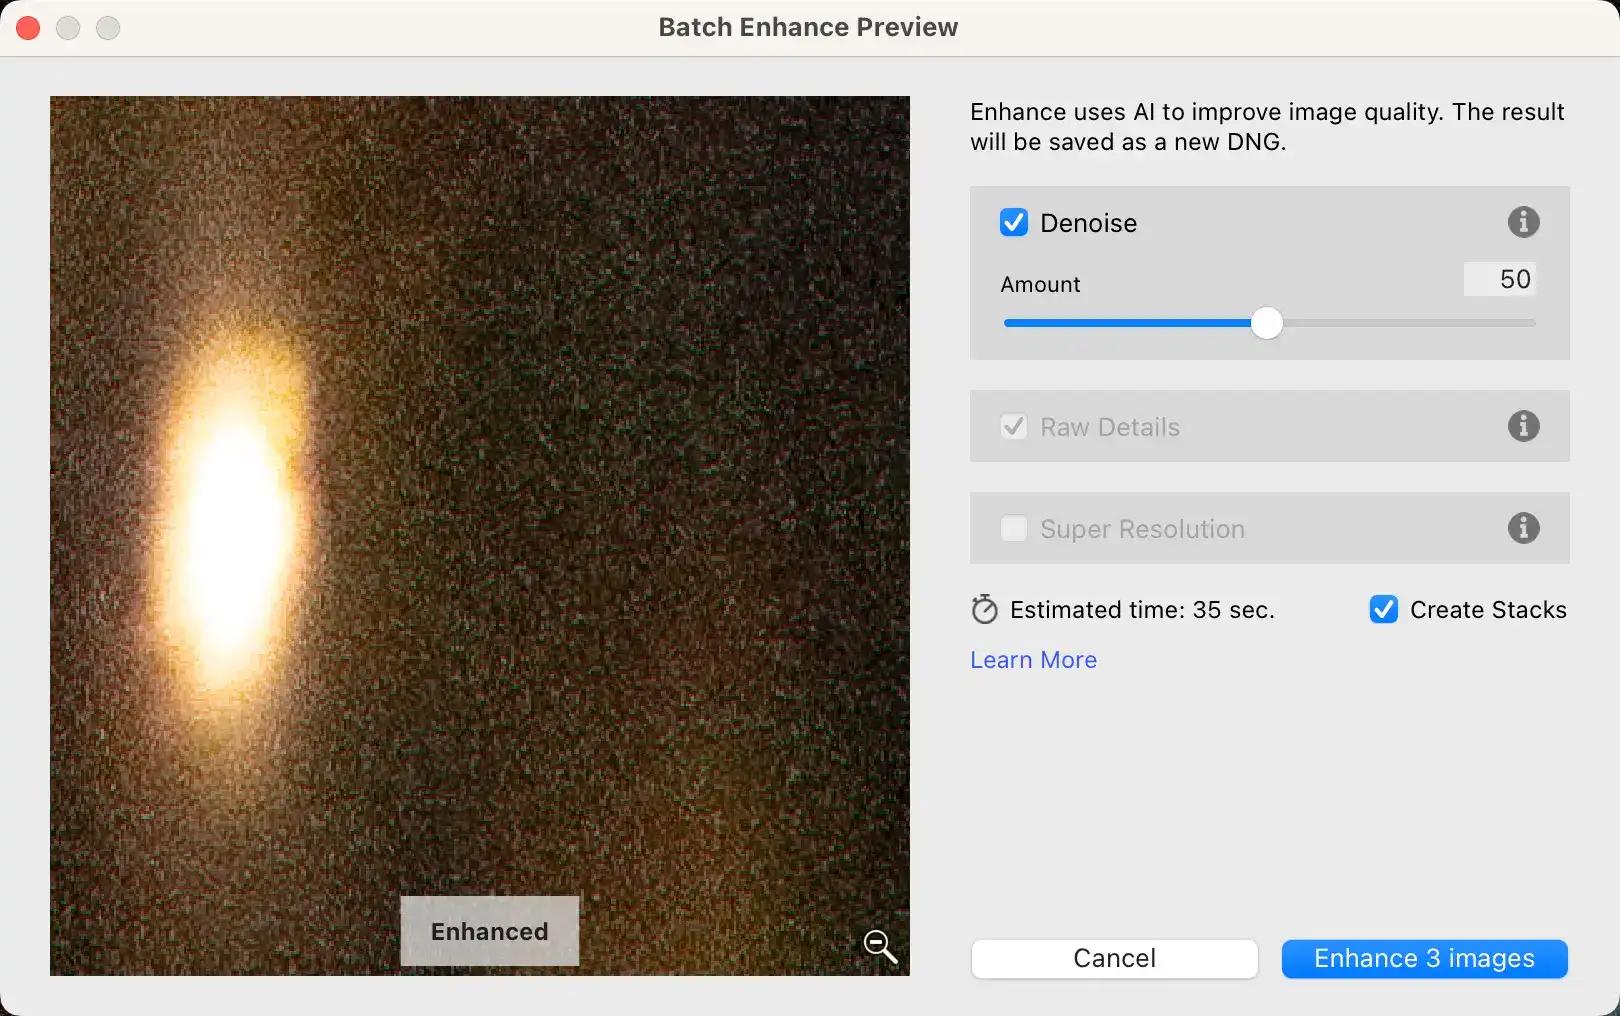
RAW details & Super Resolution
A couple of other related functions have also been added to the Denoise feature.
They are Raw Details and Super Resolution.
You can use these in combination with Denoise, but these work a little differently, and I think it’s worth dealing with those separately. They don’t directly deal with denoising; they work to improve perceived detail, something that can be lost in noisy images and the denoising process.
By all means, try them out — they can work well. But I’ll cover those in a separate post.
Things worth knowing
- The Denoise algorithms can work with many or most RAW formats, but not all. It can only work with RAW images that have been captured with cameras with Bayer or X-Trans sensors. That includes many digital cameras, but not all.
- I know that elsewhere on this site I recommend generally working from top to bottom in the Develop module’s panels, but this is an exception. Denoise is best applied at the beginning stages of working on an image, because it can affect other Develop changes.
- Denoise calculations take time, so this works better on a computer with more processing power.
- You can process multiple files at once. Simply select them as you normally would and apply the Denoise button. But each image will be assessed and processed individually. If you have the Create Stacks function enabled, each output file will be stacked with its corresponding input file.
Lightroom’s Manual Noise Reduction tools
The Denoise tool analyzes each image with machine learning and automatically decides the best settings for improving the image quality. The only manual control you have is with an amount slider, dialing it up or lower.


But there’s also a more traditional approach, where you can have more control but less guidance. You can find this in the Develop Module in the Detail panel. They’ve been renamed the Manual Noise Reduction tools.
If you’re working on resurrecting an older image, check the Process you have set in the Calibration panel. The Noise Reduction tools work differently with some older process settings. I usually just update it to the current version.
For RAW files, I’d generally recommend starting with the AI Denoise tool. I’ve found it to do a very good job most of the time. In the even you’re not happy with it, then you can try the manual sliders.
But if you’re working on a JPG, TIFF, or a type of RAW file that isn’t supported by the the Denoise tool, then your only option will be to use the Manual Noise Reductions sliders (or one of the other third-party noise reduction tools that do have automatic denoising for JPG/TIFF files).
If you’re working with JPGs out of the camera, there’s a good chance that there’s already noise reduction applied to the image. That’s because most cameras apply noise reduction to high-ISO images by default. For those images, trying to apply further noise reduction gets messy and rarely ends well.
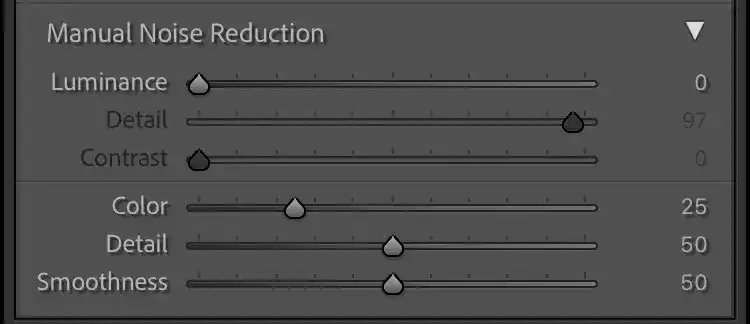
These are more traditional digital noise reduction tools, where you can address aspects like luminance and color, detail, and smoothness. And these rely on your own visual judgment, so it’s best to zoom in to 100% of the image to get the most accurate display.
Luminance slider
The Luminance slider applies to the pattern or texture of the noise that looks like speckles. And while it’s always there, it becomes much more prominent the higher you crank the ISO. It’s sometimes also known as contrast noise.
I find this is the most useful slider to start with, and, by default, Lightroom doesn’t apply any luminance noise reduction (unlike with color noise).
By default, it’s set to 0. As you move the slider from left to right, you’ll notice that the texture will smooth. With this one, less is more, and if you take it too far, that smoothness will become a problem in itself because it inevitably affects sharpness.
So it’s an easy took to overdo, but the trick is to find the right compromise. There’s not really a “right” answer; it’s just your own judgment call as to where the best balance is between noise and sharpness (but you can also combine with the separate sharpness tools, a topic I’ll handle separately).
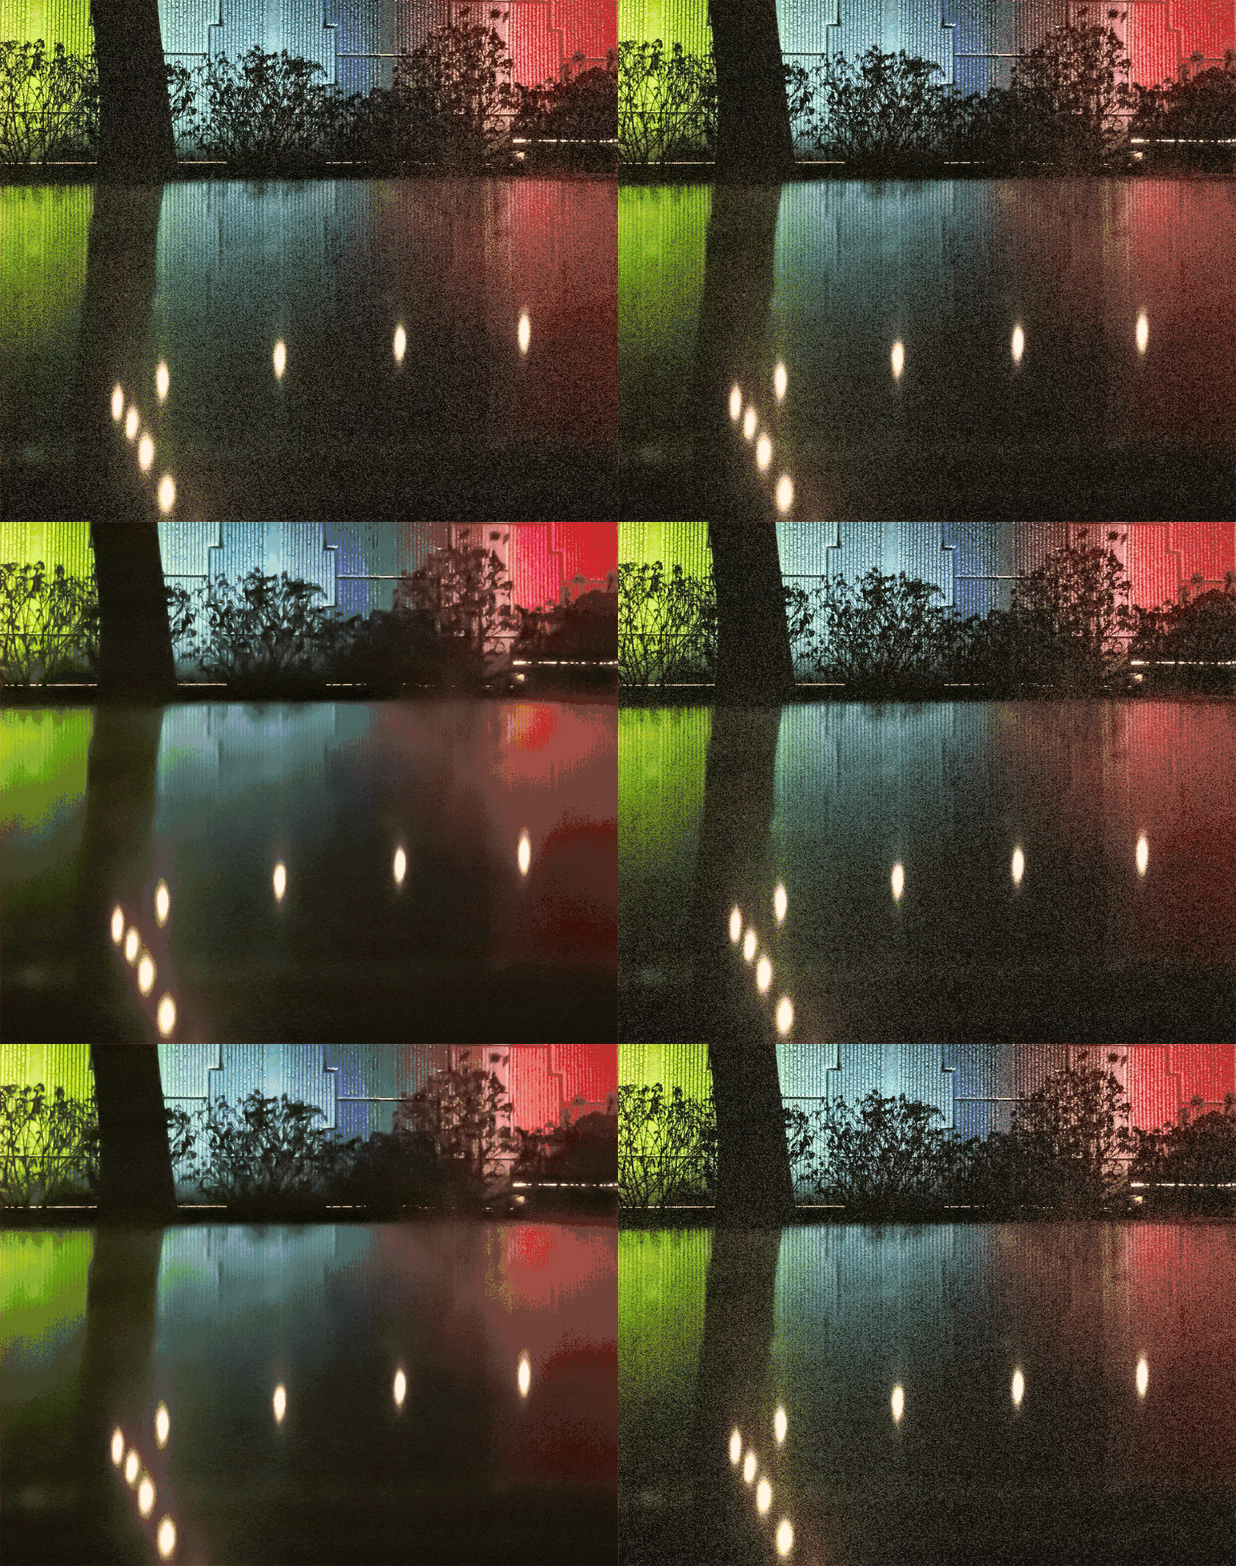
Again, drag this slider until the pattern blends into a smoother texture. This is one that’s easy to overdo.
This graphic isn’t an ideal illustration because the image quality of the embedded file here doesn’t do full justice to original images, but it still gives you an idea of what it looks like as you slide the luminance slider back and forth.
As you can see, the texture disappears, but it’s also very easy to overdo it.
Detail & contrast sliders
When the Luminance slider is at its default 0, these sliders are grayed out. As you move the Luminance slider to the right, they become enabled.
The Detail slider is setting the threshold for what should be treated as luminance noise and therefore affected by the main slider. Drag it to the left to increase the threshold so that less of the image is affected by the slider. But at some point, you might find that what is actually image noise is being inaccurately treated as image detail to be preserved. As you drag it to the left, it will reduce the threshold but might end up catching up some image detail as noise and result in too much smoothing.
The Contrast slider similarly adjusts a threshold of the main slider, in this case as an effort to increase the contrast of small areas to help reduce that smeared, plasticky look. The downside if you take it too far is that you can end up with large blocks of smooth area that look equally fake but in a different way.
Color noise slider
The tell-tale signs of color noise are red, green, and blue dots. These occur at high ISOs, and especially in dark areas of the image, when the sensor has trouble gathering enough light to determine the correct color that each pixel should register.
Unlike the Luminance slider, the Color Noise slider is set by default at 25. Drag that to the left, and you’ll immediately notice how much effect that is already having (and how useful it is as a default).
As you use the slider, it desaturates the errant color spots, creating a smoother effect with its neighbors. If you use the slider you should see the color spots disappear (or mostly disappear).
Again, this graphic isn’t as clear as trying it yourself would be, but it does give a useful idea of the effect.
As you can see, the color slider alone does add improvements, but it’s not addressing the texture issue. Which is why you usually want to use the Luminance and Color sliders together.
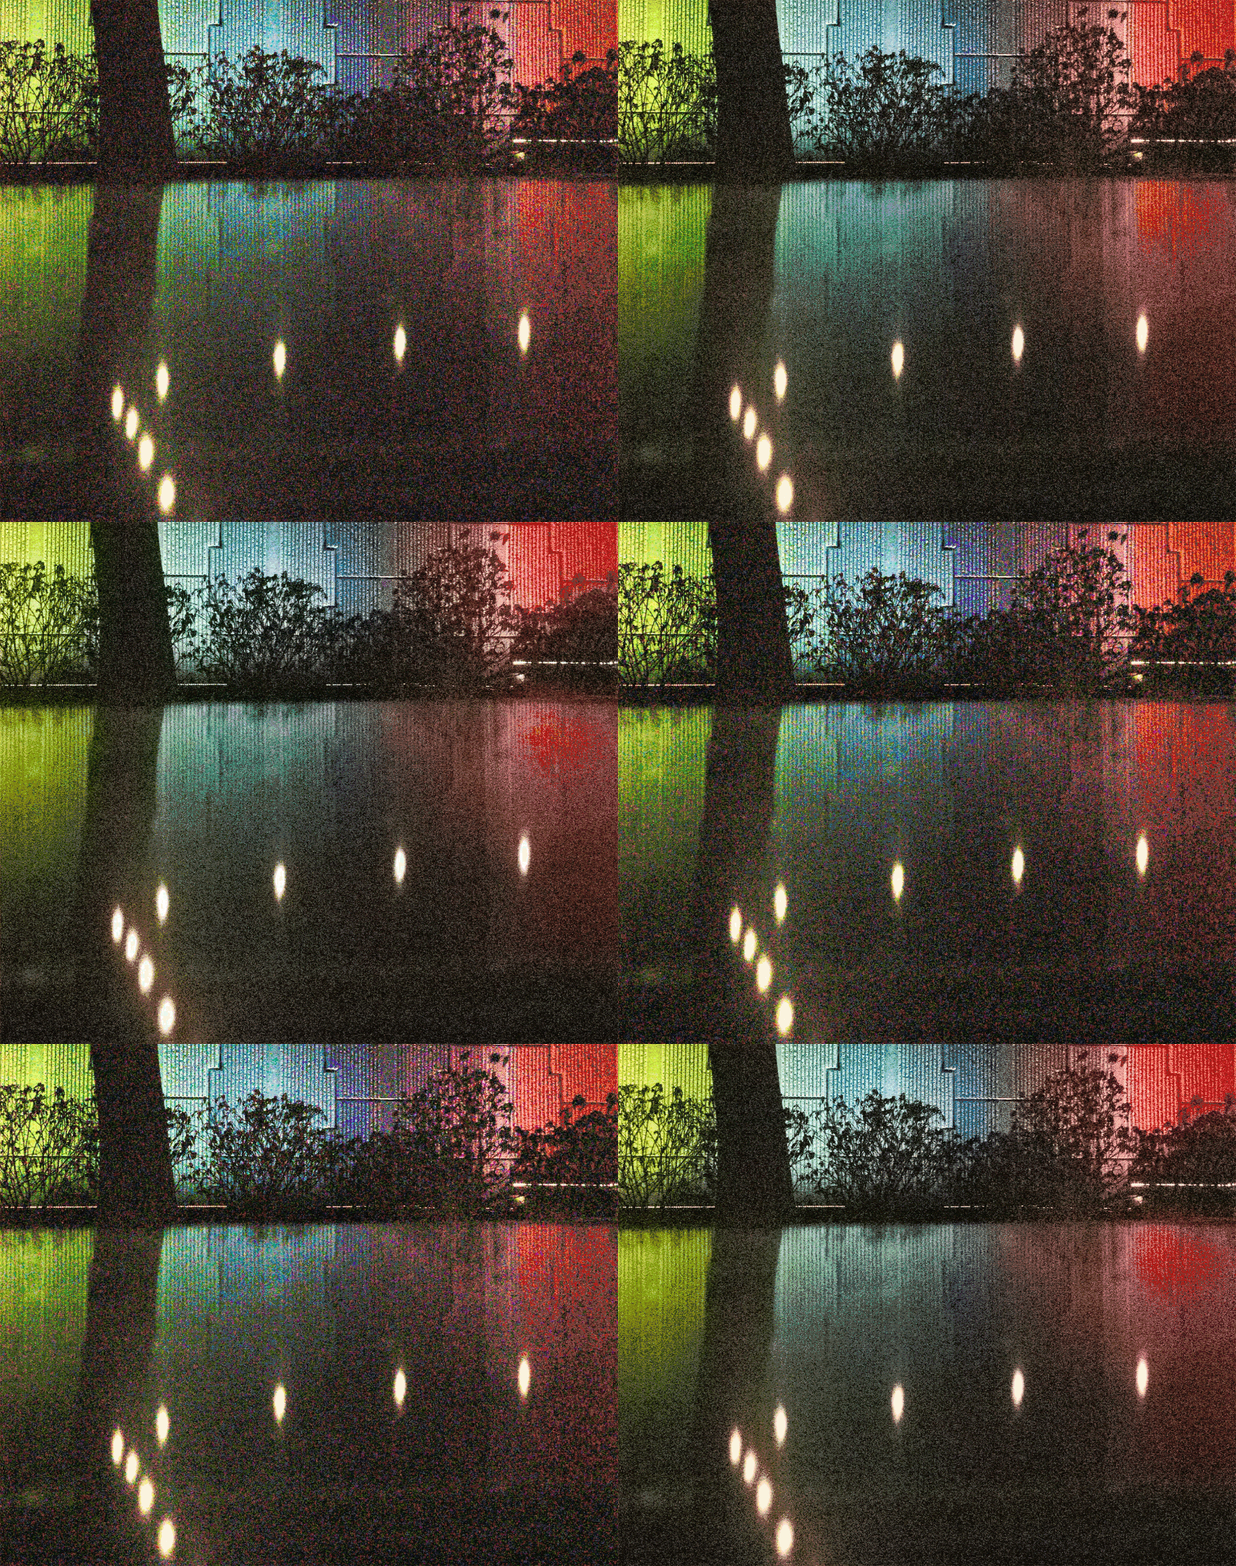
In general, the color noise slider is more forgiving. There can be some negative effects if you dial it up all the way, but in general, it’s a little harder to go wrong with this one than the luminance slider.
Detail & Smoothness sliders
Again, these are threshold sliders that affect which areas of the image that the color slider affects. In practice, I rarely find I have to use these much, but if you’re seeing some negative effects from the color noise, these can be worth experimenting with to see if you can tamp down the problems.
Common questions
Why are my photos grainy, and how do I fix it?
That grain is image noise. It shows up when the sensor doesn’t get much light — high ISO, dark scenes, or an underexposed shot that gets brightened in editing. There are two fixes: capture more light in the first place (lower ISO, wider aperture, slower shutter, or simply a brighter exposure), and apply noise reduction to the photos you’ve already taken. For RAW files, Lightroom’s Denoise, covered above, is the quickest fix; for JPEGs, the manual sliders are the tool instead.
Why is Denoise grayed out?
The photo isn’t a supported RAW file. Denoise only works on RAW files from Bayer and X-Trans sensors; on JPEGs, TIFFs, smart-previews-only files, and a few RAW types (some phone and drone formats, pixel-shift composites) it’s disabled. Use the Manual Noise Reduction sliders for those.
What Denoise amount should I use?
Start at 50. If the image looks smeared or skin looks plastic at 100%, come down to 35–40; if noise is still obvious, go up in small steps. A little remaining noise almost always looks better than over-smoothing.
Does Denoise reduce sharpness?
Less than the manual sliders do, because it works during demosaicing rather than blurring a finished image — but at high amounts it can soften fine texture. That’s why I check hair, foliage, and fabric at 100% before committing.
Should I Denoise before or after my other edits?
Before. Denoise creates a new DNG, and Lightroom’s other adjustments then apply to that file. Running it first also means you judge exposure and contrast on the clean version.
Can you Denoise multiple photos at once?
Yes. Select all the photos you want to process, then run Denoise the same way as for a single photo. Lightroom queues them and works through them one after the other, so a big batch can take a while — and each photo gets its own new DNG, just as when processing a single image.
Lightroom Denoise vs. DxO PureRAW
They use the same idea — AI denoising during demosaicing — and both are very good. PureRAW adds DxO’s lab-measured lens corrections, writes smaller output files, and is the one I reach for first on high-ISO and older-camera files; Lightroom’s Denoise is the no-extra-cost, no-extra-step option and may well be all you need. I go through the differences and standardized before/after tests in my DxO PureRAW 6 review, and compare the wider field in the best image denoise tools.
Other alternatives for image noise reduction
Lightroom Classic’s built-in tools for tackling image noise are pretty good, especially with the addition of the Denoise tool.
But there are other third-party tools that also do a very good job of combating image noise and that you might find better fits for your needs. They often provide much more granular control over how the noise reduction is applied and compensated.
These are paid apps that can work as standalone apps or integrated with Lightroom. They all have free trials, so you can try them out first before deciding on whether its worth buying a license.
- DxO PureRAW. This works similarly to the Denoise tool. It’s not perfect, but I like it better. The latest version provides more control, has more advanced algorithms, and includes fixes like DxOs top-shelf optical lens corrections (vignetting, chromatic aberration, sharpening). Like Enhance, it only works with RAW files.
- DxO Nik Dfine. This product originated with the Nik Collection, and it focuses on the more traditional approach to digital image noise reduction. Something that’s especially notable about Dfine is that you can use U-point selections for precise application of different settings to different parts of the image.
- ON1 NoNoise AI. Its “deblurring” features are particularly notable, with an emphasis on restoring sharpness that is often a casualty in denoising operations.
- Topaz Labs Photo AI. Topaz Labs used to offer its NoNoise AI as a standalone product, but it has now been integrated alongside several other image improvement tools in its Photo AI app.


