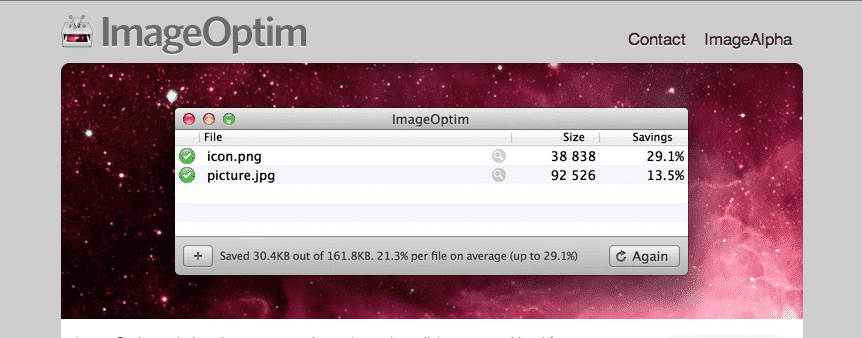
I’ve sung the praises of ImageOptim elsewhere. It’s a free Mac app that bundles together a handful of best-in-class image optimization tools into a single drag-and-drop package.
For anything bound for the web, image optimization is a very good idea. Smaller files mean faster pages, less bandwidth, happier readers, and (these days) better Core Web Vitals scores.
Lightroom’s built-in options for squeezing redundant information out of image files are pretty limited. There’s nothing like the fine-grained control of Photoshop’s old Save for Web dialog. Lightroom’s Export dialog won’t let you choose Progressive vs. Baseline JPEG encoding, won’t let you toggle the “Optimized” checkbox, and won’t let you skip embedding the color profile. The closest you get to metadata control is the Metadata dropdown (“Copyright Only” or “Copyright & Contact Info Only”) plus the Remove Person Info and Remove Location Info checkboxes.1
But there are ways to make the files Lightroom spits out much smaller without visibly sacrificing quality. They range from lossless optimization (no impact on visual quality at all) to lossy optimization like JPEGmini, which has a minimal-to-virtually-undetectable effect.
If you’re on a Mac, ImageOptim has long been one of the best options. And it plays nicely with Lightroom — you can hand off your exports to it automatically as the last step of the export, no extra clicks.
This works for JPEG and PNG exports. ImageOptim also handles GIF and SVG, but won’t touch TIFFs or RAW files — and Lightroom doesn’t export to newer formats like WebP, AVIF, or HEIC anyway.2
Here’s how to wire it up.
Setting up ImageOptim as a Lightroom post-processing step
First, install ImageOptim. You can grab it from the official site. It’s free, open-source, and Mac-only. (If you’re on Windows or Linux, the developer maintains a list of equivalents worth a look.)
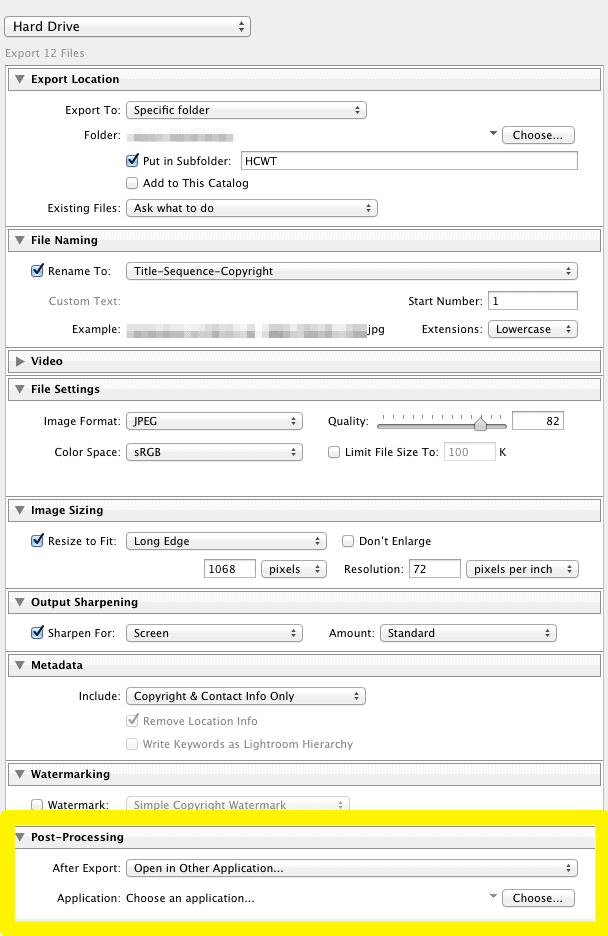
Once ImageOptim is sitting in your regular Applications folder, open Lightroom’s Export dialog (File > Export, or ⌘⇧E). Scroll down to the Post-Processing section at the very bottom of the right-hand panel. If it’s collapsed, click the header to expand it.
Post-Processing is what Lightroom does after it’s finished writing the exported files to disk. By default it does nothing — the files just land in the export folder and that’s the end of it. But you can also tell Lightroom to hand the files off to another application. Which is exactly what we want.
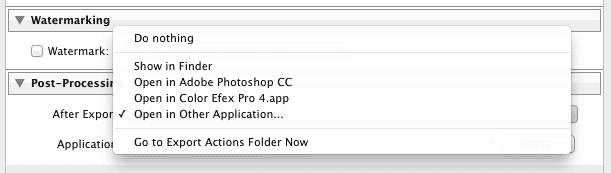
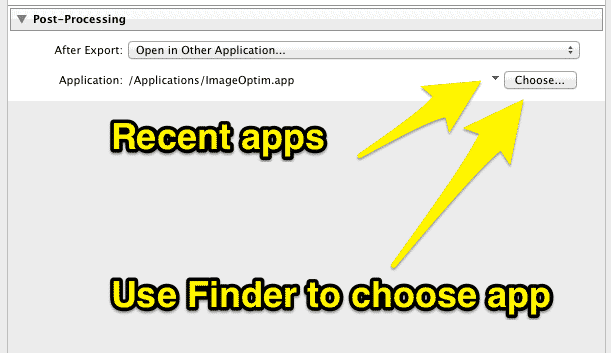
From the After Export dropdown, choose Open in Other Application. The Application field below it becomes active. Click Choose, navigate to your Applications folder in the Finder window that opens, and select ImageOptim.app. The Application field should now read something like /Applications/ImageOptim.app.
Tip: the small downward arrow next to the Choose button pulls up recently-used apps, so you don’t have to go hunting through Applications every time you switch to a different export preset.
Even cleaner: Use the Export Actions Folder
There’s a slightly more elegant alternative if you’re going to be doing this a lot. From the After Export dropdown, choose Go to Export Actions Folder Now. That opens a Finder window pointing to a folder buried inside Lightroom’s preferences. Drop an alias of ImageOptim.app into that folder. From then on, “Open in ImageOptim” appears as its own named option in the After Export dropdown across every export preset, no Choose button required.3
Run the export
Post-Processing is the very last step of the export, so nothing happens until you actually export. Hit the Export button in the bottom right of the dialog as usual.

The rest happens by itself. One of the things I like about ImageOptim is that it’s designed to start working on any files dropped onto it without further interaction — no settings dialogs, no “are you sure?” prompts. That’s exactly what makes it a good handoff target for another app like Lightroom.
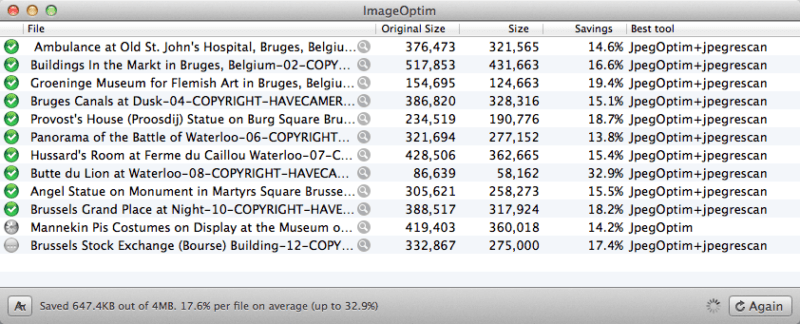
Lightroom finishes the export, ImageOptim opens, and starts grinding through the files one by one. Each row in the ImageOptim window shows you the original size, the new size, and the percentage saved as it goes.
A note on ImageOptim’s settings
ImageOptim works fine right out of the box, but it has Preferences worth poking at if you’re inclined.
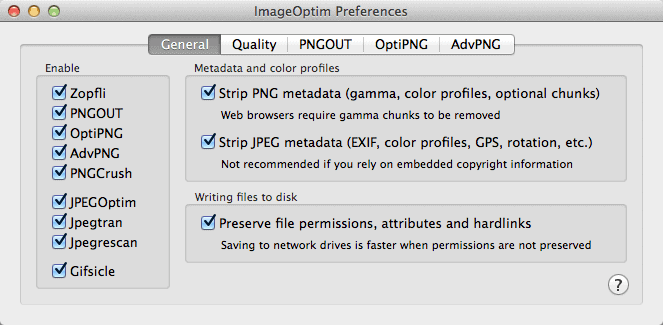
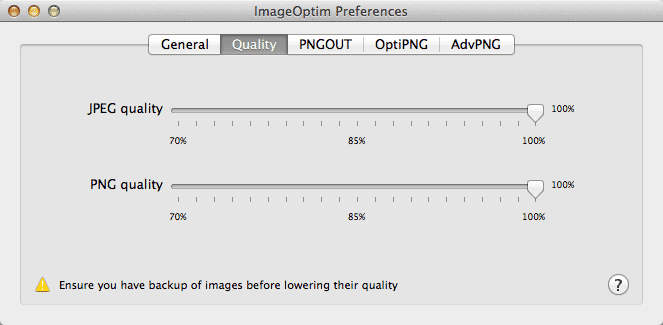
The most consequential setting is the lossless vs. lossy toggle. By default, ImageOptim is lossless — it strips redundant data and re-encodes more efficiently, but every visible pixel comes out identical. If you turn on lossy minification (under the Quality tab in Preferences), it’ll get more aggressive: re-encoding JPEGs with MozJPEG, quantizing PNGs with pngquant, and so on. The savings can be substantial, often another 30–60% on top of lossless.4 The quality cost is small but real, especially on smooth gradients and skin tones.
I’d suggest sticking with lossless to start, exporting a few representative images, and pixel-peeping the results before deciding whether the lossy mode’s extra savings are worth it for your particular kind of work. Architectural shots with clean gradients are unforgiving; busy travel scenes hide the artifacts well.
And that’s pretty much it. When you save the Export preset, the Post-Processing settings save with it, so you don’t have to wire this up every time. I have ImageOptim post-processing baked into all my web-bound export presets — uploading to the site, prepping for social, sending images by email. Once it’s set, it just runs.


Notes & References:
- Adobe added the Remove Person/Location Info checkboxes some years back; they’re useful if you don’t want EXIF GPS coordinates or Lightroom face-tag data going out with your web JPEGs. See: Kelby, How Do I Do That in Lightroom, 3rd ed., 2022, ch. 7. [↩︎]
- ImageOptim’s supported formats are JPEG, PNG, GIF, and SVG: imageoptim.com/mac. [↩︎]
- Bampton, Lightroom – The Missing FAQ, 2015, p. 367; the same trick works for any app or Photoshop droplet. [↩︎]
- ImageOptim’s lossy mode uses MozJPEG, pngquant, and similar tools to apply genuine quality reduction — see imageoptim.com/mac. [↩︎]


