It’s always a good idea to format your memory card in the camera, and with most cameras, that’s a pretty straightforward process: just go to settings and choose format. But there are some cameras that do things a bit differently.
The Olympus TG-5 is one of them. It’s still easy to format a memory card in the TG-5, but you have an extra option that does something similar but not exactly the same. That’s the “All Erase” option. So here’s a quick guide to the difference between the TG-5’s Format and All Erase options.
Memory card format vs All Erase in the Olympus TG-5
When you go into the TG-5’s menu, you access the memory card functions by going first to the wrench (spanner) icon from the left column and then choosing Card Setup.
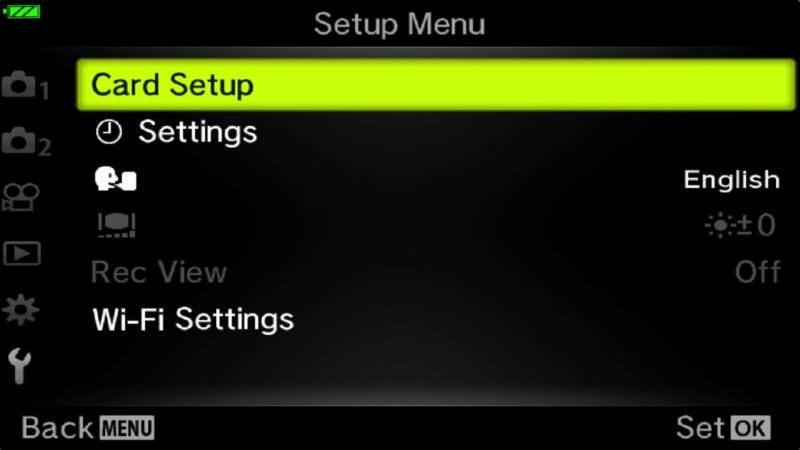
You’ll see two options: All Erase and Format.
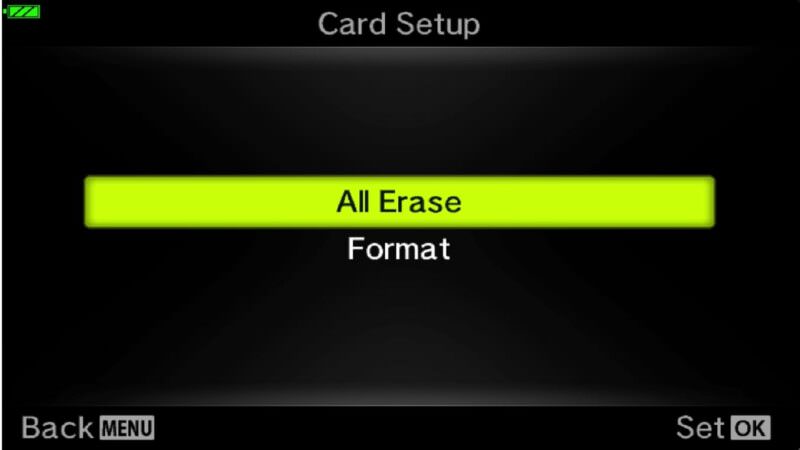

These sound like two ways of saying the same thing. But there’s an important difference between them.
All Erase deletes everything except images or video clips that you’ve specifically chosen to protect. I have more information below on what that means and how to do it. This is a good option to use on an everyday basis if you plan to use the protect feature.
Format does the more conventional process of formatting the card and getting it ready for use, though like most in-camera formats it’s a quick format rather than a secure wipe. It wipes everything, deleting all data on the card, including protected images or video clips. When you’re first inserting a new card, this is the one you want to choose.
It’s also the thing to do whenever a card has come from another camera or has been formatted on a computer. Olympus is explicit about that in the TG-5’s instructions: format the card in this camera before first use or after it has been used in other cameras or computers. Doing it in the camera lets the TG-5 write the folder structure it expects, which is also the usual fix when the camera balks at a card that reads fine elsewhere.
How to protect images and video clips on the Olympus TG-5
To make the most of the All Erase feature, you can select photos or video clips for protection. This only makes sense, obviously, if there are specific ones you want to keep amongst others that you don’t. It’s an especially handy way of freeing up space on the memory card if you don’t have a chance to download the images from the memory card to a computer or another device.
The protection feature is something that you access through the playback feature.
Protecting a single image or video clip
To protect an individual image or video clip, go to that one in playback (ie. using the play button on the back of the camera and then moving through until you find the one you want). Then hit the OK button. You’ll get a drop-down menu that looks like this:
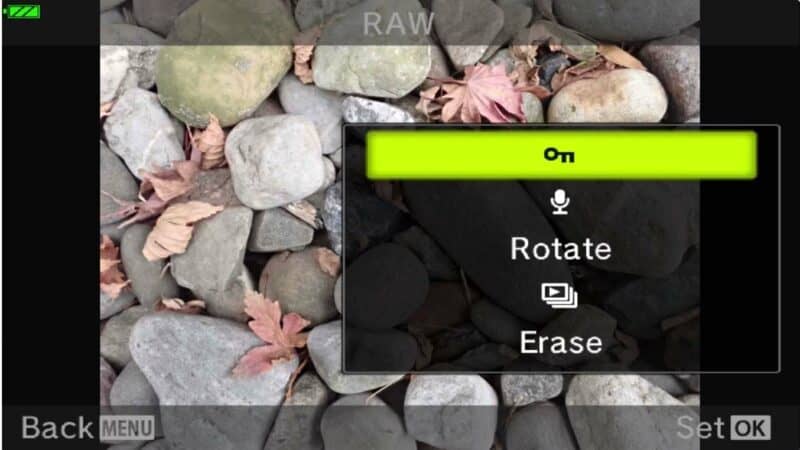
Depending on what kind of image or video clip it is, you might see some other options in that menu, but the one you’re looking for is the icon that looks like a key. Simply go to that and select it. That will then protect that image.
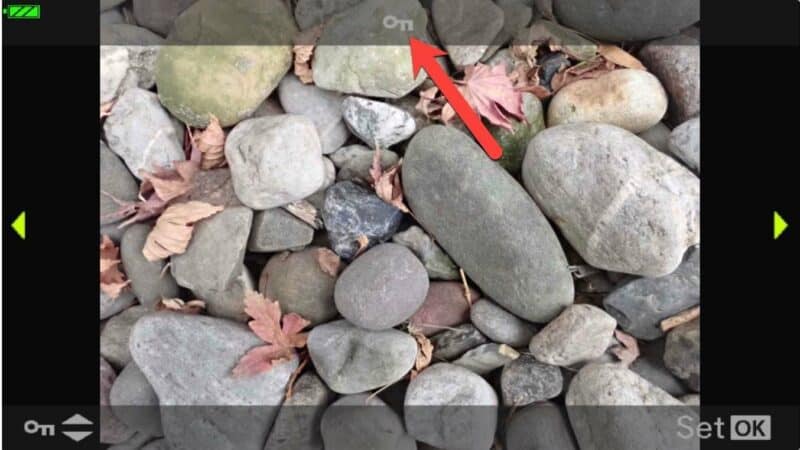
Now, when you view that image on the back of the camera you’ll see a small lock icon at the top of the screen, like this:
Protecting multiple images or video clips
You can also select multiple to protect at the same time. First you have to select the images you want to work with. To do that, cycle through them as normal using the playback menu. When you’re looking at an image you want to protect, push the video record button on the back of the camera. That’s the button with the red circle at top right. You’ll notice that next to it is a small icon with a box and check mark. That is the “select” icon. When you press that, you’ll see a small checkmark applied to the image on the back screen at the top right.
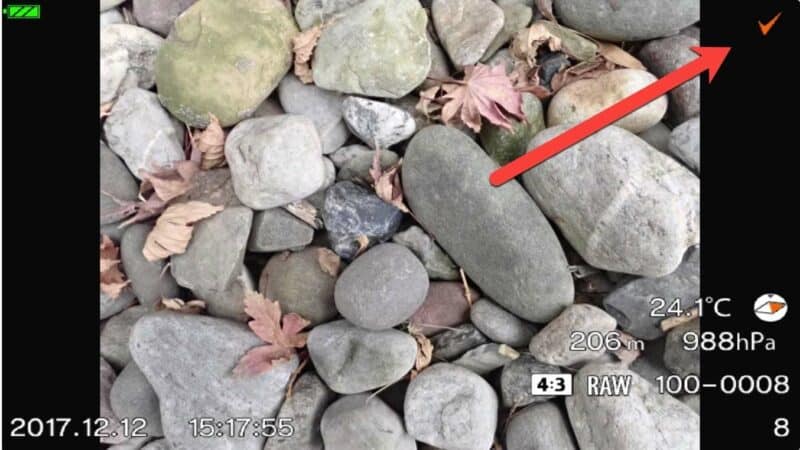
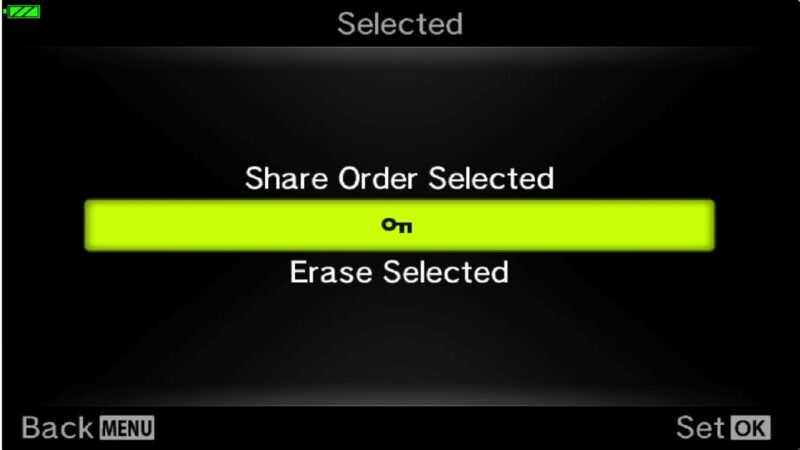
Once you’ve selected all the images you want to protect, hit the OK button. You’ll get a slightly different menu. Choose the key icon.


Protection is a toggle, so taking it off works the same way: go back to the image, hit OK, and choose the key icon again. The small lock icon at the top of the screen disappears. And it’s worth being clear about what that lock does and doesn’t do. It stops the camera’s own erase functions, including All Erase, but it doesn’t survive a Format, and it won’t stop a computer or card reader from deleting the file.
How to recover images you’ve accidentally deleted
If you’ve accidentally deleted the photos from your TG-5’s memory card, all isn’t necessarily lost. Because of the fairly simple way that the tiny computers inside digital cameras delete files and format memory cards, it might still be possible to recover any photos you’ve accidentally deleted.
It’s not something that’s specific to the TG-5, and you can try the options for recovering photos here.


