Quick Summary
- Stop Shooting Immediately: If you realize you’ve deleted photos, stop using the card instantly. Continuing to shoot runs the risk of overwriting the data, making it permanently unrecoverable.
- Don’t Panic: “Deleted” files aren’t actually gone; the file system just marks the space as available. Until new data is written over it, the original image data is usually still there.
- Scan First: Use the free trial versions of recovery software (like Stellar, EaseUS, or Disk Drill) to scan the card first. This lets you confirm the photos are actually recoverable before you pay for a license.
- Recover to a Hard Drive: When you run the recovery, never save the recovered files back to the same memory card. Save them to your computer’s hard drive to avoid corrupting the very data you are trying to save.
Sooner or later, you’re bound to experience that horrible feeling when you accidentally delete your photos. It might be from a regular deletion or even when formatting your memory card in the camera.1
Whether they’re for a personal project or a client shoot, it’s just not a fun place to be, and it’s something I’ve gone through more times than I’d like.
But here’s the thing: there’s a good chance you can recover those photos from the memory card, or at least some of them.
It’s not guaranteed, because it all depends on what has gone wrong. If the memory card has gone on the fritz, that might be a problem. But for an accidental deletion, the odds are actually pretty good.
So here’s how to go about recovering them.
A quick plan of action
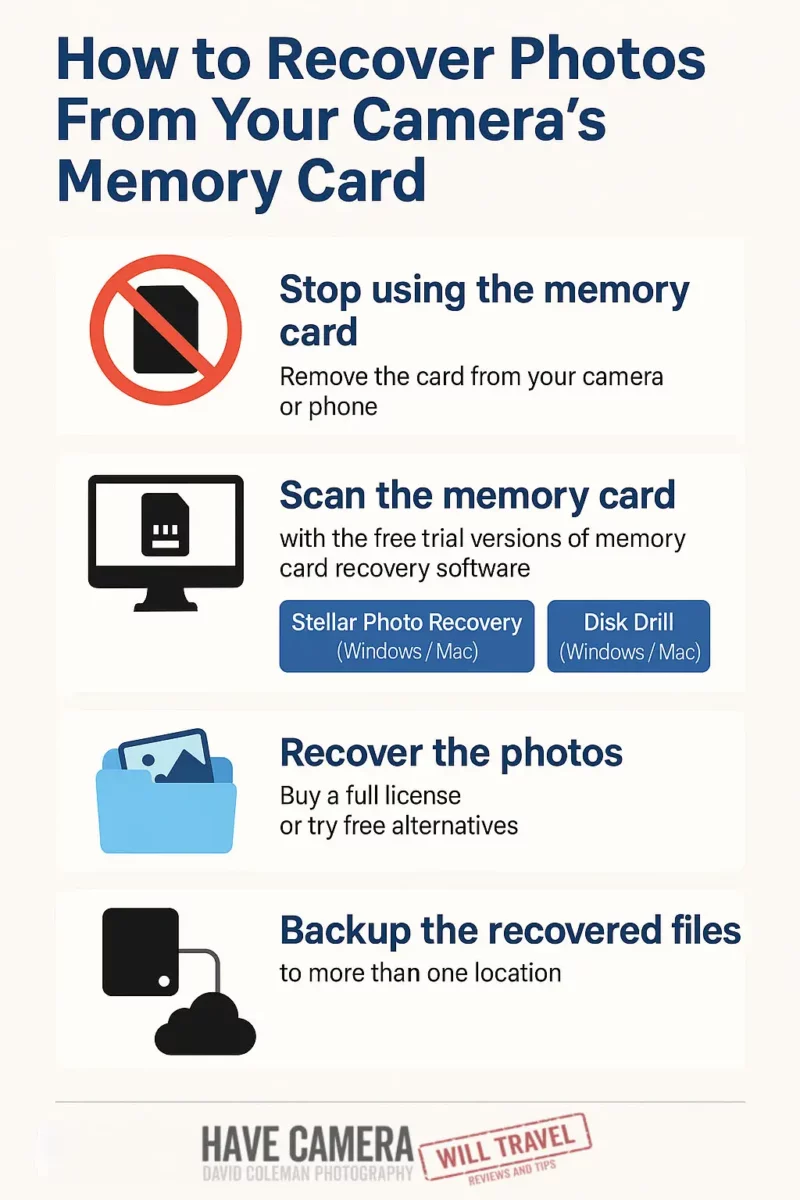
To cut to the chase, here’s a quick plan of action. You can find a much more detailed version below, but here’s the quick version:
- Stop using the memory card. This might sound obvious, but it’s important because overwriting the data will make it harder to recover deleted files from it. Remove the card from your camera or phone to reduce the risk.
- Scan the memory card with the free trial versions of memory card recovery software. These are good options to start with. All three have free trials, versions for Windows and Mac, and are straightforward to use. (Disk Drill’s trial showed the most reliable previews in my testing, which is what the scan step is for.) The scan using the free trial versions will show you whether any files can be found and recovered.
- Stellar Photo Recovery (Windows / Mac)
- EaseUS (Windows/Mac)
- Disk Drill (Windows / Mac)
- Recover the photos. If the photo recovery software can find the deleted photos, you can then decide whether to buy a full license to actually recover the lost photos. If you’d prefer not to buy a license, there are also free alternatives. They don’t tend to be as user-friendly or might be feature-limited, but they can still work well. I have more on them below.
- Backup the recovered files to more than one location. To be safe!

First steps for recovering photos from your memory card
If your photos suddenly aren’t showing up when you go to view them on the camera or on your computer, it still might be possible to recover them.
I can’t promise you’ll be able to recover deleted photos from the memory card, but there are some things you can definitely try that often work.
It’s Not Just for SD Cards
While I mainly talk about “SD cards” in this guide because they are the most common format for photographers, this process works for almost all digital storage.
Whether you are using a microSD card in a drone or GoPro, a CFexpress or XQD card in a professional camera body, or even a USB thumb drive or external SSD, the underlying technology is similar. The recovery software and steps detailed below apply to all of them.
Troubleshooting this type of problem involves working methodically.
- First off, don’t panic. It happens to all of us at some point. Accidental deletion and the ever-present risk of data loss is one of the occupational hazards of shooting with a digital camera. It’s the equivalent of accidentally exposing the film, except, in this case, there’s a much better chance of recovering the photos.
- Second, stop shooting new photos or recording new videos on the SD card. As in, right now. The more you continue writing to the memory card, the harder it’s going to be to recover what’s there. Depending on what has gone wrong, you run the risk of writing over the original photos, effectively burying them deeper (and potentially beyond recovery).
Whether you’ve accidentally formatted your memory card with photos or videos still on it, you removed the card while it was still writing, the card has become corrupted, or there’s been some problem that has made the photos disappear, here are some suggestions for trying to recover them.
Before knowing how to tackle the problem, you’ll first need to isolate it. If you can’t read your memory card, it’s natural to assume it’s a problem with the card. Sometimes it is. But sometimes, it can be something else. So what you want to do is confirm that it’s the card misbehaving and not something else.
Step 1: Isolate the problem
Tip: To eliminate any risk of new data being written to the memory card, I recommend locking it first using the lock on the side of the SD card before proceeding.
I’d recommend trying to put the card back in the camera and see if you can view the photos using the camera’s own playback. If you can, go ahead and sigh with relief — you’ll almost certainly be able to recover your photos, and the problem is apparently somewhere else.
But don’t take any more photos or record any more videos — you don’t want to make the problem worse by overwriting data on the card.
If your digital camera can read the card normally, there are several things that could be going wrong. The issue might be with your card reader, the cable connecting your card reader to the computer, or even the computer’s USB or other connection port.
With USB, a common culprit is an unpowered USB hub (or even a powered one, for that matter). If you’re using a hub, try plugging the reader into a USB slot that’s connected directly to the motherboard (i.e., one on the computer itself rather than one on a peripheral device). It’s also worth trying to plug it into a different USB slot.
It’s also possible that it’s a software issue. Most modern operating systems can read most memory cards without extra software. But it’s not impossible to have a setup that causes problems. If you have another computer handy, try that.
Nearly all modern cameras can be used as card readers by connecting the camera directly to the computer via a USB cable. Usually, you’ll need to have your camera powered on. With some, you’ll need to put the camera in connection mode. Your camera’s instruction manual can help if you’re in doubt. So, with the memory card in the camera, connect it to your computer to see if you can access the photos. If you can, go ahead and download the photos to your computer right away. Get the photos to a safe place first, then worry about finding out what went wrong.
If your camera can’t read the photos either, then the problem probably does lie with the card. So it’s time to move on to more serious data recovery efforts.
RELATED: Fastest SD Cards | My Independent Speed Test Results


Step 2: Scan the memory card to find what photos are recoverable
When your photos are on the memory card, it’s a pretty weak link in the chain. In most cases, it means there’s only one copy (unless you have one of the newer, high-end cameras that can copy to two cards simultaneously). And while memory cards are pretty reliable, there is nevertheless still a small percentage failure rate. Once you download the photos off the memory card to your computer, one hopes you have a robust backup system in place involving multiple copies (and if you don’t, here are some ideas on where to start). Until then, you’re relying on the memory card.
There are several data recovery software options available. While they aim to do basically the same thing, they don’t all do it in the same way.
I’ve listed my recommendations in the next section on which apps to try first. But whatever app you’re using, the scan is a crucial first step to see if the data is probably recoverable.
Some of these photo recovery software options are free; some are quite expensive. Some work in some instances and not others. Some are limited to certain file formats, while others get the whole shebang. So you might be in for a little trial and error. The reputable ones shouldn’t do any further damage to the data on your card. For any that involve a paid license, I strongly recommend running a trial version first to get an indication of whether anything’s going to be recoverable. You don’t want to shell out money unless you have some confidence it’s going to get results.
How successful these will be in recovering your lost photos depends on what has gone wrong in the first place. If it’s a simple case of accidentally formatting a card, there’s an excellent chance of recovering the files. Things get trickier the more you’ve overwritten new data over the top of existing data or the card is damaged.
If you already have data recovery software installed, it’s worth trying that. But make sure it’s compatible with memory cards. Some software is designed for specific types of data recovery, such as memory cards or hard drives.
There are several options for data recovery software. Here are some options worth looking at. All of them work with SD, CompactFlash, and microSD cards, along with other types of flash memory devices. The scans are going to take a while, so don’t expect instant results. All of the software works by taking a virtual fine-tooth comb to the data on the card.
Tip: Many of these apps provide the option to visually preview the data. If that option is available, make sure to use it. That’s because sometimes the apps might list a file but can’t actually get the full file. If you get a proper visual preview, it greatly increases the confidence that you can recover the file without having to go through the separate process of trying to repair it.
Next steps for recovering deleted photos & videos from a memory card
Once you’ve identified that the data is there and recoverable, you can actually begin the recovery process.
There are many options for doing this. The most straightforward approach is probably to buy a license for whatever app you used to scan. After all, you already know it can see the data and access it.
But there are also free options. They’re often less user-friendly or have limits on how much data they can recover, but they can work well.
My recommendations
There are more than a few data recovery apps out there. These are the ones I’ve found most useful after many years of using this type of app.
Disk Drill
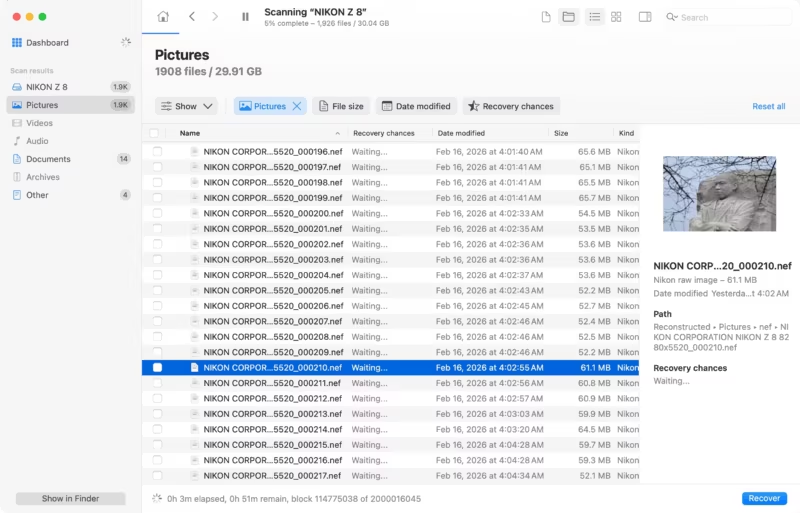
Disk Drill, by CleverFiles, is now my top recommendation. It’s a full-featured data recovery app that can recover photos and videos along with just about any other kind of file format. So it’s a handy app to have available in other situations, not just when you need to recover photos from a memory card. And I particularly like some of the more advanced features they’ve added in recent versions. It has now become my go-to app.
The things I like about Disk Drill are:
- It has a user-friendly layout and workflow.
- It’s flexible and powerful — it works on all file types, not just photos and videos.
- You can recover up to 100MB for free with the Windows version (for more than that, you’ll need to buy a license; the Mac free version is scan and preview only).
- They’ve added some really useful advanced features, such as assessing recovery chances and in-app RAW previews.
It gives you a lot of control over specifically what kind of files you want to look for. There are also some related features: for example, it has built-in S.M.A.R.T. monitoring that can alert you to potential problems brewing with your storage devices, and it has a duplicate file finder to help you free up storage space taken up by redundant duplicate versions of the same file.
There’s a free version that will run the scan and show you what it can find — including proper previews of RAW files, which in my testing is where it beats the other trials. On Windows it will also recover up to 100MB free; on a Mac, recovery needs the licensed Pro version. Either way, the scan-and-preview step costs nothing and tells you whether paying will get your photos back — and when you buy a license, the activation code unlocks recovery in place, with no need to rescan.
There are versions for Mac and Windows.
PhotoRec

While I often use PhotoRec, and it has a big advantage of being completely free, it’s definitely not the most user-friendly version here. Unlike the other options here, which all have graphic user interfaces, PhotoRec is entirely command-line. If you’re comfortable with using command-line apps, great. If not, it’s probably not the best choice.
PhotoRec is primarily a command-line tool, which can be intimidating. However, the Windows download includes a graphical version called QPhotoRec that is much easier to use. Mac users are unfortunately stuck with the command-line interface.
The things I like about PhotoRec are:
- It’s very thorough and will work on pretty much any filetype and any drive type.
- It’s free.
PhotoRec is one of my go-to data recovery apps, but it’s not going to be everyone’s cup of tea. On the plus side, it’s powerful, thorough, and reliable. It’s also free. It’s compatible with a very large number of operating systems. And you can restore just about any kind of file from just about any kind of storage media.
On the negative side, its native interface isn’t very user-friendly if you’re not comfortable with text-only interfaces, and you don’t get features like being able to view the thumbnails of the files and select specific images to recover — you either save everything or all the files of the file types you specify. Which makes it slower most of the time rather than being able to be selective.
PhotoRec is available here. And I have put together a guide to using PhotoRec.
EaseUS Data Recovery Wizard
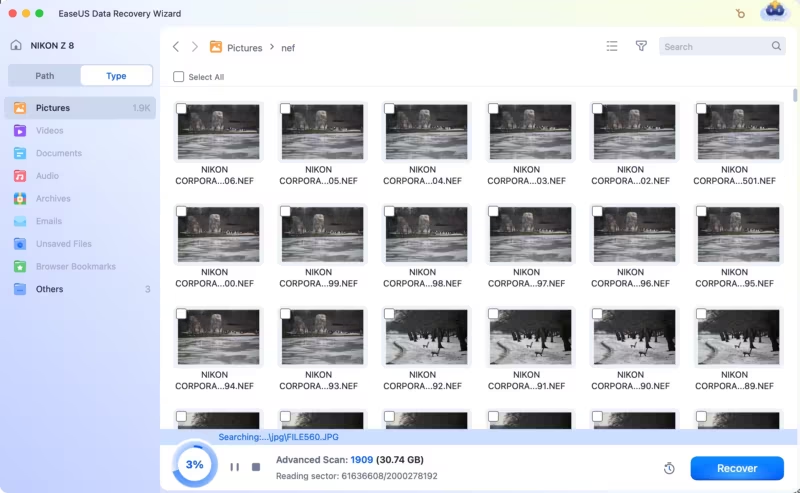
EaseUS offers much the same functionality with a slick and well-thought-out interface that walks you through the process of recovering deleted pictures from an SD card.
There are versions for Windows and Mac.
There’s also a free version for Windows with the most generous genuine allowance of these apps: 500MB of recovery out of the box, rising to 2GB if you use the in-app share button to post about it on social media. One important Mac caveat: EaseUS’s free Mac version doesn’t support recovery from SD cards at all — if the card is your source, the Mac version needs a license before it will recover anything.
Stellar Photo Recovery
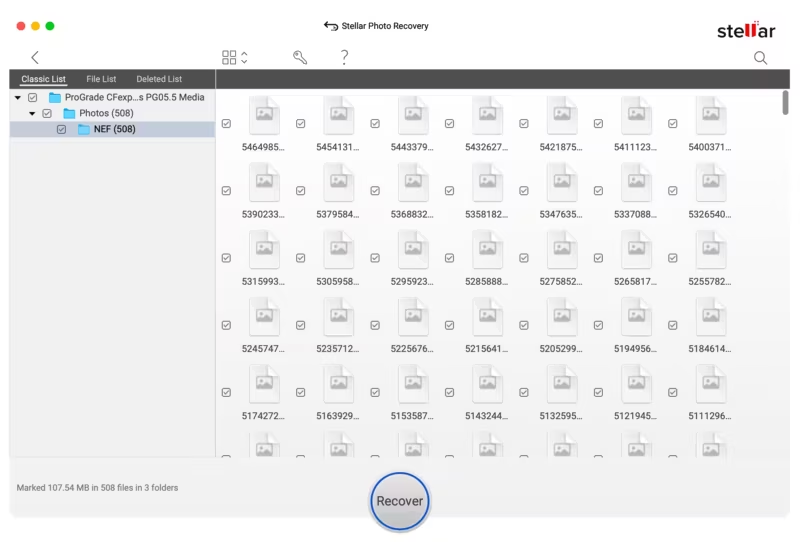
This used to be my top recommendation, and the licensed version is still reliable and easy to use. The reason it has slipped to second choice is the free trial: in my recent testing, it no longer shows previews for files over 10 MB, which makes the scan-first step much less useful if you shoot RAW (I cover this in detail in my hands-on walkthrough). The things I still like about Stellar Photo Recovery are:
- It’s very user-friendly, with one of the best interfaces and workflows of all the options here.
- It’s reliable and thorough.
The folks at Stellar have a full suite of data recovery apps, from email recovery to video repair to databases. Stellar Photo Recovery focuses on image files, but despite the name, it also recovers video and audio files, so you can use it for all the kinds of files you’ll be shooting with your camera.
Or you can narrow your search to one or more specific file extensions or a particular region of the source disk or card.
The option to select by thumbnails or carousel rather than from a file list is handy in the licensed version — though in the free trial, previews only render for files under 10 MB. The ability to resume scans is also useful.
I have a detailed post on how to recover photos with Stellar Photo Recovery here.
The free trial lets you scan and list recoverable files (with the preview limitation noted above). To actually save the files, you’ll generally need to buy a license.
If you decide to buy a license to run the recovery operation, you can get 10% off with the coupon code HCWT10 at checkout. There are versions for Mac and Windows.
Other alternatives
In addition to those top recommendations, these are some others I’ve found to work well.
Remo Recover
Remo Recover is designed to be more comprehensive than just recovering photos, and it works on hard drives as well as memory cards. There are versions for Mac and Windows. There are three editions — Basic, Media, and Pro — with corresponding increasing features and prices. The Basic edition doesn’t recover photos, so you’ll need the Media ($70) or Pro ($180) versions for that. The Pro version can also recover from deleted partitions and reformatted hard drives. There’s a free version for Windows that is limited by the amount of data you can recover.
I have a detailed review of Remo Recover here.
SanDisk RescuePRO / RescuePRO Deluxe
SanDisk has its own data recovery software, RescuePRO and RescuePRO Deluxe, that’s designed especially for memory cards and flash drives. But it also works with cards from other brands, not just SanDisk. So if you happen to already have a license for it, you can certainly use it to recover.
There are two key areas of difference between the standard and deluxe versions: the deluxe version handles more RAW and video formats and will also work with cards larger than 64GB. It’s available for Windows and Mac.
Some of the higher-end SanDisk memory cards include a license key for the app that comes on a small piece of paper with the card. If you kept that number and have it handy, go here to download RescuePRO. If you didn’t keep the little piece of paper that came with the card, you’ll need to buy a new license.
There’s a trial version that allows you to save the first 25 image files and show other files that can be recovered. If you want to go ahead and recover more than the first 25 files, you’ll need to buy a license that works on an annual subscription basis.
PhotoRecovery / PhotoRecovery Professional
This is similar to the RescuePro line and is distributed by the same company that distributes RescuePro, but it’s not a branded SanDisk product. It’s a bit more expansive in the file formats it can recover, the interface is different, and it will let you work with a media image file if you’ve managed to clone the original media.
Aside from price, the differences between the standard and professional versions related to memory card tests and diagnostics, memory card benchmarks, and repairing memory cards. There’s a trial version available that will show you what files can be recovered but won’t let you save any of them.
ProGrade Digital Recovery Pro
ProGrade Digital Recovery Pro is another one branded for a card memory manufacturer (in this case, Prograde Digital), but its functionality isn’t limited just to their cards. In this case, it’s another rebranded version of LC Technology’s PhotoRecovery app.
If you have a license for it that came with your ProGrade Digital memory card, this is a good option for getting full-featured recovery without paying another licensing fee.
DiskDigger
DiskDigger is available for Windows, Android, and Linux (there’s no native Mac version, but they have an experimental version here for pre-Catalina OSX) and can recover most kinds of files from most kinds of storage media.
There’s a free trial version, and at $14.99 (personal license), the cost of the fully licensed version is significantly lower than most of its competitors. You can find it here.
Recuva
Recuva is a no-nonsense app that offers much the same functionality. One thing in its favor is that it’s priced more competitively than some of the other options. It’s Windows only.
CardRecovery / CardRescue
This does basically the same thing as the others. In its favor is a refreshingly straightforward user interface that walks you through the process. There’s a version for Windows and Mac. And there’s an evaluation version — try that first before buying a license.
Lexar Recovery Tool
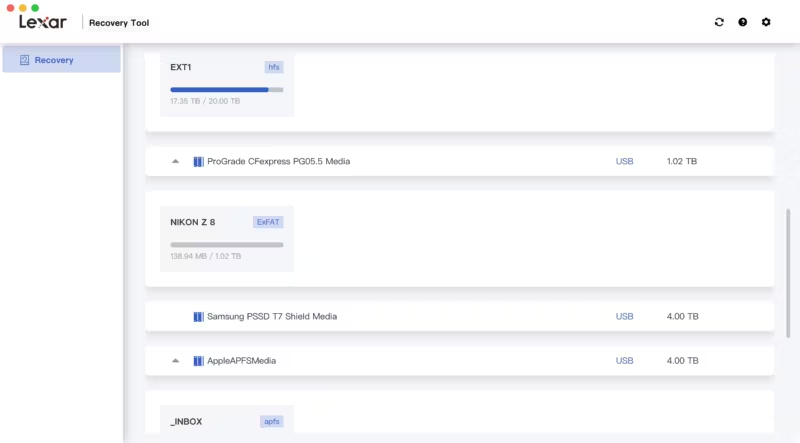
Memory card maker Lexar has long made a basic data recovery tool available for use with its cards (although it’s not limited only to Lexar-branded cards, and it works well with other media, too). Some of Lexar’s higher-end cards included a license to it. It wasn’t available for a while, but now that the LongSys acquisition has stabilized, they’ve released an updated version.
It’s pretty bare-bones, but it’s free. You can download it directly from Lexar.
When other options don’t work, you can call in the big guns (and be prepared to pay big bucks for it!)
OK, so maybe things have just gone horribly, horribly wrong. If your memory card isn’t showing up on your computer at all and you’ve tried everything else to access the data on it without luck, it suggests more serious damage or data corruption of the files. In which case, it might be time to call in the big guns.
But this option really only makes sense if the photos on there have a lot of personal or professional value, and there’s no other option left. Because it’s not cheap. Nor is it quick.
But it can make sense if the missing files are from, say, a client’s wedding shoot. As expensive as it might be, it’s still a lot simpler and cheaper than staging a reshoot (and less likely to tick off your business insurance!).
In that case, it’s time to send the card or cards to a professional data recovery lab.
I’ve never had to use any of these services and can’t personally vouch for them. But here are some services that offer more advanced levels of data recovery from memory cards. In some cases, they can even recover data from cards that have some physical damage.
- Drive Savers Data Recovery. A long-established and well-known option that can handle just about any kind of data recovery (for a price!).
- Recover My Flash Drive. Based in Connecticut, this is a smaller, boutique operation that I’ve heard good things about.
- LC Technology. Based in Florida, LC Technology is the firm recommended by SanDisk for their media. They do other brands of media, too, but there’s a flat-rate fee structure for recovery from SanDisk products based on the amount of data and whether any of the connectors are broken. You can find those rates here. If they can’t recover any data, you only get charged for return postage.
- Ace Data Recovery
- Western Data Recovery
- Gillware
Tips for keeping memory cards healthy
Memory cards are pretty resilient, but there are some precautions you can take that can save a lot of headaches.
- Always format the card in the camera.
- Format the card regularly.
- Eject the card safely from the computer. Pulling a card while the OS is indexing it is a primary cause of “missing photos.”
- Never remove the card while data is being transferred.
- Turn the camera off before removing the card.
- Have a backup card or two handy, just in case.
What if your memory card won’t mount on your computer?
Sometimes your memory card might not show up in your filesystem. There are all sorts of reasons that might happen. Obvious first troubleshooting tips include taking the card out and reinserting it or rebooting the computer.
Make sure your card reader is compatible with the kind of memory card you’re using. For instance, a card reader that is only compatible with SDHC won’t read SDXC cards, and a CompactFlash reader won’t read a CFAST 2.0 card. But they’re nearly always backward compatible within the same form factor, so an SDXC reader will read SDHC cards.
Here are some more ideas to try.
Mac users:
- Open Disk Utility (
Applications > Utilities > Disk Utility.app) and see if it’s showing up there. - If you’re using a USB card reader, try a different USB slot on your computer and connect directly to the computer rather than through a USB hub.
- A first step is to check
System Information (Apple Menu > About This Mac > System Report > USB). If the card reader shows up there but not in Finder/Disk Utility, you know it’s a mounting/filesystem issue. If it doesn’t show up there, it’s a hardware/connection issue. - Open a Terminal window (
Applications > Utilities > Terminal.app), remove the memory card, enterKillall Finderin the Terminal window, and hit Return, reinsert the memory card, and check Finder again. - Try the SD Memory Card Formatter app put out by the SD Association. You can find it here.
See if it shows up in a drop-down menu at the top of the app’s screen.
Windows users:
- Try the SD Card Formatter app put out by the SD Association. You can find it here. It is the gold standard in terms of formatting and setting up SD cards.
- See if it shows up in a drop-down menu at the top of the app’s screen.
- Check Disk Management. Sometimes the computer sees the card but just hasn’t assigned it a drive letter, so it remains invisible in File Explorer.
- Right-click the Start button and select Disk Management.
- Look for a drive in the list (usually labeled “Removable”) that matches the storage size of your memory card (e.g., ~119GB for a 128GB card).
- If you see the card listed but it doesn’t have a letter (like E: or F:) next to it, right-click the drive’s bar, select
Change Drive Letter and Paths, clickAdd, and assign it a letter. It should then pop up immediately.
Things worth knowing
- Specific Brands? It’s also worth mentioning that, in general, the apps that are branded by a specific memory card manufacturer aren’t limited to working with only cards made by that manufacturer. So you can generally assume that any of this recovery software will work on any memory card from any manufacturer.2
Notes & References:
- There are different types of formatting. Most cameras do what’s known as a quick format by default. That basically removes the index pointing to the data, but the data remains intact. So that can often be recovered. Some cameras also offer what’s known as a “full format” or “low-level format” as an extra option (but it’s not usually a default setting). That is a more thorough process, and it will often render the data beyond normal recovery methods. I have a more detailed explanation of the differences between quick and full format options here along with recommendations on when to choose which. [↩︎]
- There are some memory card software tools that will only work on their specific brand. For example, Prograde Digital’s Refresh Pro checks first that you’re using a Prograde Digital memory card. But that kind of check generally isn’t applied with these data recovery apps. [↩︎]
More in this series — memory card recovery: What to do when you’ve lost photos (start here) (this post) · Free recovery software compared · PhotoRec on Mac, step by step · Disk Drill walkthrough · Stellar Photo Recovery walkthrough · SD Card Formatter · Quick vs full format


