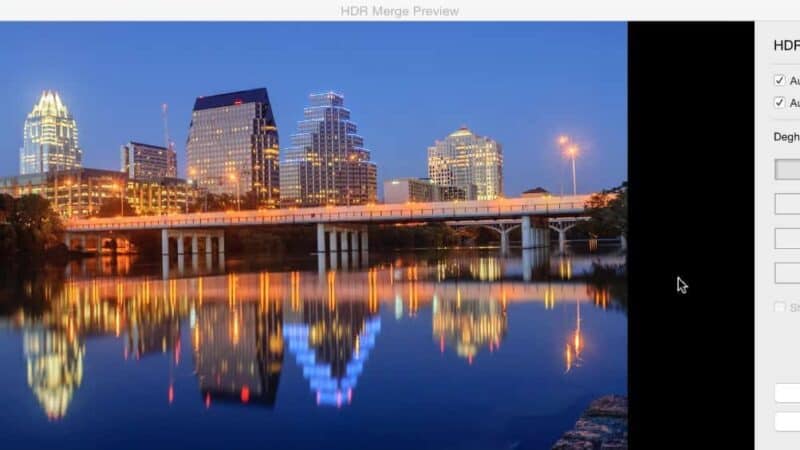
Quick Summary
- To merge an HDR in Lightroom Classic: select the bracketed exposures, then
Photo → Photo Merge → HDR(or press Ctrl/Cmd-H). - The preview dialog has three controls: Auto Align (leave on unless you shot on a locked-down tripod), Auto Settings (a starting tone map you can undo later), and Deghost Amount — which is what most people land here asking about, so it gets its own section next.
- Merge writes a new 32-bit floating-point DNG that you edit like any RAW, with far more highlight and shadow latitude.
What Deghost Amount does
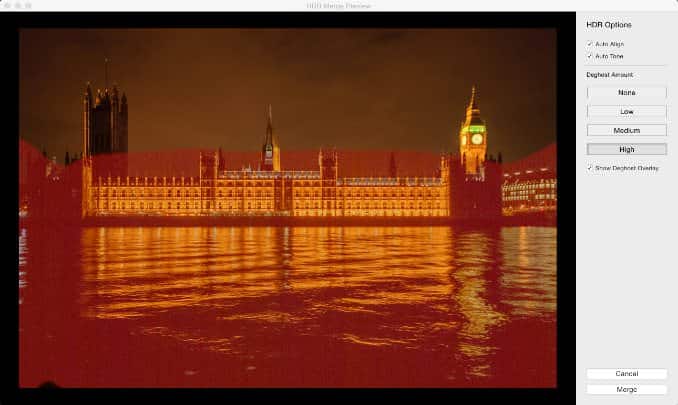
Anything that moved between your bracketed frames — people, leaves, water, cars — shows up in the merge as a semi-transparent “ghost.” Deghost tells Lightroom to take those moving areas from a single frame instead of blending them. None blends everything (best if nothing moved); Low, Medium, and High detect and replace progressively more motion, at the cost of a little noise or tonal mismatch in those patches. Tick Show Deghost Overlay to see the affected areas in red and pick the lowest setting that clears the ghosts. Start at Low; go higher only when the overlay shows it’s needed.
HDR, or high dynamic range, photos blend multiple different photos of different exposures into a single image.
The main objective is to better capture the brightest highlights and the darkest shadows and use both in the photo.
It’s a look that can very easily be overdone, ending up in some very garish, surreal photos.
But used carefully and subtly, it can make interesting photos out of scenes that otherwise have too much lighting variation for a camera’s sensor (or film, for that matter) to capture.
Architectural and real estate photographers use it to recover detail from blown-out window highlights while still shooting indoor scenes, for example.
Landscape photographers sometimes find it useful for adding texture and detail to skies that would otherwise be blown-out highlights compared to shadows on the ground.
And some photographers use it simply for its dramatic effect.
Now Lightroom has its own HDR option built-in.
Back in Lightroom 6, Adobe introduced two new photo merge features: a panorama stitcher and the HDR compiler. Both mean that can stitch panoramas and blend HDR images without having to export the photos from Lightroom and reimport them into your dedicated third-party software — it’s all handled within Lightroom itself. That’s a big convenience boost.
That said, in its current version, Lightroom’s HDR tool is pretty basic without much room for manual control. If you’re doing more than the occasional HDR image you’ll probably want something more powerful and with more fine-tuned control (and that means a dedicated paid app).
Some good places to start are:
- NIK HDR Efex Pro from DxO
- Photomatix Pro, which has long been my go-to
Using Lightroom’s HDR Photo Merge
The first thing you’ll need to do is select the images you want to merge. You can either create “true” HDR using individual photos that were shot with different exposures (or bracketed) or you can mimic the effect by starting with a single image and creating virtual copies with different exposure settings. The feature works best with RAW files (more on this below).
If you’re applying any develop settings, in many cases it’s a good idea to sync those settings across all of the images you want to merge. That’s especially true for settings that change the shape of the image, such as cropping or using the lens profile distortion corrections.
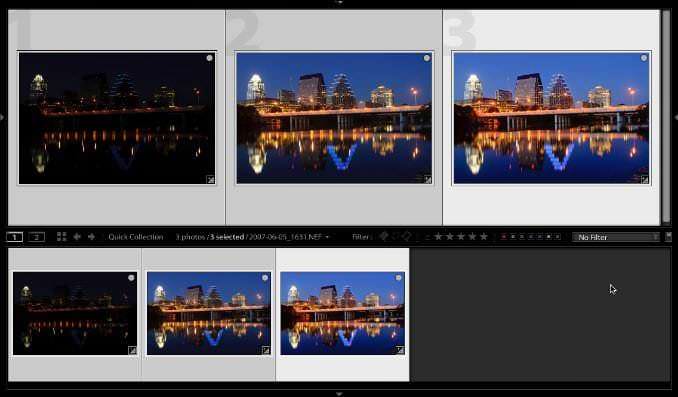
To start up the HDR photo merge, select all of the images you want to merge. In this example, I’m using 3, but you can also use just 2 or, say, 5 or 7.
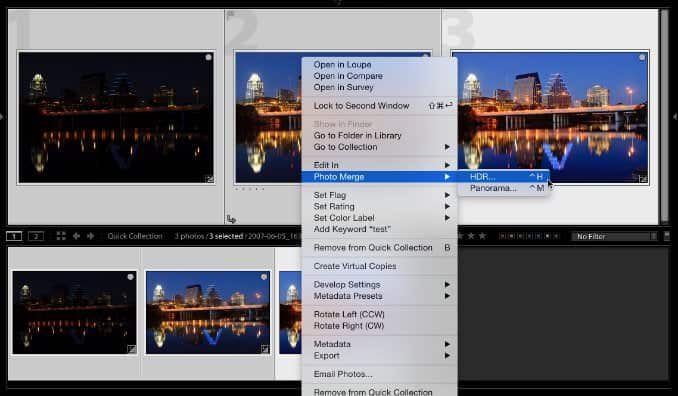
There are three ways you can start the photo merge process once you’ve got the thumbnails selected:
- Use the keyboard shortcut CTRL-H
- Right-click and choose
Photo Merge > HDR - From the top menu, choose
Photo > Photo Merge > HDR
It’ll then go through the process of generating a preview image. You’ll get a popup window and a progress bar.
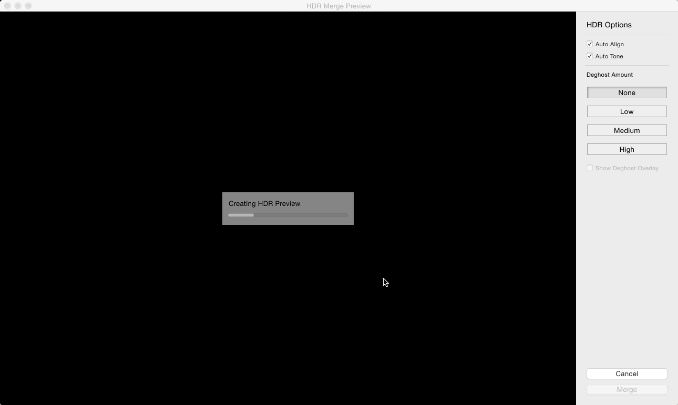
Once the preview is generated, it will be displayed on the screen. The first time you use it you’re likely to have the auto settings enabled in the options at right.
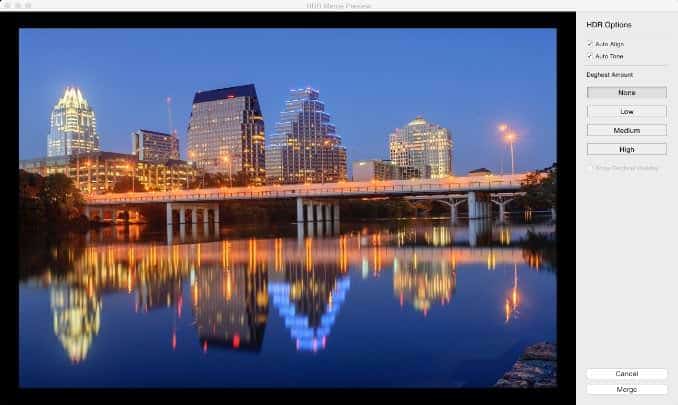
Options: Auto Align & Auto Tone
The first option is for Auto Align.


In most cases, you want this checked. It’s especially useful for small differences between images taken handheld. It’s less of an issue for images taken on a solid tripod, but it’s still a good idea to leave it on.
The second option is for Auto Tone.
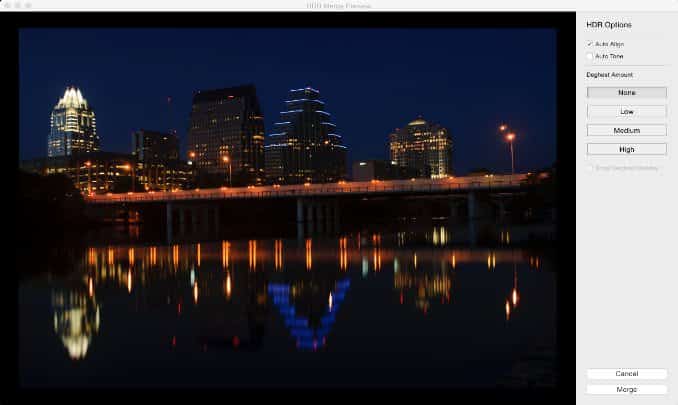
Again, in most cases, you probably want this turned on, especially since there’s no way to manually adjust the tone or exposure. This, for example, is what this one looks like with Auto Tone unchecked. The result is the median exposure across all three images, and while the brightest highlights and darkest shadows are actually handled quite well, all of the mid-range is much darker than I’d like.
So, for this image, I’m leaving Auto Tone on.
Options: Deghosting
The next options are some controls for the amount of deghosting.
Ghosting results from objects moving in the frame from shot to shot when you’re shooting a bracketed sequence.
Say, for example, a bird flies across the sky. It will be in a different position in each shot. When the images are merged together, you can end up with a semi-transparent ghost of a bird in different spots across the sky.
In the Deghosting Amount options, you can choose None, Low, Medium, or High. If you’re choosing something other than None, you can also check the box to Show Deghost Overlay that shows a red semi-transparent overlay of where the effect is being applied.
While there’s no “right” setting for this — it varies from shot to shot and personal preference to personal preference — in general you want to apply as little deghosting as you can get away with. The reason is that you can end up with some pretty ugly side-effects. There’s no way to apply it in only one part of the image, so you might end up fixing the bird ghost but introducing other problems elsewhere in the image.
Sometimes, you get better results by living with the ghost in the HDR merge and then removing it with the healing brush later.
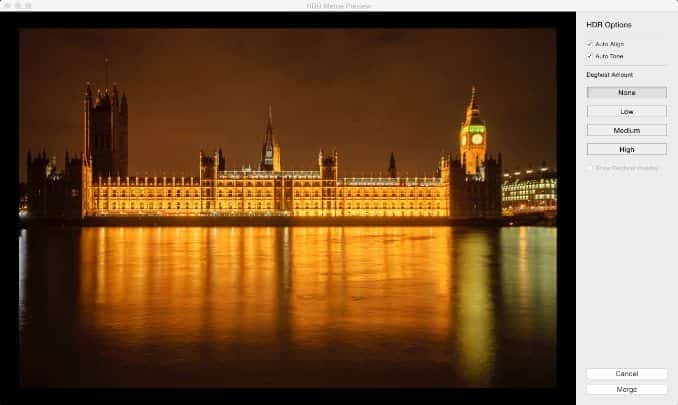
Here’s an example where the ripples on the water are different from shot to shot. This first version has Deghost Amount set to None.
And here’s the same thing with the Deghost Amount set to High.
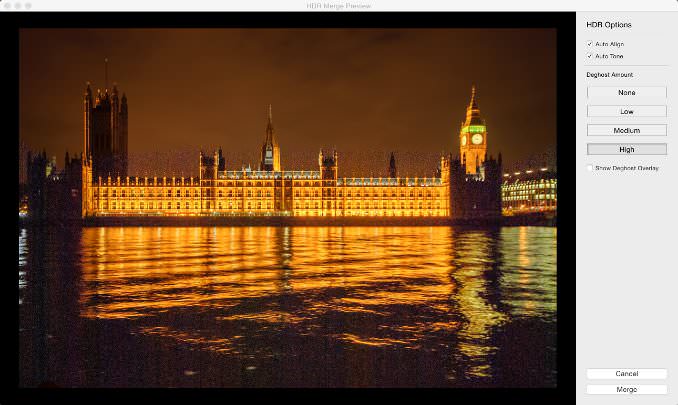
The problem is not just that the water isn’t smoothed out anymore — it’s that the software is getting confused and trying to compensate for movement on the building itself, which of course isn’t actually moving. With the Deghost Overlay turned on, you can see that it’s applying the effect to parts of the image that aren’t moving, resulting in some very ugly artifacts.
Merging
Once you’ve settled on your options, you just hit the Merge button at bottom right.
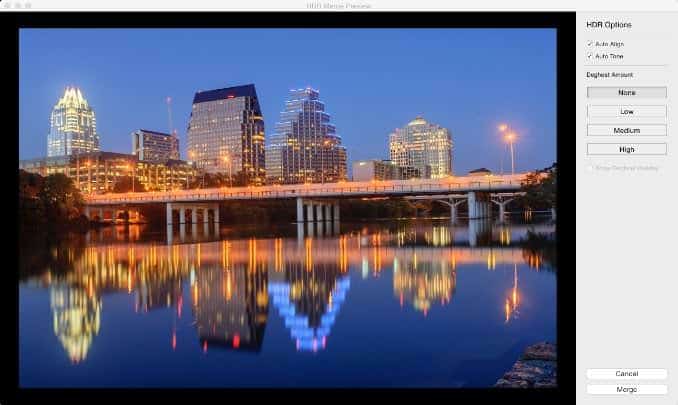
The resulting merged image will be added back into your Lightroom catalog alongside your original images with a filename with “-HDR” added to the end. Whether you started with JPG or RAW originals, the resulting merged HDR image is saved as a DNG RAW file along with its own develop settings.
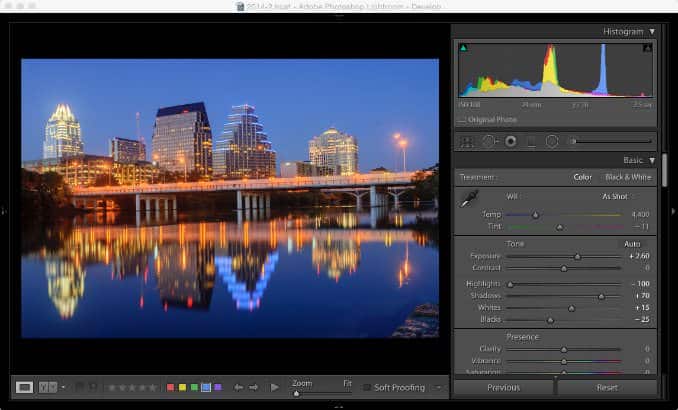
Once you’ve got it back in Lightroom, you can go ahead and fine-tune the Develop settings to your taste.
Common questions
Which Deghost Amount should I use?
None if nothing moved; otherwise the lowest setting that removes the ghosts in the overlay — usually Low or Medium. High is for busy scenes (crowds, traffic, wind) and can leave visible patches.
How many exposures does Lightroom HDR need?
At least two; three to five at 1 – 2 stops apart is the usual range. Lightroom handles up to 20, but more frames add ghosting risk without adding latitude.
Should I shoot RAW for HDR?
Yes. The merge works from RAW data and outputs a DNG with the full combined range; merging JPEGs throws most of that away before you start.
When not to use HDR Photo Merge
In its current form, the HDR Photo Merge function built into Lightroom is pretty basic. You don’t have much control, and there’s not much you can do in the way of fine-tuning the results. If you’re doing anything other than the occasional HDR image, you’re better off using something like Photomatix Pro, HDR Efex Pro, or LR/Enfuse.
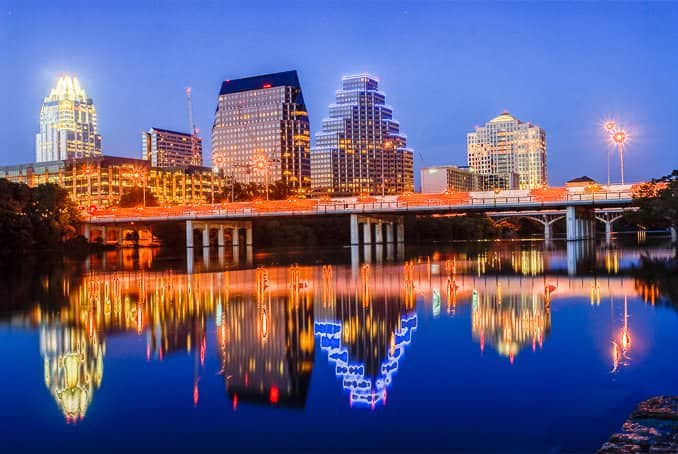
I’d also recommend sticking with RAW originals, ideally run through a RAW pre-processor like DxO PureRAW before you merge. The feature appears to lean heavily on the extra image depth that RAW files have in shadows and highlights — typically much wider latitude than in JPGs — and it seems to have real trouble using JPG originals. As an experiment, I exported the same three original images above as JPGs, reimported them back into Lightroom, and ran the Photo Merge on those JPGs. The result was horrible, as you can see here.
Wrap-up
Overall, the new HDR photo merge feature is a nice addition, although it’s a bit limited to be something I’d use often — at least for now. Because you have to rely on the Auto Tone to control how aggressive the merge algorithm is, it can be hit-and-miss. I quite liked what it did with the photo of the Austin skyline above, but what it did with the Houses of Parliament was too aggressive for my tastes.
So, for now, I’ll mostly be sticking with dedicated options like Photomatix Pro.


