The Fujifilm GFX100RF doesn’t have in-body image stabilization (aka IBIS). The only stabilization in the system is DIS (Digital Image Stabilization), which is movie-only and applies a crop.
For stills, you’re working unstabilized, as I noted in my full review of the camera. That mightn’t sound like a big deal — after all, we got by for decades with other cameras without it. But at 102MP, that’s a sharper trade-off than it sounds, especially for a camera like this which is explicitly aimed at walking-around hand-held photography.
It’s a problem of math and optics. The higher the resolution, the more it’s going to amplify any camera shake when you view the image at 100%. And you’re probably going to want to view it that large, or near to; this is probably not the camera you’d choose if you only plan to post to social media thumbnails.
A blur that would be invisible on a 24MP file is visible on a 102MP file. The reciprocal-of-focal-length rule that most of us learned with film bodies — 1/30s for a 30mm lens, 1/60s for a 60mm lens, and so on — is barely adequate at this resolution, and the camera’s default Auto ISO behavior leans on it more than I’d like. After learning the hard way with too many shots that looked good as thumbnails but just weren’t sharp when viewed at 100%, I saw the need to do something about it.

The fix is to set a minimum shutter speed that actually accounts for the sensor, not just the focal length.
In short, I run 1/250s in AUTO1 for careful work in good light, 1/125s in AUTO2 as my everyday setting, and 1/60s in AUTO3 when the light gets bad. The ISO ceiling rises as the shutter speed drops, from 1600 in AUTO1 up to 12800 in AUTO3.
So here’s the setup I use to address it.
Where the Auto ISO settings live in the menu
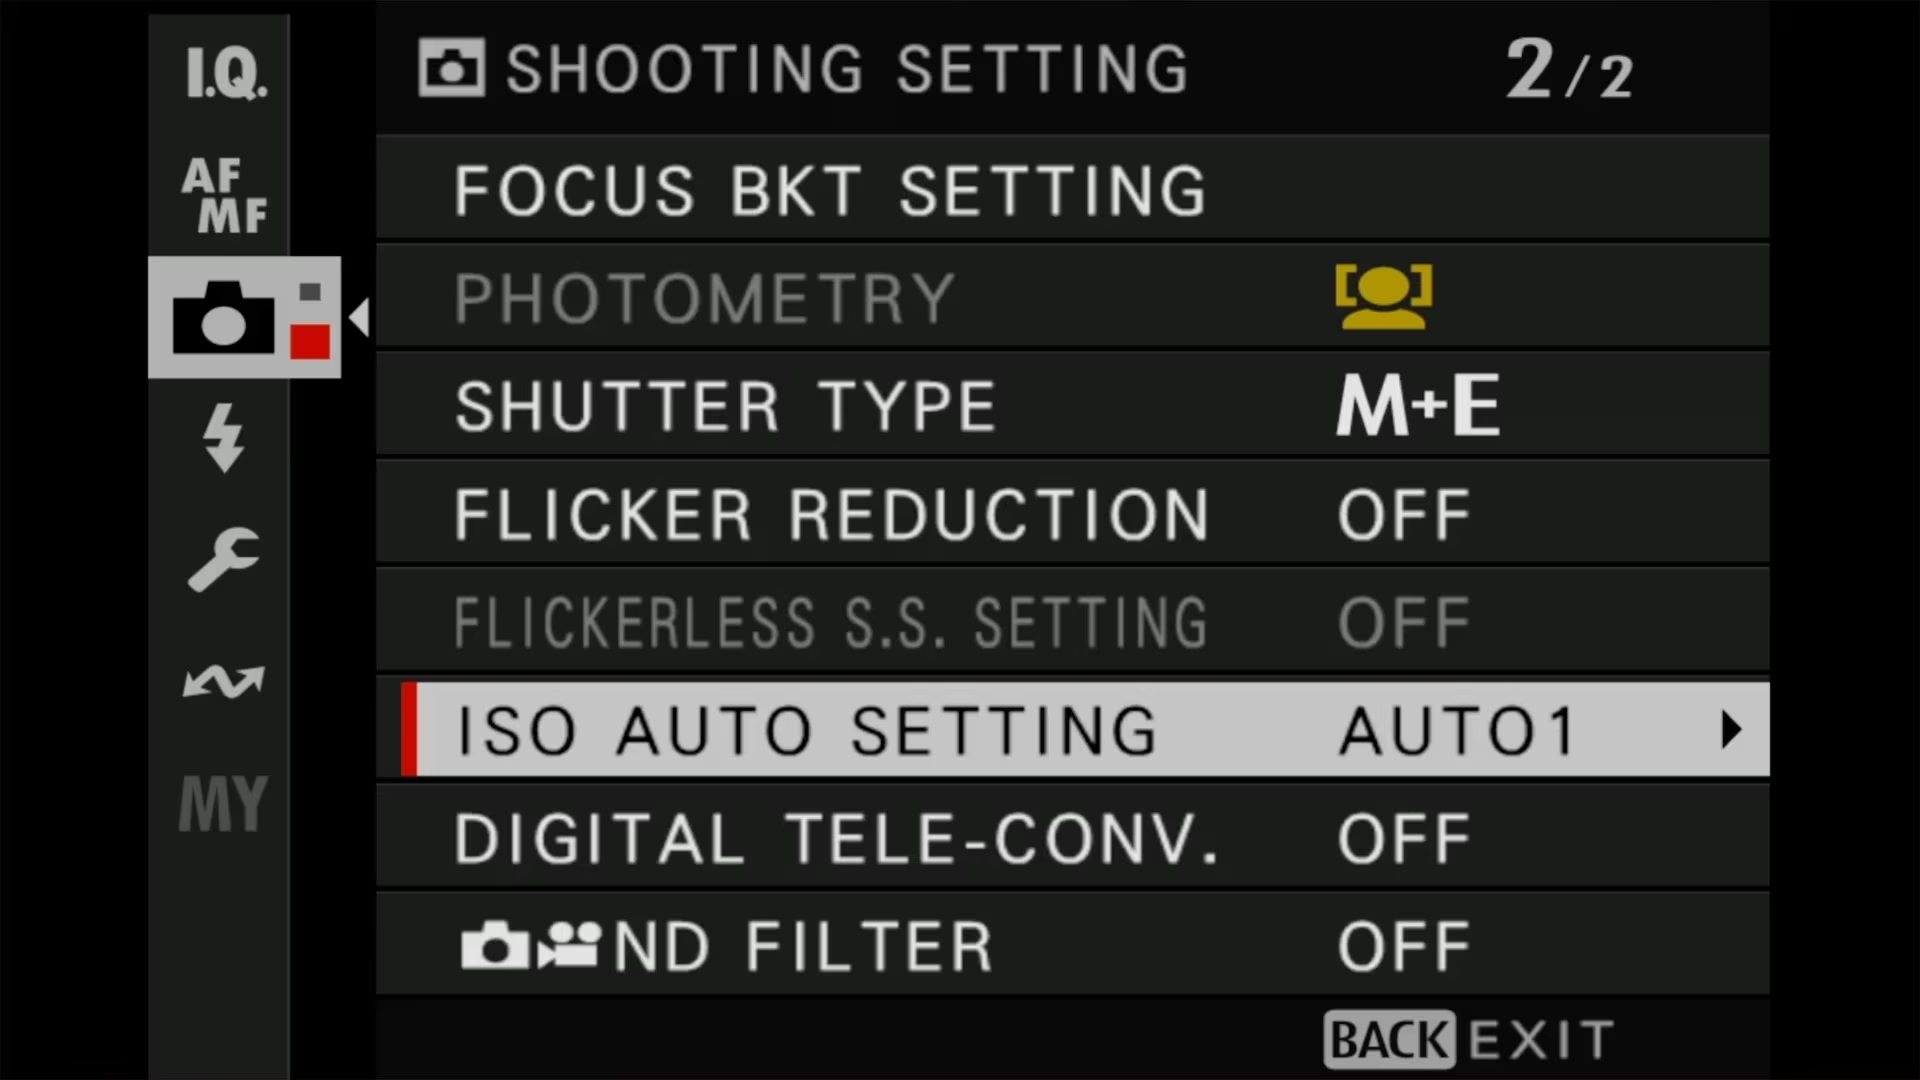
The setting you want to look for is:
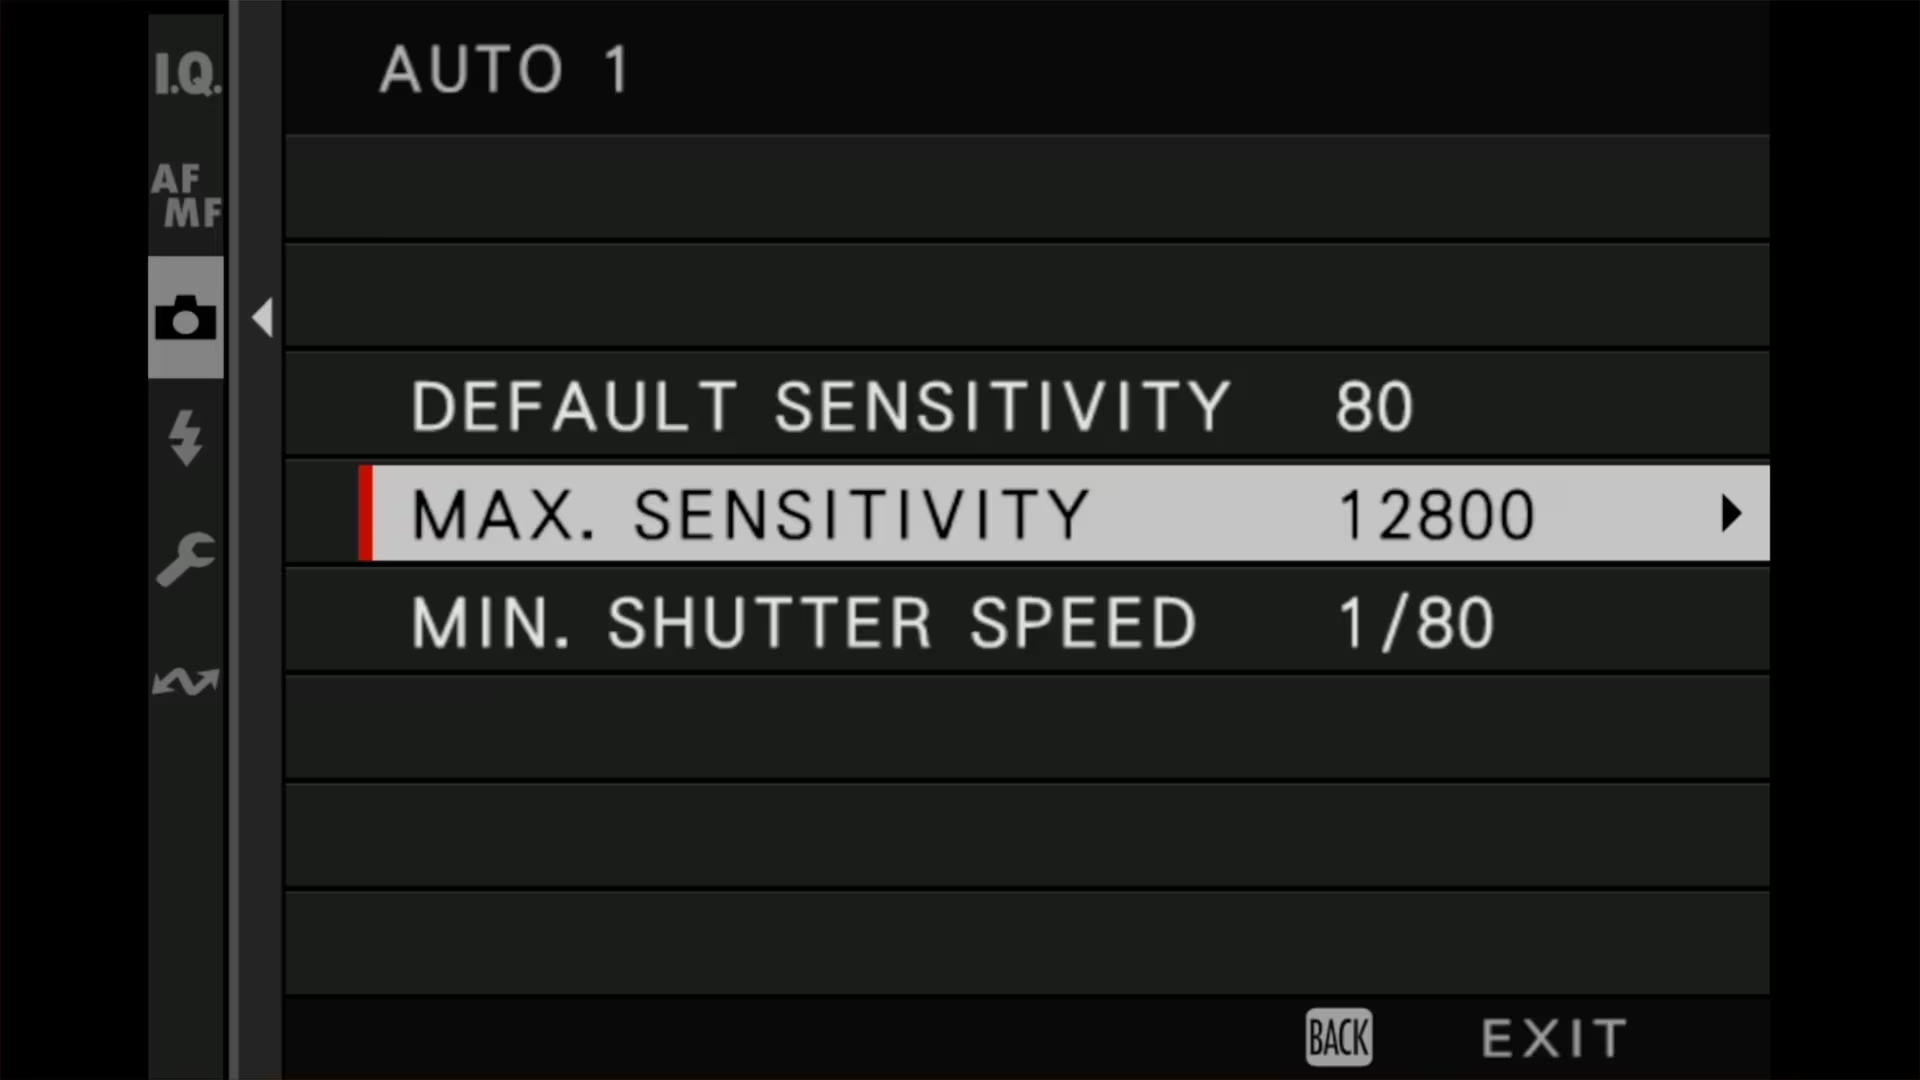
MENU/OK > A SHOOTING SETTING > ISO AUTO SETTINGYou’ll find three saved profiles — AUTO1, AUTO2, and AUTO3 — each with three independent parameters:
- DEFAULT SENSITIVITY — the ISO the camera uses when light allows
- MAX. SENSITIVITY — the ceiling above which the camera won’t raise ISO
- MIN. SHUTTER SPEED — the slowest the camera will go before pushing ISO higher
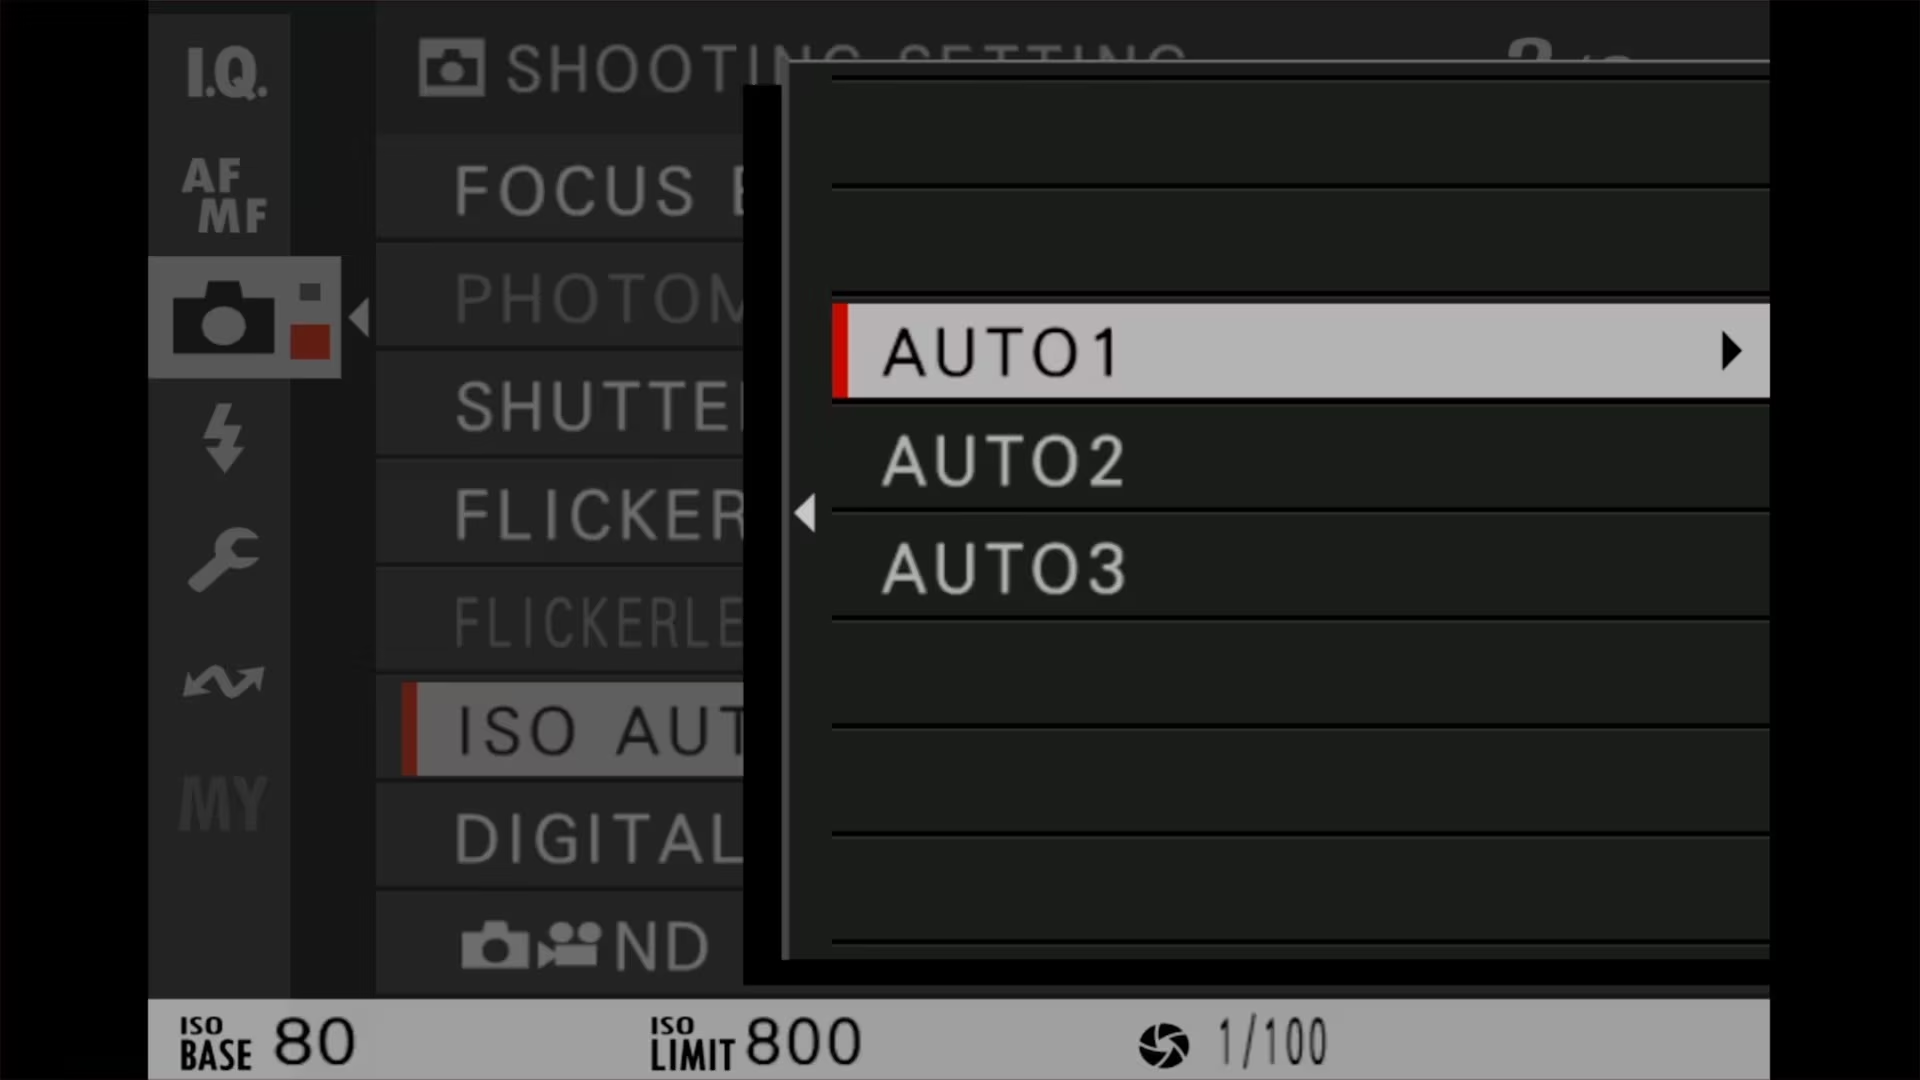
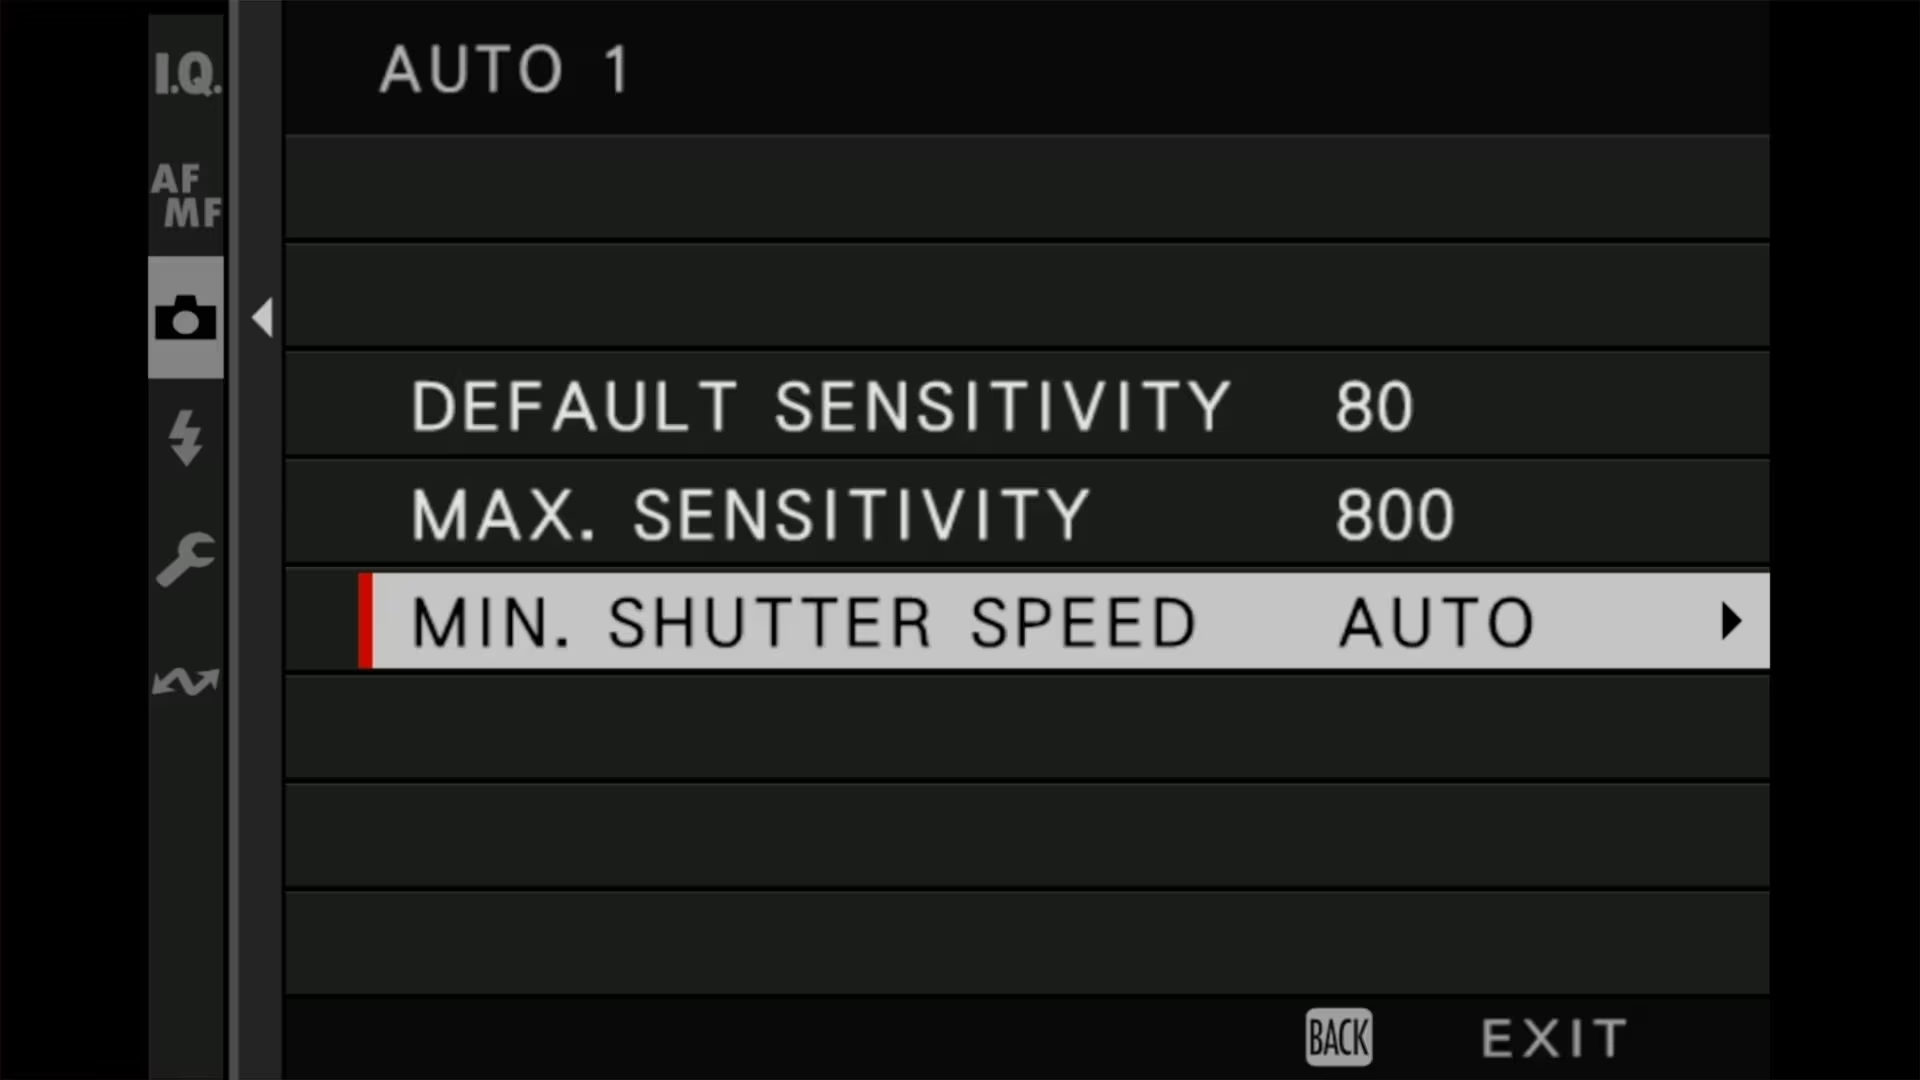
The factory defaults are:
| Profile | Default Sensitivity | Max Sensitivity | Min Shutter Speed |
|---|---|---|---|
| AUTO1 | ISO 80 | ISO 800 | AUTO |
| AUTO2 | ISO 80 | ISO 1600 | AUTO |
| AUTO3 | ISO 80 | ISO 3200 | AUTO |
That AUTO setting on the minimum shutter speed is the problem.


What “AUTO” minimum shutter speed actually does
Fujifilm’s manuals do spell this out: with AUTO selected for MIN. SHUTTER SPEED, the camera picks a minimum shutter speed roughly equal to the inverse of the lens’s focal length. With the GFX100RF’s fixed 35mm lens — a 28mm-equivalent field of view — that puts the AUTO floor somewhere in the 1/30s to 1/40s neighborhood.
But it gets worse, because in low light — especially with a relatively slow f/4 lens — it will often go well below that floor to levels that just aren’t suitable for handheld shots. I have more on that below.
For a stabilized body, 1/30s at 28mm equivalent is a reasonable threshold. For an unstabilized 102MP body, it isn’t. I’ve found that anything slower than about 1/125s shows visible micro-blur at full zoom even when I think I’m holding the camera steady. The pixel density isn’t forgiving, and the 28mm field of view doesn’t change that.
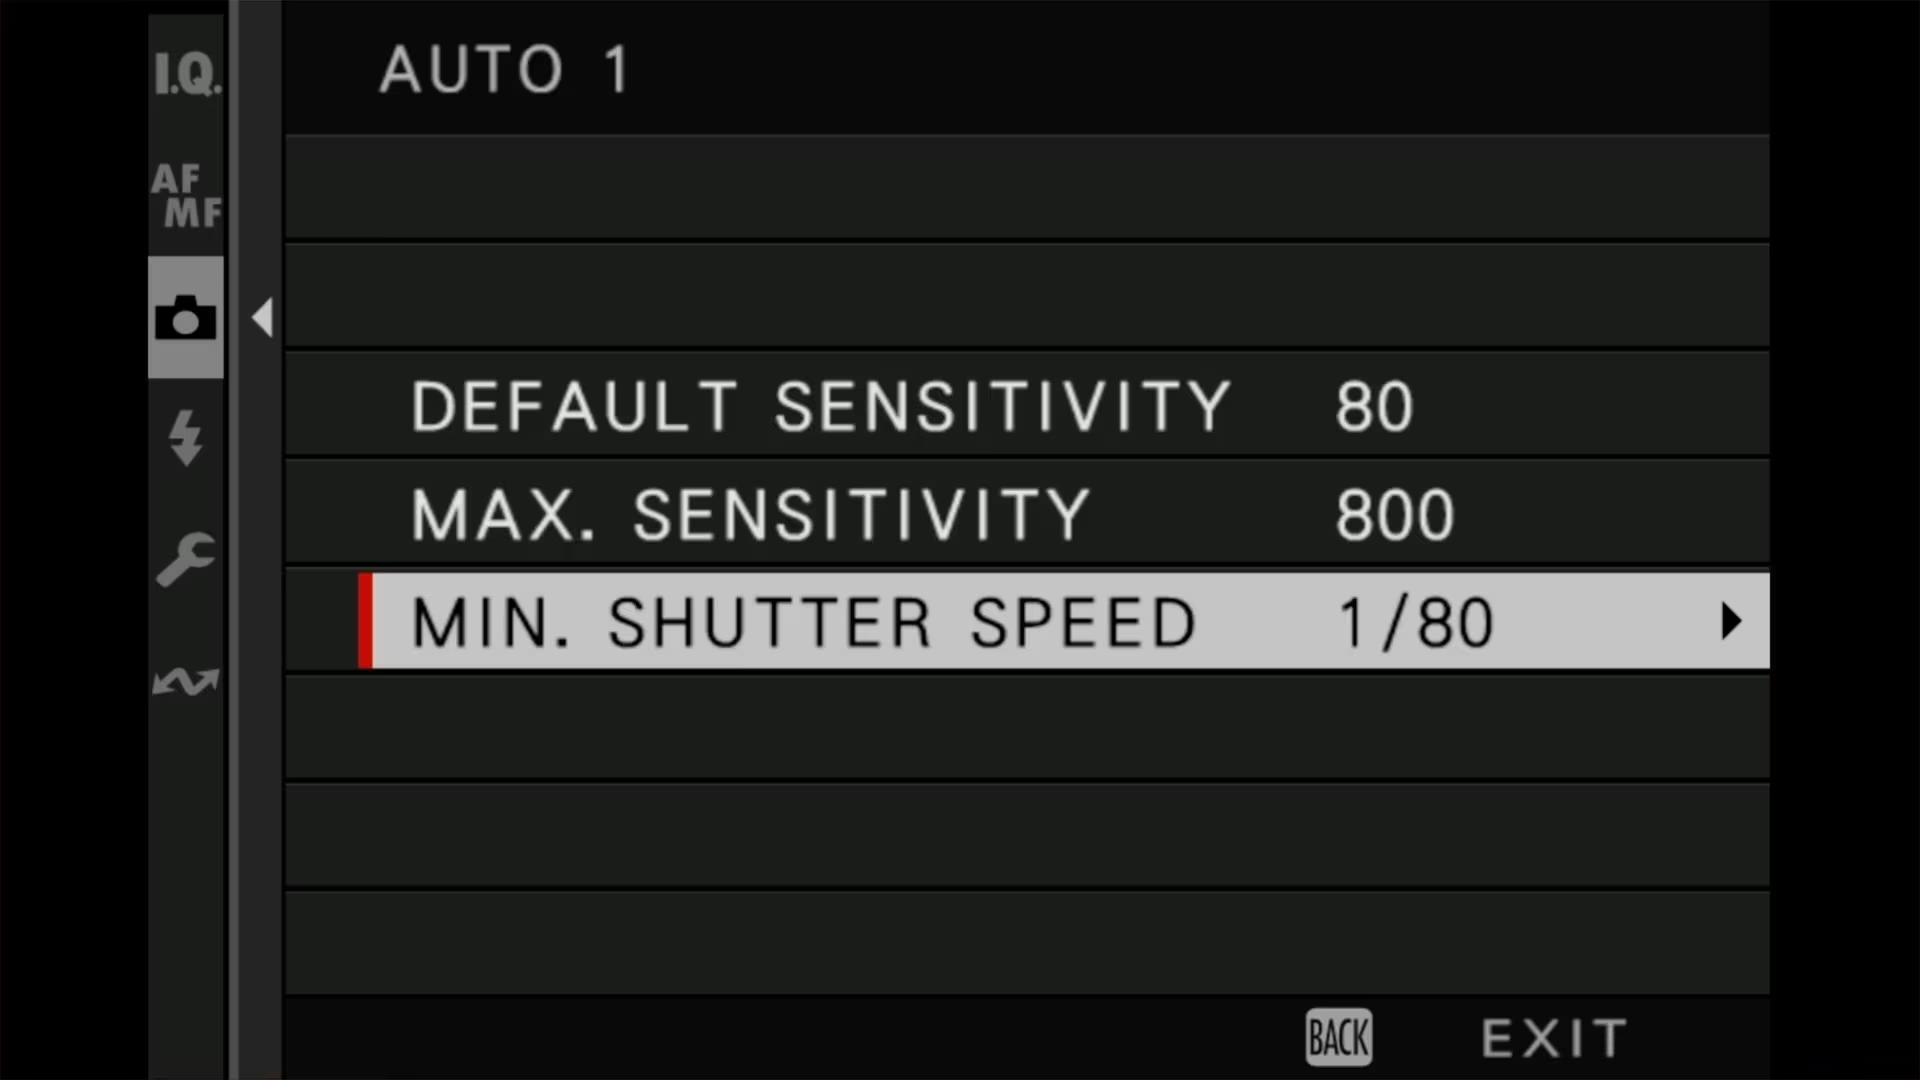
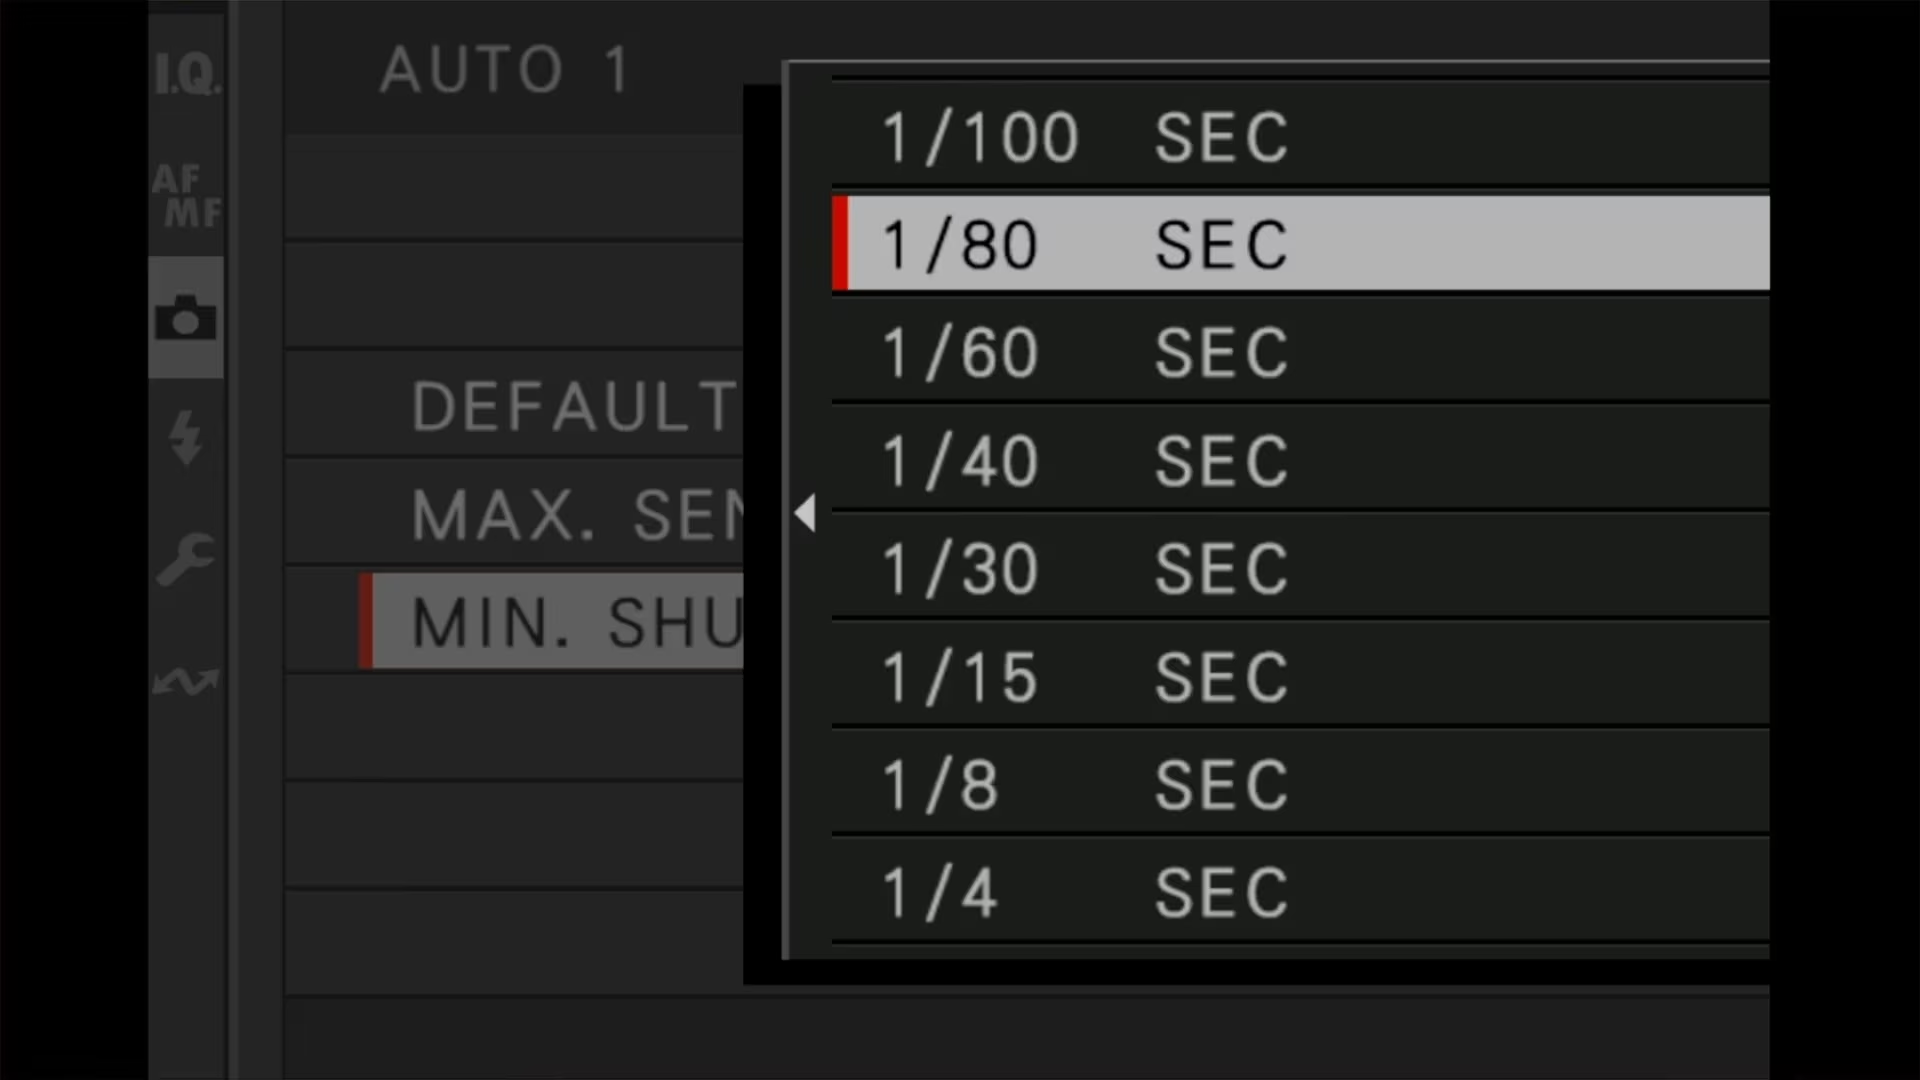
The settings I use
I treat the three AUTO profiles as a spectrum from “best image quality” to “highest ISO ceiling I’m willing to accept,” and I hard-code the minimum shutter speed in each rather than leaving it on AUTO.
| Profile | Use Case | Default | Max | Min Shutter |
|---|---|---|---|---|
| AUTO1 | Bright daylight, careful work | 80 | 1600 | 1/250 s |
| AUTO2 | Travel walkaround, mixed light | 80 | 6400 | 1/125 s |
| AUTO3 | Low light, getting the shot | 80 | 12800 | 1/60 s |
A few notes on why these numbers:
1/250s for the careful profile. When I’m shooting handheld in good light and the priority is maximum sharpness, I want enough shutter speed to defeat any micro-jitter. 1/250s is three stops faster than the reciprocal rule’s 1/30s, which is what the resolution demands.
1/125s for general use. This is my default working profile. It’s the speed where I trust handheld 28mm-equivalent work to look genuinely sharp at 100%, and it’s slow enough that I don’t unnecessarily push ISO in average daylight.
1/60s for low light. This is the floor where I accept some risk of micro-blur in exchange for getting the shot at all. Shots of monuments in predawn hours, and so on. Below 1/60s I’d rather miss a frame than salvage a soft one.
Max ISO ceilings. I cap AUTO1 at 1600 because the camera’s lower ISOs are visibly cleaner — I’d rather get a slightly underexposed file at ISO 1600 than a noisier one at 6400. AUTO3 at 12800 is the native sensor max, and I don’t push into the extended ISO range (up to 102400) because the noise penalty is real.
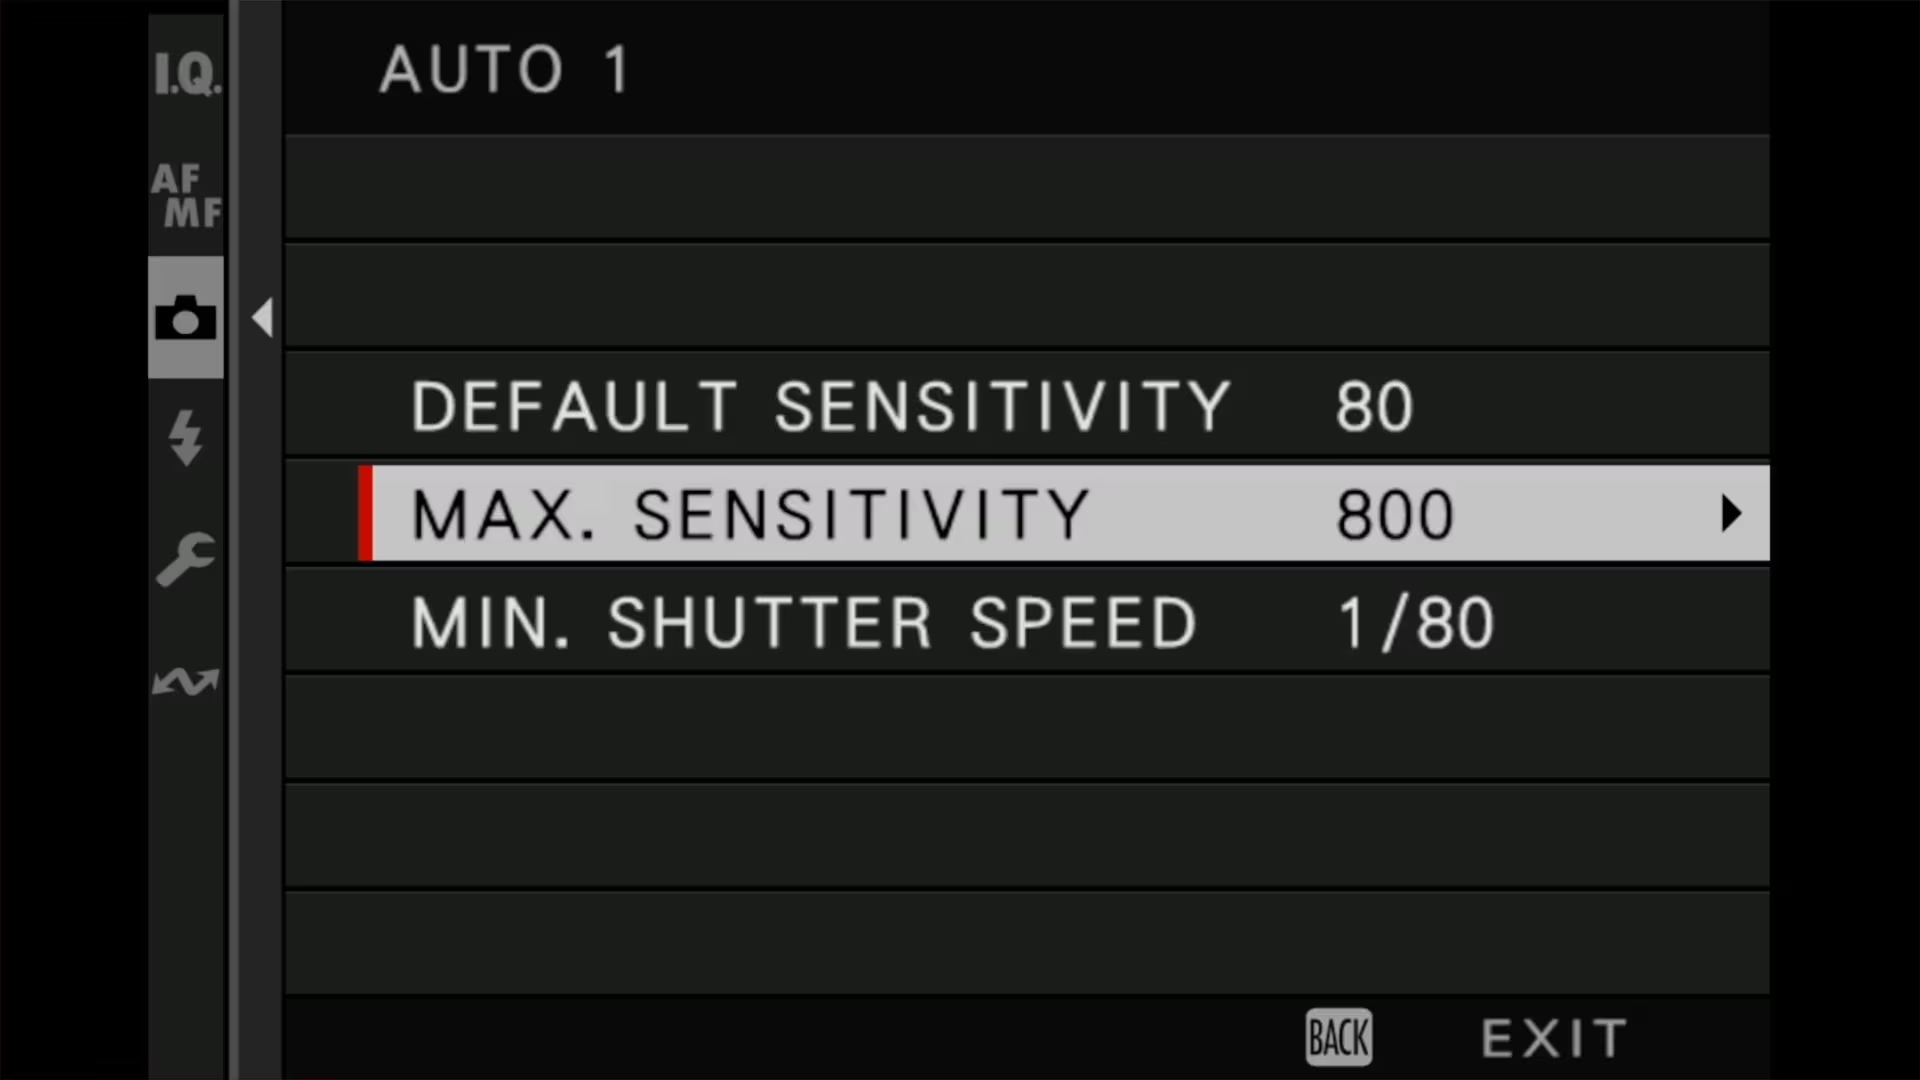
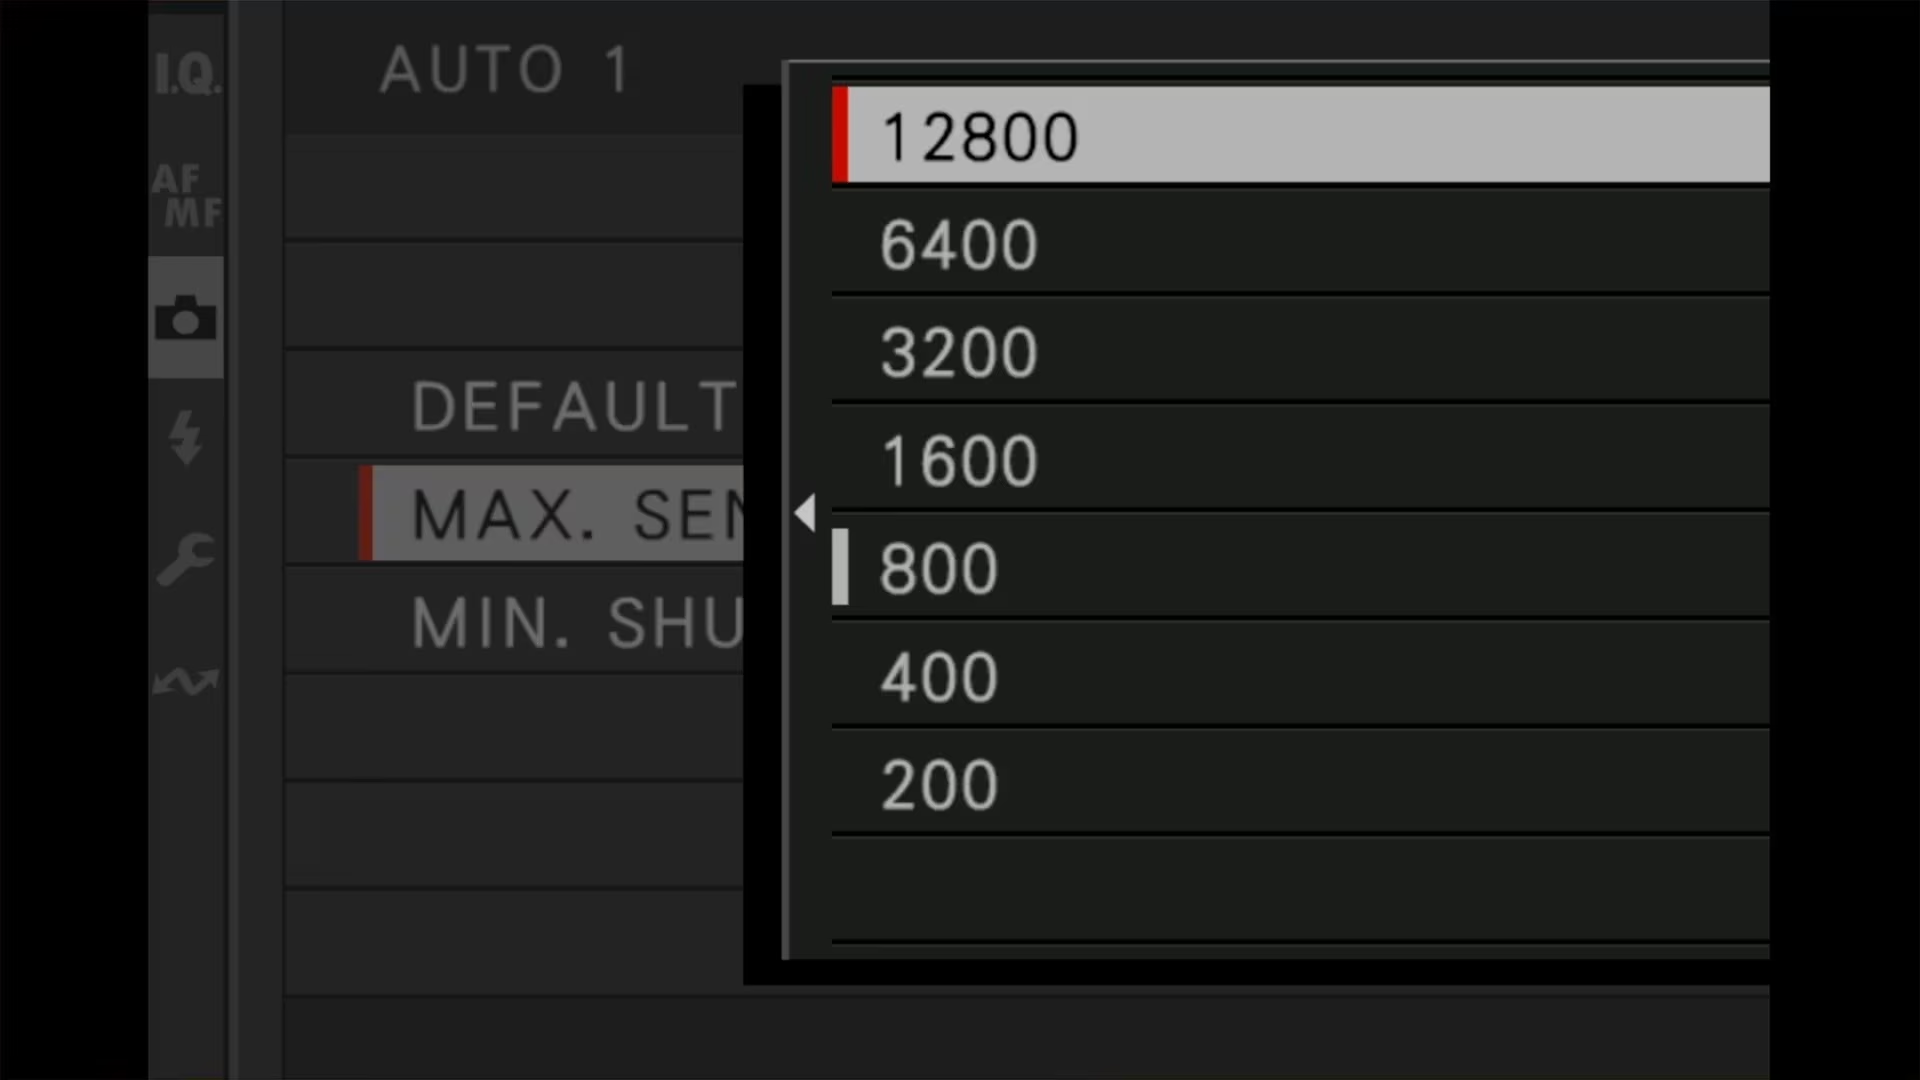
When the camera ignores your minimum shutter speed
There’s a footnote in the manual (on page 106) that’s worth understanding clearly because it changes how you set the max ISO. And it’s something that took me a while to grapple with:
The camera may select shutter speeds slower than MIN. SHUTTER SPEED if pictures would still be underexposed at the value selected for MAX. SENSITIVITY.
This means MIN. SHUTTER SPEED is a target, not a guarantee. If you set 1/125s as the minimum and ISO 1600 as the maximum, and you’re shooting in light dim enough that the camera needs ISO 6400 to make the exposure work, the camera will silently drop the shutter speed below 1/125s rather than refusing to expose properly.
The practical implication: if you really want sharp handheld files, your MAX ISO has to be high enough that the camera never gets boxed in. That’s why my AUTO3 ceiling is 12800 rather than 6400 — I’d rather have a noisier-but-sharp file than a cleaner-but-blurred one.
The teleconverter wrinkle
One thing the manual doesn’t address but matters in practice: when you engage the digital teleconverter, your effective focal length changes. At the 50mm equivalent crop, my reciprocal-rule starting point should logically be 1/50s, not 1/30s. At 63mm equivalent, 1/60s.
Worth remembering that the teleconverter doesn’t actually crop the RAW file at capture — the crop is written as metadata that Lightroom applies when you open the file, so you can undo it. That doesn’t get you off the hook on shutter speed, though. Cropping magnifies whatever shake is in the frame, so the tighter you go, the less forgiving a slow shutter speed becomes.
The Auto ISO profiles don’t know about the teleconverter. If you do a lot of cropped work, it’s worth setting your AUTO2 minimum shutter speed (currently 1/125s in my setup) somewhere around 1/250s instead, just to give yourself headroom across the crop range. Or, more simply: switch to AUTO1 (which already has 1/250s) when you’re working at the longer crops.
Switching between profiles
The three AUTO profiles aren’t useful unless you can switch between them quickly. The cleanest way is to set the ISO dial to A and use one of the function buttons or the Q menu to cycle through AUTO1/AUTO2/AUTO3.
Alternatively, you can assign ISO AUTO SETTING to a function button via D BUTTON/DIAL SETTING > FUNCTION (Fn) SETTING for one-press access to the profile menu.
Either way, having three profiles ready means you can adapt to the light without diving into menus mid-shoot.
A note on when to just use manual ISO
The Auto ISO setup above is for handheld work where conditions vary. For tripod work — landscapes, architectural interiors, anything stationary — Auto ISO is the wrong tool.
Set ISO 80 manually, set the minimum shutter speed concern aside entirely, and let the long exposure do its job. But the reality is that this camera is designed primarily as a walking-around handheld camera. That’s the whole point of its notably compact size (for a medium-format camera).




