
There are two ways to change the aperture on the X100VI. The most obvious is the traditional manual aperture ring on the lens.
Either way you control it, the range is the same. The fixed 23mm lens goes from f/2 to f/16 in third-stop steps, using a nine-blade diaphragm.
I normally quite like a manual aperture ring. But because of the lens’s slim profile on the X100VI, I don’t find this one particularly quick or easy to use.
It’s a bit too close in to be usable with my usual way of holding the camera, so it’s a bit of an awkward reach around.
So there’s an alternative method: you can use the front command dial. I prefer this method, and it’s how I have my X100VI set up.
The Goal: Move Aperture control from Lens Ring to Front Dial
Step 1: Set “Command Dial Setting” (Front) to Aperture
Step 2: Turn Physical Aperture Ring to “A”
Step 3: Set “Aperture Ring Setting (A)” to “Command”
Crucial Tip: Press the front dial inward to cycle functions if it isn’t responding
Trade-off: Disables quick access to Auto Aperture (Program Mode)
Step 1: Customize the front command dial to aperture
You can find this under: Set Up menu > Button/Dial Setting > Command Dial Setting.
Set Up > Button/Dial Setting 1/3 > Command Dial Setting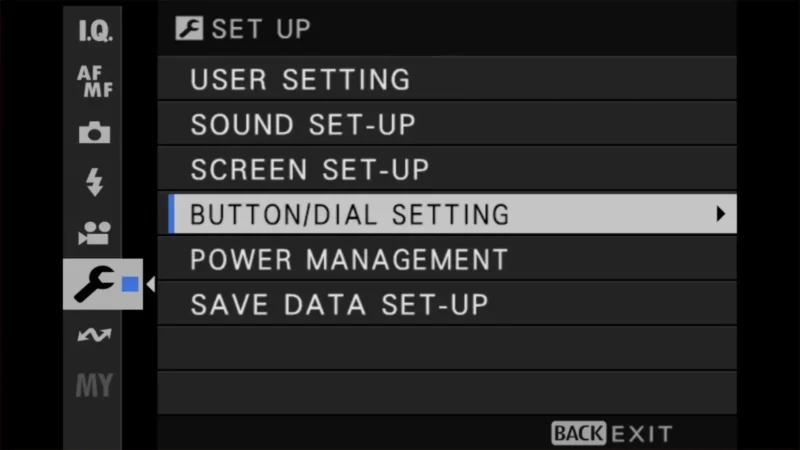
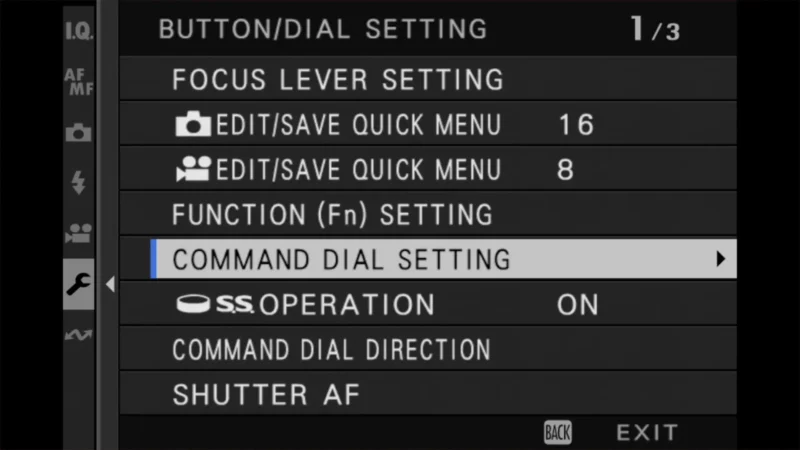
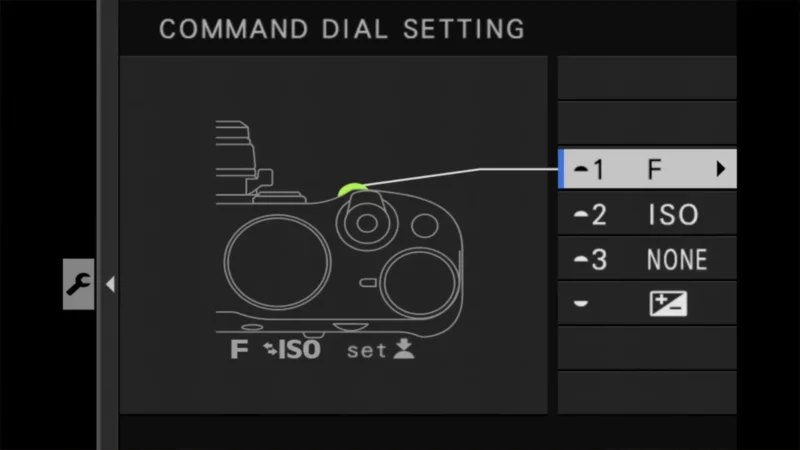
This screen is where you set both the front and the back command dials. The first option at the top of the list is the front command dial.
There’s a shortcut to this screen, too: press and hold the center of the front command dial and it opens straight from the shooting display. It’s worth knowing that the front dial has three slots here — Front Command Dial 1, 2, and 3 — and a quick press of the dial’s center steps through them. That’s why the dial won’t always be adjusting aperture even after you’ve set it.
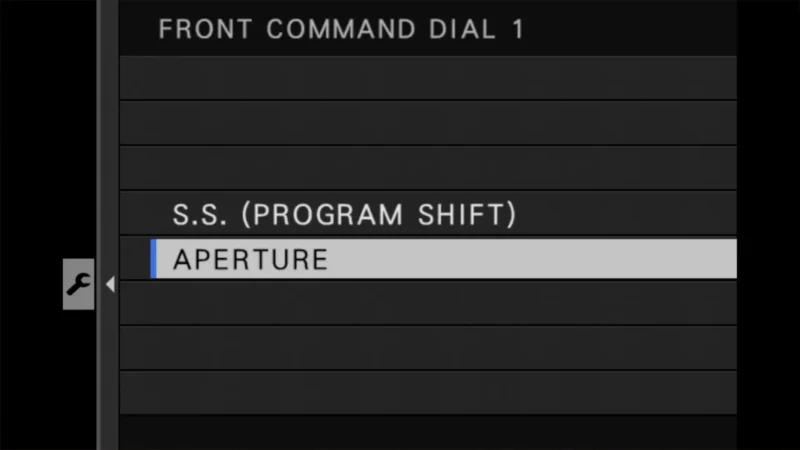
Press right to access the available options for it. Which are either S.S. (Program Shift) or Aperture. You want Aperture.
Step 2: Put the aperture ring to A
If you have the aperture ring set to anything other than A, it’s going to disable the command dial.
So turn the aperture ring to A.

Step 3: Aperture Ring Setting to Command
Make sure that the Aperture Ring Setting is set to Command.
You can find this under: Set Up menu > Button/Dial Setting > Aperture Ring Setting (A).
Set Up > Button/Dial Setting 2/3 > Aperture Ring Setting (A) > CommandImportant: The Front Command Dial controls multiple settings. If you turn the dial and the Aperture doesn’t change, press the dial inward like a button. This cycles between Aperture, ISO, and Exposure Compensation. Keep pressing until the blue Aperture number highlights.
Troubleshooting
If it’s not working for you, the first thing to check is that the lens aperture ring is set to A. That was the issue I ran into at first.
If that doesn’t solve it, check that you have the Aperture Ring Setting set to Command. If it’s set to Auto, this method won’t work.
Note: By doing this, you lose the ability to quickly switch to Auto Aperture (Shutter Priority or Program Mode). ‘A’ now always means Manual Aperture Control.
Aperture priority still works, though. Set the shutter speed dial to A, pick an f-number with the front command dial, and the camera chooses the shutter speed. It’s the same A mode you’d get from the lens ring — you’re just dialing the f-stop in a different place.



You need to set the aperture ring settings to Command for this feature to work. Otherwise the Program mode is active.
Thanks for the tip. Since I already had that set to Command, I overlooked it. I have updated above and appreciate you suggesting it.