
I tend to use exposure compensation quite a lot in my shooting. There’s often specific lighting in the frame that I want to make sure is exposed how I want it. Sometimes, that might be using underexposure to make highlights stand out. Other times, I might want to use overexposure to create more of a high-key look.
The upshot is that when I’m shooting, I’m often using the exposure compensation to tweak the auto exposure (I often shoot with aperture priority mode).
If you’re new to it, exposure compensation is just a way of telling the camera to make the photo brighter or darker than the exposure its meter picked. Dial in +1, and you’re asking for one stop more light than the camera thought it needed; dial in −1 and you’re asking for one stop less. It only does something when the camera is choosing part of the exposure for you — program, aperture priority, or shutter priority. In full manual, where you’re setting shutter speed, aperture, and ISO yourself, there’s nothing for it to nudge.
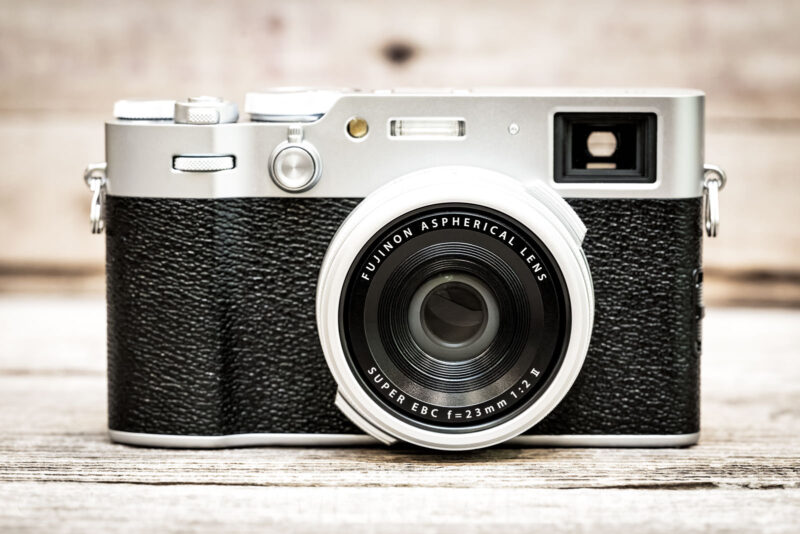
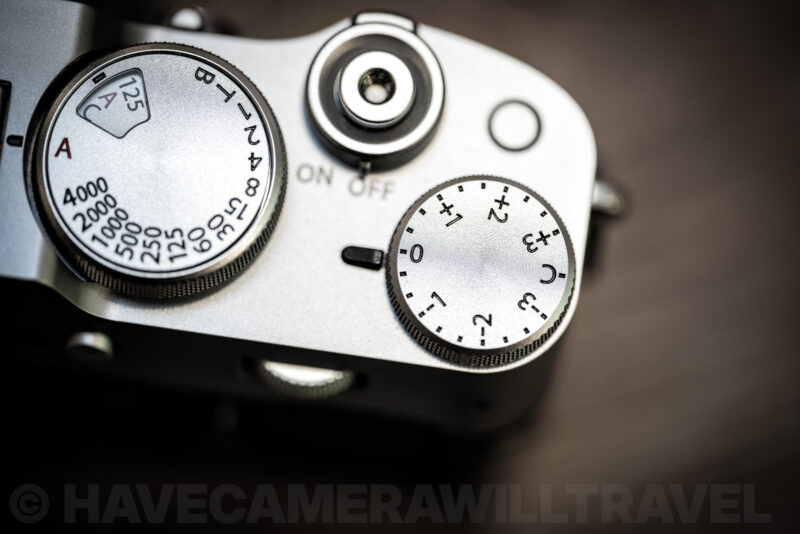
On the X100VI, there are two core methods out of the box for controlling exposure compensation. One is very obvious — it’s right there with its own dial on the right side of the top plate, marked from −3 to +3.
But there’s another option that’s much less obvious, but actually has a key advantage. And that’s the one I prefer.
Standard Range: +/-3 EV (via Top Dial)
Extended Range: +/-5 EV (via Command Dials)
Required Setting: Set Top Dial to “C” (Command) position
Customization: Map to Front or Rear Dial in “Button/Dial Setting”
Visual Aid: Enable “Exp. Comp. (Scale)” in Display Custom Settings
Method 1: The exposure compensation dial on top
The most obvious way to do it is with the exposure compensation dial on top of the camera.
It’s an old-school rotating dial that you can rotate with your right thumb while still holding the camera in a normal shooting position.
It gives you +3 to -3 exposure compensation.
Method 2: Using one of the command dials
But there’s another option. And that is using a combination of a very specific setting on that top dial in tandem with either the front or rear command dial.
Some users might find that a preferable way to change it. For instance, I like that the incremental distance between clicks is smaller.
But the big advantage of using this method is that it actually gives you a wider latitude. Instead of the 3 stops in each direction that you get when using the top dial, this method gives you 5 stops in each direction.
First: Set the exposure compensation dial to C
The first thing you have to do is set the top exposure compensation dial to the C setting. Without that, the methods below won’t work.

Method 2A: Front command dial
By default, the exposure compensation function is assigned to the front command dial.

So once you change that top exposure compensation dial to C, you’ll be able to use the front command dial to change the exposure compensation right away. (But it won’t work unless you first change the regular exposure compensation dial to the C setting!)
I only wish that pressing the front command dial in would instantly reset the EV to 0, but unfortunately, that’s not how it works. Note: Since the Front Dial controls multiple things by default, if turning it changes your Aperture or ISO instead of Exposure, press the dial inward like a button to cycle through the functions until the Blue EV icon highlights.
Method 2B: Rear command dial
If you prefer to use the back command dial for this instead, you can. You’ll just first have to assign the exposure compensation function to that dial.
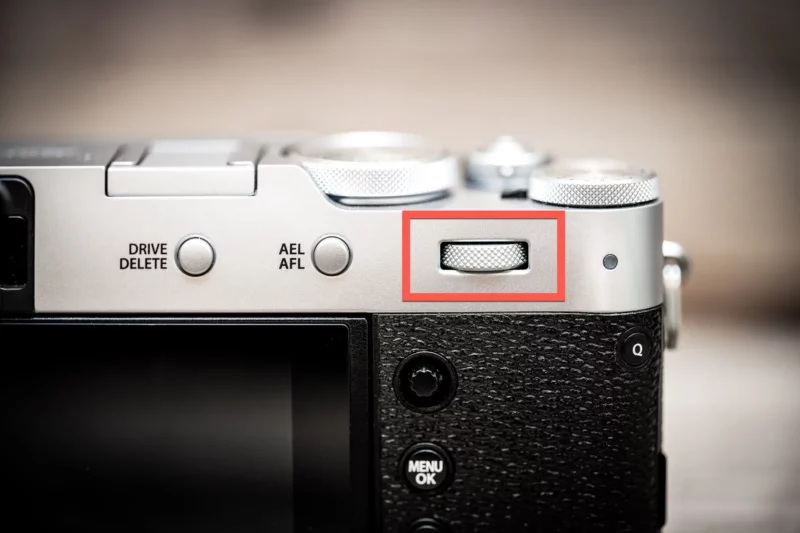
This is my preferred method, mainly because I’m used to using controls in that position on other cameras like my Nikons and my Ricoh GR III. It’s not that it’s better or worse — it’s just a personal preference thing. And you still get that same +/- 5-stop latitude.
To assign the exposure compensation to this dial, go to:
Set Up > Button/Dial Setting > Command Dial SettingOn that page, you’ll see four lines on the right side. The first three refer to the front command dial, and which is active depends on your shooting mode.
The last is the one for the rear command dial. You can change that to the exposure compensation option by pressing right and then choosing Exposure Compensation.

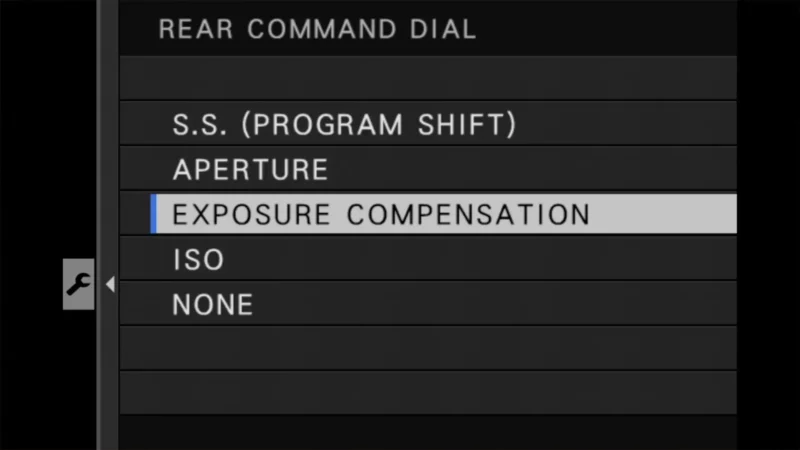
Keep in mind that if you map Exposure Compensation to the Rear Dial, you lose the ability to fine-tune your Shutter Speed (SS) with that dial. You will have to rely strictly on the top Shutter Speed dial.
How to enable the exposure compensation scale on the screen & in the viewfinder
With the top exposure compensation dial, you have the advantage of analog markings to see the current setting of that feature. But there’s a more convenient option, and it’s pretty much essential if you plan to use the command dials.
That’s to put the readout on the viewfinder and back screen.
To enable the exposure compensation scale so that you can see it when shooting, whether through the viewfinder or on the back screen, you can go into the settings to enable/disable it.
You can find this under:
Screen Setting > Disp. Custom Setting
Then choose which type of display to customize.
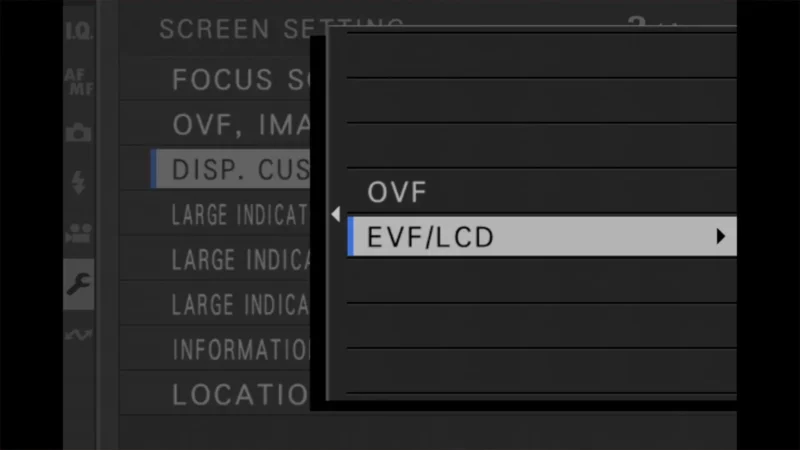
You’ll notice that there are two versions here. One is for an old-school scale. The other is for a digital reading as a decimal number.
You can choose one or the other have both.

When you’re shooting, they display like this:

Things worth knowing
When you switch between these methods, the on-screen exposure compensation scale also adjusts. That is, when you’re using the top dial, the scale on the screen will show +/- 3 stops. When you switch to the front command dial, it will change to +/- 5 stops.
The wider range is for stills only. Switch to video, and exposure compensation is capped at ±2 EV no matter which dial you’re using, so the extra latitude you get from the C position doesn’t carry over to movie recording.
Explore the Fujifilm X100VI
Here’s a tool I created to help identify which buttons and dials are where — and what they’re called, because every brand has their own dialect and jargon.




