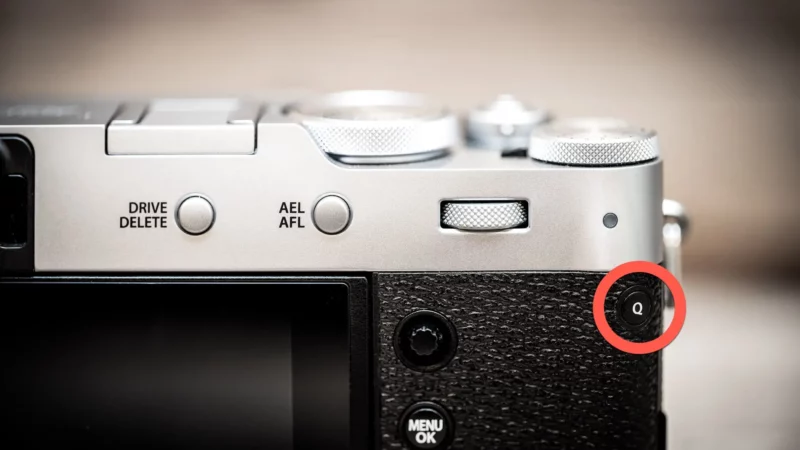
The Fujifilm X100VI has a number of quick shortcuts built in.
They’re not essential, as you can still access the same settings through the traditional menu system. But these shortcuts will take you to specific sections of the menu. That can be very handy if you’re out shooting and want to focus more on taking photos than scrolling through the menu system.
Some examples include a quick shortcut to take you straight to the format SD card screen, as well as another to take you directly to the screen for assigning custom controls to buttons and dials.
Both of those are useful, but I use them less often than the one I’m focusing on here. This is one I find particularly useful.
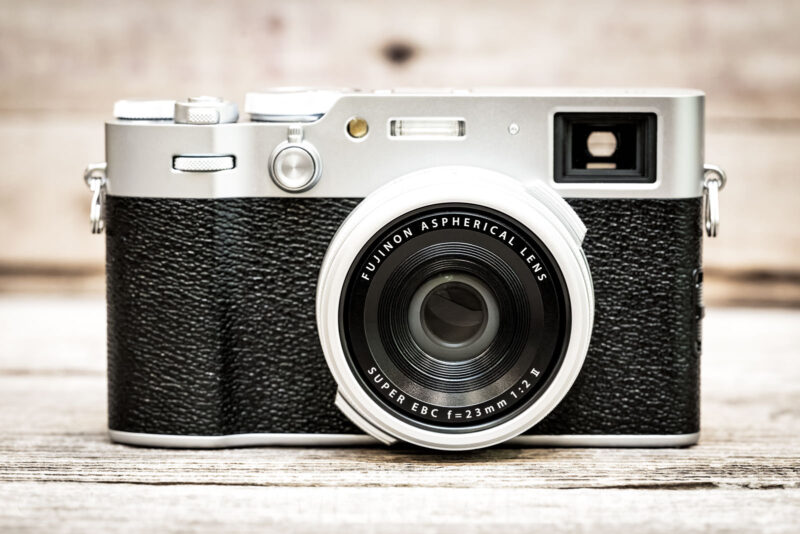
That’s because it provides a global overview of some of the key settings of the camera. So rather than accessing each setting individually, it provides a quick-access card that shows the current settings.
The Shortcut: “Q” Button (Rear Right Corner)
Standard Usage: Joystick to select, Rear Dial to change values
Visual Benefit: Transparent background shows real-time changes
How to Edit: LONG PRESS the Q Button to reassign slots
Customization Tip: Reduce slot count to 4, 8, or 12 for a cleaner interface
Access the Quick Menu
Fujifilm has included a dedicated button for this. It was on previous X100 models as well, but it’s a bit more hidden on the X100VI.
It’s that small Q button on the back corner. I’ve marked it with the red circle in the photos at the top of this page. Q, of course, stands for Quick Menu.
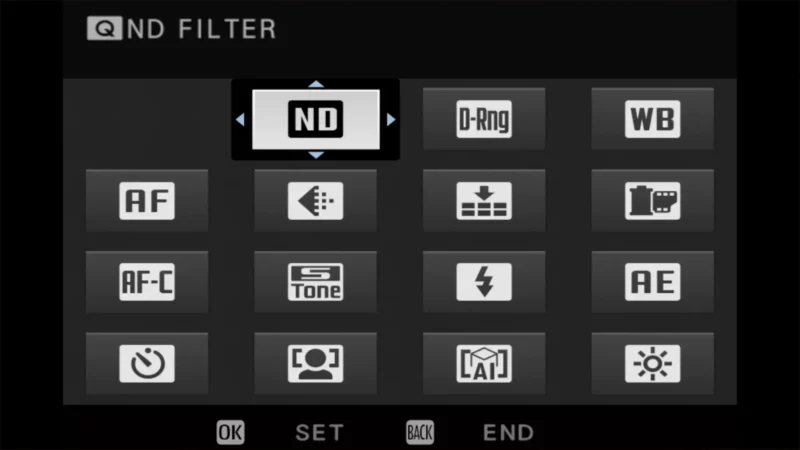
Just press it and you’ll get a panel that looks similar to this (depending on what mode and settings you’re using).

It’s useful just as a quick reference to see what settings you have set, but you can obviously change the settings as well. As you can see, by default, it includes many of the most important settings when shooting, things like autofocus mode, metering mode, file type, and so on.
You can use the small joystick on the back of the camera to move between the different slots.

Customize the Quick Menu
Not only does this screen provide a global overview of key settings on the camera, but you can customize it to your own shooting preferences. So you can reassign the on-screen buttons to the settings you want to be able to access most often.
To customize the layout, Press and Hold the Q Button for 2-3 seconds. This will open the ‘Edit/Save Quick Menu’ screen. From there, highlight the slot you want to change and press the MENU/OK button to select a new function from the list.


When a line item has a vertical gray bar next to it, as in the example above, that’s showing you the option that is currently assigned to that button.
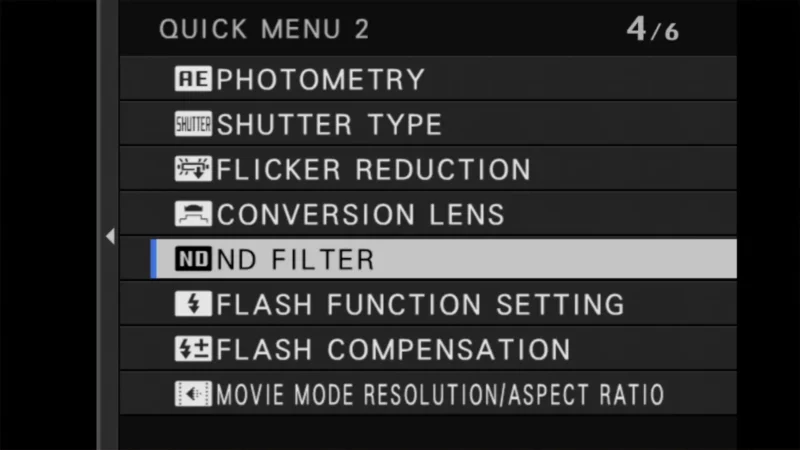
Things worth knowing
- By default, the Q Menu shows 16 slots (4×4), which can be overwhelming if you only need 5 or 6 things. But you can reduce that. While you are in the “Edit” screen (after long-pressing Q), you can choose to display 4, 8, 12, or 16 slots. Reducing this to 8 makes the menu much faster to read.
- On the X100VI, the Q Menu has a transparent background. That’s a small but actually pretty useful advantage over the main menu because you can see your image changes (like White Balance or Film Simulation) happen in real-time as you scroll the dial.
Explore the Fujifilm X100VI
Here’s a tool I created to help identify which buttons and dials are where — and what they’re called, because every brand has their own dialect and jargon.


