
Okay, so all your photos and videos are gone. Your computer says the card is empty.
Yes, I know that sinking feeling very well. Maybe you accidentally formatted the card. Maybe something else has gone wrong. But all isn’t necessarily lost. Depending on what’s gone wrong, there’s a reasonable chance you can recover your photos and videos.
There are quite a few options for software that can recover photos from a memory card. I’ve listed some of the best ones before, which you can find here. Most likely you’ve never looked into them before you really need them. Some of them can be quite expensive.
But before you hand over your money, one option that might be worth looking at is PhotoRec. It can look a little intimidating at first, and it doesn’t offer all the bells and whistles of some of the other options, but if you’re looking for reliable, thorough, and inexpensive, it can be a great option. It has been my go-to data recovery tool for years.
It’s not pretty, and it doesn’t have bells and whistles. But it’s rock-solid reliable.
Aside from being free, PhotoRec works on just about any operating system, including both Windows and Mac, along with all sorts of digital storage media like memory cards, thumb drives, and hard drives. 3 But it’s not the most user-friendly program out there.
It’s not actually a command-line app in that you don’t have to type in long strings of code to make anything happen. It walks you through the process, but it does it with text-only screens and menus. It doesn’t “prettify” things like the names of the memory cards or give you thumbnails to select individual images.
In this example, I’m focusing on using it to recover photos from a memory card, but it will also work on just about any other kind of file and on other types of storage media. I’m using a 32GB SanDisk Extreme Pro card that I’ve formatted in the camera to delete all the photos. If you try to see the photos in the camera or on the computer, it’ll say the card is completely empty.
I’m using the Mac version in the examples below, but the versions for the other operating systems work almost exactly the same. There will, however, be some differences in how the media selections are named — that is something that relates back to the operating system.
Installing PhotoRec on Mac (Intel & Apple Silicon)
In the past, you could just download a folder and run the file. On modern macOS, security permissions and System Integrity Protection (SIP) make that a headache. If you’re on a modern Mac — especially those with Apple Silicon (M1, M2, M3, or M4 chips) — the cleanest way to install it is via Homebrew.
- Open your Terminal (Cmd + Space, then type “Terminal”).
- If you have Homebrew installed, type:
brew install testdiskand hit Enter.1 - If you don’t use Homebrew, you can still download the direct Intel version. On an Apple Silicon Mac, this will run perfectly via Apple’s built-in Rosetta 2 translator (your Mac will prompt you to install Rosetta if you haven’t already). To prevent macOS Gatekeeper from blocking the download, you will likely need to right-click the
photorecfile and select Open from the menu rather than double-clicking it.
Run PhotoRec
Running PhotoRec is very easy. If you used the Homebrew method above, it is already in your system path.
Before you run the program, make sure to insert your memory card into the card reader. That will then make it available so that PhotoRec can see it.
To launch the program with the permissions it needs to actually “see” your hardware, type the following into Terminal and hit Enter:


sudo photorecYou’ll be prompted for your Mac’s login password. Type it in (you won’t see any characters appearing as you type) and hit Enter.
You’ll then get a page that looks like this.
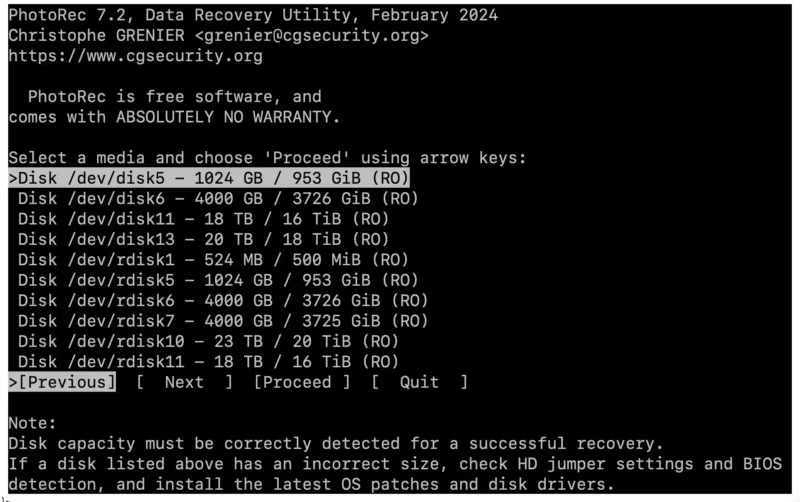
This is the page where you choose which memory card (or other device) to work on.
Use the up and down arrow keys to select the media you want to recover from.
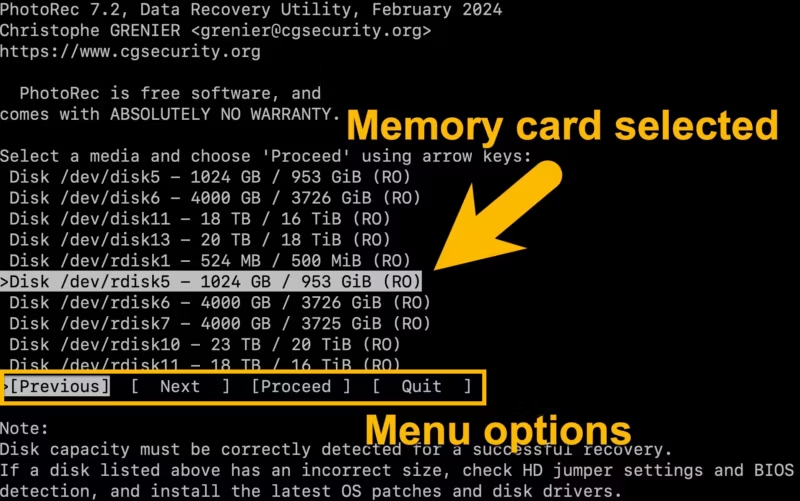
Pro Tip: On a Mac, look for the device labeled
/dev/rdisk. The “r” stands for “raw,” and it is significantly faster for data recovery than the standard disk interface. If you’re unsure which is which, look at the size. If you’re scanning a 32GB card, look for the entry that matches that capacity.
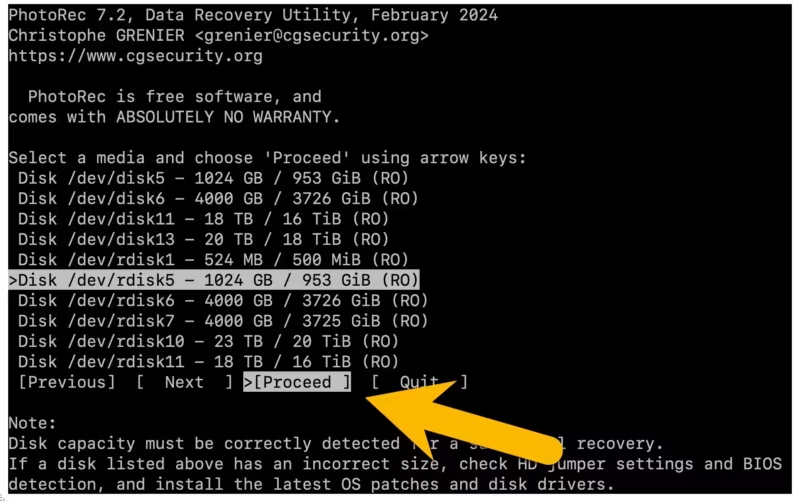
Once you’ve highlighted the media you want, use the left and right arrows to move through the menu at the bottom until Proceed is highlighted. Hit Enter.
Selection & file options
You’ll move to a screen that isolates the media you’re working with. You should see the volume name here, which helps confirm that you’ve selected the correct one. You also get information about the sectors and the file system. Even on modern Macs, if you’re scanning an SD card, it will usually default to [Intel] or [EFI GPT]. Stick with the default it suggests.
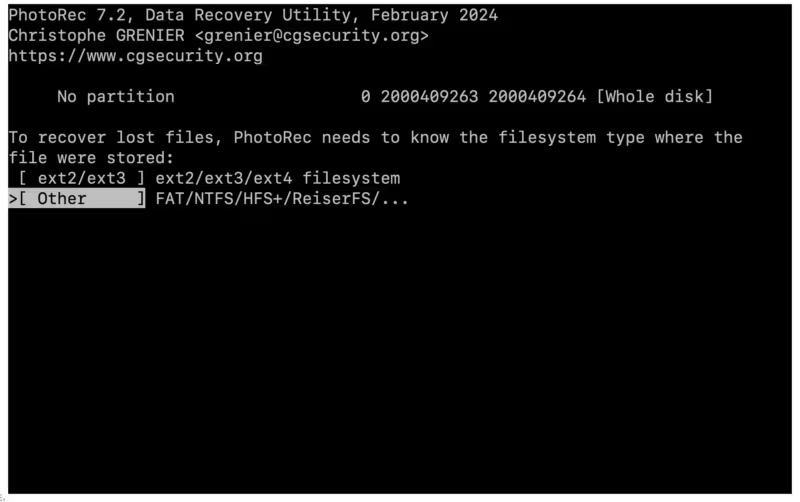
You can, if you like, just hit Enter here and proceed with searching. By default, PhotoRec will try to recover every non-corrupted file it can find. If you want some further control over how the operation is done, move across to Options or File Opt.
Recovery file options
The File Opt (File Options) menu is where you can save a lot of time. Some other photo recovery software gives you thumbnail previews and you can select to restore individual photos. PhotoRec doesn’t have that option. You can either recover everything or everything of selected file types.
PhotoRec supports over 400 file types. If you want to be comprehensive, leave them all selected. But say you’re only interested in recovering your Nikon’s RAW files (.NEF) or your Canon’s RAW files (.CR2/CR3). Press ‘s’ to deselect all the file types. Then use the down arrow to scroll down to find the filetype you’re after.
Note for RAW shooters: You’re not going to find NEF or CR2 as separate entries. What you want is tif. That’s used to cover many RAW formats such as PEF, NEF, DCR, SR2, and CR2 because those RAW files are technically structured as TIFF files.2
Scroll down to TIF, hit the space bar to select it, and hit Enter to quit back to the main screen.
Run the search
Back at the main screen, use the left-right arrows to select Search and hit Enter.
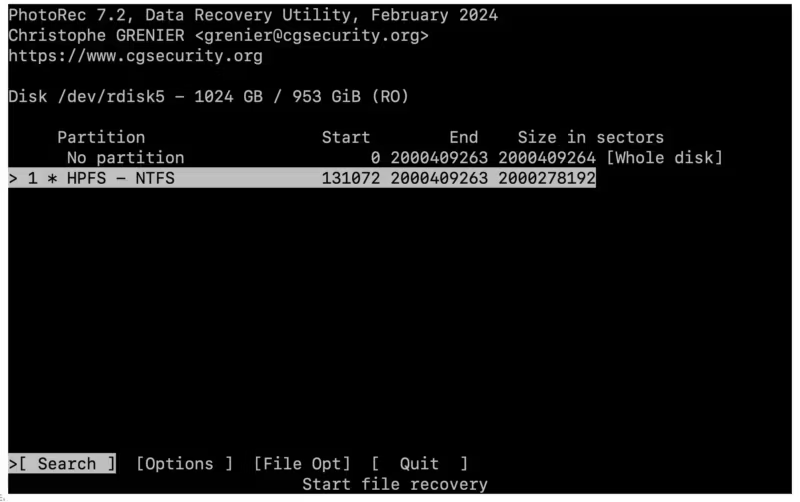
- File System: For almost all memory cards, choose [Other] (FAT/NTFS/exFAT).
- Scan Type: Choose [Free] to focus only on the “free” space where deleted files live. Choose [Whole] if the card is corrupted and won’t mount.
- Destination: Choose where to save the recovered files. Saving files back onto the same disk you are scanning will overwrite the data you are trying to rescue, so you’ll want to select a folder on your internal drive.
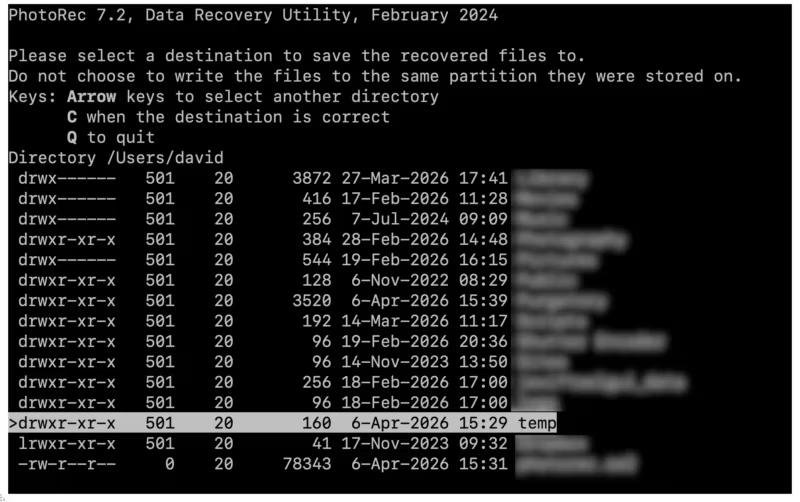
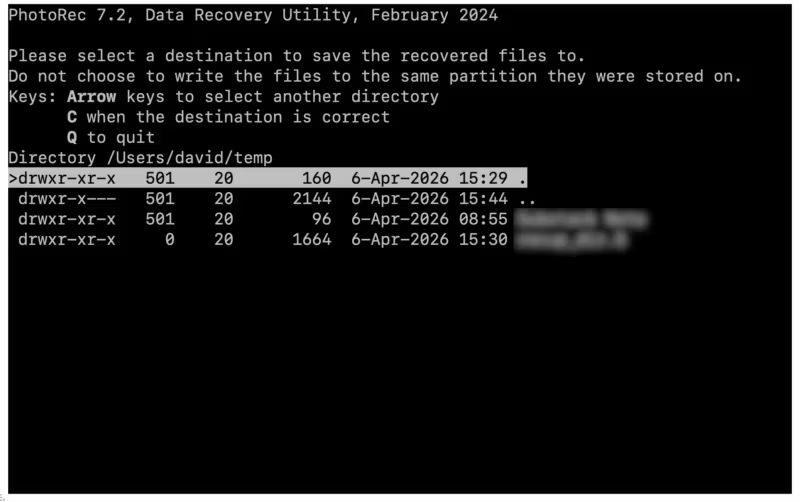
Navigation tip: Because there is no standard mouse cursor, navigating to a folder like your Desktop can be confusing. To move up a folder level, select the line with two dots (
..) and hit Enter. Keep doing this until you see theUsersfolder, select your username, and then selectDesktop.
- Press ‘C’ (capital C) when you are in the correct folder to begin.
It’s now a matter of sitting back and letting PhotoRec do its thing. It’ll give you a running update of how many files it’s recovered and how long it estimates it will take. The time depends on the size and speed of the card and your reader.
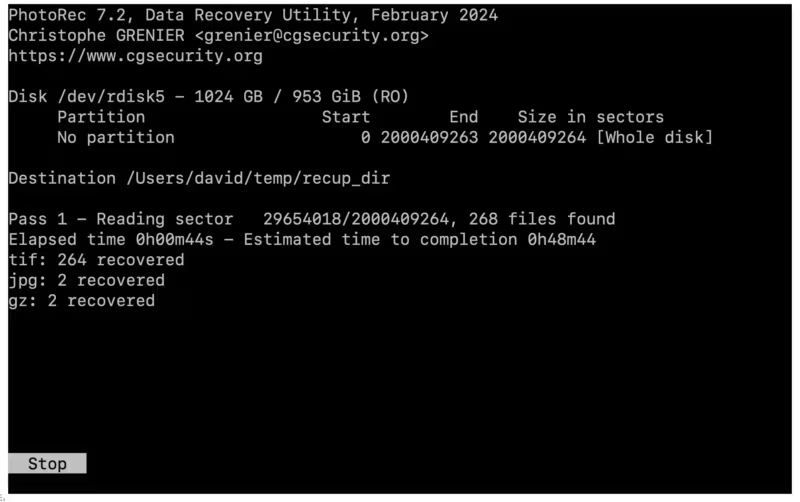
Your files are being saved in a subfolder called recup_dir.1, and you can see them being added in real time. Once finished, you’ll get a brief status report. To quit PhotoRec, hit Enter to go back to the original screen, select Quit, and close the Terminal.
While it can look a little intimidating at first, PhotoRec is actually very easy to use once you get used to the way to navigate through it. It has saved my bacon on more than a few cases and is one of the most reliable tools I keep in my workflow.
RELATED:
- How to Recover Photos from a Memory Card
- SD Card Speed Tests
- Quick Format vs Full Format: Which should you use?
Notes & References:
- PhotoRec is bundled within the “testdisk” package in the Homebrew repository. [↩︎]
- PhotoRec File Formats. [↩︎]
- For hard drives, TestDisk by the same developer is often a better option for recovering entire partitions. [↩︎]
More in this series — memory card recovery: What to do when you’ve lost photos (start here) · Free recovery software compared · PhotoRec on Mac, step by step (this post) · Disk Drill walkthrough · Stellar Photo Recovery walkthrough · SD Card Formatter · Quick vs full format


