
You can’t shoot GoPro RAW (.GPR) with the Linear lens — on every model from the HERO6 Black through the HERO13 Black, RAW is Wide-only, and even the HERO5 Black, which allows Medium and Narrow with RAW, excludes Linear. The workaround is to shoot RAW in Wide and straighten it in Lightroom with the Lens Corrections profile, dialing the Distortion slider to taste. The steps are below.
It isn’t pixel-identical to the camera’s Linear mode (Adobe’s profile and GoPro’s in-camera correction are different math), and correcting distortion crops the edges, but it gets you a rectilinear RAW. For everything else about the format — which models and modes allow RAW, why, and what opens the files — see GoPro RAW (.GPR) files explained, and JPG vs RAW on GoPros for whether to shoot RAW in the first place.
If you want to shoot in GoPro’s RAW photo format (.gpr), you’re limited to shooting in the Wide field of view mode. The Linear field of view, which digitally corrects for the fisheye distortion of the GoPro lens, is only available when you shoot in JPG.
But there are good reasons that many people, myself included, much prefer to shoot in the RAW file format that many GoPros offer, such as the HERO10 and HERO9 Black.
So here’s a workaround that lets you apply linear FOV, or something very close to it, to GoPro’s RAW photo format.
This method uses Lightroom Classic’s Lens Corrections feature.
It’s pretty straightforward to do, but here’s a quick rundown.
Correcting GoPro lens distortion in Lightroom
Open the GPR file in Lightroom’s Develop module, as you normally would. In the set of panels to the right, scroll down to the Lens Corrections panel. Make sure that the Profile tab is checked at the top.
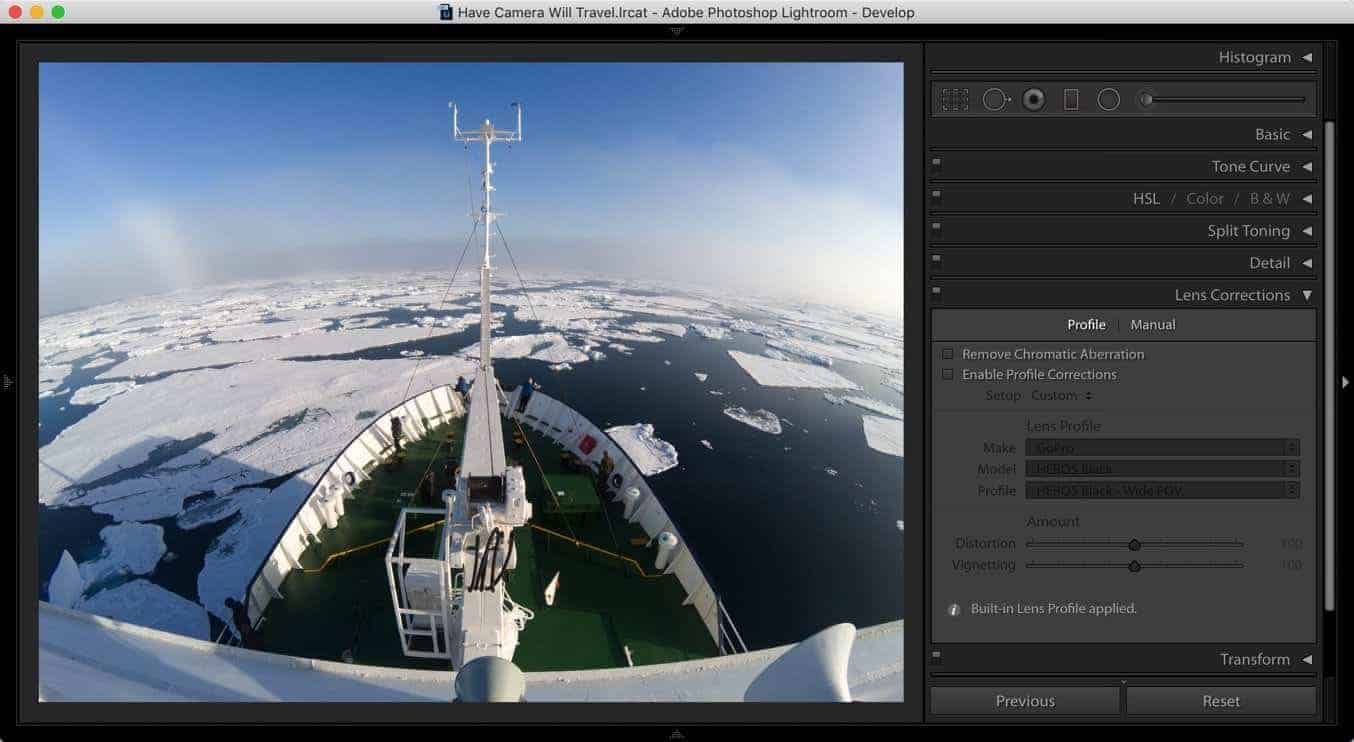
Check the box next to Enable Profile Corrections. So long as you’re using a fairly recent version of Lightroom, it should have GoPro lens profiles built-in and detect them automatically.
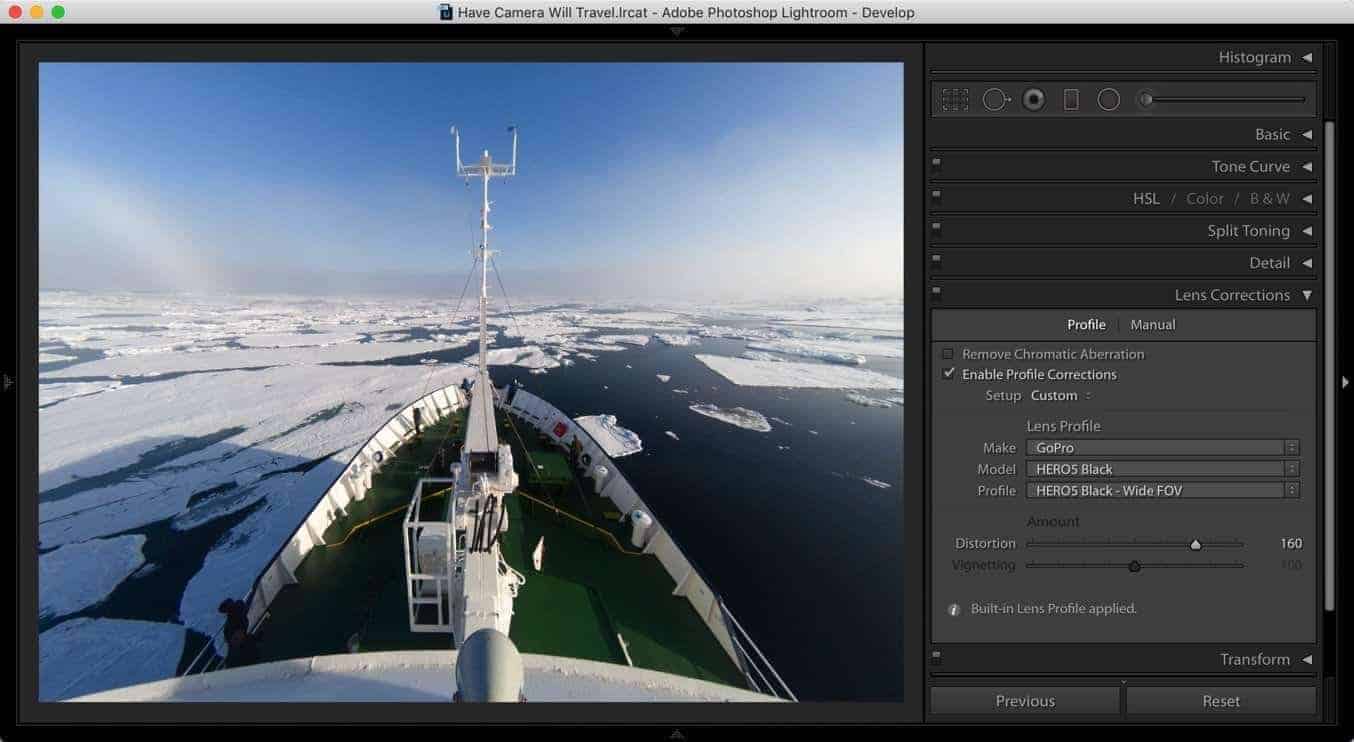
The adjustments to the FOV are made with the Distortion slider. By default, it will start at 100, which results in a field of view similar to GoPro’s built-in Linear FOV. You can see in this example that the horizon has been mostly, but not completely straightened, and some of the image has been cropped from each side.

Have Camera Will Travel Newsletter
Practical field notes, hands-on gear tests, and the fun of exploring the world with a camera in hand.

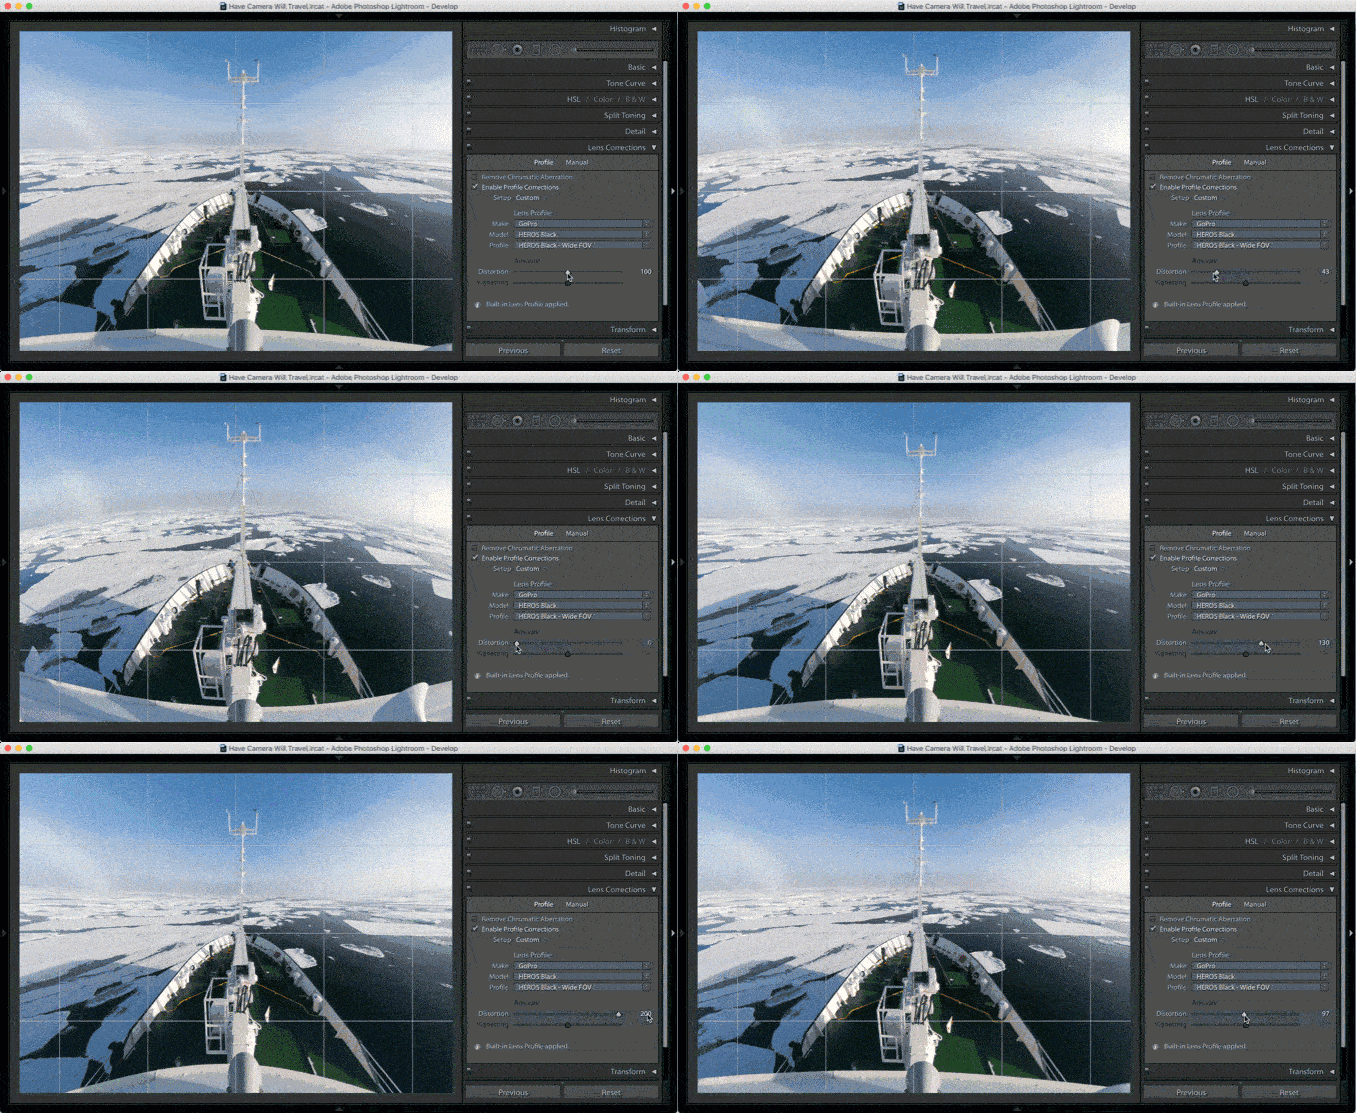
Even though it’s not perfectly identical, there’s a big benefit to doing it here rather than using GoPro’s own version: you can have control over how aggressively to apply the distortion correction. Simply drag the slider left for less correction or right for more correction. Like this:
Things worth knowing
The distortion correction algorithms that Lightroom uses are similar but not identical to the in-camera algorithms of GoPro’s Linear FOV. But they’re similar enough for most uses, and the added flexibility is a bonus.
This method obviously relies on you using Lightroom Classic. Some other RAW processing apps have similar functionality.
If you need to apply the same distortion correction to multiple photos, perhaps shot in a sequence, you can easily do that with Lightroom’s Sync Settings function to apply the settings to multiple images in one hit.


