There are several options for recovering photos from a memory card, and I’ve previously covered several of them, both free and paid.
Whether you accidentally deleted photos on the card, formatted the card in the camera, they’ve just gone missing, or there’s some error with the memory card so that it has become corrupted, there’s a reasonable chance that something can be recovered.
That’s not always true, of course. The card can be so damaged that all the data has become corrupted. Or you might have kept shooting and writing over the old files. But it’s definitely worth trying, and there’s a good chance of being able to recover at least some of the data.
I originally posted this guide on Stellar Photo Recovery several years ago, and it has been my go-to recommendation as a user-friendly option for photo data recovery for some time. But there have been several upgrades since then, along with some policy changes. So it was time to take a fresh look and retest it.
The short version of this retest: on a card formatted in-camera, the current version of Stellar Photo Recovery still finds the files and lists them. And the paid version still works well. But there have been some changes to the free trial version that greatly reduce its value as a scan-first choice. In the trial version, previews are now capped at 10 MB, so most RAW files come up as a filename and a file size with nothing to look at, and in my test the free ten-file recovery allowance was used up by an attempt that never delivered a file (possibly a bug). The details, and how that compares with Disk Drill and PhotoRec, two of the other big players — although both very different — are further down.
Free vs paid options
There are free options, and there are paid options. Unfortunately, while free options like PhotoRec can be very effective indeed, they also tend not to be very user-friendly.
So if you want user-friendly, you’ll probably be looking at one of the paid options.
Many of these have a free version that lets you scan the card to see what can be recovered before you pay anything — though as you’ll see below, how much you can actually see in Stellar’s free version has been scaled back.
And some higher-end memory cards also come with an included license for photo recovery software.
Here I’m focusing on one of the most popular and user-friendly options: Stellar Photo Recovery.
It’s possible that it looks familiar to you even if you haven’t used it before. That’s because it’s the app that Lexar includes with some of their higher-end cards. They just put the Lexar logo on it.
There are three flavors of Stellar Photo Recovery app available for each of the Windows and Mac versions: Free, Standard, and Premium.
You can find a detailed comparison table and pricing information here, but the gist is that all of them recover photo and video files. The core difference between the Standard and Premium versions are that while both will recover deleted data from your memory cards, the Premium version can also repair corrupted photos and videos (your mileage might vary on that, depending on the nature of the corruption).
As of this update (version 12.7, August 2026), licenses run $49.99 for Standard and $69.99 for Premium (both discounted from higher list prices; check the license term at checkout).
You’ll also see a Free version listed on that page. Its functionality has been scaled back quite a bit; more on that below.
Stellar Photo Recovery basics
The gist of how it works is pretty straightforward:
- Insert your memory card.
- Run a scan to see what’s recoverable.
- Recover the deleted files.
1 and 2 will run on the Free version. For 3, you’ll need a paid license.
Once you start a new recovery operation, it’ll scan for the various types of storage media you have connected, including memory cards, USB sticks, and hard drives. In this example, I’m using an SD card that has been formatted in-camera. When I try to look at the photos on the camera or on my computer, the cards are showing up as blank. So they’ve been deleted in the camera.
It’s worth being clear about what the camera actually did to the card, because the wording scares people more than it should.
A standard in-camera format doesn’t scrub the photos off the flash — it writes a fresh file system and clears the index that points to your files, and the image data itself sits there untouched until something new is written over it. It’s what’s sometimes known as a quick format.
That’s why a signature scan can still find everything a card held before it was formatted. It’s also why the single most useful thing you can do is stop using the card the moment you realize files are missing.
Some cameras also offer a more robust formatting option that’s sometimes known as a full format. That’s a more secure process that is specifically designed to make the data unrecoverable (and also repair some issues with the memory card storage system). If you’ve used that option, your chances of recovering data through standard methods are negligible. It’s one more reason to use quick format as your standard routine and reserve the full format option for infrequent use only when it’s needed.
Earlier versions had a feature I liked a lot: a Create Image function that made an exact backup of the problem media before you started, so the recovery worked from a copy rather than hammering a possibly failing card. That feature is no longer in the current Mac version I tested — the app now goes straight to scanning the card itself. (Stellar’s own support pages still describe it, but I couldn’t find it anywhere in the Mac app.) If working from a backup image matters to you — and with a card that’s acting up, it should — Disk Drill still includes a byte-to-byte backup tool that does exactly this.
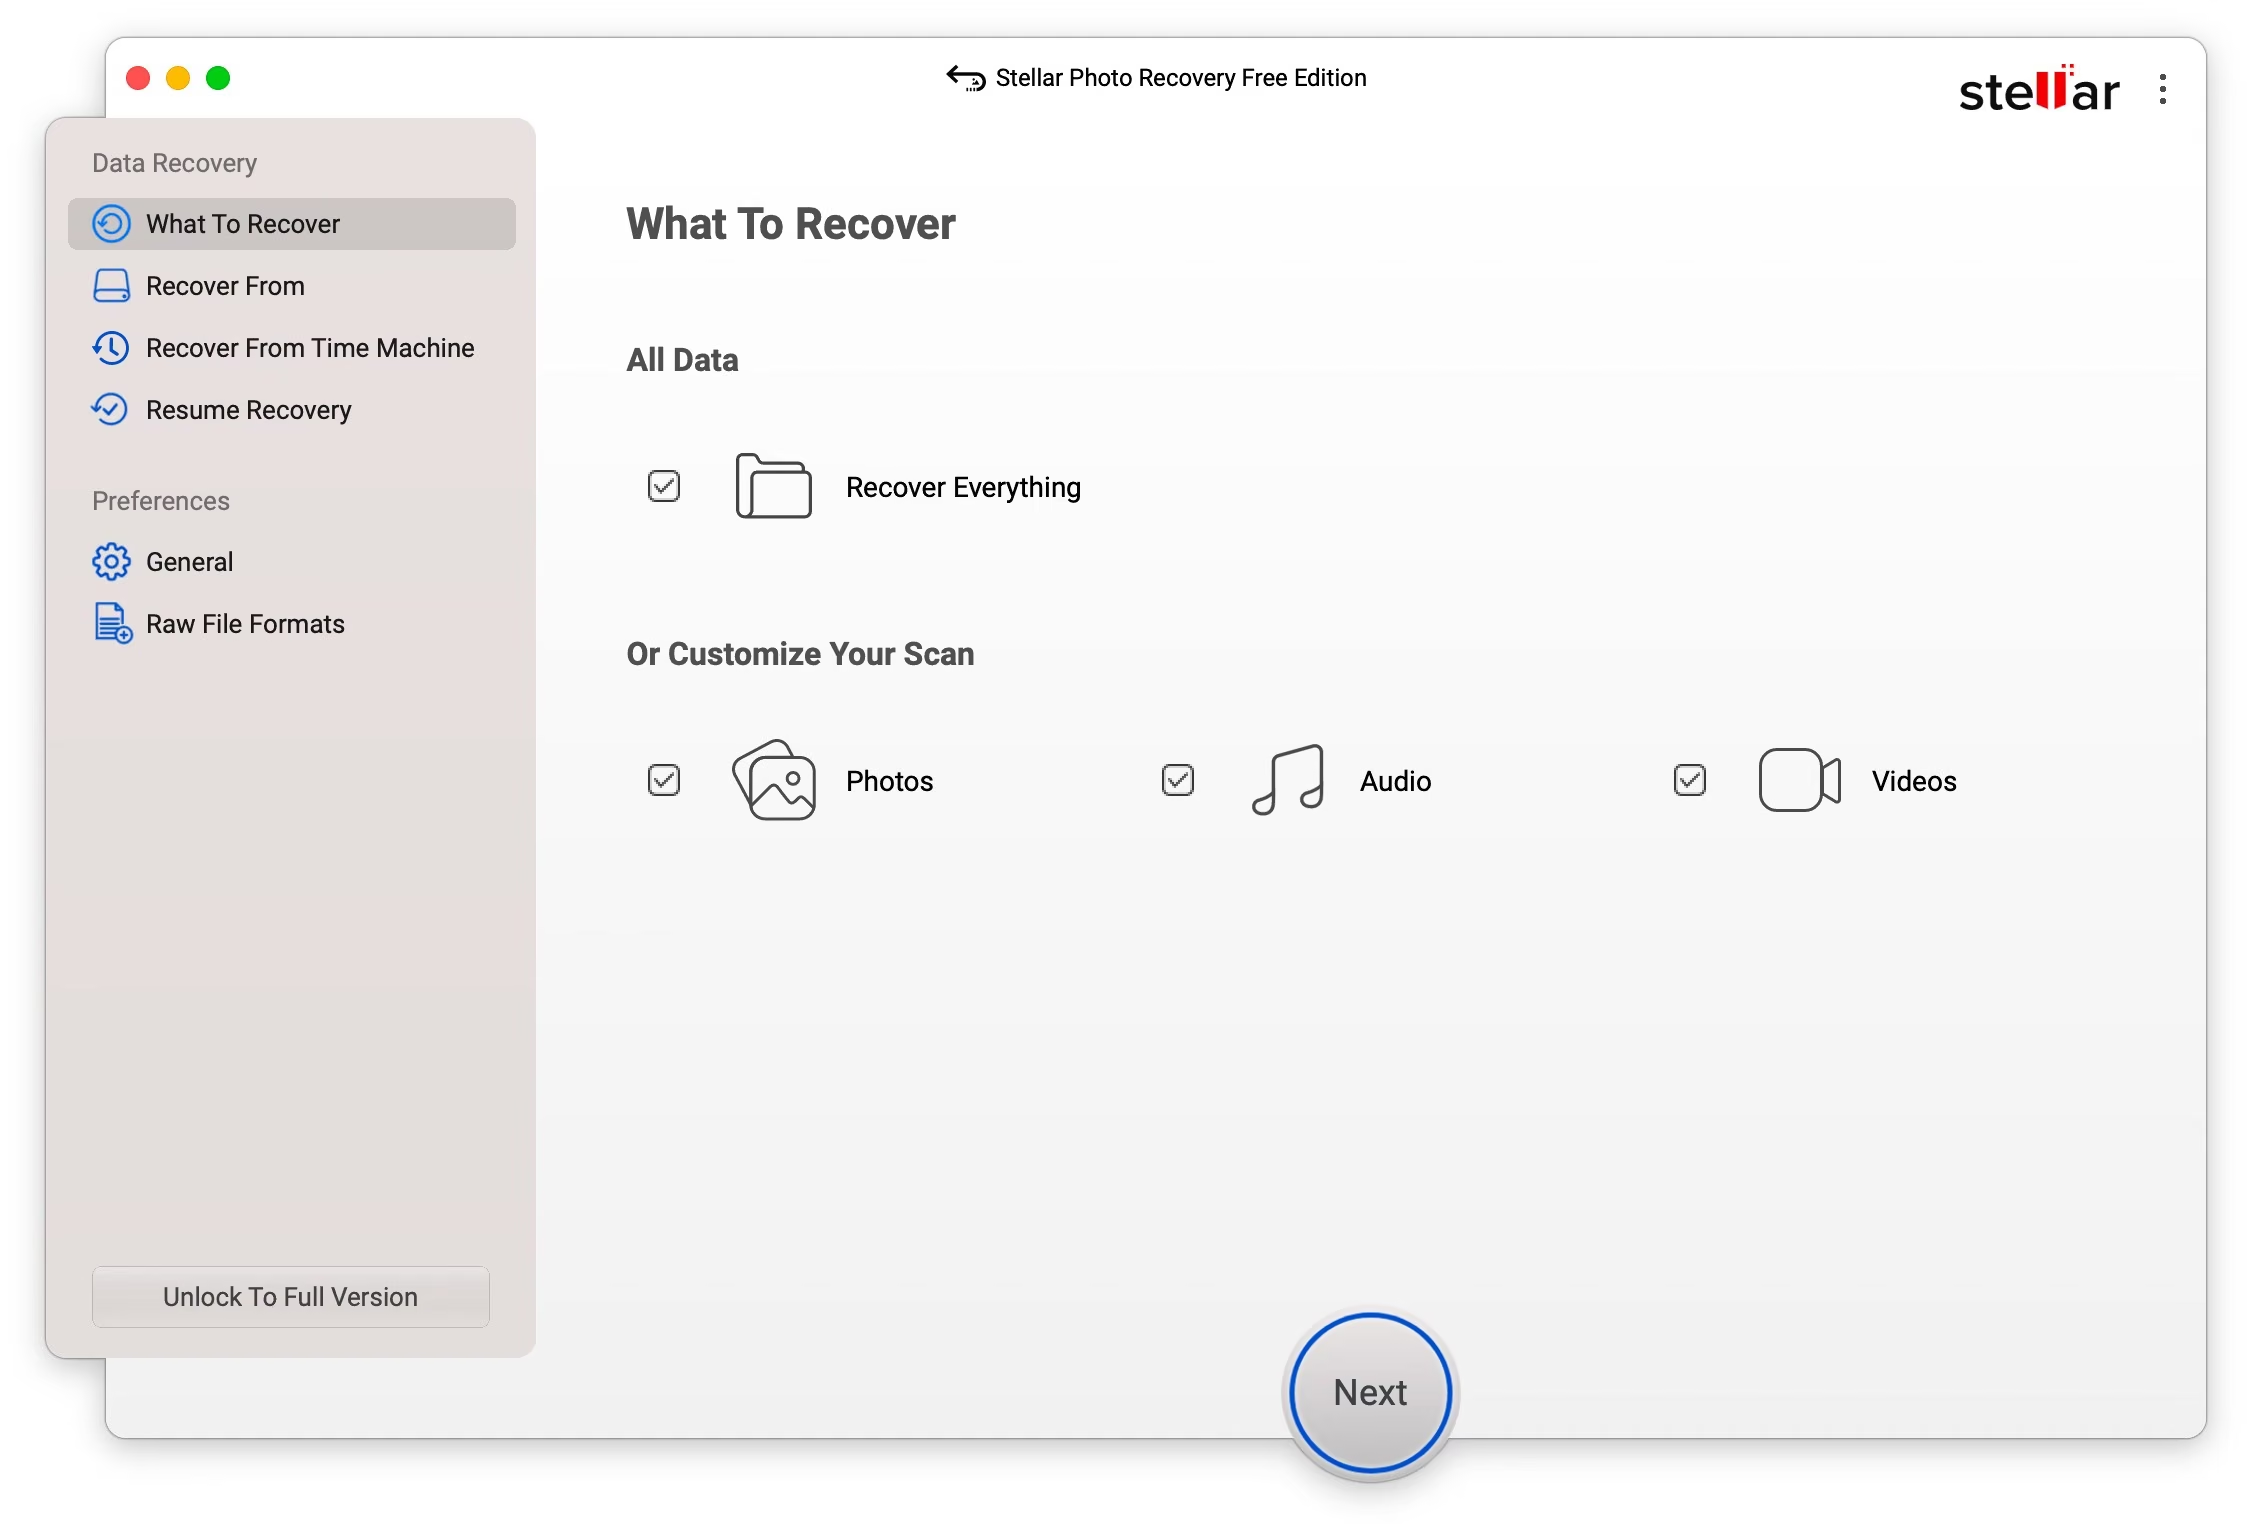
When you first fire up Stellar Photo Recovery, you get a choice of media formats you’re trying to recover. If in doubt, you can just leave all of them active. You can narrow it to just photos to declutter the results; leaving everything checked is fine too, which is what I did here.
You do have fine-tuned control over the specific file extensions to look for — just RAW files, for example, or just JPGs — but for now, I’ll just do a basic search of everything. (See the Advanced Settings section below regarding narrowing the search to specific file formats.)
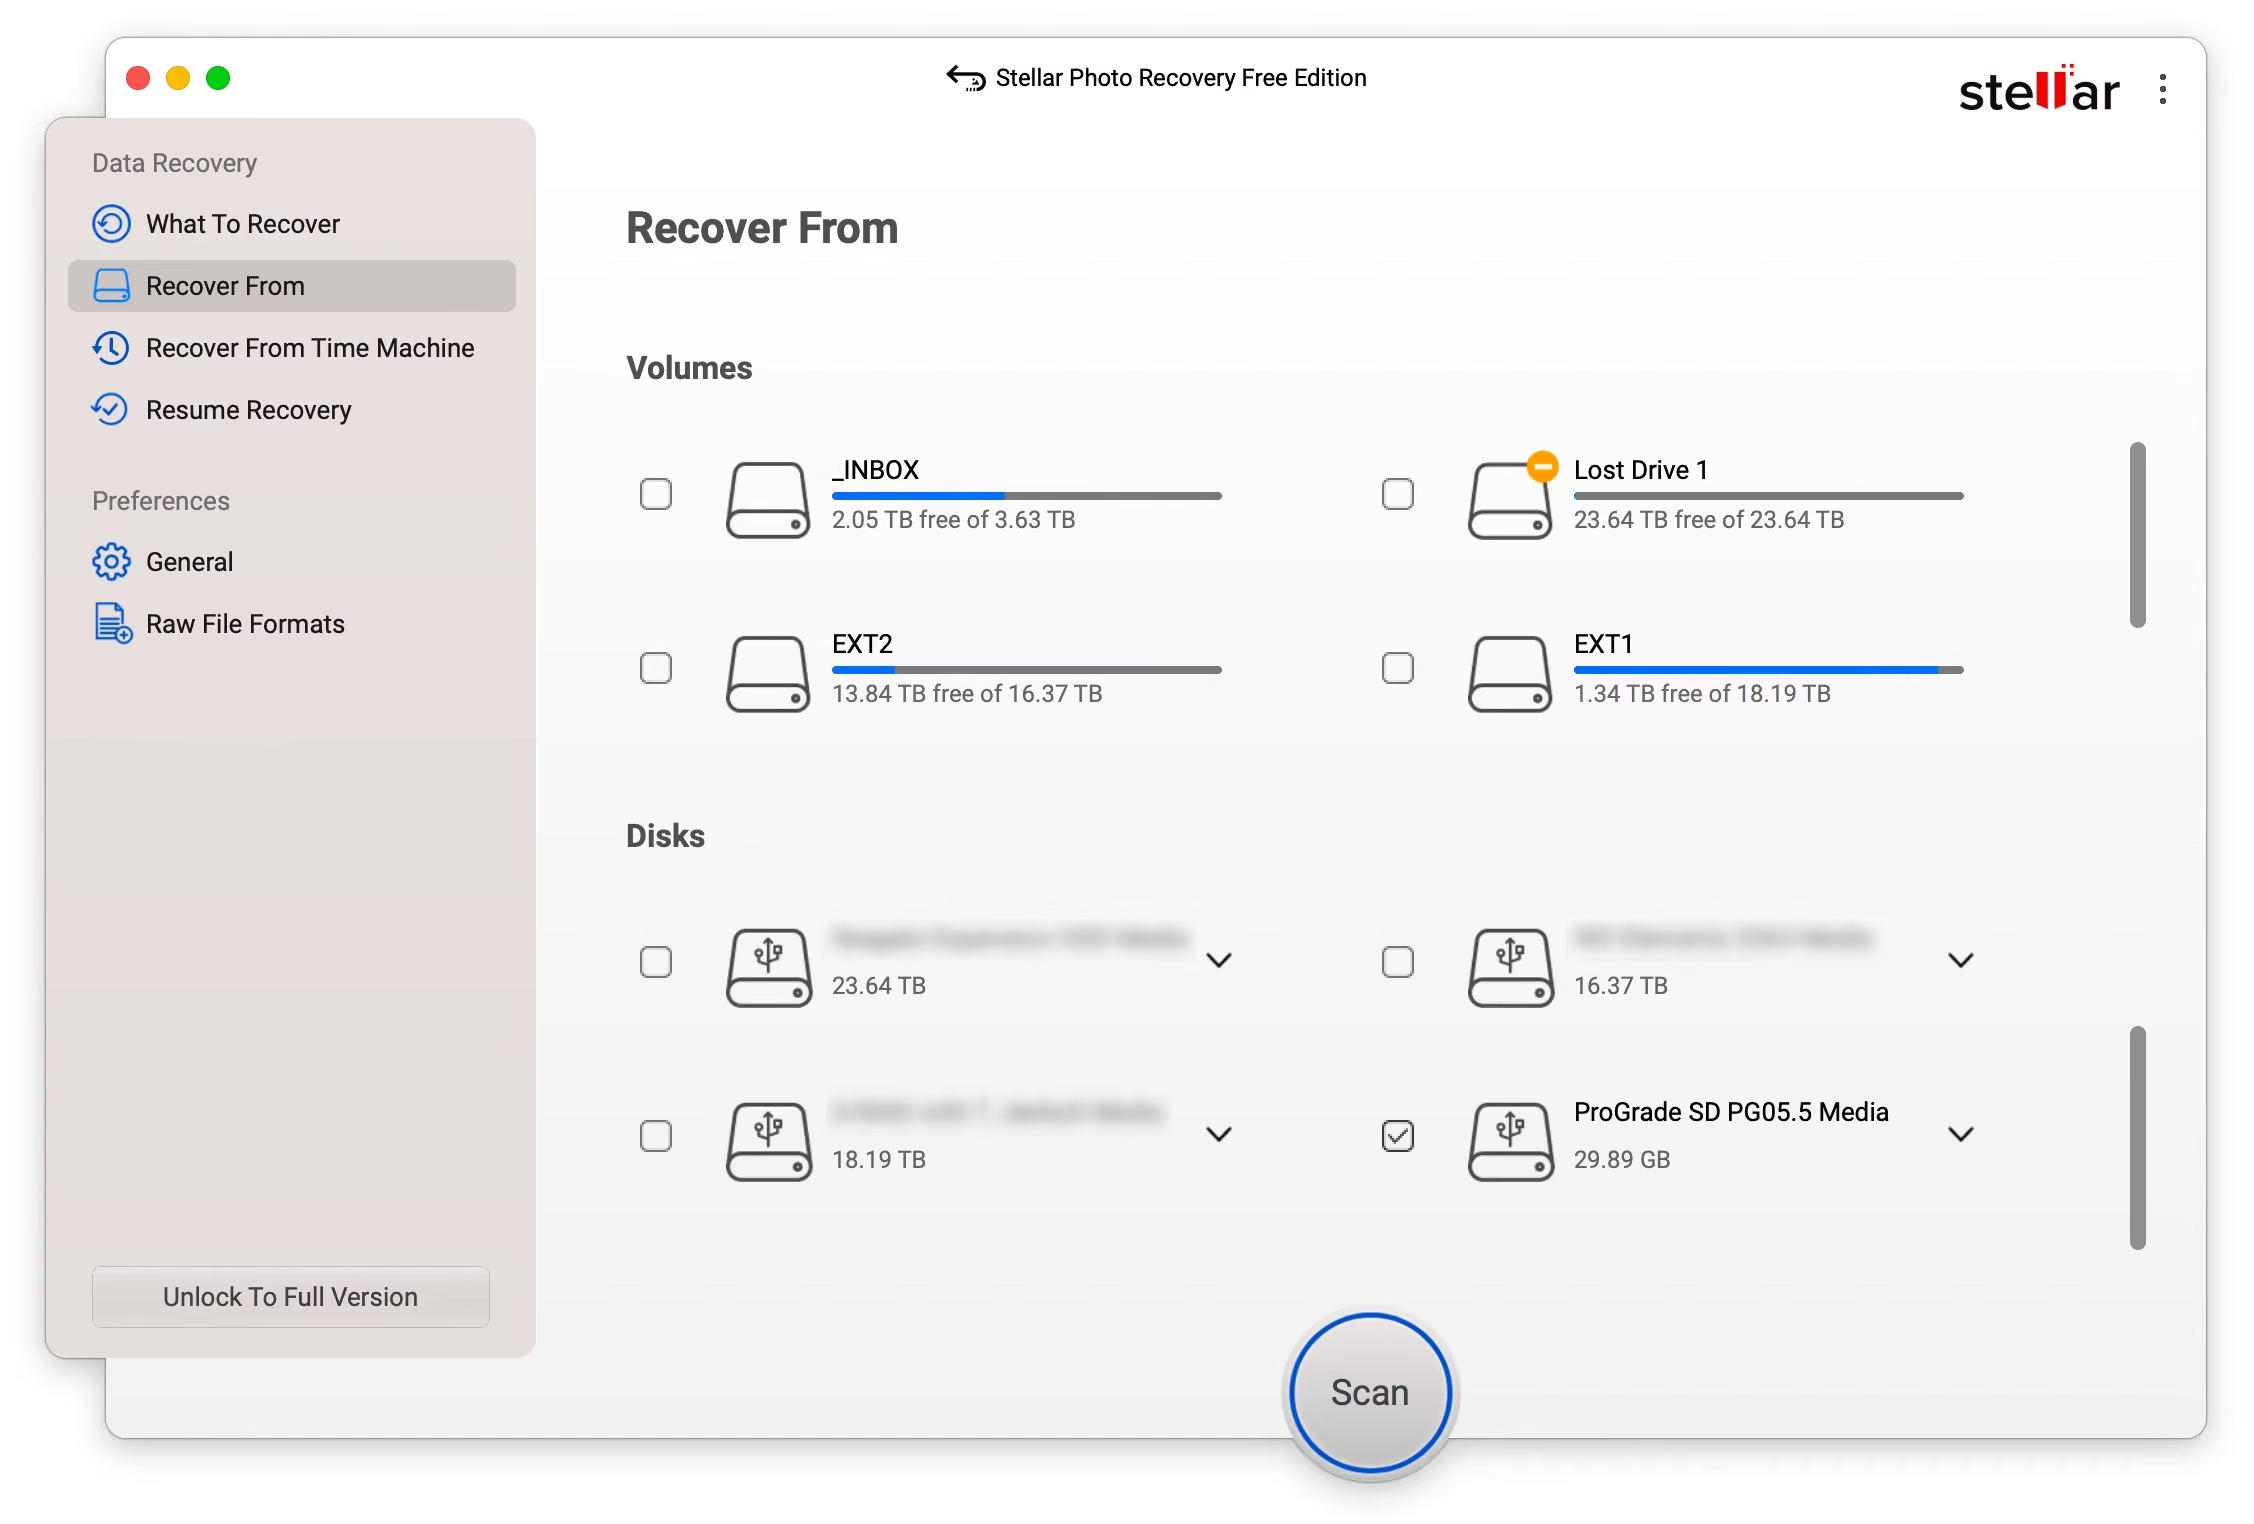
You then select the drive you want to scan. In this case, I’m choosing an SD card.
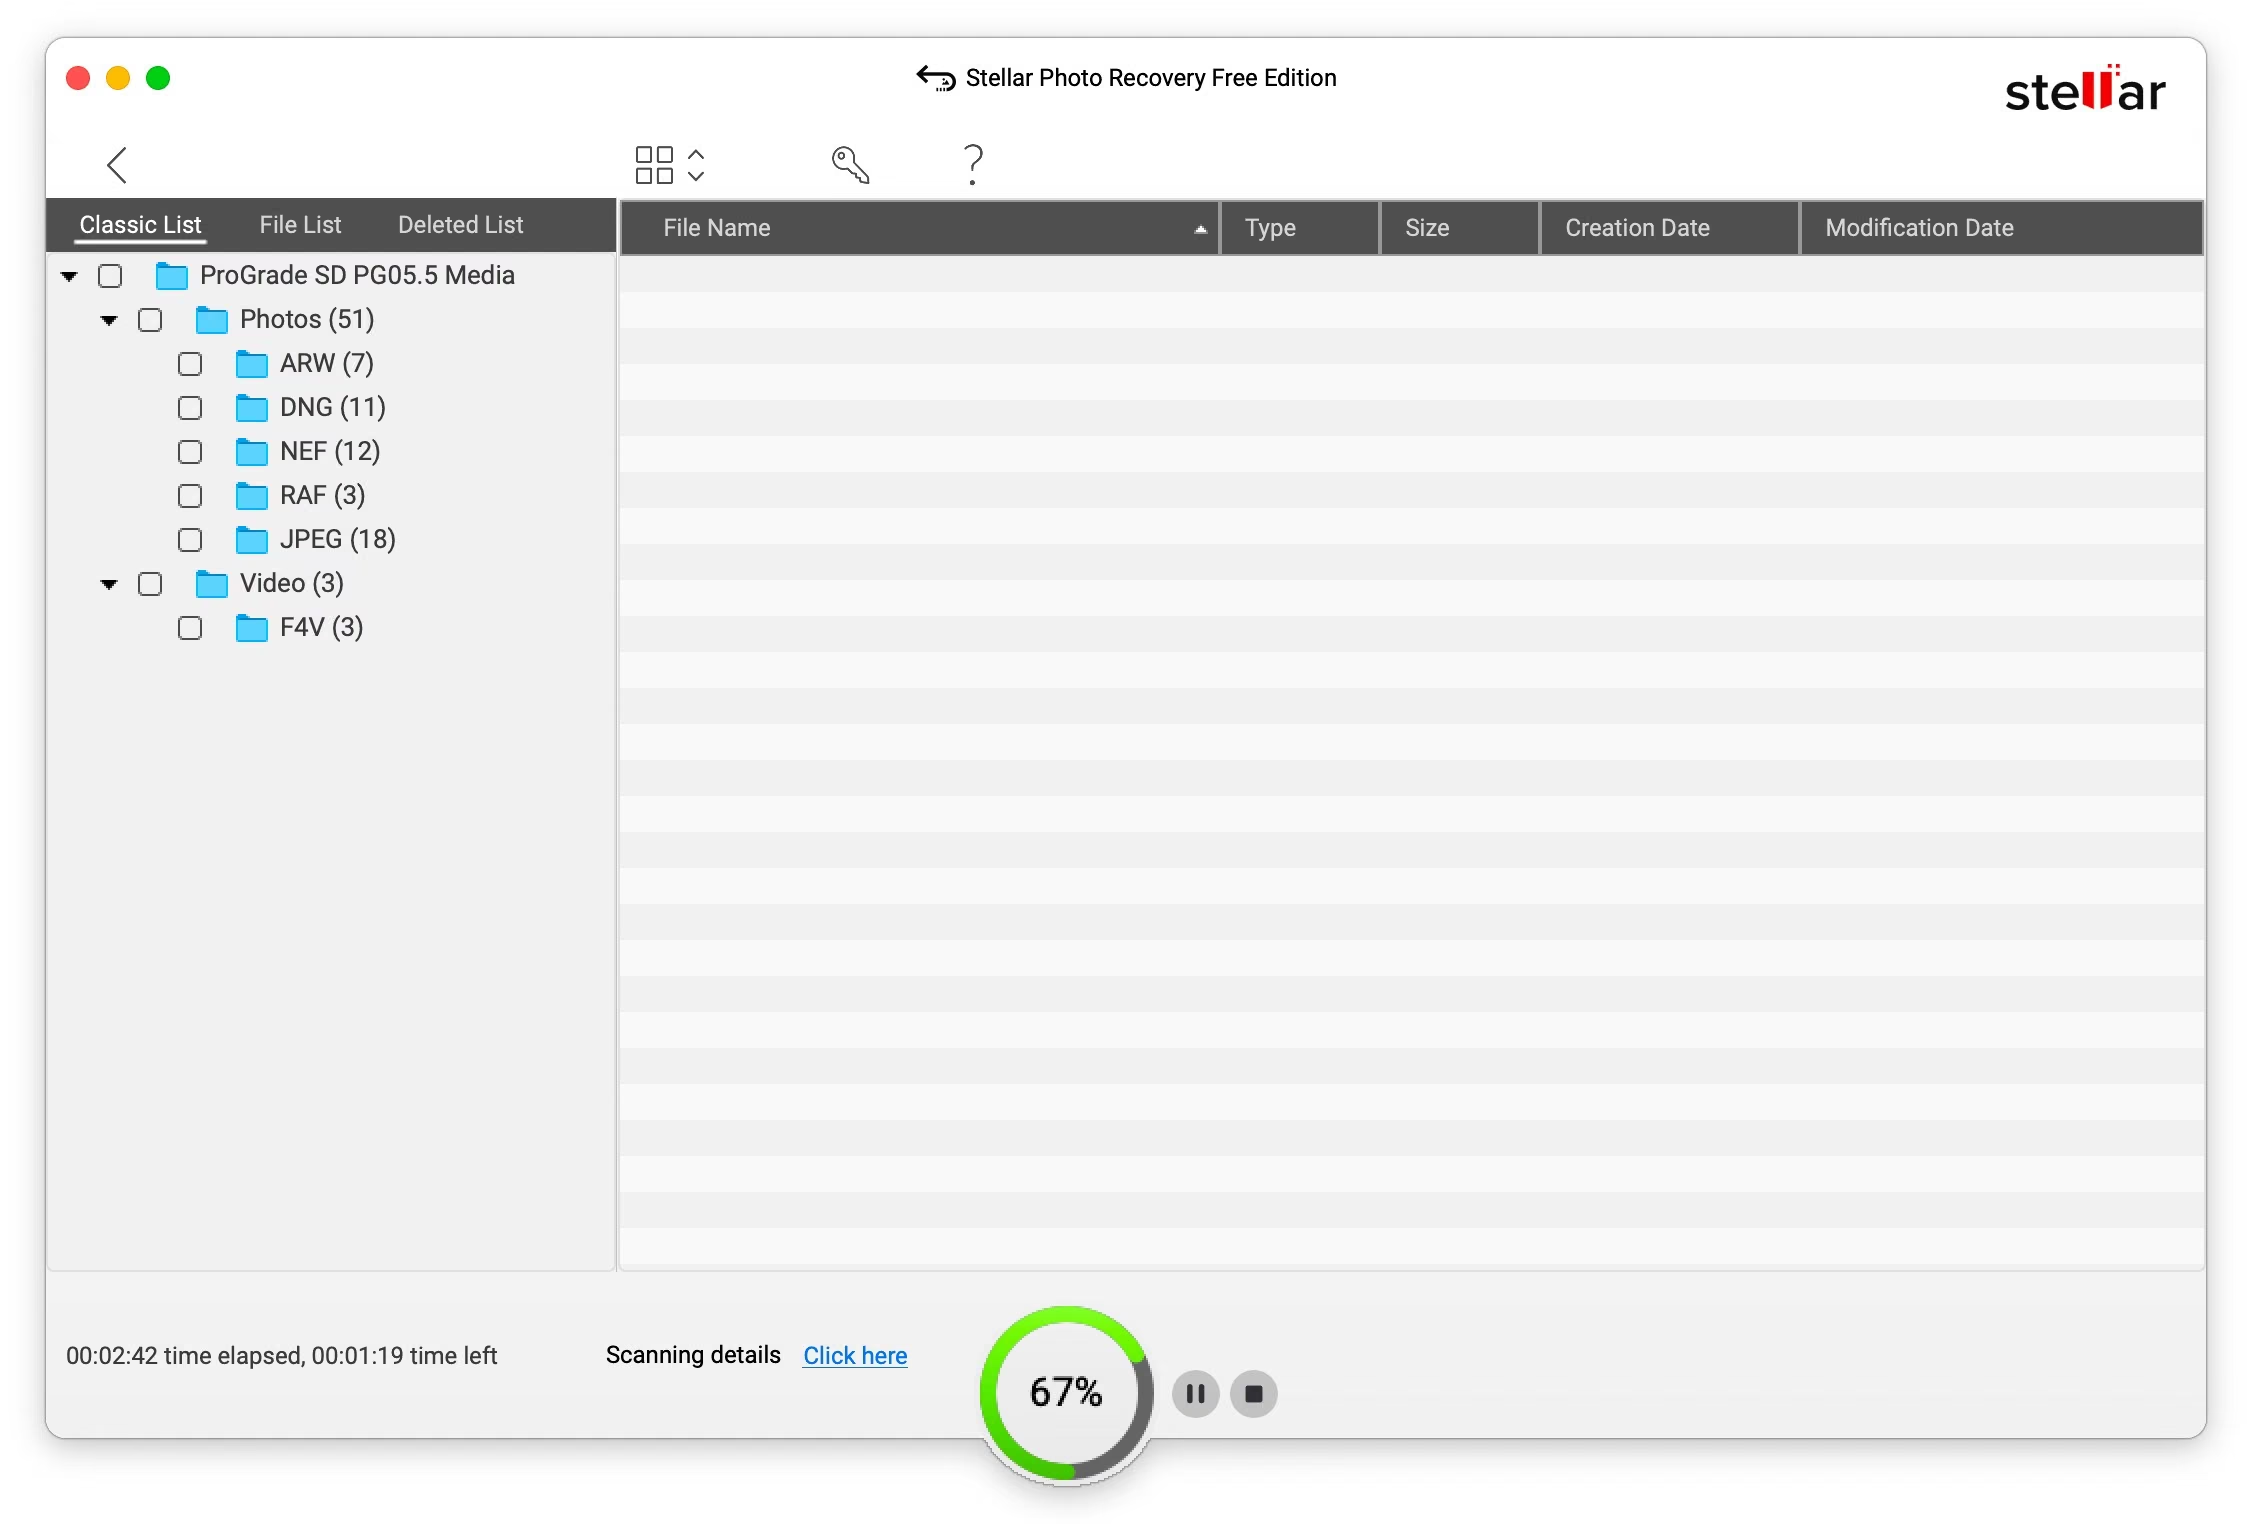
It’ll run a series of scans, with clear progress indicators for each.
And tell you once it’s done.
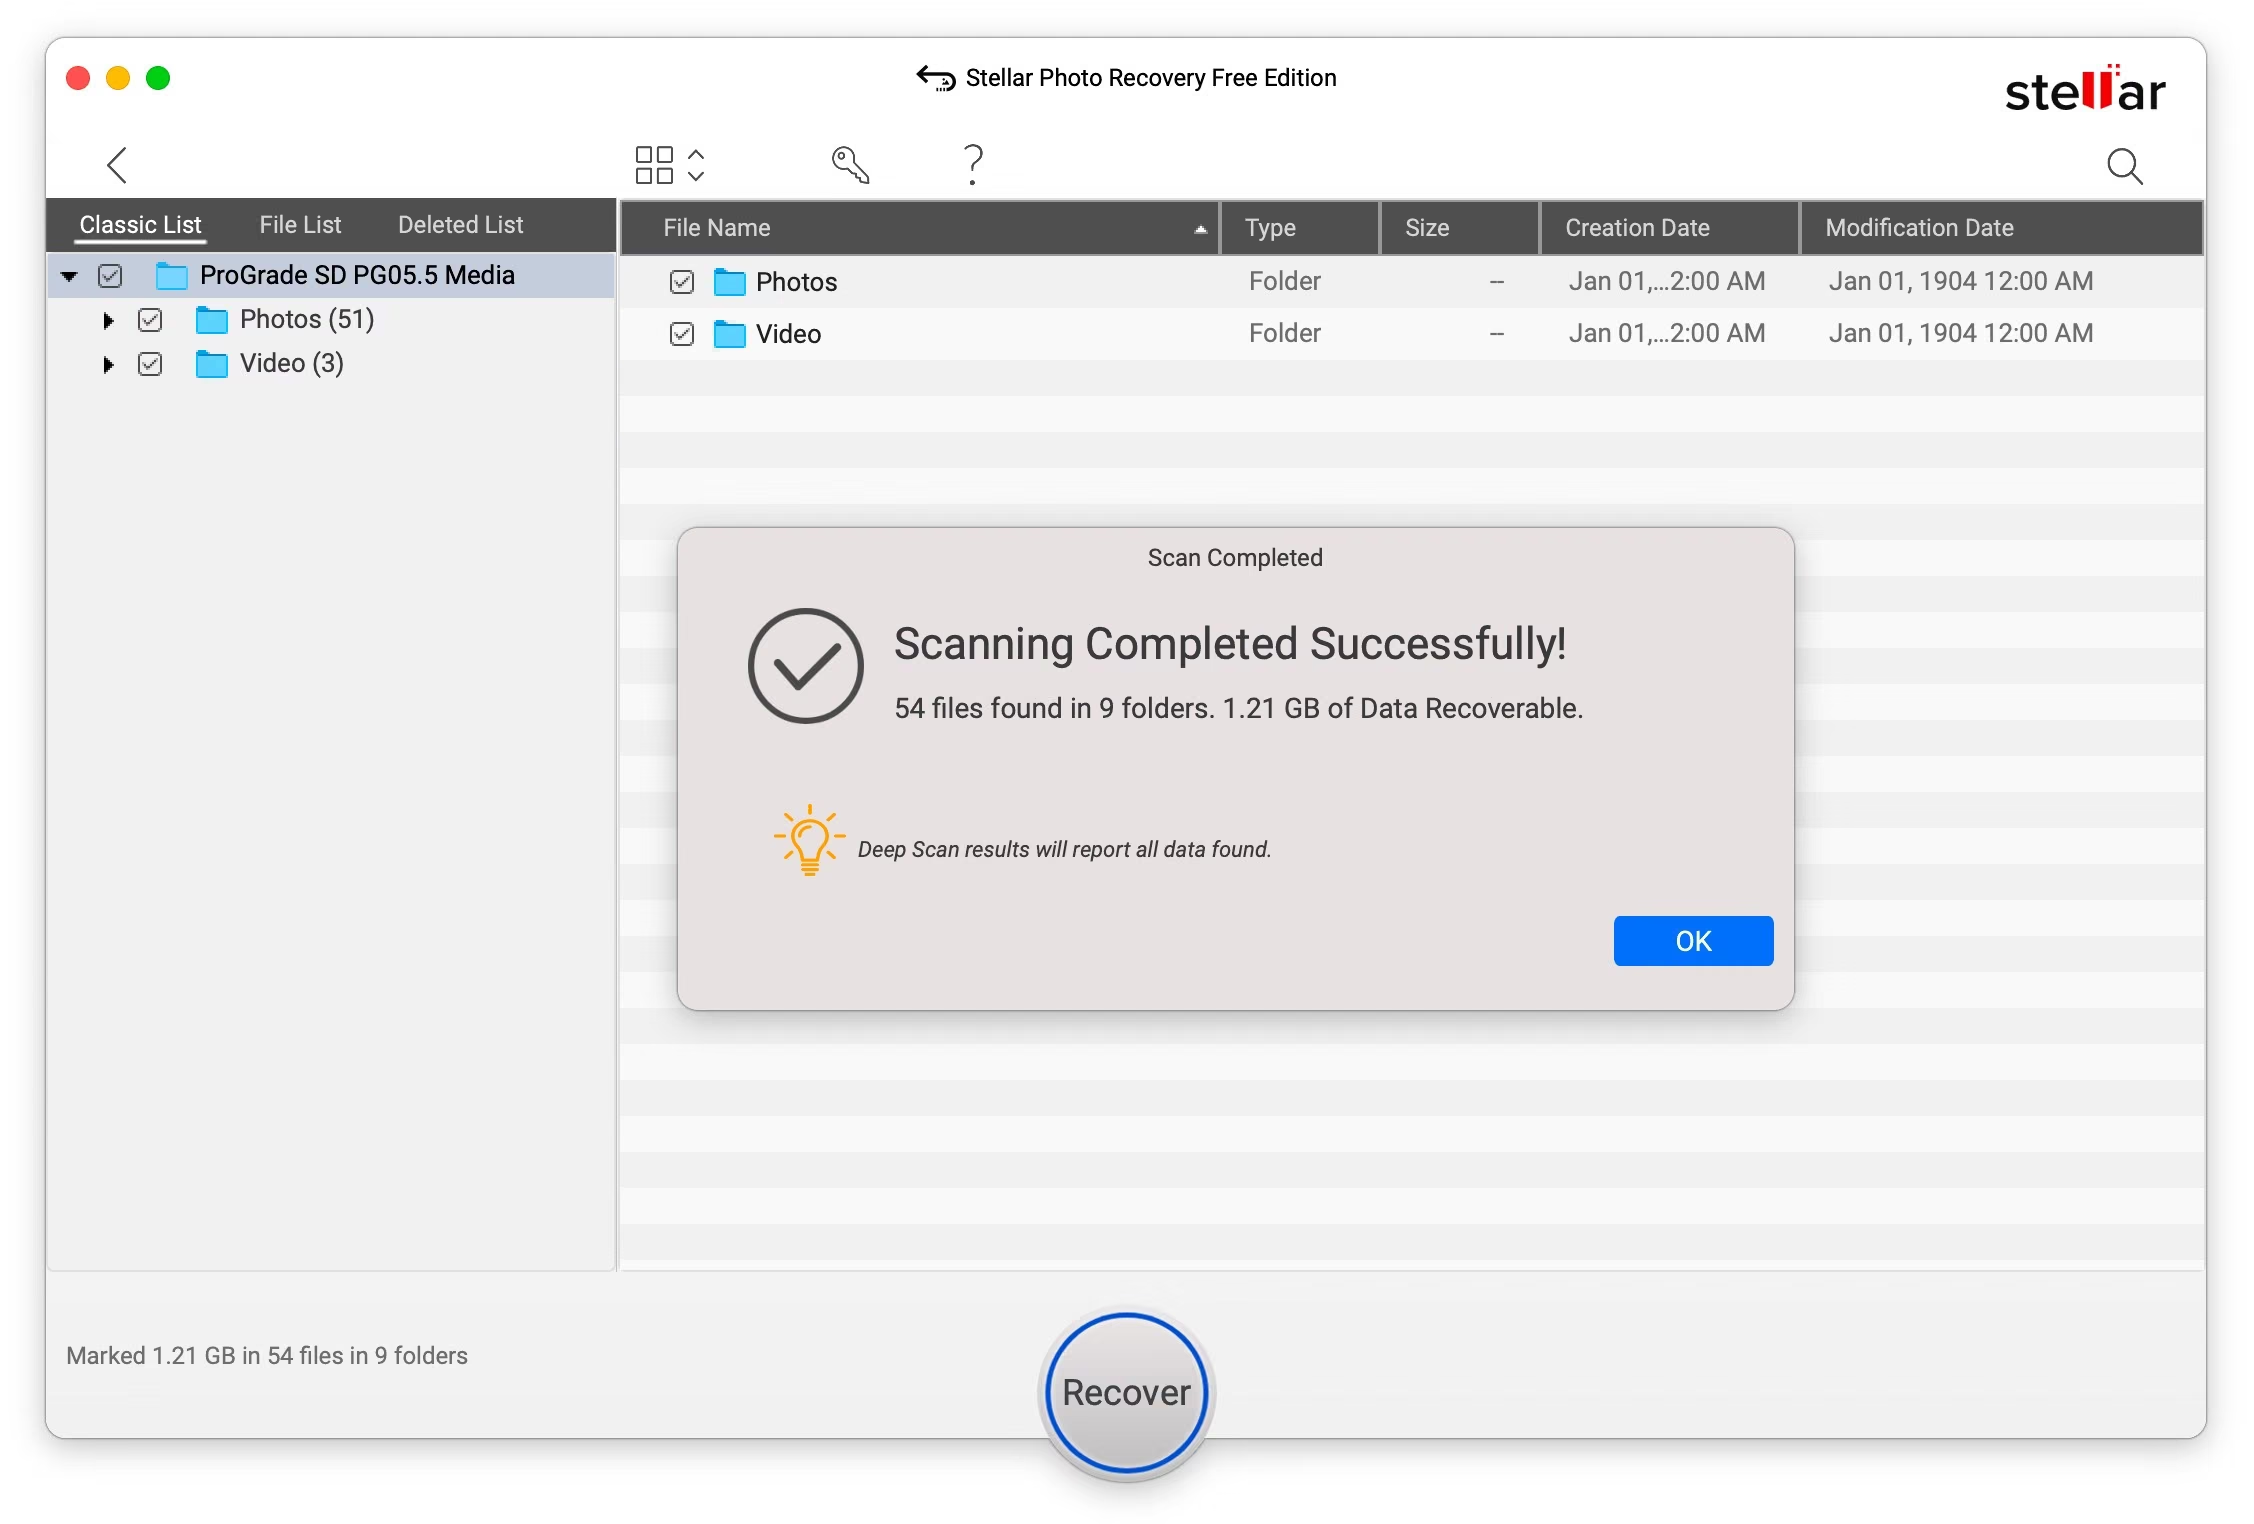
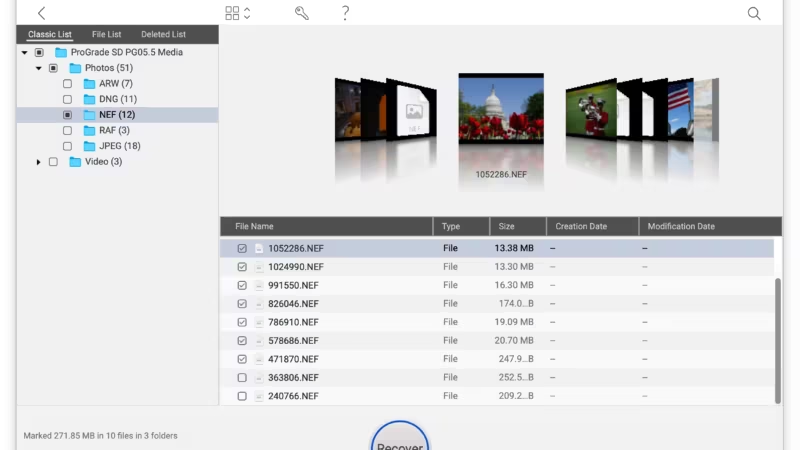
Once you dismiss that little popup, you’ll get a list of nested folders in the left panel. You can drill down by the file extensions and then by individual files. There are also thumbnail and coverflow views, which in principle let you choose visually rather than from generic filenames — but as I cover below, in the free version they’re of limited use for RAW files. I’m using the basic file list here.
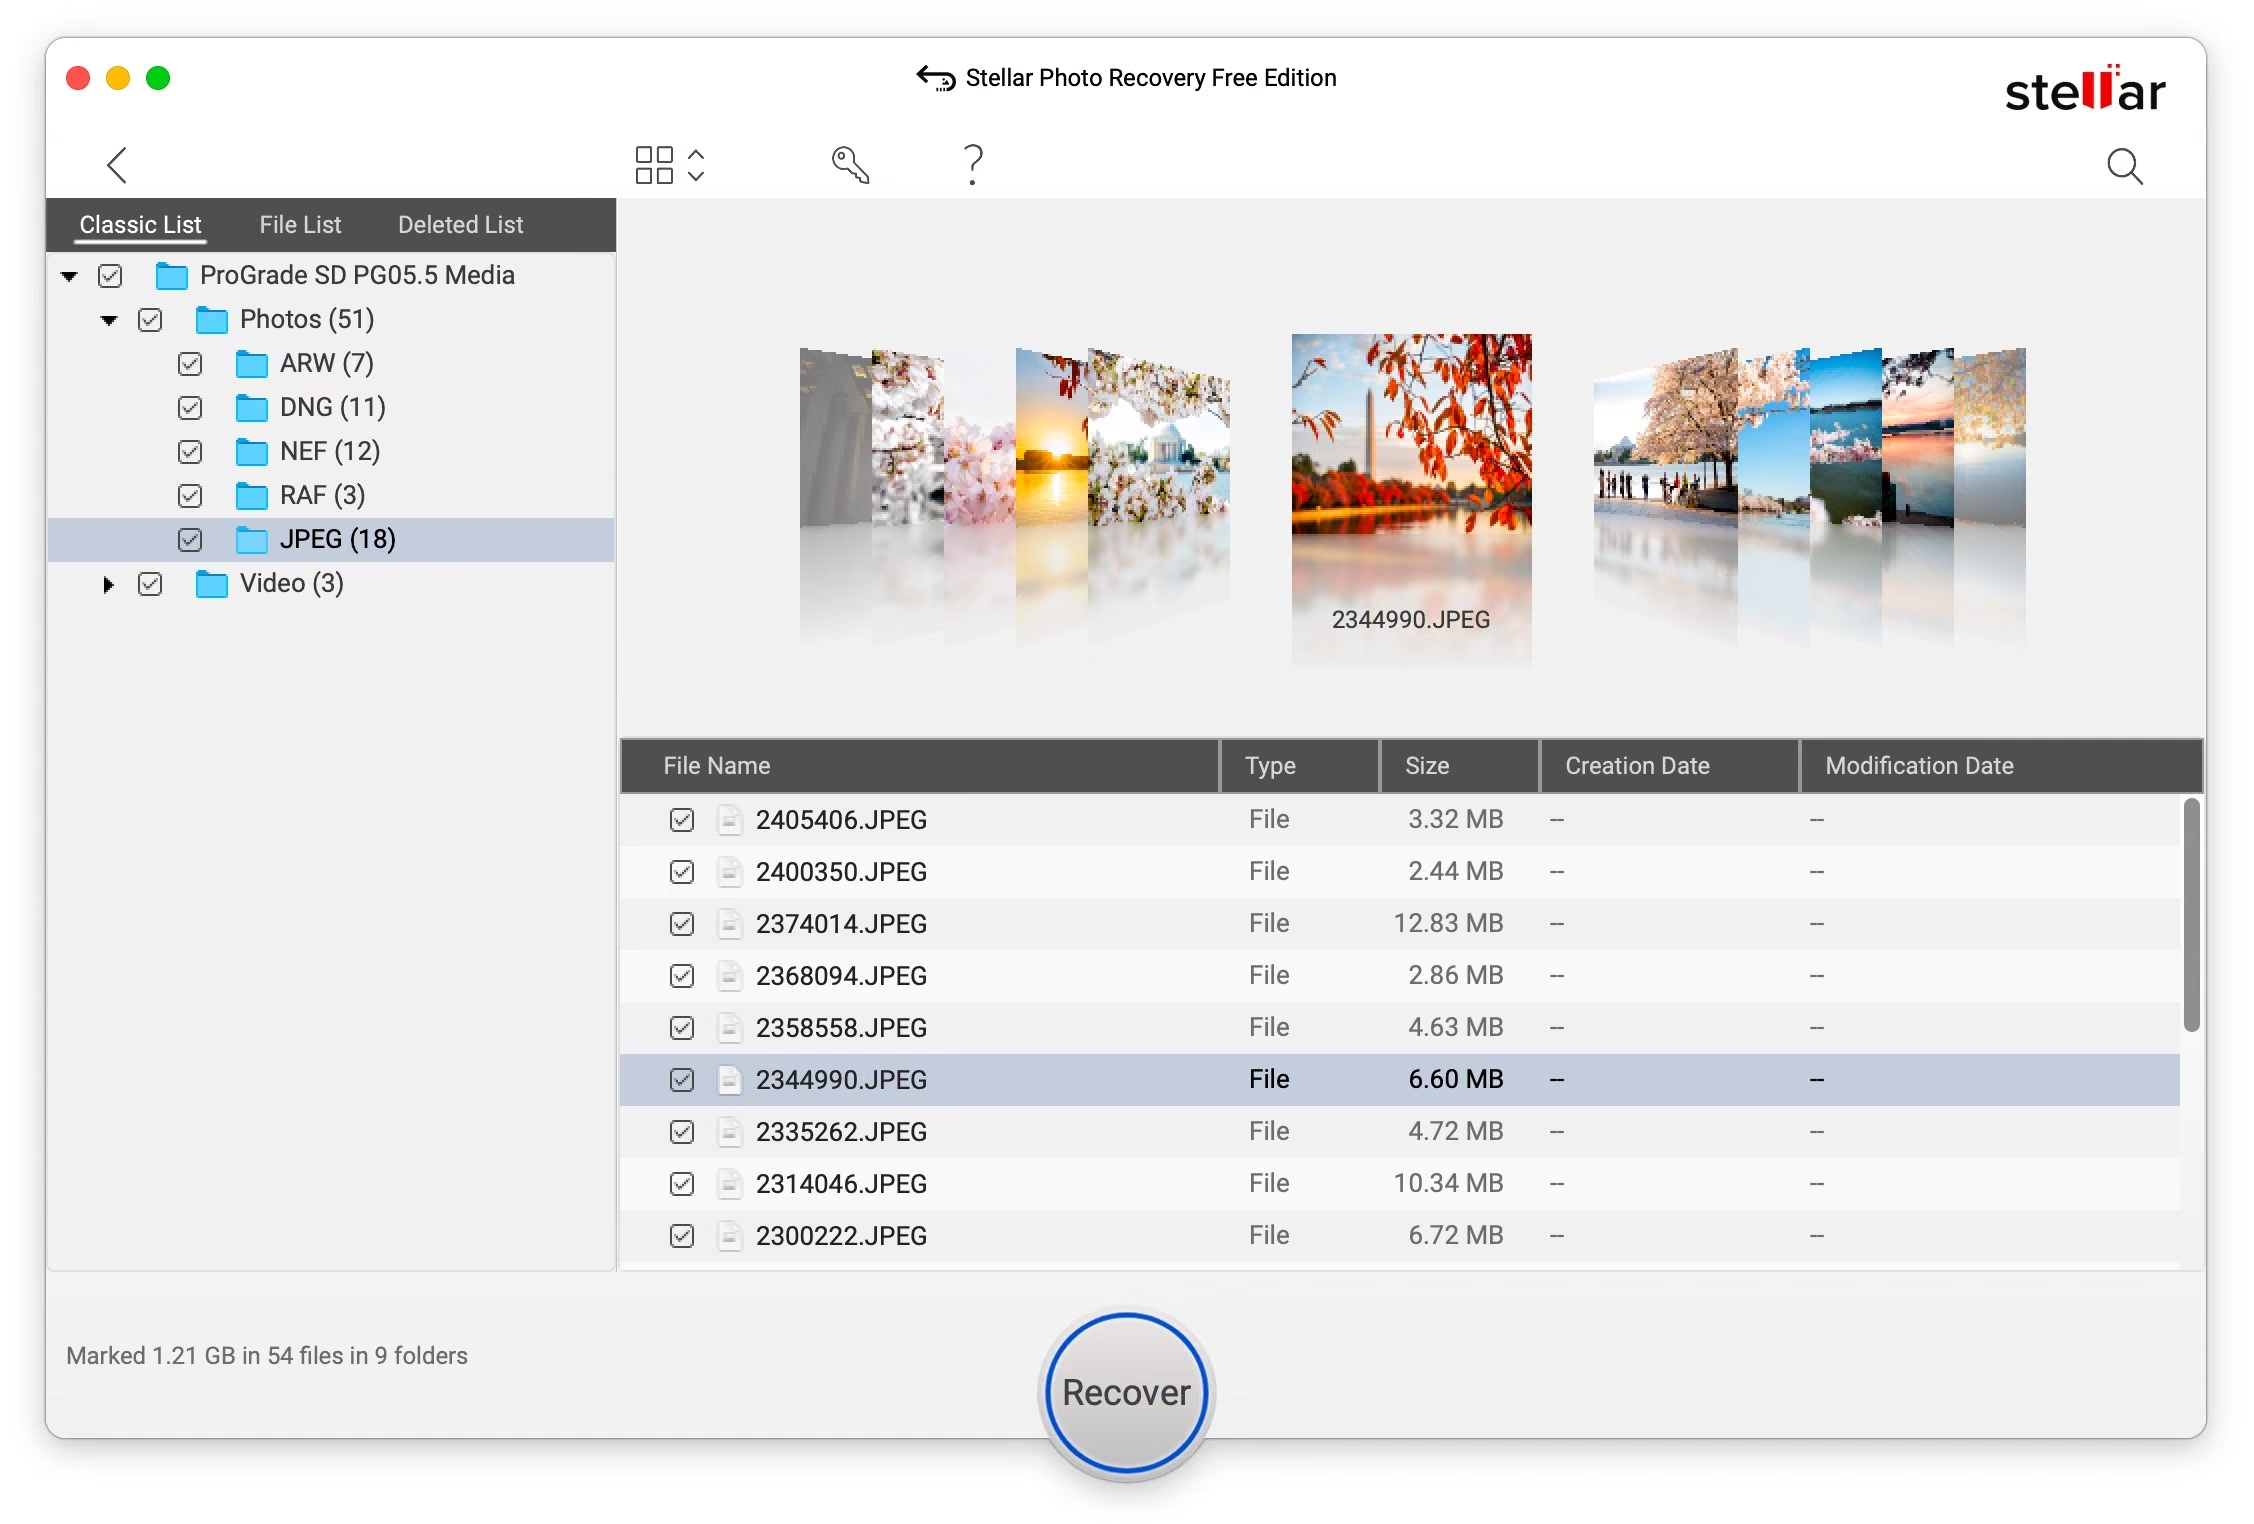
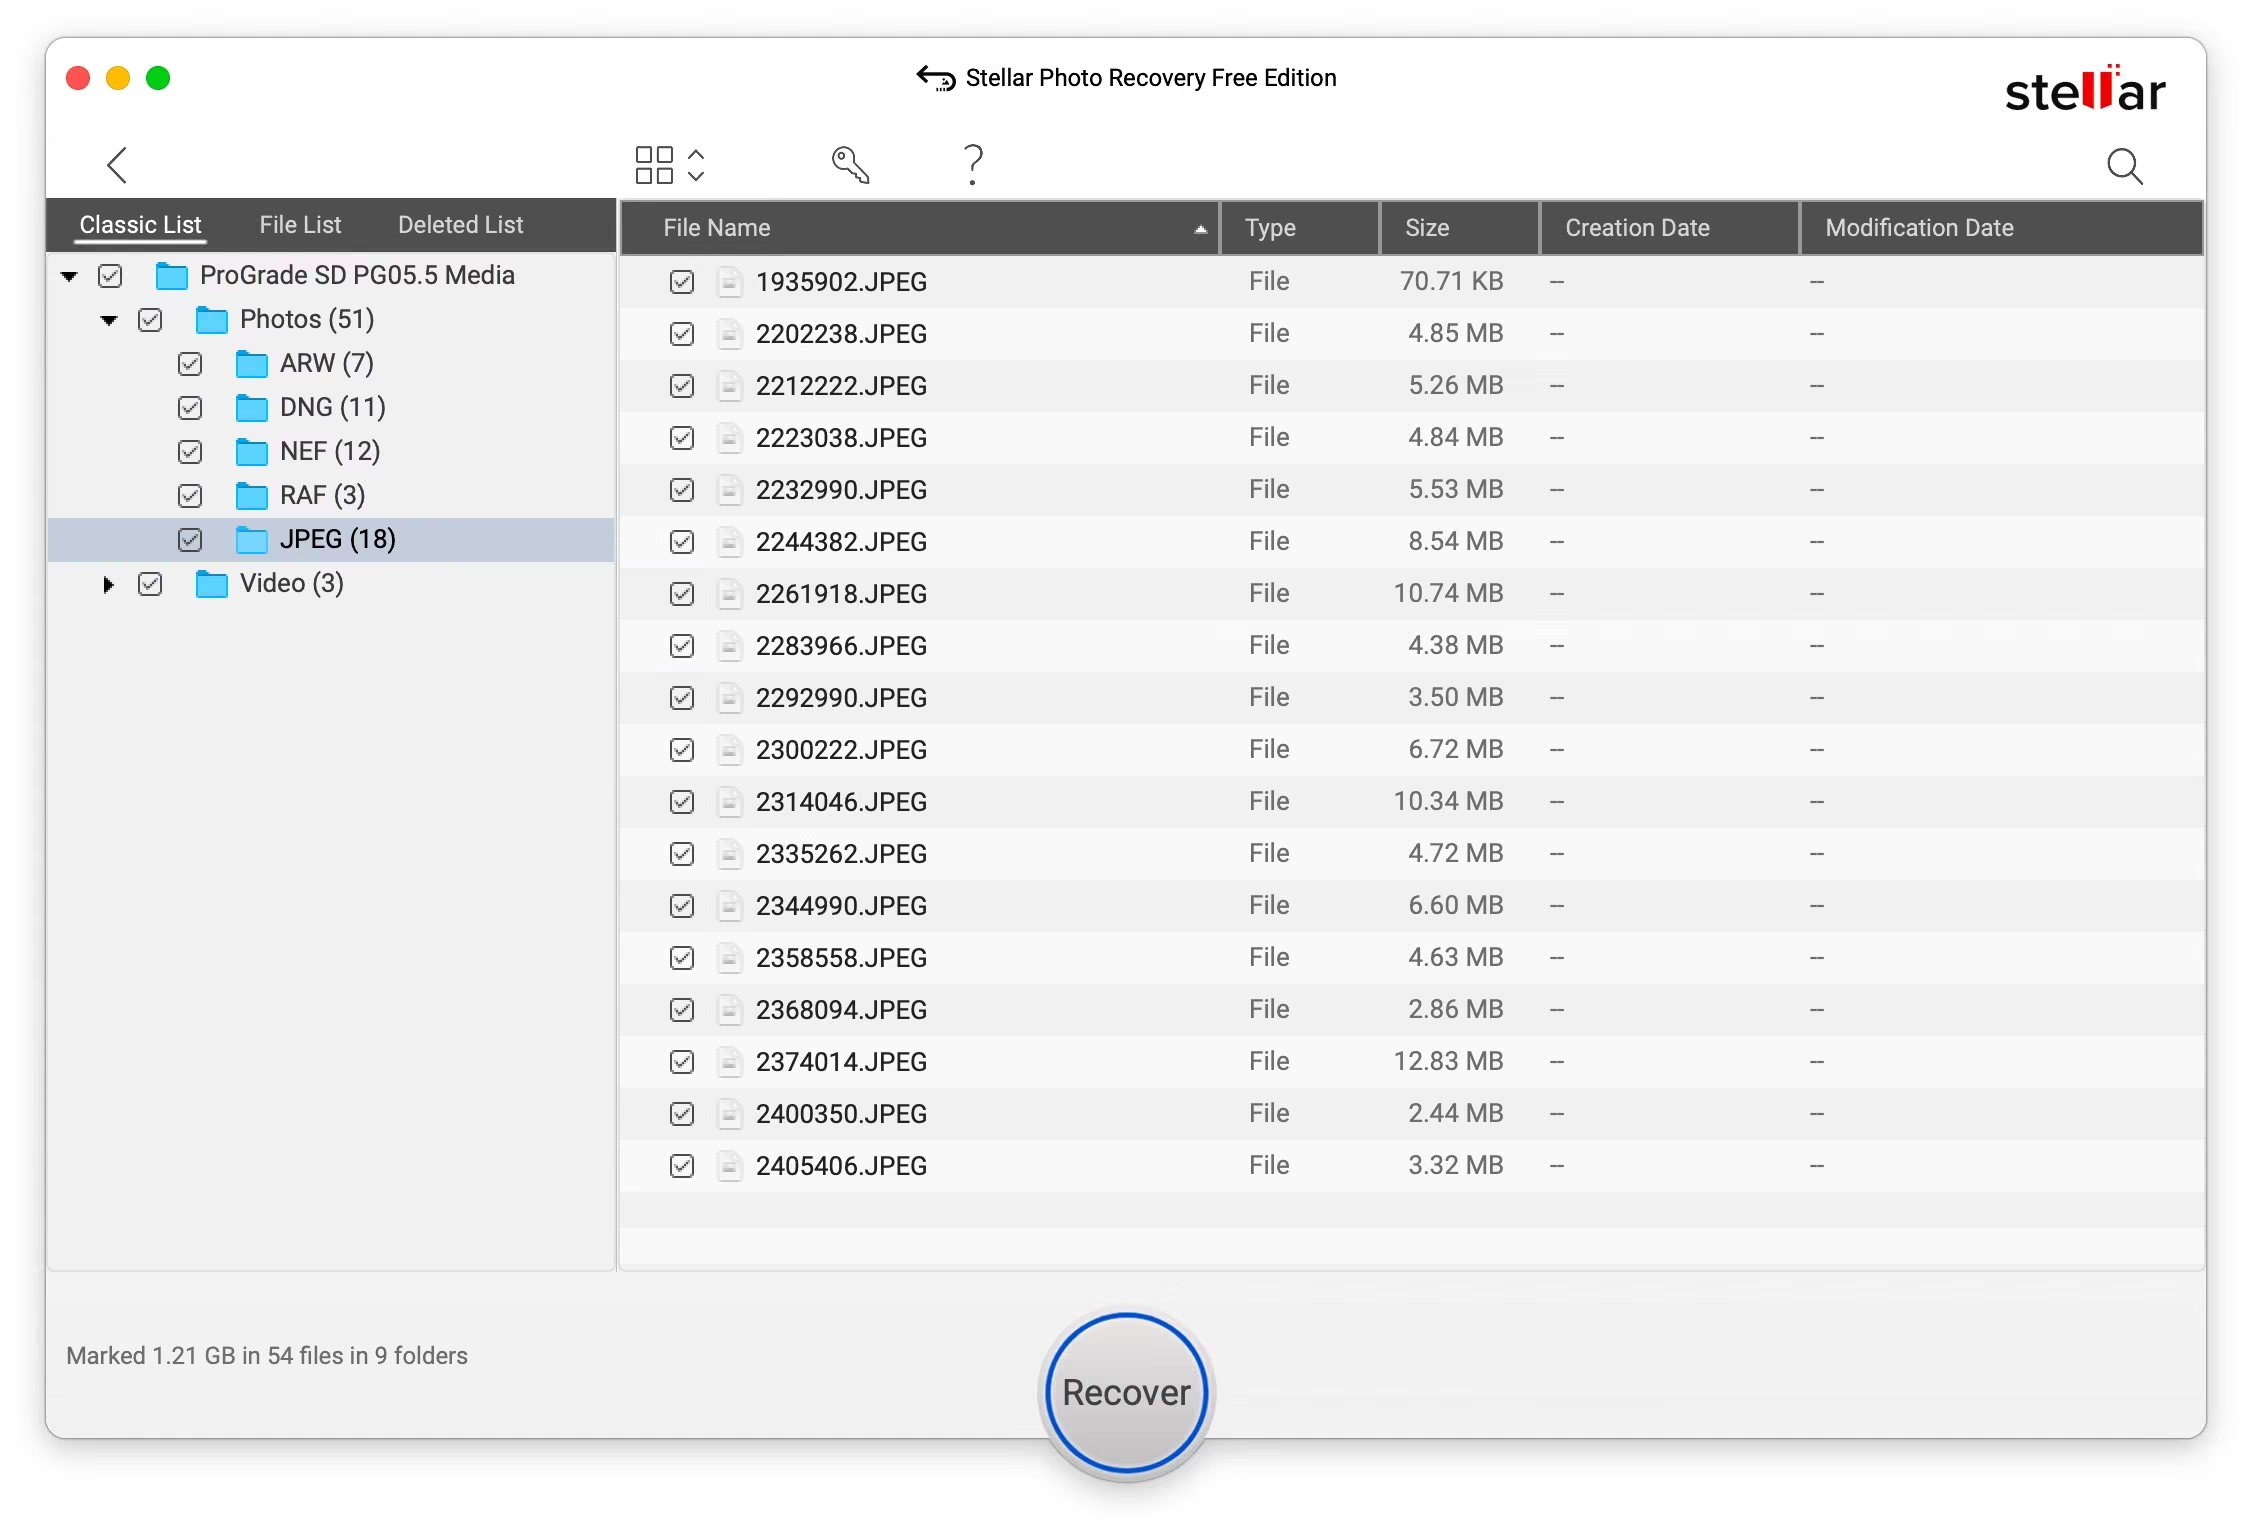
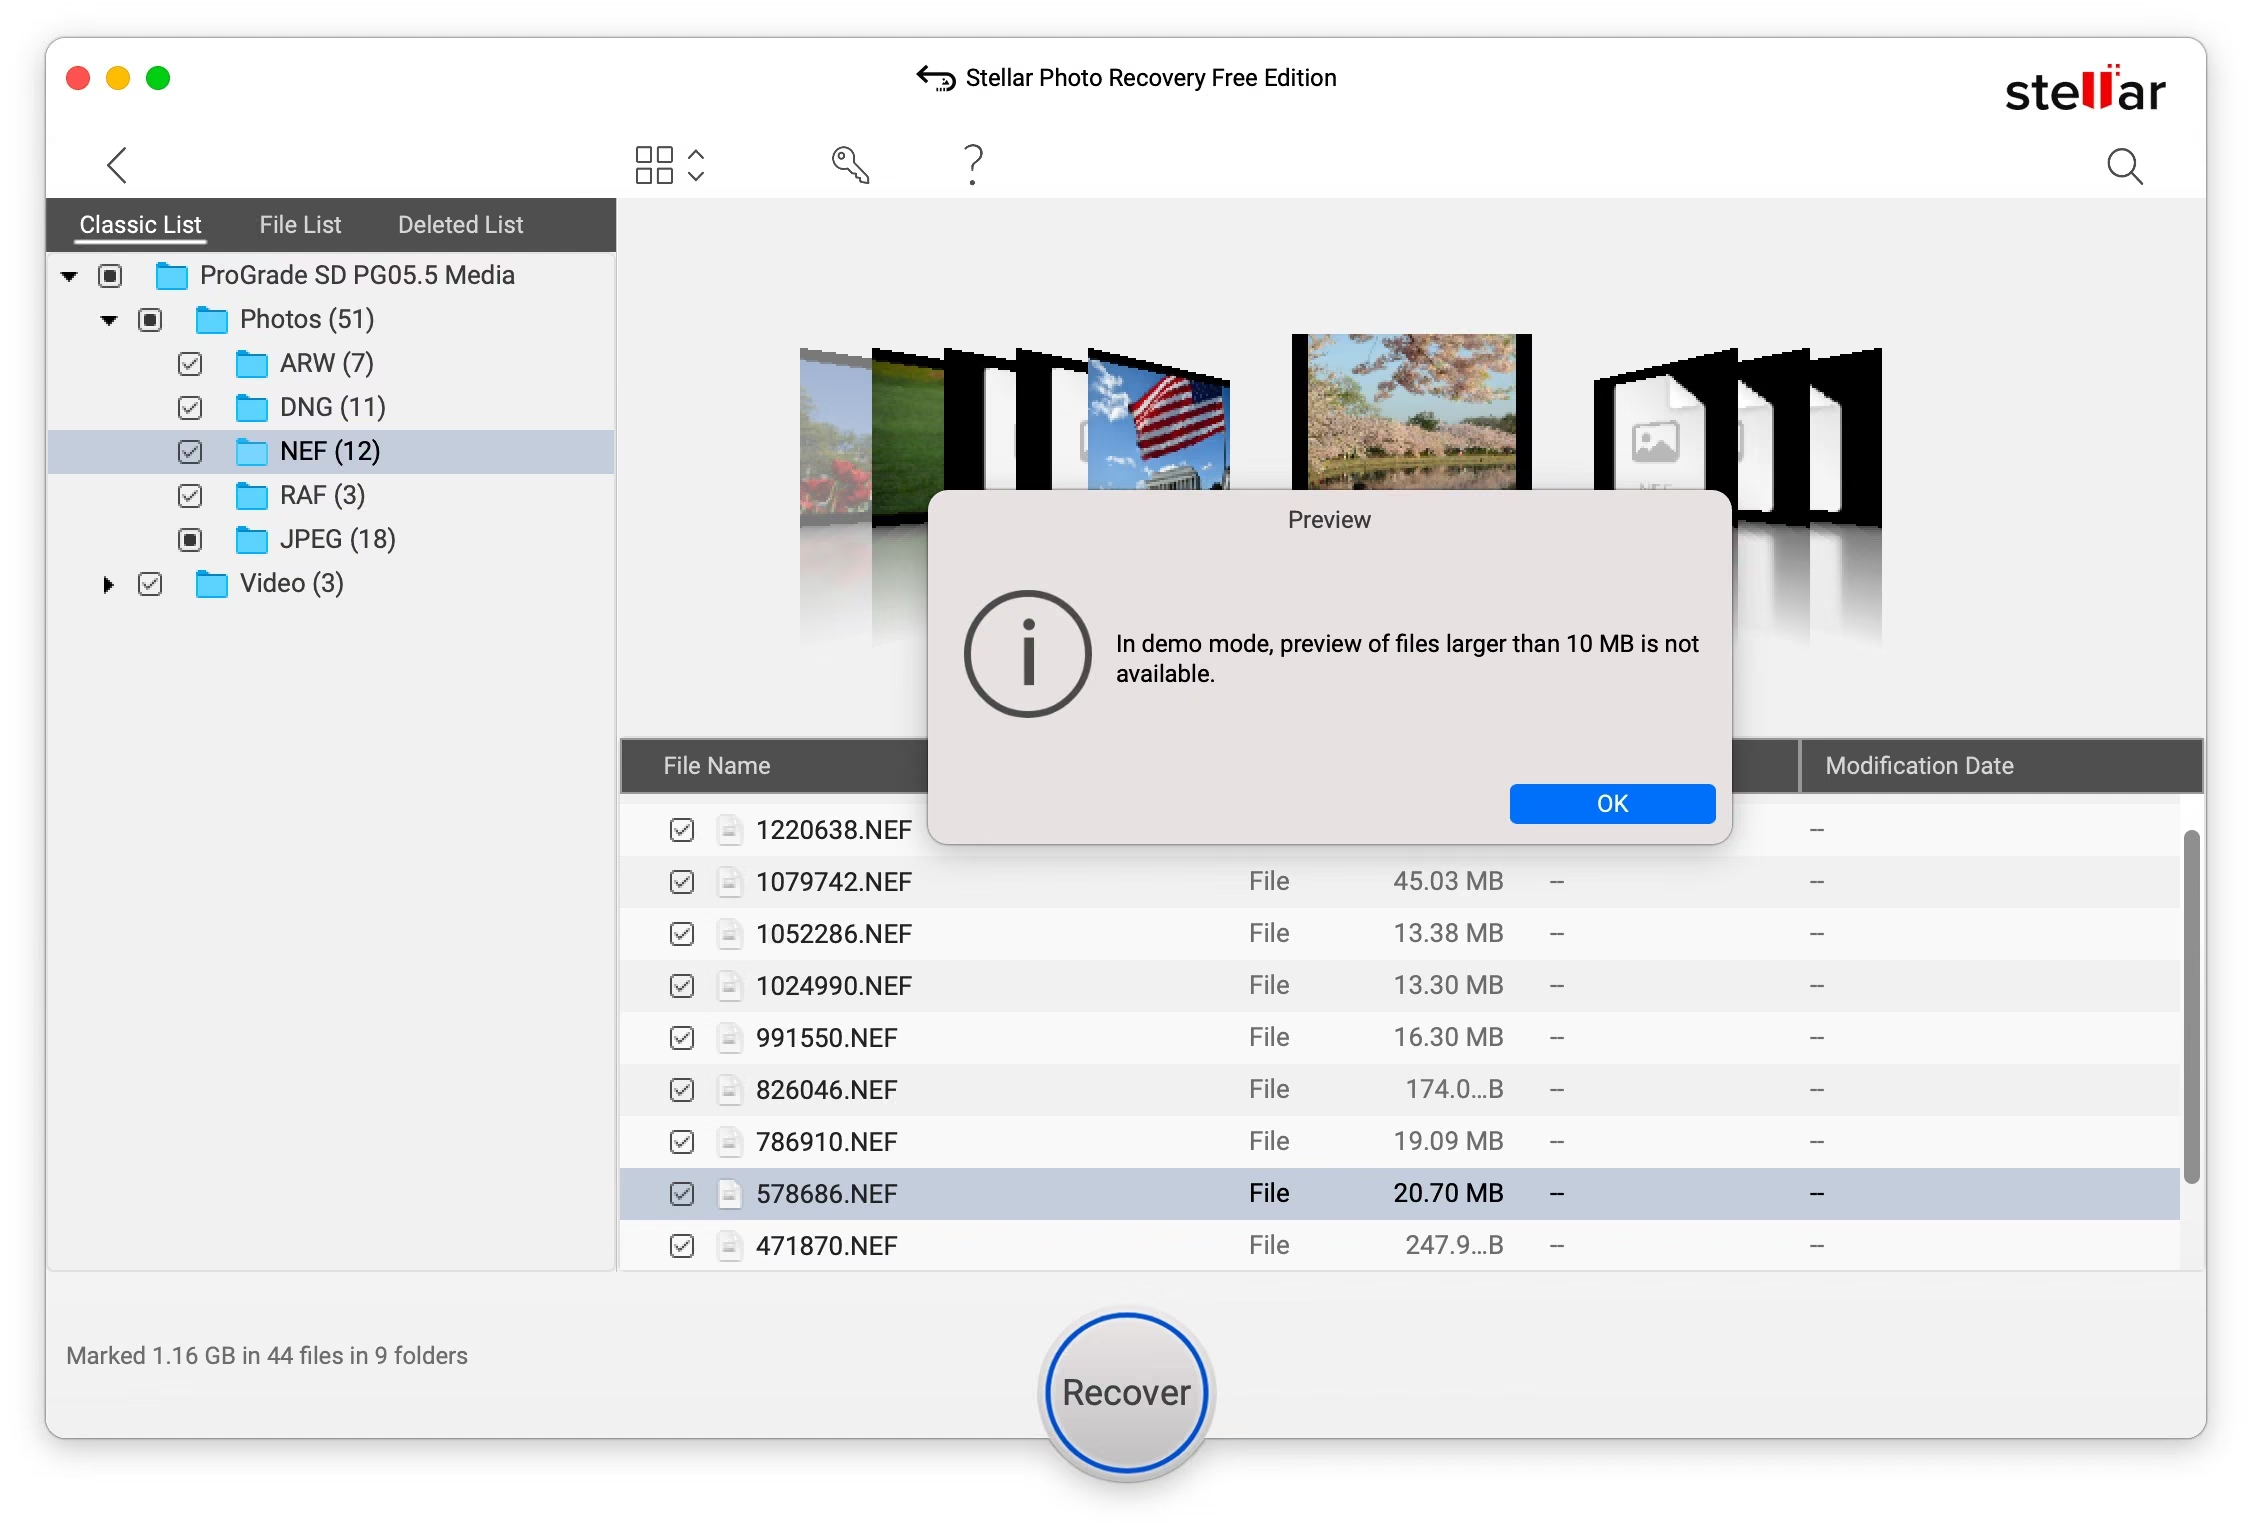
You can get this far — the scan and the file listing — without paying anything. But there’s an important catch I ran into when I re-tested the current version on a formatted card: in the free version, previews only work for files under 10 MB. JPEGs usually preview fine; virtually every current RAW file is bigger than that, so my NEF and ARW files showed up as generic filenames and sizes with no preview. How much that hurts depends on the situation.


If your files were deleted, the scan keeps the original filenames (minus the first character), so you can still find and target specific shots. But on a formatted card, the recovered files come back with meaningless generated names — my Z8’s photos turned up as things like “1220638.NEF.” No names you recognize, no previews over 10 MB: as a RAW shooter in the free version, you’re flying blind. You can see that twelve NEFs were found, but not which photos they are. On paper, the free version will also recover up to 10 files (max 100 MB per file).
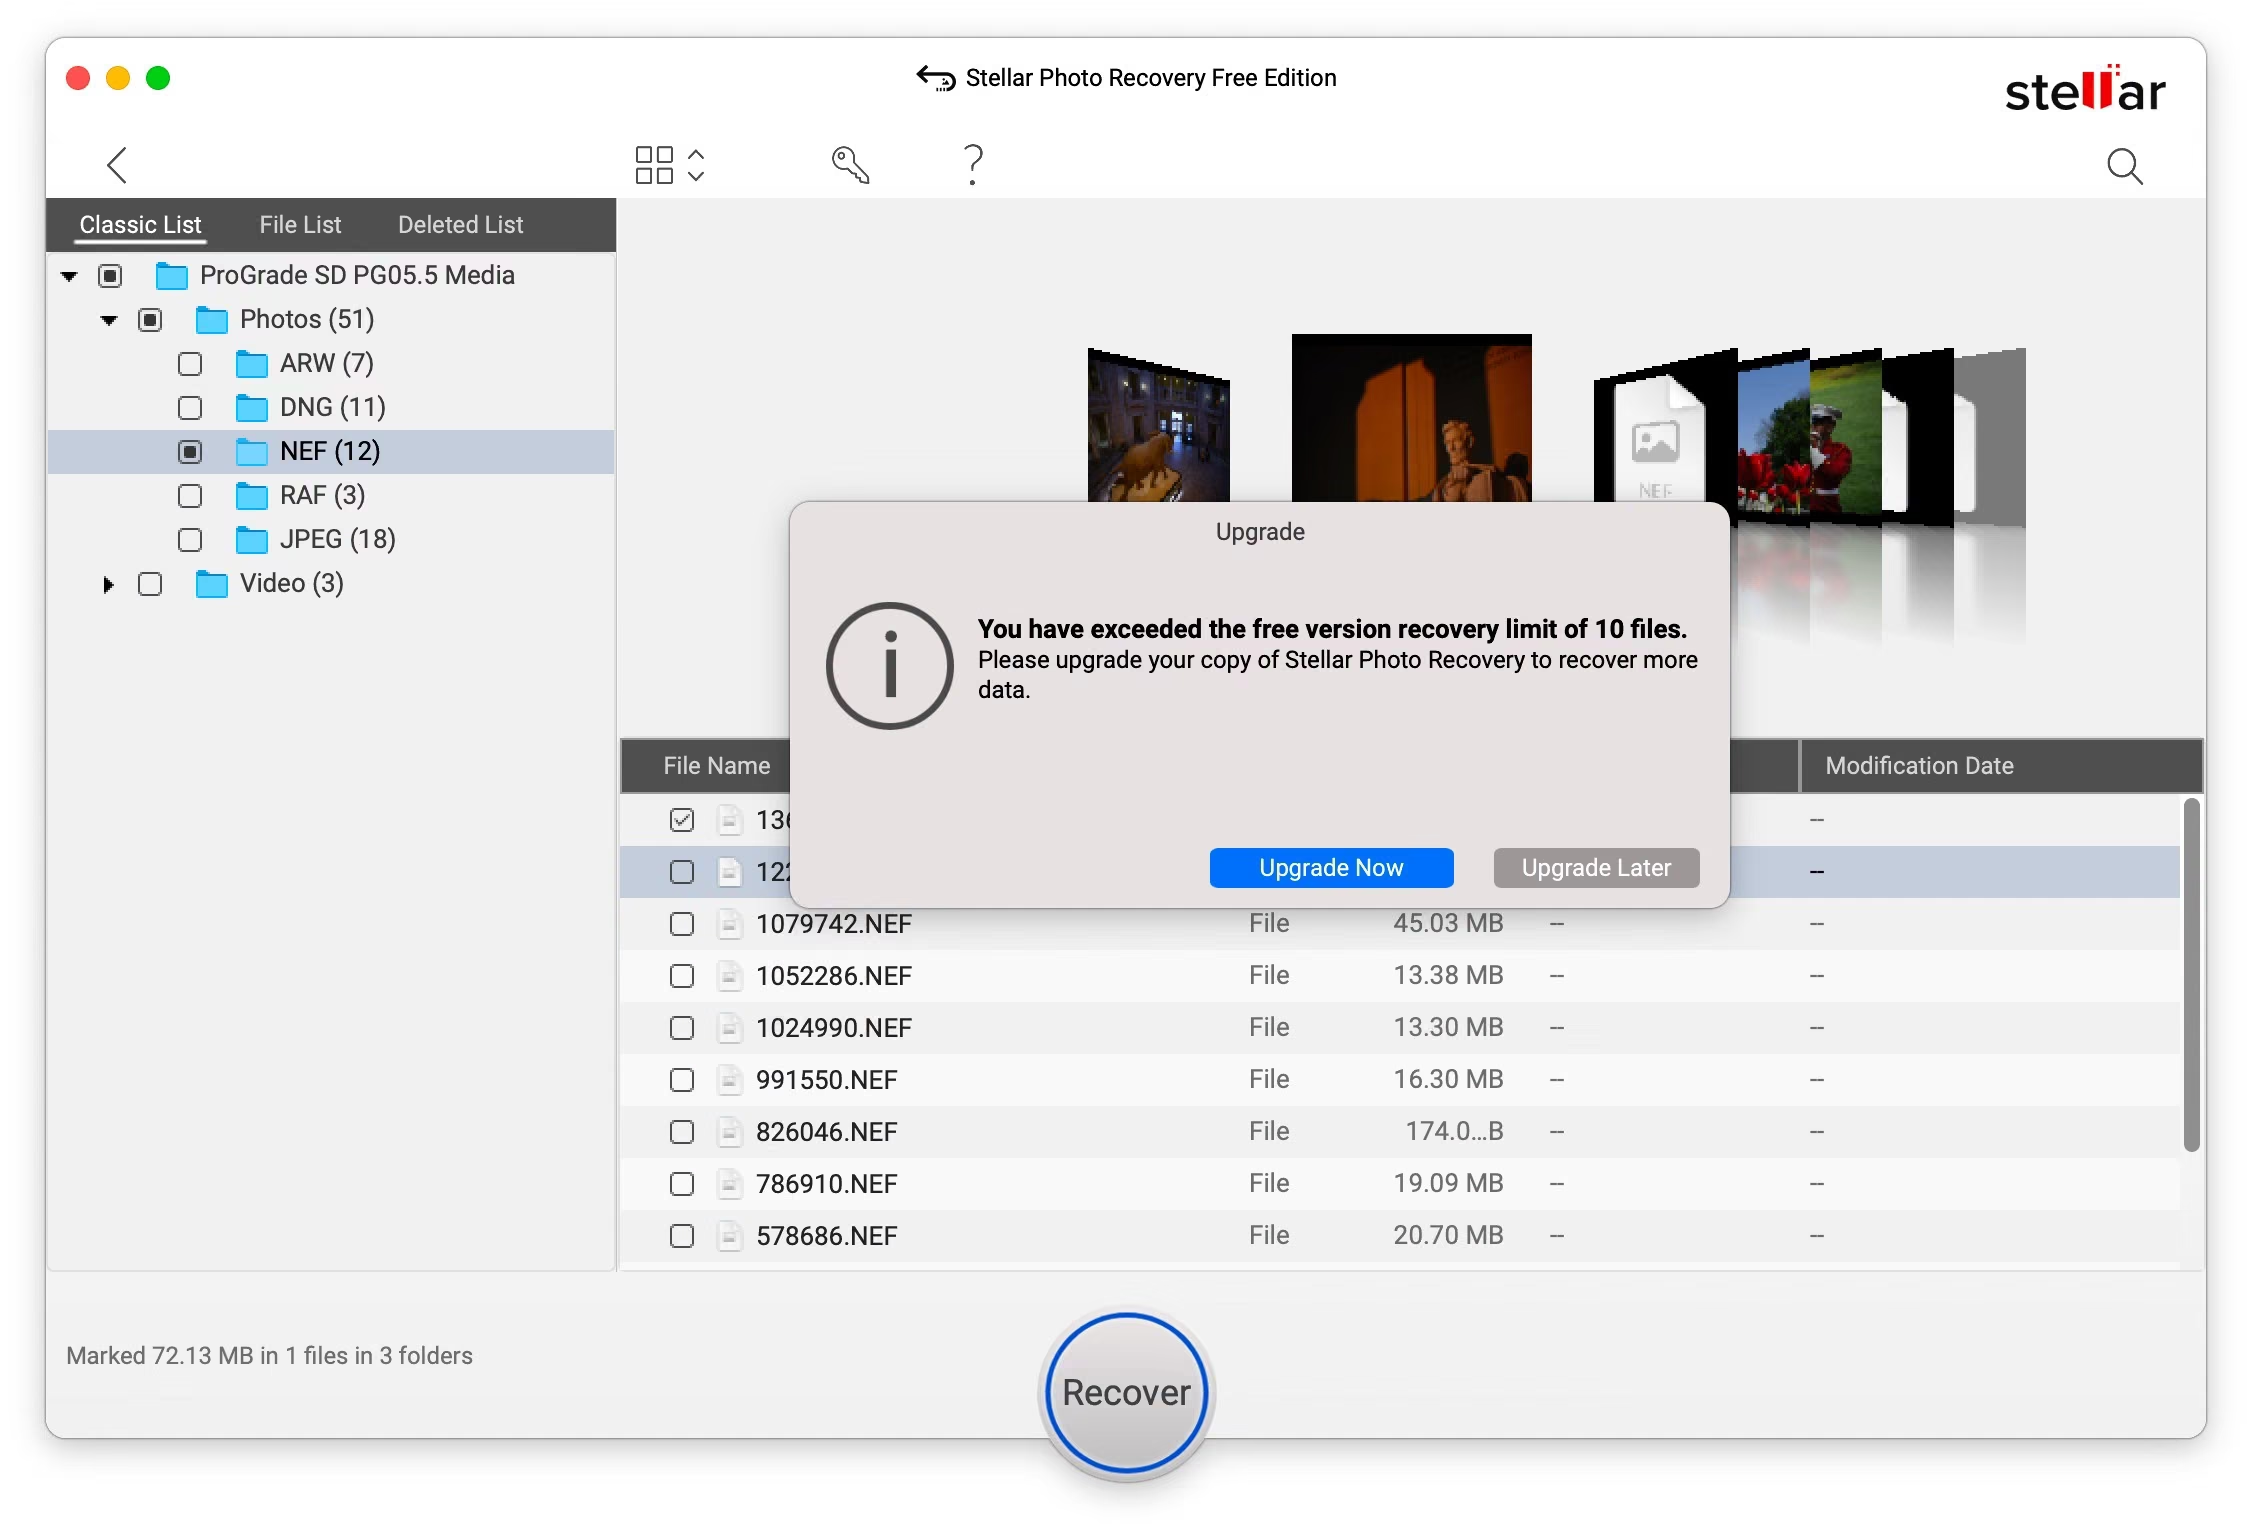
In my most recent test, it didn’t deliver even that: my first recovery attempt had too many files selected, the app showed an upgrade prompt, I dismissed it — and that aborted attempt, which never recovered a single file, apparently consumed the entire 10-file allowance. From then on, even selecting one file brought up the same “you have exceeded the free version recovery limit” message. Maybe that’s a bug in version 12.7; either way, I’d plan on the free version being scan-only in practice, and on paying for a license if the scan shows your files were found. With that, you can recover individual files, a few files, or all of them. Choosing one or just a few is going to be the quickest, and something I find useful when I’m looking for something specific that’s missing.
One important thing to note: if the files you’re looking for didn’t show up in the regular quick scan, it might still find them in the Deep Scan. You’ll get that option once the Quick Scan completes. As the name suggests, it takes a much more thorough look, but it also takes significantly longer.
Stellar Photo Recovery: Advanced settings
In the current version, the narrowing options have moved. Broad type filtering (photos, video, audio) happens up front on the What To Recover screen. Finer control over specific file formats lives in the app’s preferences, under Raw File Formats, where you can also add custom file types the app doesn’t know about.
That’s useful if you’re trying to narrow the results to something specific, say just RAW files.
And if you need to, you can fine-tune the filetypes even further with custom file types and filters, but most users won’t need to bother with those settings most of the time.
File types
The Photo Recovery app limits its focus to media files. If you need a broader selection of non-media files, you’ll want the Data Recovery app for Windows or Mac.
At the time of writing (August 2026), this is the selection of image types that the Photo Recovery app is compatible with:
| File Extension | Image Type |
|---|---|
| ARW, SR2, SRF | Sony RAW |
| CR2, CR3, CRW | Canon RAW |
| DCR, K25, KDC | Kodak RAW |
| DNG | Adobe Digital Negative |
| ERF | Epson RAW |
| MEF, MOS | Mamiya RAW |
| MRW | Konica Minolta RAW |
| NEF, NRW | Nikon RAW |
| ORF | Olympus RAW |
| PEF | Pentax RAW |
| RAF | Fujifilm RAW |
| RAW | Panasonic RAW |
| X3F | Sigma RAW |
| JPG, JPEG | JPEG |
| JP2 | JPEG 2000 |
| TIFF | TIFF (Motorola and Intel byte order) |
| PNG | Portable Network Graphics |
| BMP | Bitmap |
| GIF | Graphics Interchange Format |
| PGM | Portable Graymap |
| TGA | Targa |
| PSD | Adobe Photoshop |
| INDD | Adobe InDesign |
| EPS | Adobe EPS (Mac and Windows) |
| PSP | Paint Shop Pro |
| PCT | Picture File |
| DJVU | DjVu scans |
And here is the list of video types:
| File Extension | Video Type |
|---|---|
| MP4, M4V, M4B | MPEG-4 / Apple video |
| MOV, HDMOV, MQV | QuickTime |
| AVI | Audio Video Interleave |
| MPEG, MPG | MPEG |
| MKV | Matroska Video |
| MTS | AVCHD |
| DIVX | DivX |
| WMV, ASX | Windows Media |
| VOB | DVD Video Object |
| 3GP, 3G2 | 3G mobile video |
| F4V | Adobe Flash video |
| MXF | Material Exchange Format |
| MOI | JVC/Canon MOI |
| TOD | JVC |
| SVI | Samsung |
| OGM | Ogg Media |
| AJP | JPEG2000 CCTV |
| VID | Generic video |
Formats per Stellar’s published support list for the current version (12.7, checked August 2026).
One common video type that I noticed that isn’t on the list is FLV. I’m not sure why it’s not there — it might be because it’s not a format that’s typically used for capture.
It’s also compatible with quite a few audio file types, but I’m focusing here on the main types that photographers and videographers would likely be looking to recover.
Troubleshooting notes
- If you’ve connected your camera to your computer and it’s not showing up as an available source in the source selection panel, try taking the card out, putting it in a card reader, and then connect the card reader to the computer. That helps eliminate the camera itself or the connection between the computer and the camera as the problem.
- If you find that the photos that you’ve recovered are still corrupted, it still might be possible to repair them by upgrading to the Premium version, but that’s a process that’s beyond the scope of what I’m doing there.
- The scan is a non-destructive process. That is, nothing is written to your card or drive during the scan.
- The scanning can only go one level deep. What I mean by that is that if the part of the memory was overwritten with another photo or other data, the bottom-most data will be lost, and only the most recently written data can be recovered. Occasionally you can end up with a partial overlap. That’s pretty typical of consumer data recovery software.
How it compares to PhotoRec and Disk Drill
The obvious question is why you’d pay for this when PhotoRec is free and has no recovery limits.
It comes down to convenience and previews.
PhotoRec is a command-line tool that dumps everything it finds into folders with generic filenames; Stellar organizes what it finds by file type and lets you pick exactly the files you want — though note that in the free version, previews only render for files under 10 MB, so for RAW files the picking happens by filename and size — and in my test the free 10-file recovery allowance was consumed by an aborted attempt without ever delivering a file. Budget for a license if the scan finds what you’re after.
If you’re comfortable in a terminal window, try PhotoRec first — it’s what I reach for myself. If you’re not, this is one of the friendliest of the graphical apps, and its photo-and-video focus means good support for camera RAW formats.
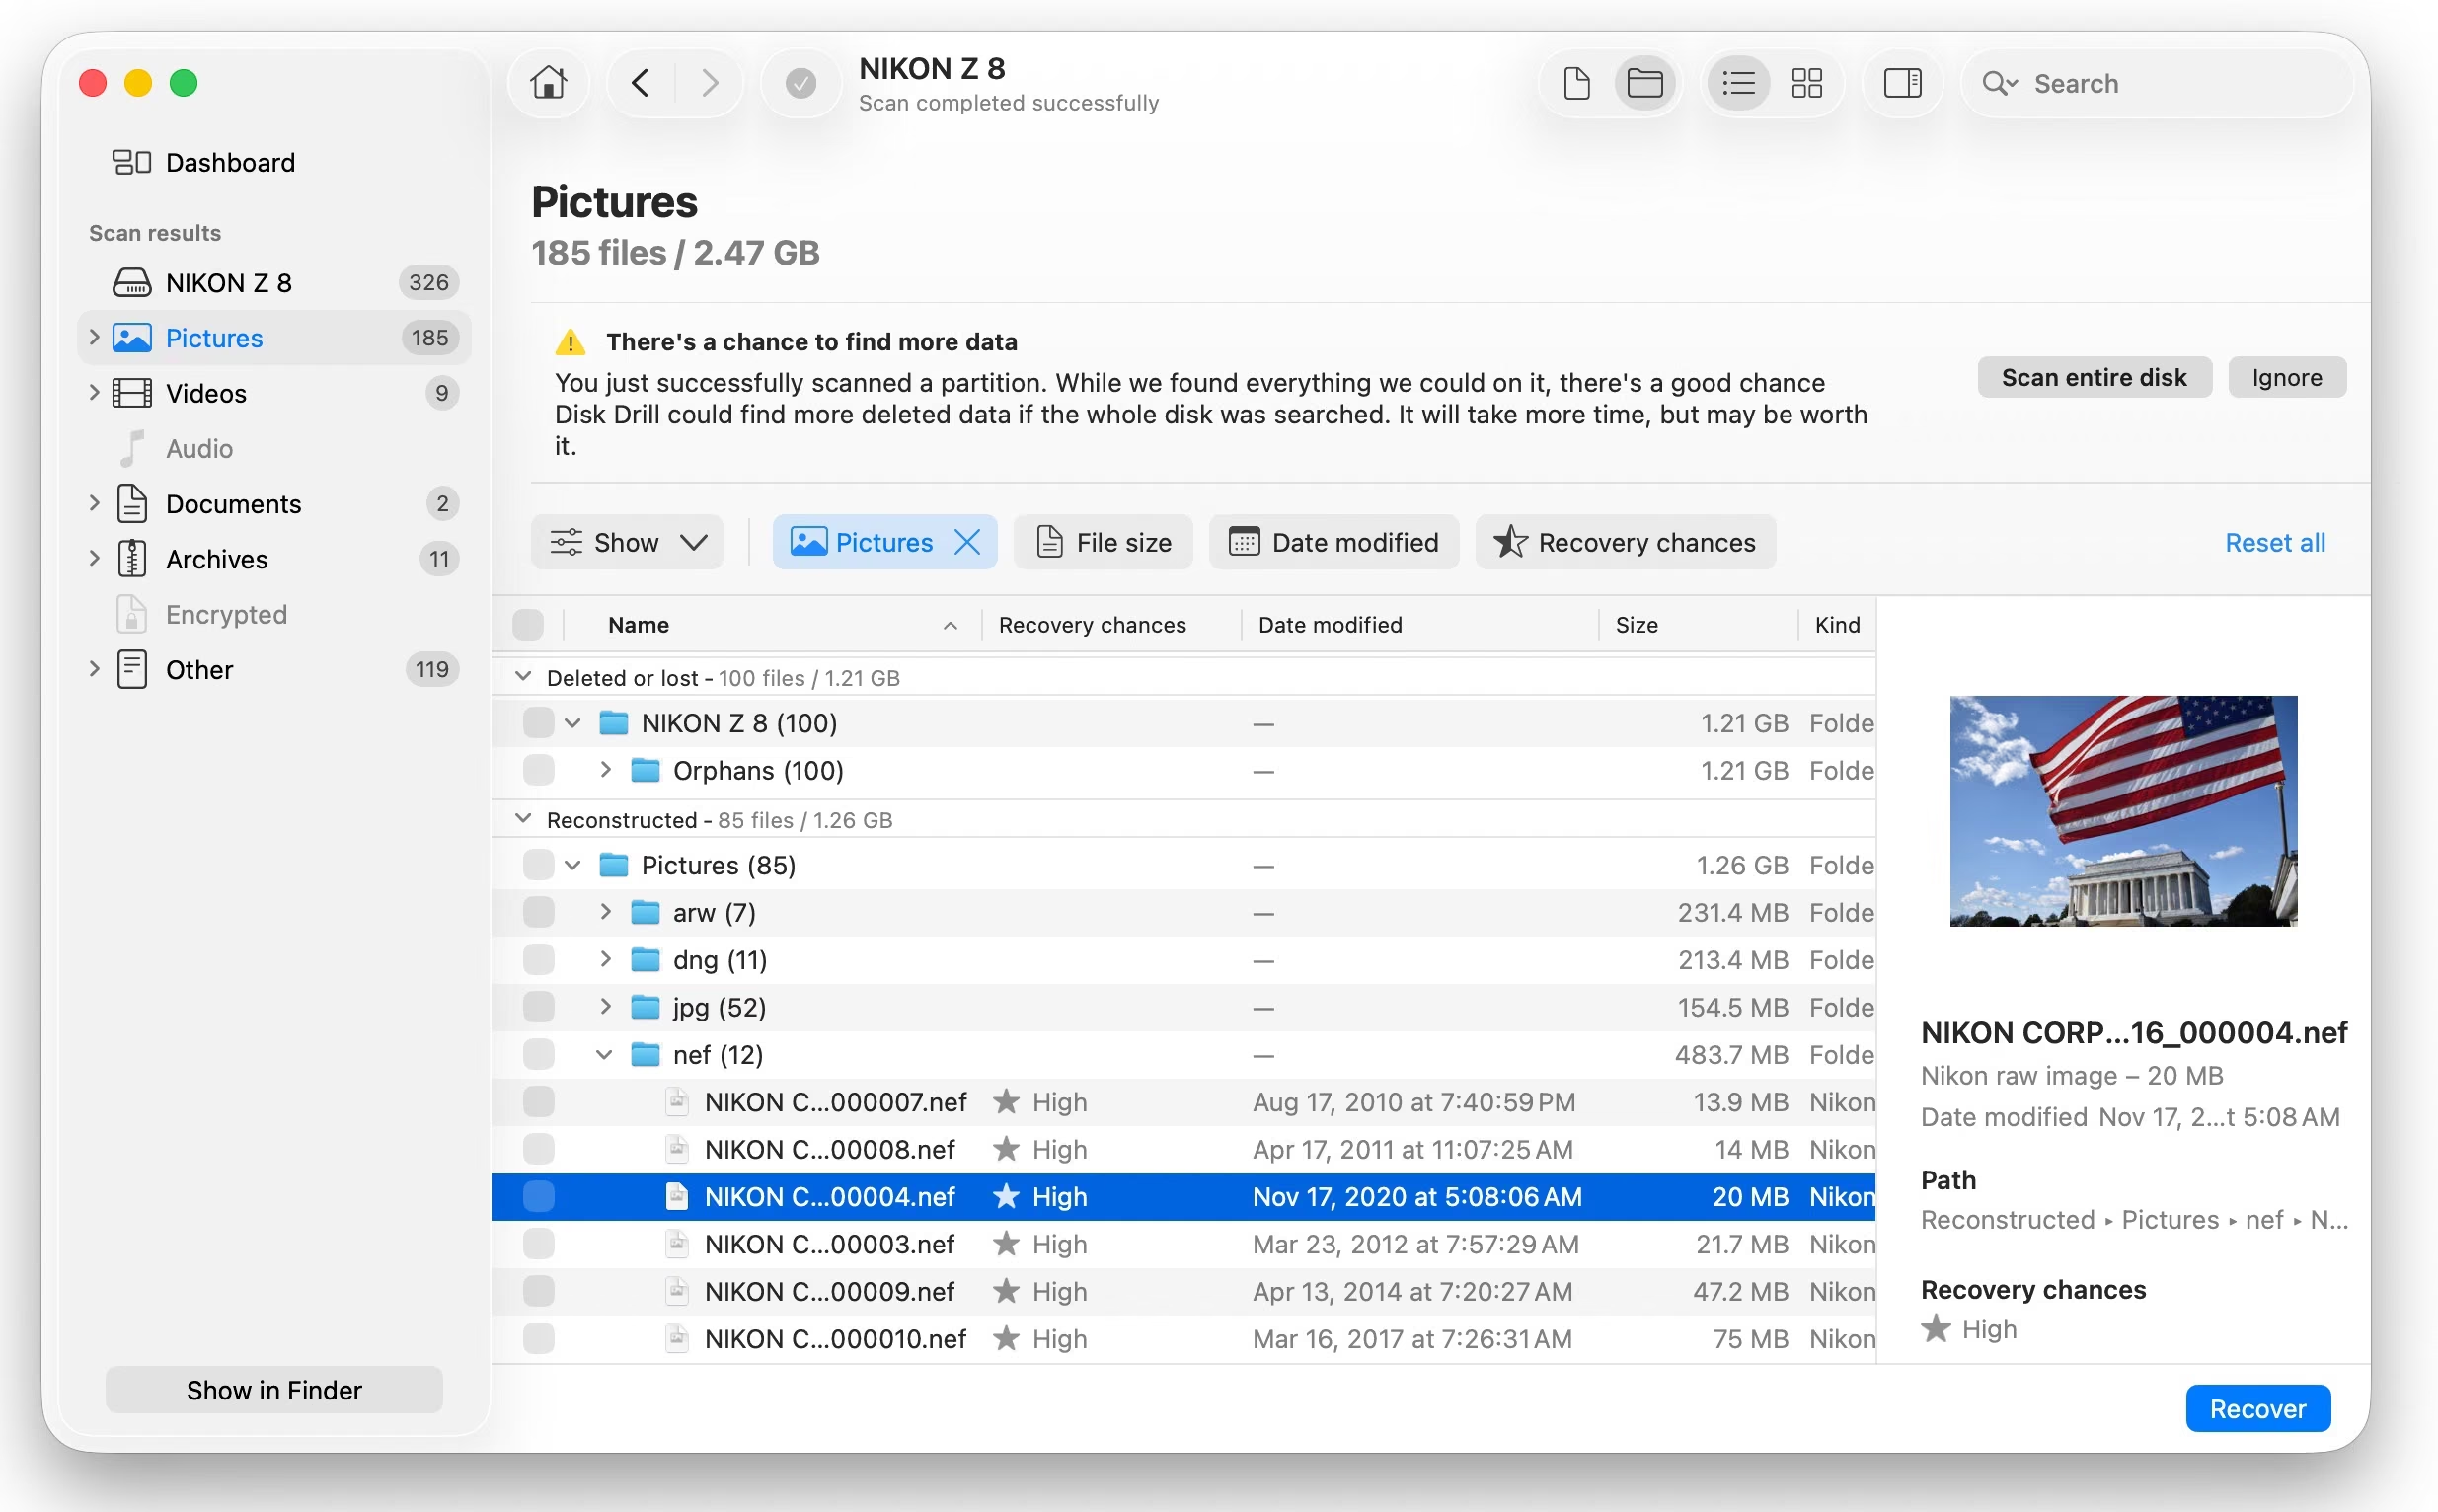
Against Disk Drill, the comparison has shifted since I first wrote about these tools. Testing the current versions side by side on the same formatted card, Disk Drill’s free scan rendered proper previews of the carved RAW files; Stellar’s free version capped previews at 10 MB and showed most of my RAW files as generic icons. Being able to see which photo is which before paying is precisely what you want from a trial, and right now Disk Drill does it and Stellar doesn’t. Stellar’s remaining edge is its photo-and-video focus — strong camera RAW format coverage, and the Premium tier adds photo and video repair. If you buy the licensed version, Stellar is still a reliable and user-friendly choice in my experience — but the trial limitations diminish what made it easy to recommend: you can no longer meaningfully see what’s recoverable before paying. For straightforward card recovery today, I’d look at Disk Drill first and treat Stellar as the second choice, with its photo-repair tiers as the differentiator.
Wrap-up
Your mileage might vary on what you can recover. It depends on the specific media and the circumstances of what went wrong. If you accidentally deleted photos or formatted the card, it’s often pretty straightforward. If there are physical errors on the card or it’s damaged or corrupted in a more serious way, then that probably poses a bigger problem. But even if you can’t recover everything, you might be able to recover some data from the card, so it’s well worth trying.
There are a lot of file recovery options available, several of which focus on media files. Stellar Photo Recovery is one of the more established ones, and it’s the one that Lexar has rebranded for its own uses.
I’ve found it to work well. That said, like other file recovery apps, there’s no guarantee it’s going to be able to recover your images. I’ve had some instances where nothing could be found. But in general use, I’ve found them to be able to recover files more often than not. And while Stellar Photo Recovery is not the cheapest option available — there is free software that can get you to a similar end result in a less user-friendly way — its user interface is intuitive and functional. And the ability to narrow your search by either file extension or region on the disk is a handy feature that can save you time sifting through the results.
Before diving in and buying a license, I’d still recommend first running a scan with the free trial version — with the caveat that for RAW files you’ll mostly be looking at file names and counts rather than previews. Then, once you’ve determined that you can recover the data you’re looking for, buying a license will unlock the functionality to actually recover the files.
There are versions for Mac and Windows.



trying to recover sony qd card all i get are .ppm files and no previews
Hiya,
My local camera shop kindly recoved some deleted images using Lexar and loaded them back onto the SD card. I don’t have a card reader so I returned the card to the camera and attached to PC in the usual way to download the images. However, although the SD card shows used space, there are no images in the DCIM folder. Can I recover my photos?
Thanks
Without having it in front of me, I can really only speculate what’s going on. My first guess is that they might have saved the recovered files in a different folder. If you can browse the whole card, I’d look elsewhere on the card for them. If you’re using dedicated software that will only let you access the DCIM folder, the best bet will be to try to access the card using a card reader of some kind. There are a few options for that if you don’t have one already. Buying or borrowing one, of course. But many public libraries, printing stores, or even the standalone photo print stations you find at places like CVS or Staples will have card readers that usually let you access the entire card.
Hi Roger, I am wondering how I can select ALL files to recover once I get that list after doing the scan. I have 1209 photos. Please don’t tell me I have to go through and check each and every one. I cannot see an option to “select all”. Thank so much. Aimee
That was very Useful. Thanks Roger!
I was in a bit of dilemma if I should use this Software. But after your detailed review, I was sure I can rely on this one. It worked like a charm in recovering my photos. Gotta say it’s a useful software.
There are no second thoughts when it comes to the utility of this software. Recovered back 100’s of photos from my broken phone’s memory card. Really couldn’t ask for more!