
Here’s my hands-on review of the Sony E 15mm f/1.4 G lens. It’s a fast prime designed for Sony’s E-mount cropped-sensor APS-C cameras in the Alpha range.
I’ve been shooting with it on the Sony a6700 and using it alongside a Sigma 16mm f/1.4, which is a direct competitor. I’ll write up a side-by-side comparison between these lenses separately, but I’ve found the comparison useful in helping to identify each lens’s strengths and weaknesses.

The a6700 has an APS-C cropped sensor, so the effective focal length here is equivalent to a 22.5mm focal length lens on a full-frame camera (aka 35mm equivalent).1
That’s close to my ideal desert-island lens: a 24mm f/1.4. (I’ve also reviewed another Sony lens, the FE 24mm f/1.4 GM, which is designed for full-frame cameras.))
So it’s a focal length and speed that I’m a big fan of, and it was fun to test out on the Sony a6700.
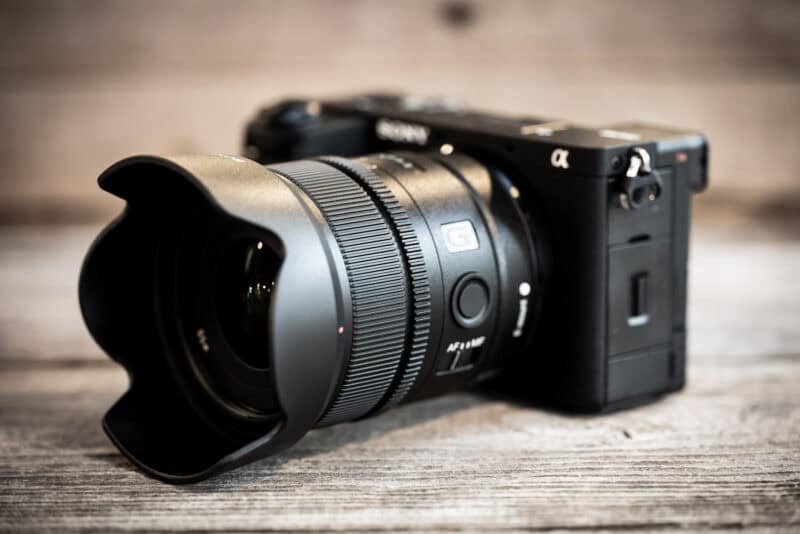
What it’s like to shoot with this lens
It’s small and light; significantly smaller than the Sigma 16mm. It is, however significantly larger than the 10-20mm f/4 that is one of the kit lens options with some of the Sony Alpha APS-C cameras.
| Dimensions (ø x L) | 2.6 x 2.7 inches / 66.6 x 69.5 mm |
| Weight | 7.7 ounces / 219 grams |
And it feels, frankly, a little plasticky in the hand. Not necessarily in an especially notable way, except that it doesn’t feel nearly as solid and reliable as the Sigma 16mm f/1.4. The focus ring is fine, but it’s not silky smooth and true, which is more of an issue with shooting video than stills. By comparison, the Sigma feels much more solid and its focus ring is much smoother.
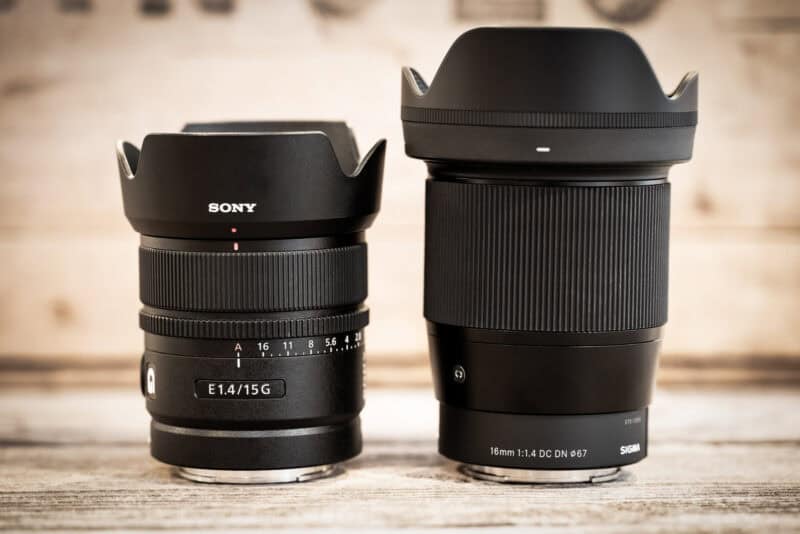
It’s also an easy lens to shoot with for the simple reason that there’s not much going on with it. By that I mean it doesn’t have many bells and whistles. It doesn’t have lens optical stabilization, so if you need that, you’ll be relying on the camera’s IBIS.
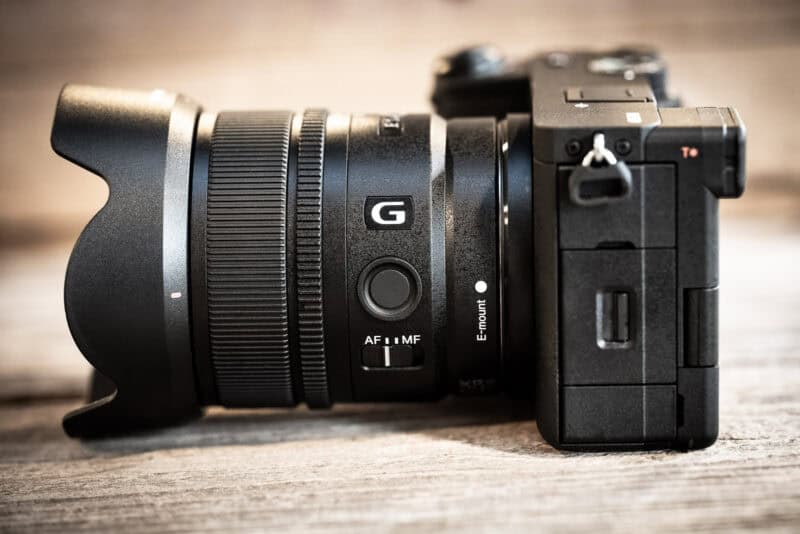
Which is not a complaint and not to suggest it’s lacking anything essential. It has a customizable button on the side that you can set up using the camera’s menu system.
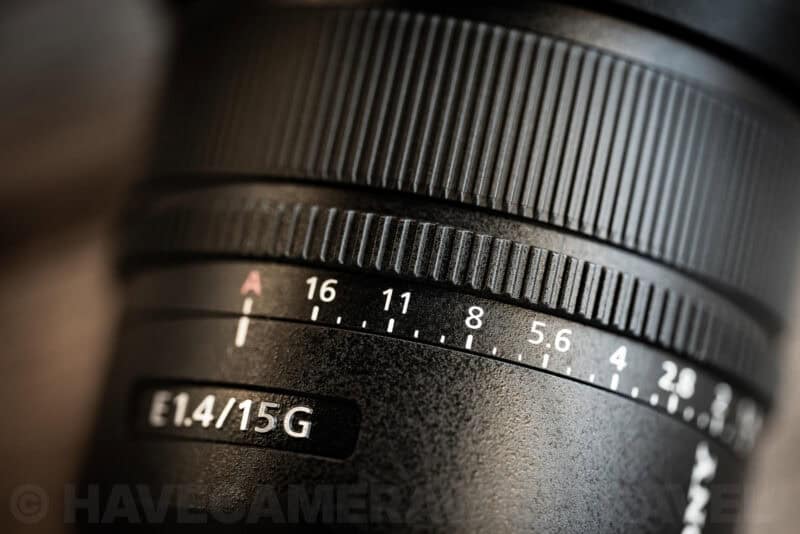
It has an aperture ring, and it’s up to you whether to use it. That’s because you can also use the camera’s controls for aperture. Basically, you can use it to control the aperture in the old-school way, or you can set it to the A (for Auto) setting and control the aperture through the camera. And while I do have some quibbles with the way it’s implemented (more on that below), it’s simple and mostly foolproof.
It also has a switch on the side for toggling between autofocus and manual focus.
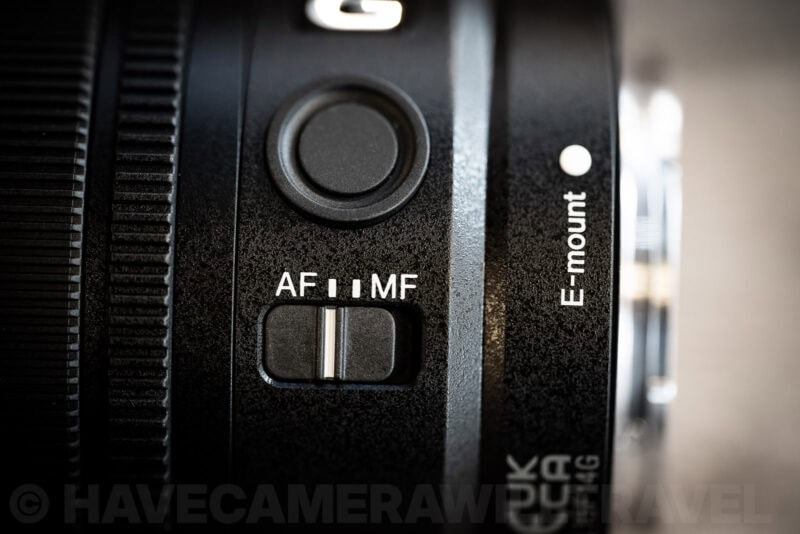
But there’s a third option: autofocus with manual focus override. For that, you’ll need to turn on a setting on the camera’s menu (it’s off by default). On Sony cameras, that setting is called Full Time Direct Manual Focus, or DMF. That’s disabled by default on at least some Sony cameras; it is on the a6700, and I put together a quick guide to changing it on the Sony a6700 here. With that feature enabled, you can use autofocus as normal and then tweak as necessary manually.
How is its optical quality?
Overall, I was happy with the results.
I found it to be reliably sharp even wide open. I’m not one to obsess over sharpness in a technical sense, and the reality is that I’m often shooting wide open or close to it, so I don’t necessarily expect corner-to-corner crispness. But I didn’t run into any situations where I found sharpness to be lacking.
Focusing is quick. No complaints there when factoring in the camera it’s on.2
As I said, it’s an easy, no-fuss lens to shoot with, and I didn’t run into any glaring issues at particular apertures. Nothing that would prevent me from using the maximum aperture in cases where I’d want to. And I experienced nothing about the focus speed that would cause me to miss shots (the aperture ring is a different story).
A note on barrel distortion
For quite a wide perspective, this lens has very little barrel distortion. Lines tend to stay very straight, even near the edges of the frame.
But all is not quite as it seems there. That’s because much of that is attributable to processing to minimize lens barrel distortion. The lens design does use three aspherical elements. But I was surprised at how much of the heavy lifting on this is actually done digitally.
What I mean by that is that, by default, a corrective lens profile is applied electronically in the camera to JPG files and enabled by default for RAW files. And, interestingly, it’s applied in real-time through the electronic viewfinder and back screen, which is a wrinkle I was impressed with. It is possible to disable it, but I can’t think of too many reasons you’d want to in normal shooting.
The images I’ve included below and on the sample images page are nearly all with those default settings enabled. But I wanted to include a practical example to show the difference.
Both of these start with the exact same RAW image file. The first/left image is with the default corrective profile applied (it’s enabled by default in Lightroom Classic). The second/right image is with that profile disabled. As you can see, the second image as quite pronounced curvature of straight lines near the edges of the frame, both vertically and horizontally.


This is another point of difference with the Sigma 16mm f/1.4. That lens also has a built-in profile that’s applied automatically. But it’s a little different in that it’s only for chromatic aberration, and it’s actually embedded within the RAW file. So when you open the RAW file taken with this lens in something like Lightroom Classic, the embedded CA profile is applied but the barrel distortion and vignetting profiles are not automatically applied. You can, however, enable them and use a lens profile created by Adobe (or create your own, if you’re so inclined).
Sony 15mm f/1.4 sample photos
Here are a few sample images to give a bit of a sense of its perspective. I’ve posted a larger selection of sample images separately.


What to know about these sample images
These were shot on a Sony a6700 in RAW and lightly processed in Lightroom Classic.
I haven’t applied extra optical corrections to these in post, but that’s not to say these are unadulterated optical versions. Because my objective here is to test typical real-world use rather than do scientific lab tests, I’ve left the default settings on.
And in this case, the default settings applied for the combination of the Sony a6700 and this lens include automatic corrections for issues like barrel distortion, chromatic aberration, and lens vignetting. When you open the RAW files in Lightroom, the lens profile is automatically applied, and if you’re shooting JPG, the fixes are automatically applied in-camera to those JPGs. It’s possible to turn the profile off, but I’ve left it as is here. So what you’re seeing here are versions that include the default corrections.
A smattering of sample images
You can click on each image for a full-size version for a closer look. And I’ve included key shooting data in each caption.


Quibbles & annoyances
I don’t have many complaints about this lens, and when I do, they’re relatively minor.
My main complaint doesn’t have anything to do with the optical performance; it has to do with a minor annoyance I repeatedly ran into. And it’s something that you might not run into if you use your camera bag differently.
There’s an aperture ring on the camera itself. And I normally like that. But in this case, I found it kept moving when I was taking the lens in and out of the camera bag because there’s not much resistance with it.
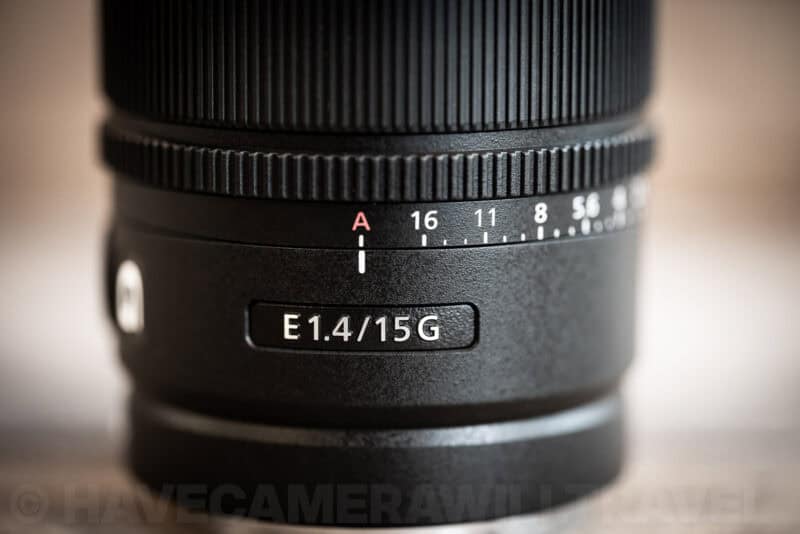
I use a satchel-style camera bag most of the time (either of my trusty Think Thank Retrospective 30 or Retrospective 20). So I’d pick up the camera to shoot and the aperture would be on a different setting. But I wouldn’t noticed until I started shooting and noticed that he aperture/ISO/shutter speed wasn’t quite what I’d expect.
That’s mostly an issue if you’re trying to use the camera’s controls for aperture, because if the lens aperture ring is on anything other than A, the camera’s controls won’t do anything.
So if you want to use the camera’s controls to direct the aperture rather than use the manual aperture ring, you need to set it to A. But there’s no latch or lock to hold in place like some other lenses have. And it moves out of position quite easily.
So if you go to take a photo and find that the aperture is suddenly at something like f/13, that’s the first thing to check.
This is not a dealbreaker problem by any stretch. It’s very much in the minor annoyance category rather than major annoyance. But I did find it happening more often than I’d like. It’s also very much a case of your mileage might vary.
Key specs
It does not have built-in lens optical stabilization.
It has an angle of view of 87°.
| Maximum Aperture | f/1.4 |
| Minimum Aperture | f/16 |
| Lens Mount | Sony E |
| Lens Format Coverage | APS-C |
| Angle of View | 87° |
| Minimum Focus Distance | 6.7″ / 17 cm |
| Maximum Magnification | 0.15x |
| Optical Design | 13 Elements in 12 Groups |
| Diaphragm Blades | 7, Rounded |
| Aspherical Elements | 3 |
| Focus Type | Autofocus |
| Image Stabilization | No |
| Filter Size | 55 mm (Front screw-in) |
| Dimensions (ø x L) | 2.6 x 2.7 inches / 66.6 x 69.5 mm |
| Weight | 7.7 ounces / 219 grams |
Filters & hood
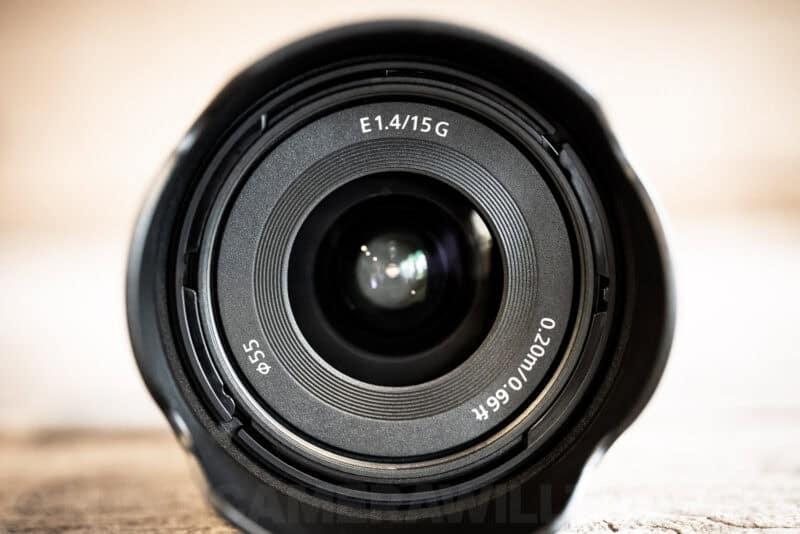
It takes 55mm screw-in filters.
It comes with a lens hood, model ALC-SH171.
Price & availability
Sony has set an MSRP of $749. You can often find it less than that.
Check the current price at:
Notes & References:
- In the EXIF data, it self-reports as a 22mm focal length in 35 equivalent terms. [↩︎]
- What I mean by that is that this isn’t a full-size pro-level rig and doesn’t pretend to be. So I’m not going to judge its focus speed by the same standards that I would a to-shelf pro camera I might use shooting sports at the Olympics. [↩︎]


