The Sony a6000 is over a decade old now, and its sensor shows it. By today’s standards, its high-ISO files are noisy, and detail in the shadows disappears quickly.
But the camera itself is still perfectly good, and there are very good reasons that it was so incredibly popular in the first place. If you have an archive of Sony a6000 RAW files, they’re better than you remember. And if you’re still shooting with it, here’s a good way to give a kind of image quality upgrade to what the sensor itself can do. It can also tilt the scales if you’re thinking about picking one up used: Sony a6000 bodies go for very little now, and this is a cheap way to close a lot of the gap to a newer camera, especially as the price of new cameras has been climbing rapidly recently.
This isn’t about some hardware hack. There’s no messing with electronics, hacking firmware, or sending it in for repair. It’s using the new generation of software to process those RAW files. And it can really work wonders more often than you might expect.
New RAW-denoising technology
Software has moved on far faster than sensors have. AI-based RAW processing can pull cleaner, sharper images out of Sony a6000 files today than the camera could ever have produced when it was new.
The software I’m focusing on here, and the one I use most often in my own workflow, is DxO PureRAW. And at the heart of PureRAW is a technology that DxO calls DeepPRIME. (I wrote a broader comparison of these tools in my look at the current crop of denoise tools.)
The catch is that it only works on RAW files. That’s not a limitation of one app — it’s where the gains of this type of technology come from.
Tools like DxO PureRAW and Lightroom’s newer generation of denoise tools work on the sensor data before it has been demosaiced and baked into the pixels, and that’s where these newer machine-learning models have the advantage over the older generation. You can still run the older style of noise reduction on JPEGs and TIFFs (using other apps, not PureRAW), but you’re working with already-cooked data, and the results are a different league. So this is the payoff for deciding to keep all those RAW files from years ago.
You’ll see the most dramatic improvements in high-ISO frames and in shadow detail. That’s where older RAW files degrade most visibly. In many of today’s cameras, ISO 3200 looks fantastic. But in many older digital cameras, ISO 3200 was the bleeding edge and came with pretty heavy noise and graining.
But the improvements aren’t only limited to high ISOs. Even at the camera’s base ISO, you can see useful improvements, albeit usually more subtle.
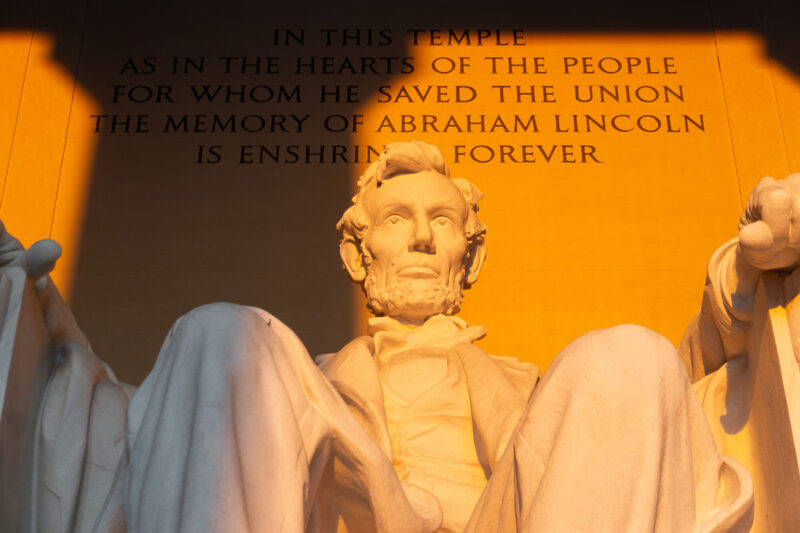
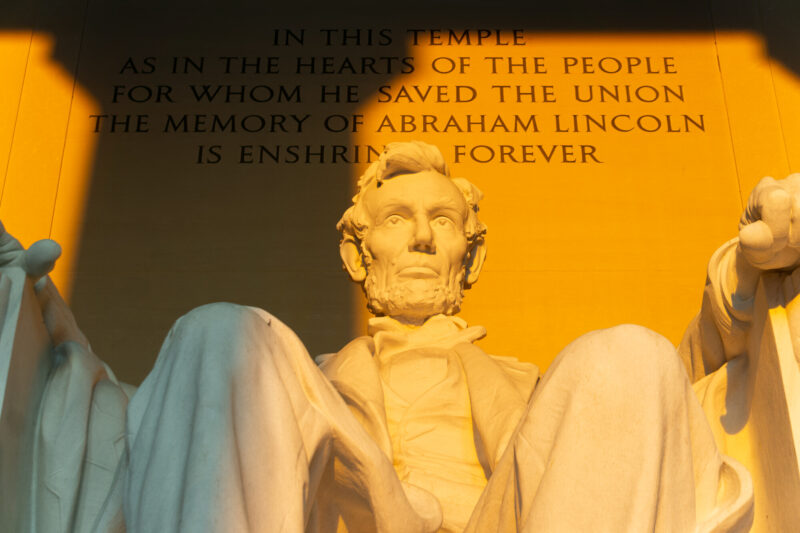
There is, however, something to be aware of with the a6000 RAW files. As you can see in the examples below, I find that PureRAW skews the output green. That’s an inconvenience rather than a problem, but it’s definitely worth knowing about. More on that below.
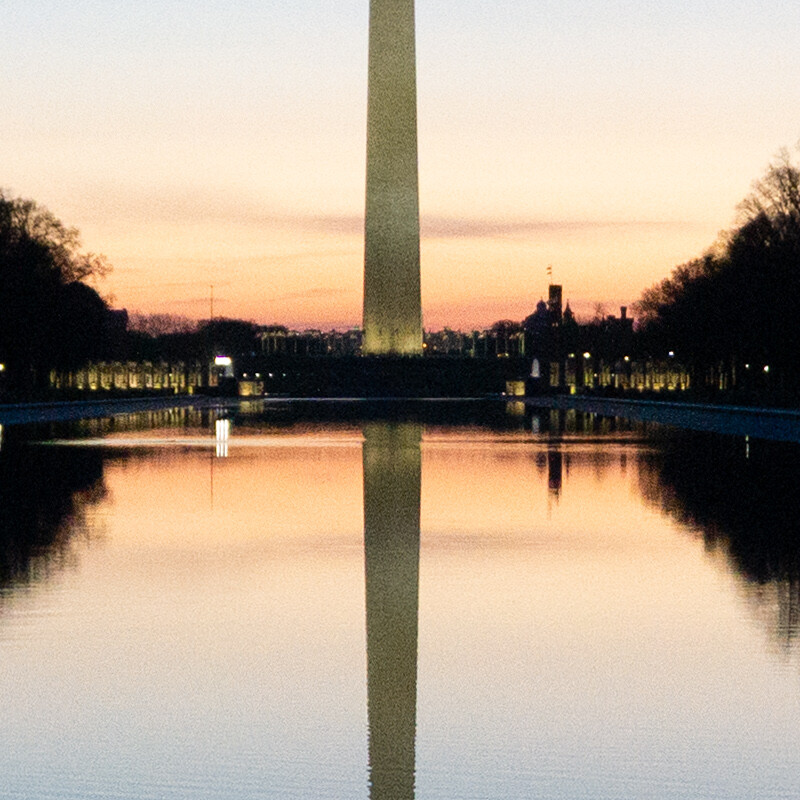
The examples below are all using my own a6000 photos, shot in ordinary real-world shooting conditions. You can slide each side-by-side comparison, and the 100% crops below give you a closer view. If you’d like an even closer look, you can also download the RAW/DNG files; I have more information on how you can get those at the bottom of the page.
The Sony a6000: Sensor and ISO range
A quick look at what we’re working with here.
The a6000 has a 24.3-megapixel APS-C CMOS sensor measuring 23.5 × 15.6 mm. Its base ISO is 100, and the standard sensitivity range runs from ISO 100 to 25600, with no separate extended setting. It came out in 2014, so there are plenty of RAW files from it sitting in archives by now, including my own.
The examples below run from ISO 2500 down to ISO 100, highest first, since that’s where the differences are most obvious.
| Sensor | 24.3 MP APS-C CMOS 23.5 × 15.6 mm |
| Base ISO | 100 |
| Native ISO range | 100 – 25600 |
| Extended ISO (low) | none |
| Extended ISO (high) | none |
| ISO in these examples | 2500 – 100 |
About that color shift . . .
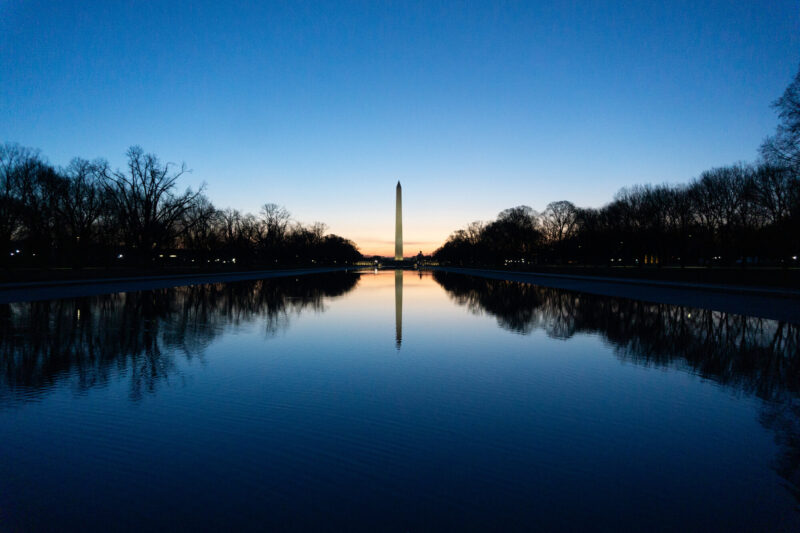
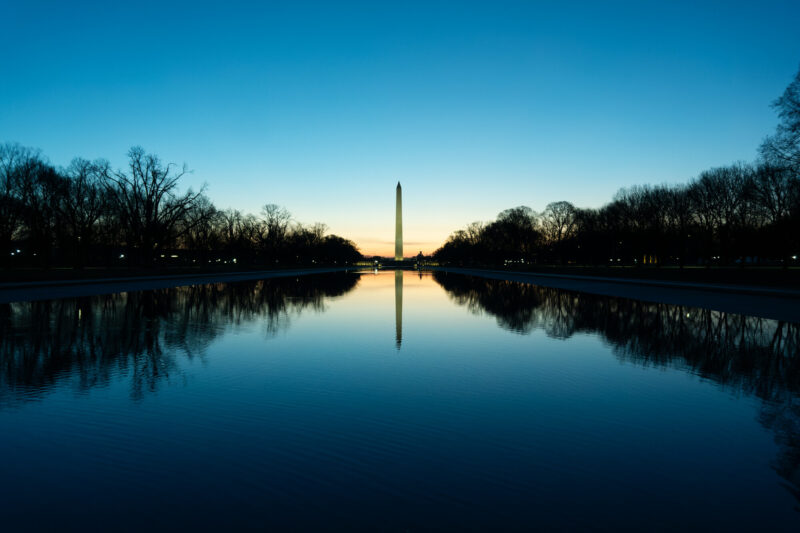
As you’ll quickly see in the examples below, I’ve found PureRAW — at least the current version — to lean the color rendering green. That’s not an issue I’ve seen in the many other camera RAW files I’ve processed, but it’s definitely a thing with all of the a6000 RAW files I’ve processed.
That’s an inconvenience, but I don’t see it as a dealbreaker for the simple fact that we’re working with RAW files here. The color tints and white balance in RAW files are easily adjustable here in ways that they’re not in, say, JPG files, where the color is baked in.
For these examples, I’ve deliberately not corrected it, because the point of this series is to show what you’ll actually get. It isn’t white balance metadata (Lightroom reads the same As Shot values on both files); it’s in the pixels DxO writes for this camera.
The inconvenience part is that you’ll need to adjust it to your eye on a per-image basis. A quick way of doing it is using Lightroom’s eyedropper on a neutral part of the image (i.e., neutral gray is ideal).
So it really comes down to whether that extra white balance step is worth what the denoising gives you. The examples below are the best way to judge that.
Before and after: Sony a6000 RAW files through PureRAW
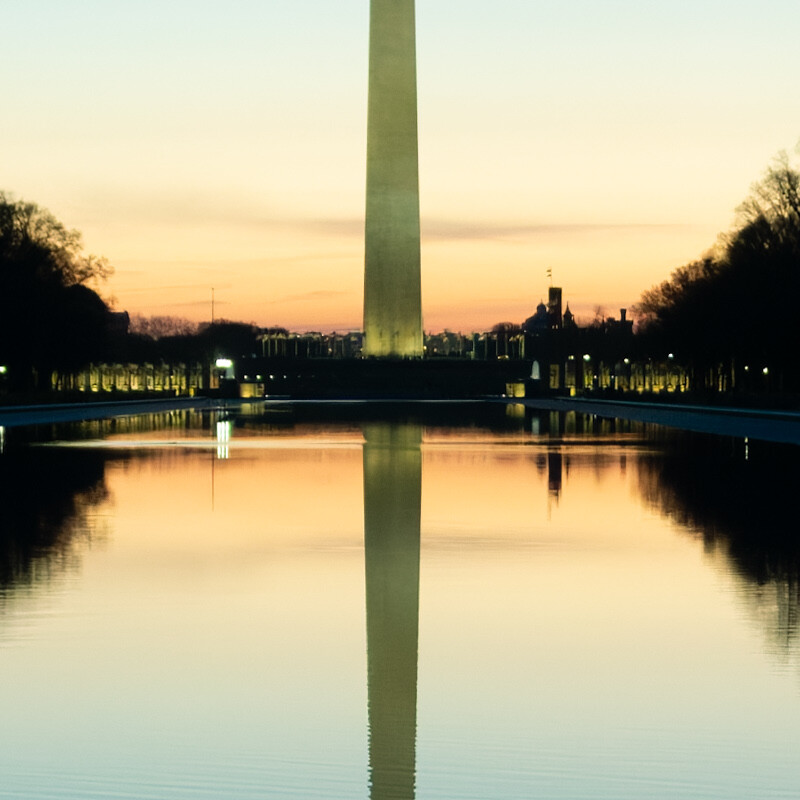
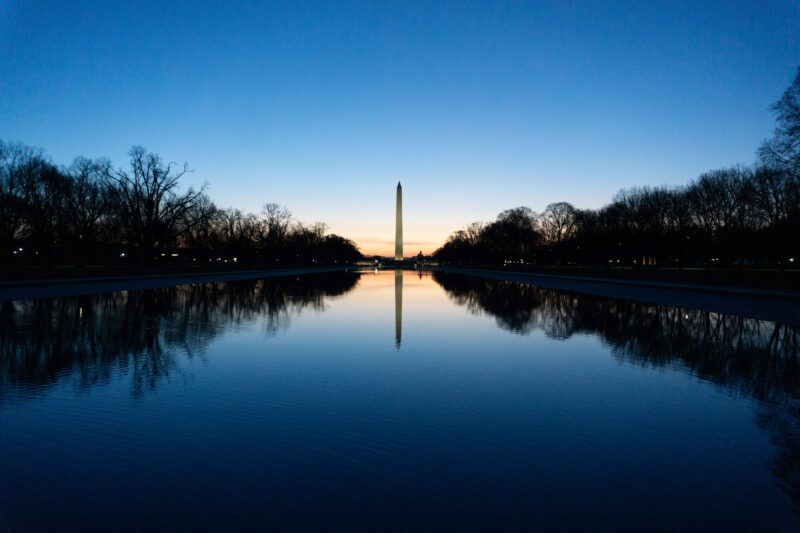
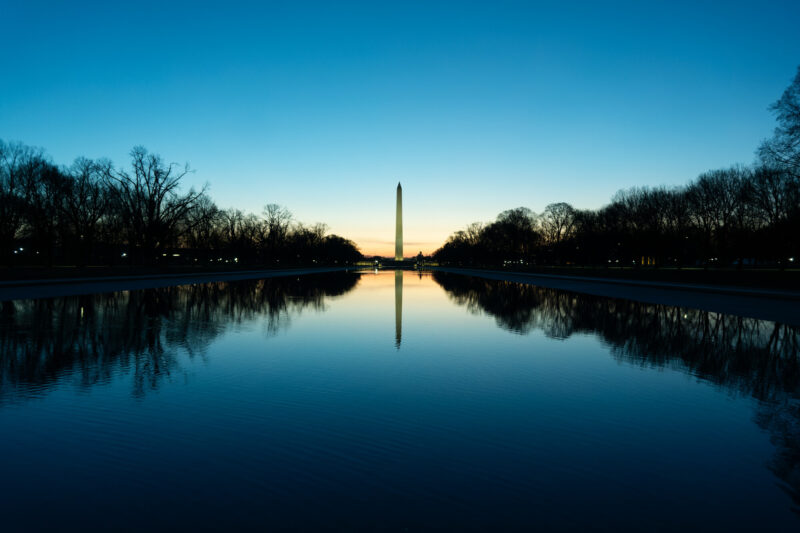
Shot 1: ISO 2500

Shot 2: ISO 320
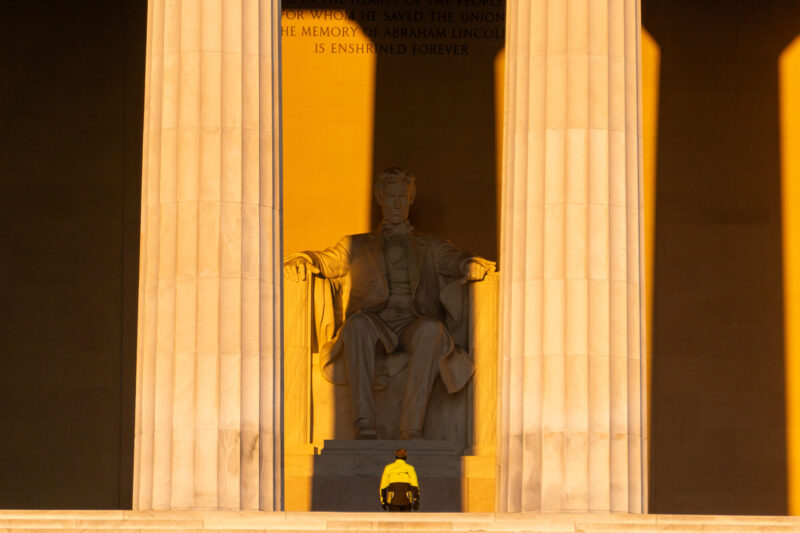
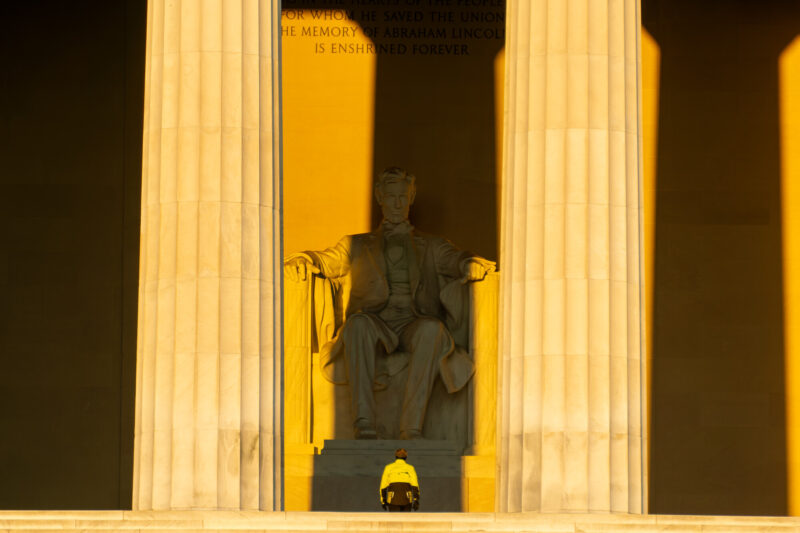
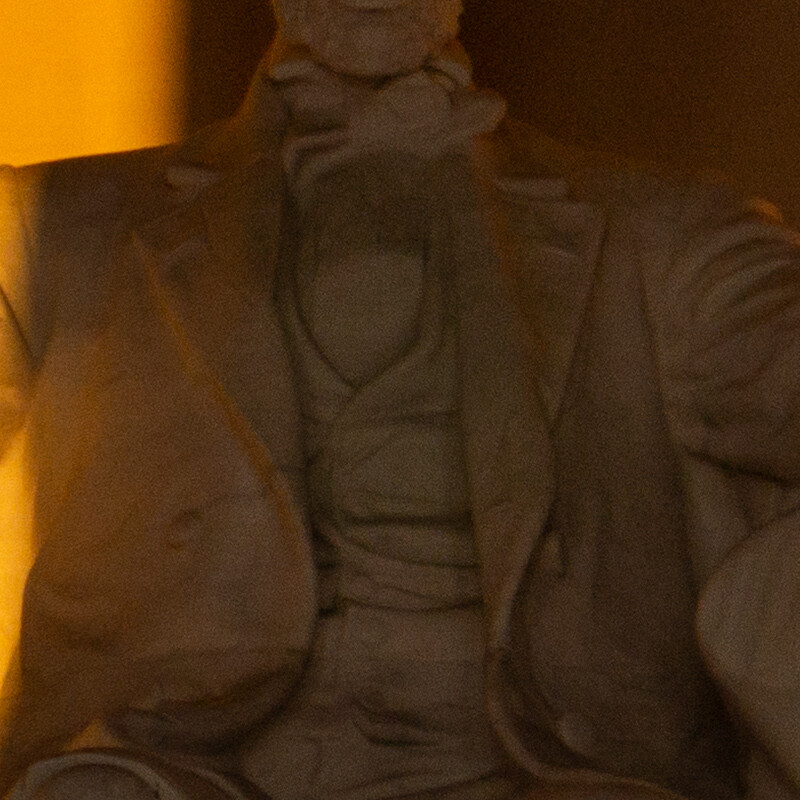
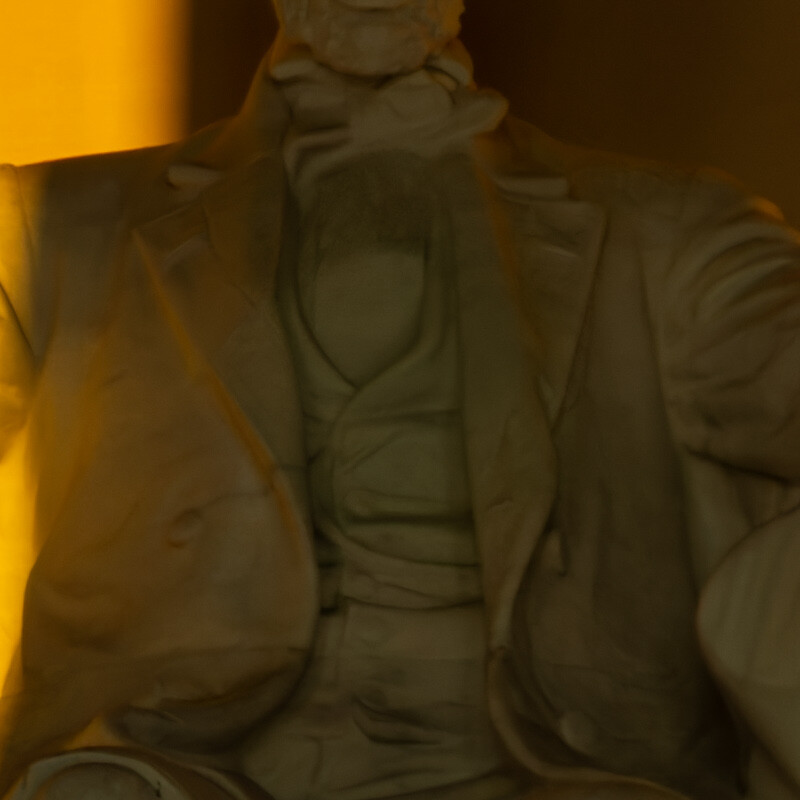
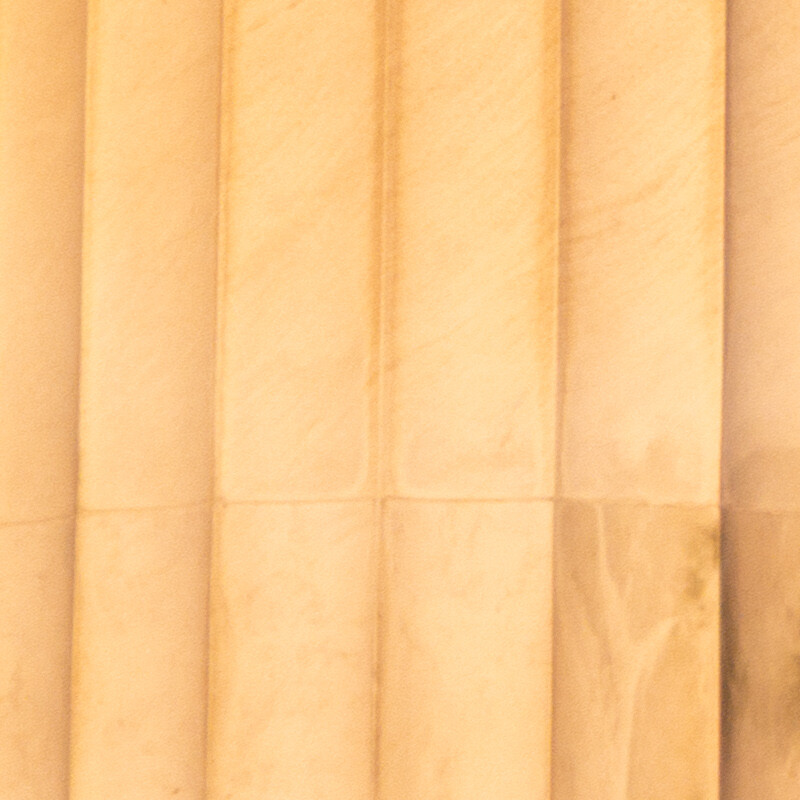
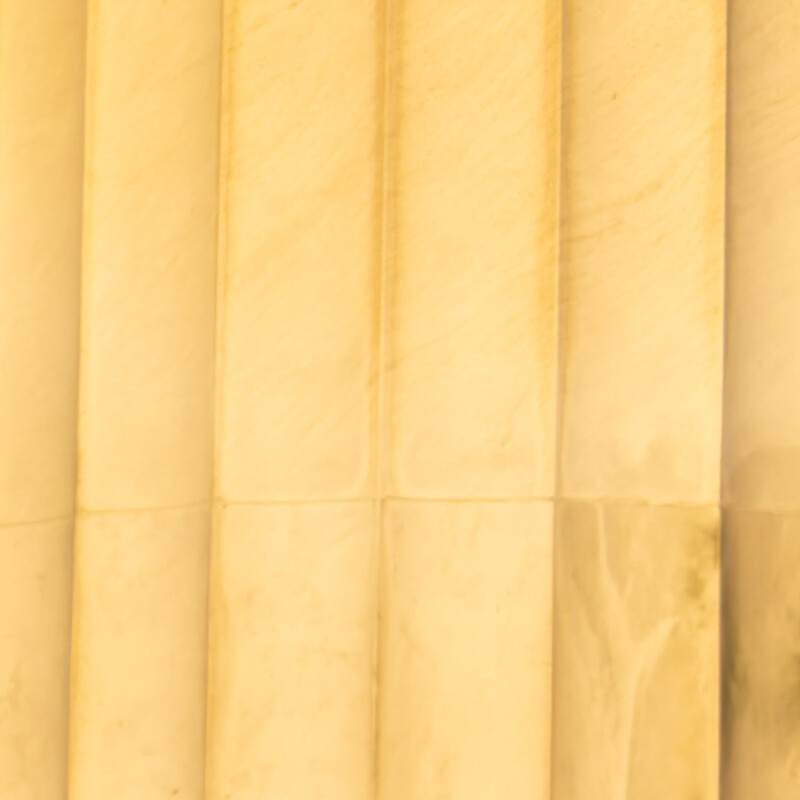
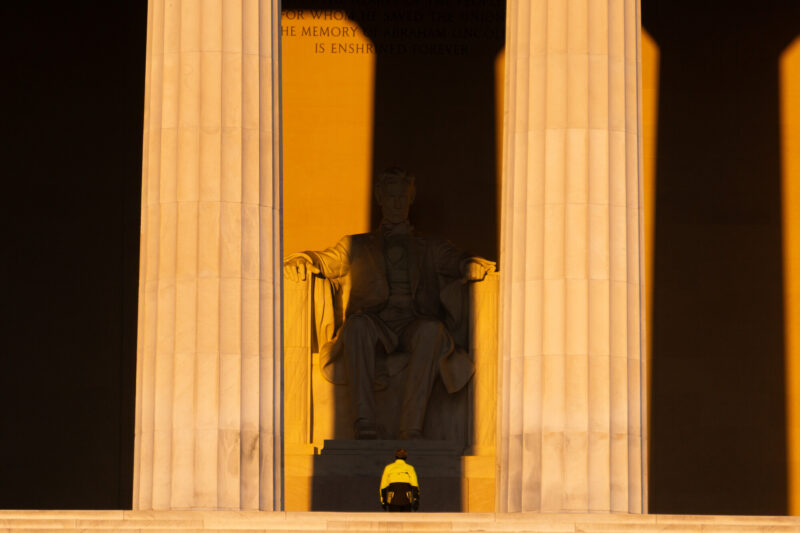
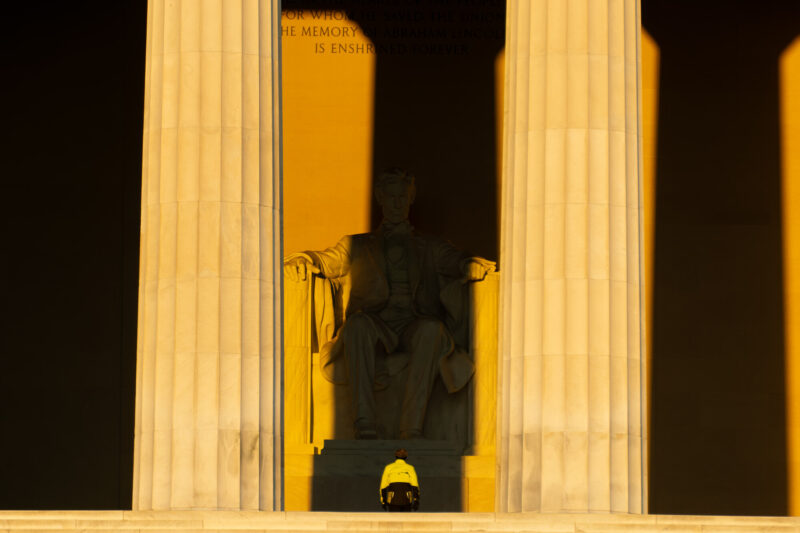
Shot 3: ISO 160
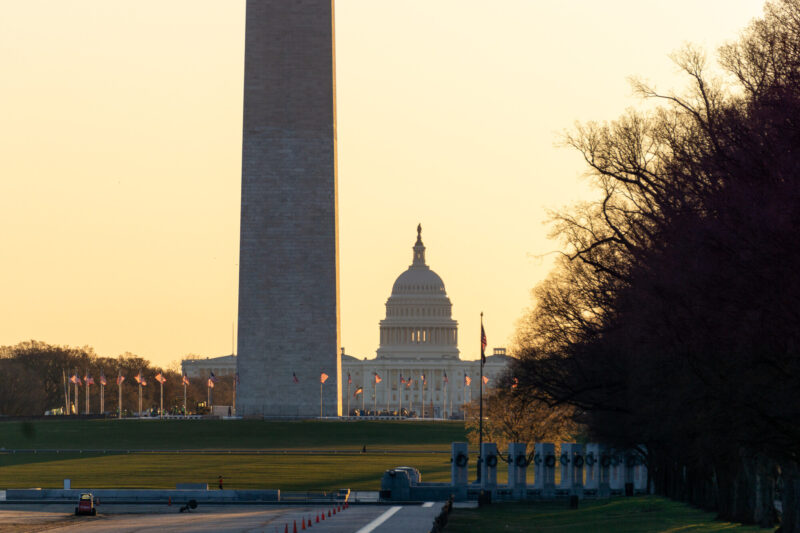
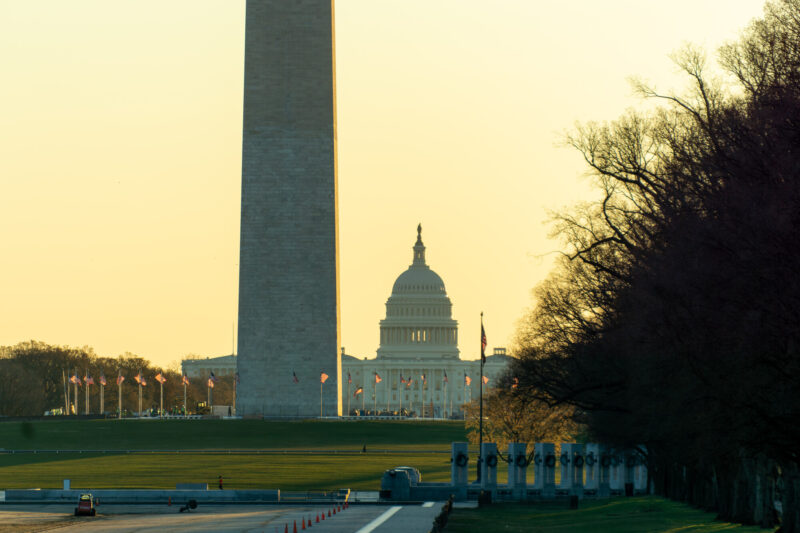
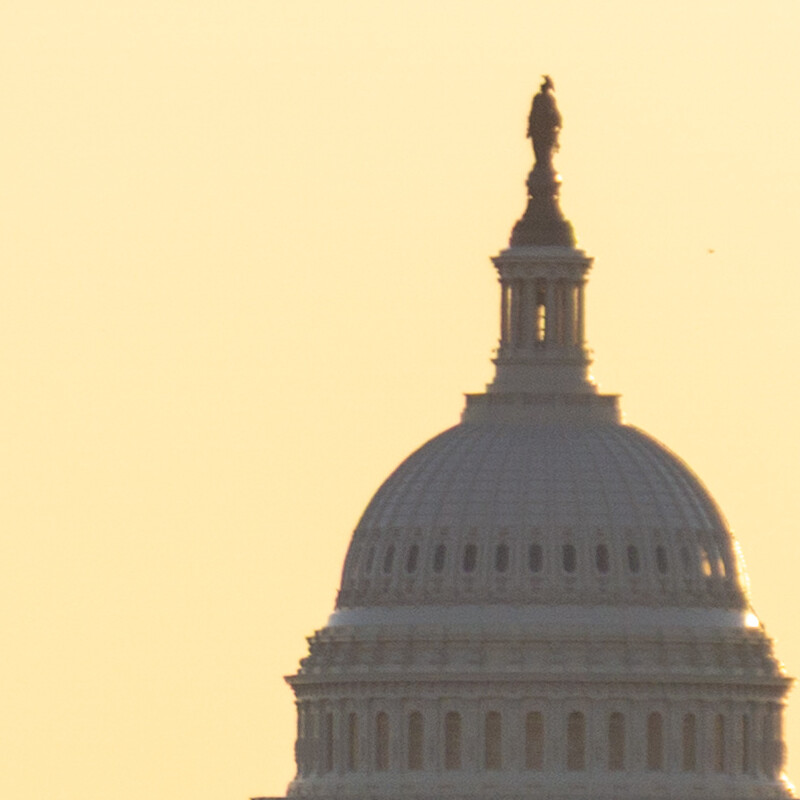
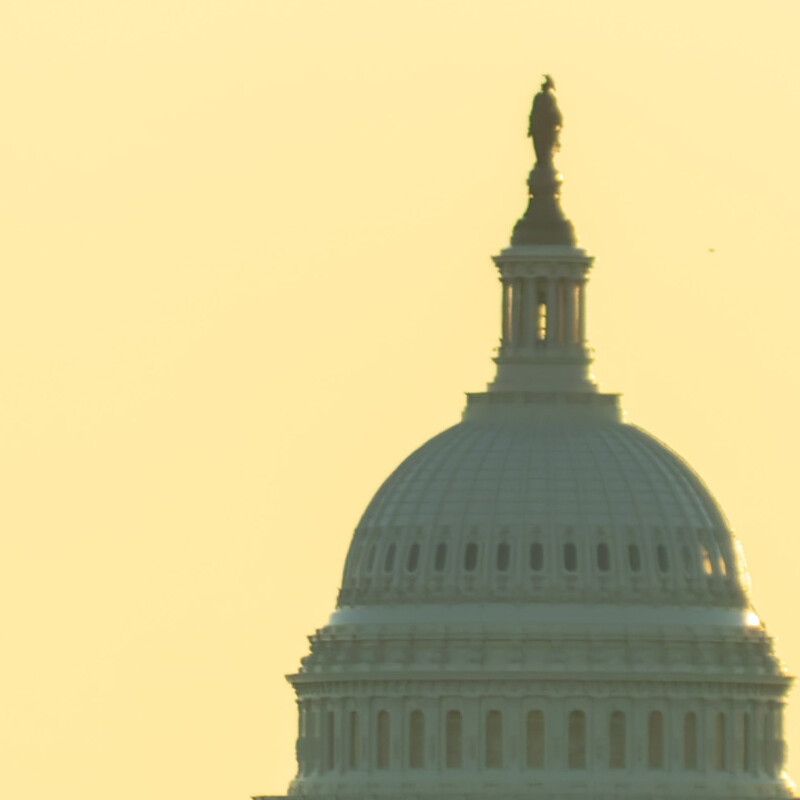
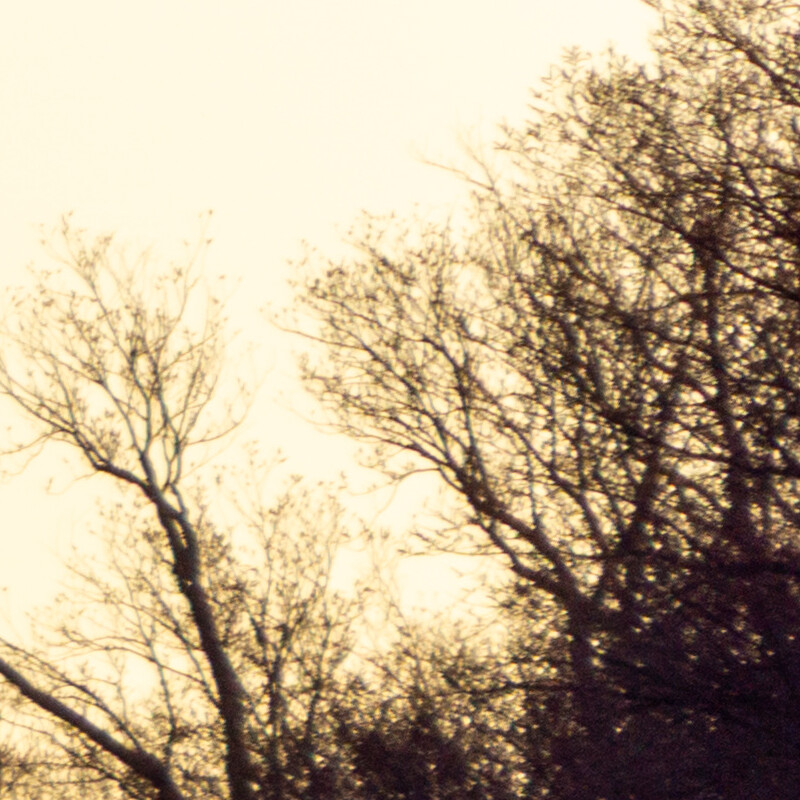
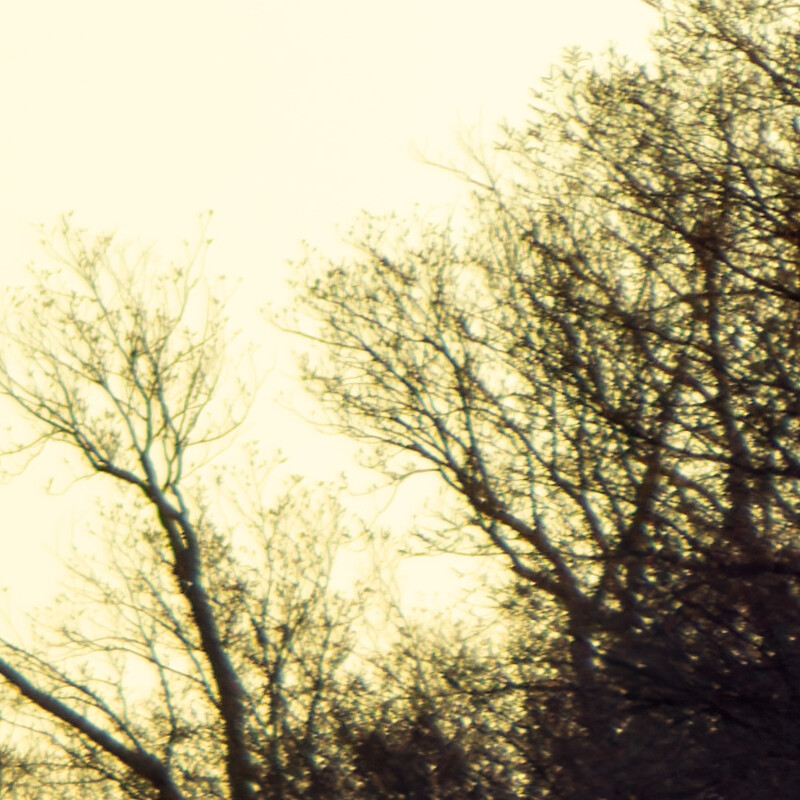
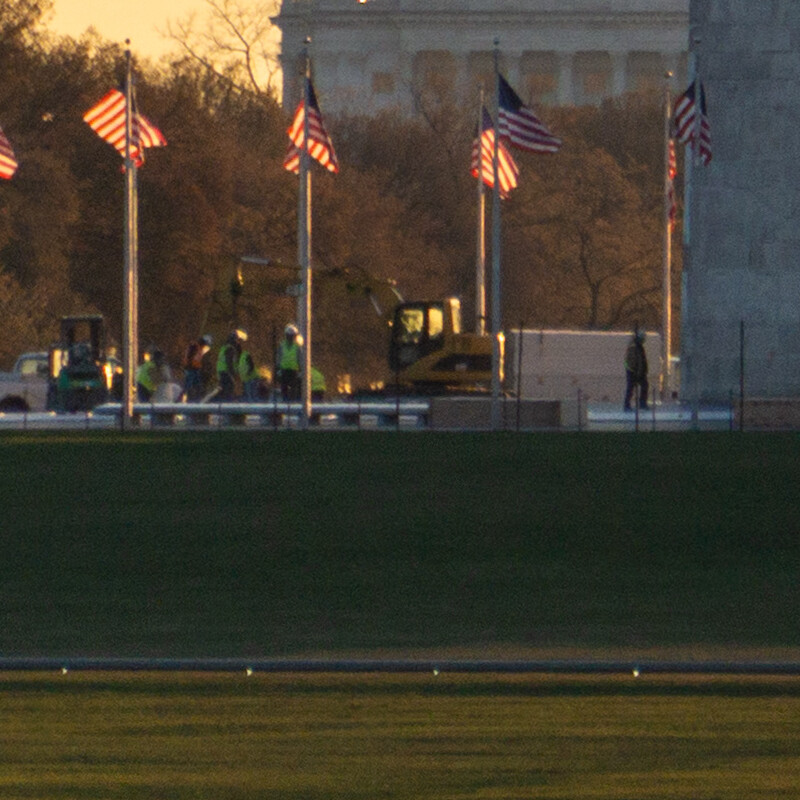
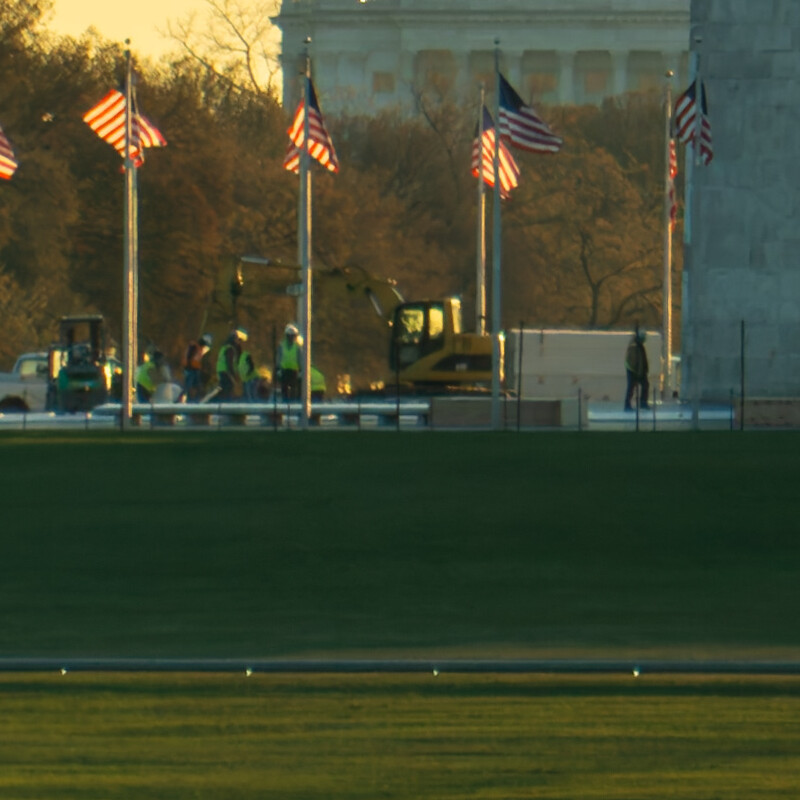
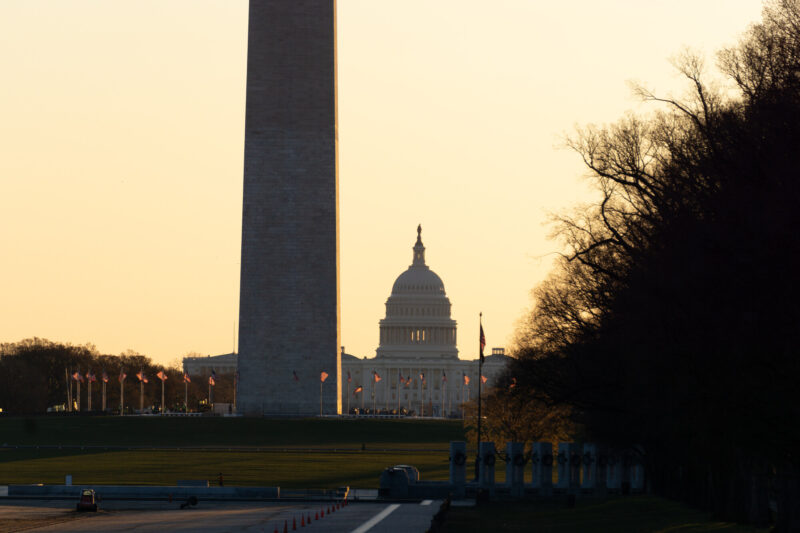
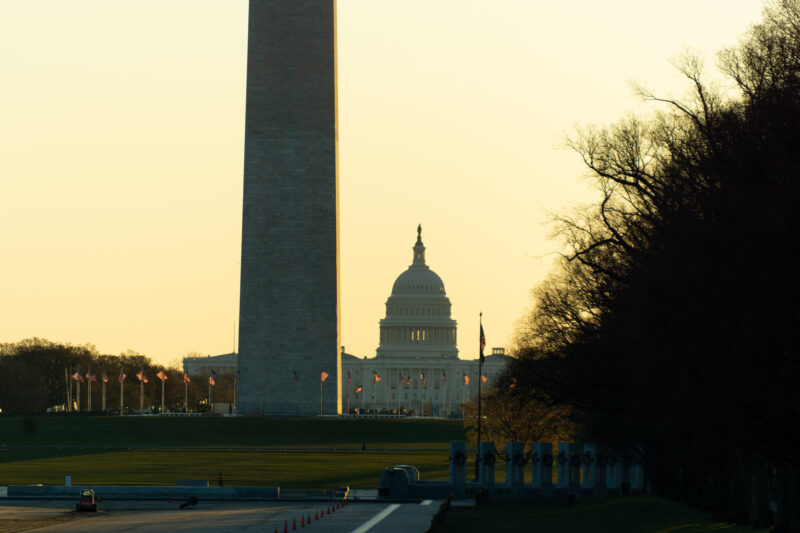
Shot 4: ISO 100
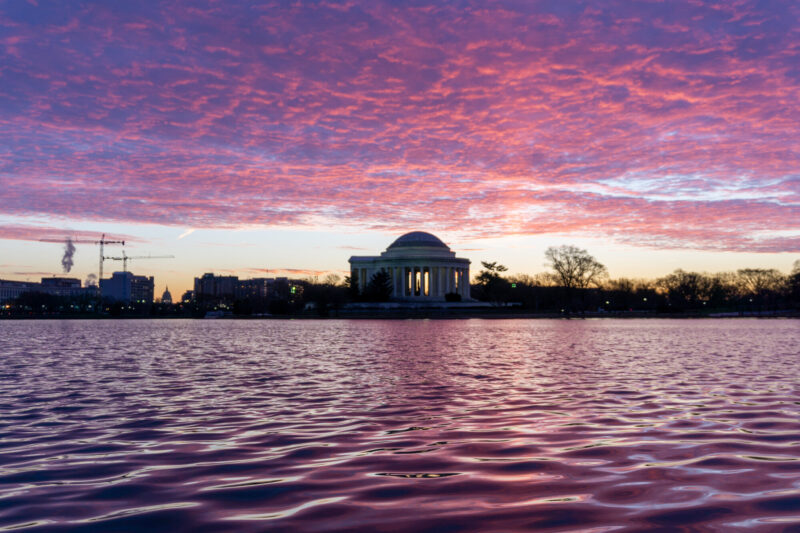
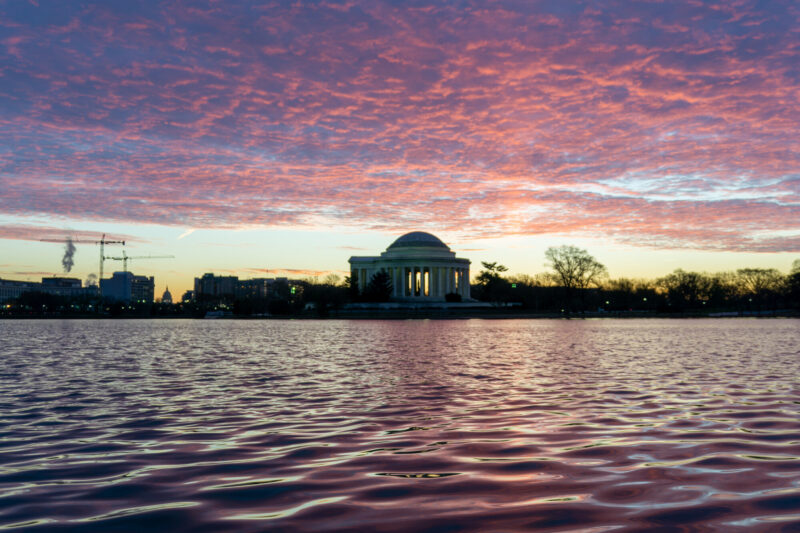
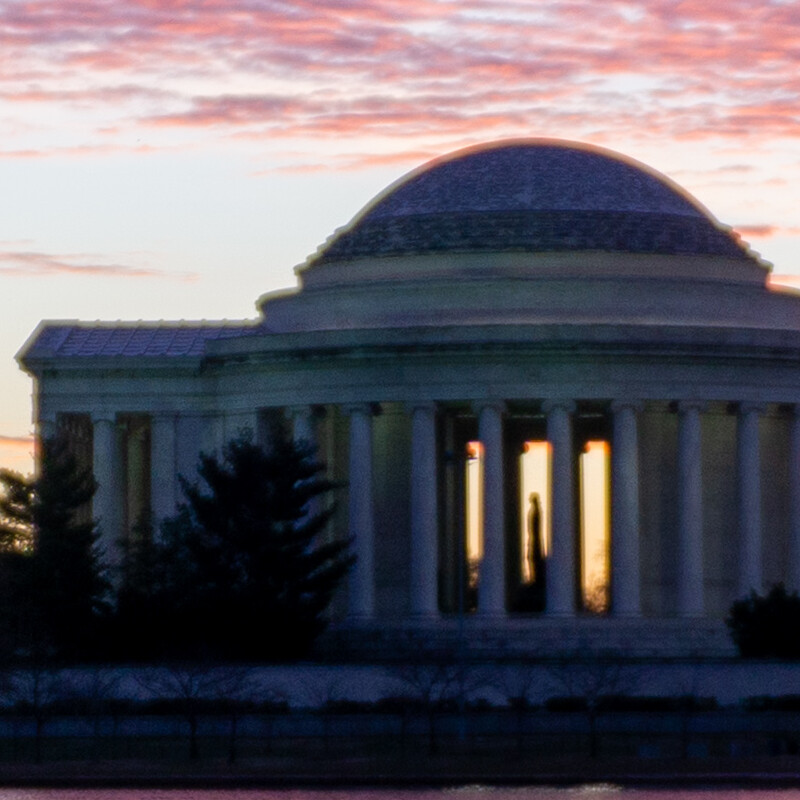
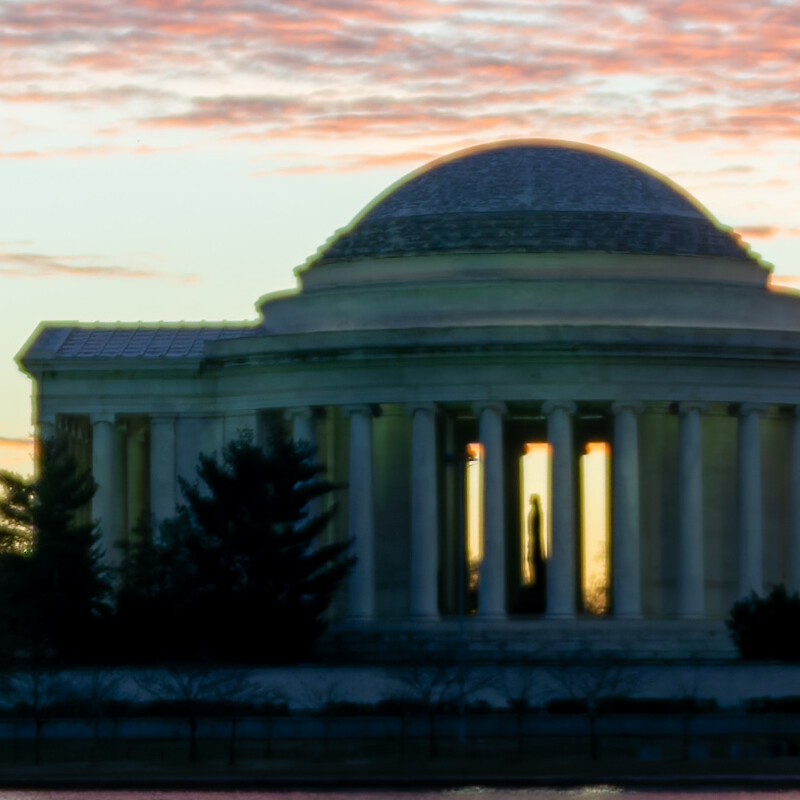
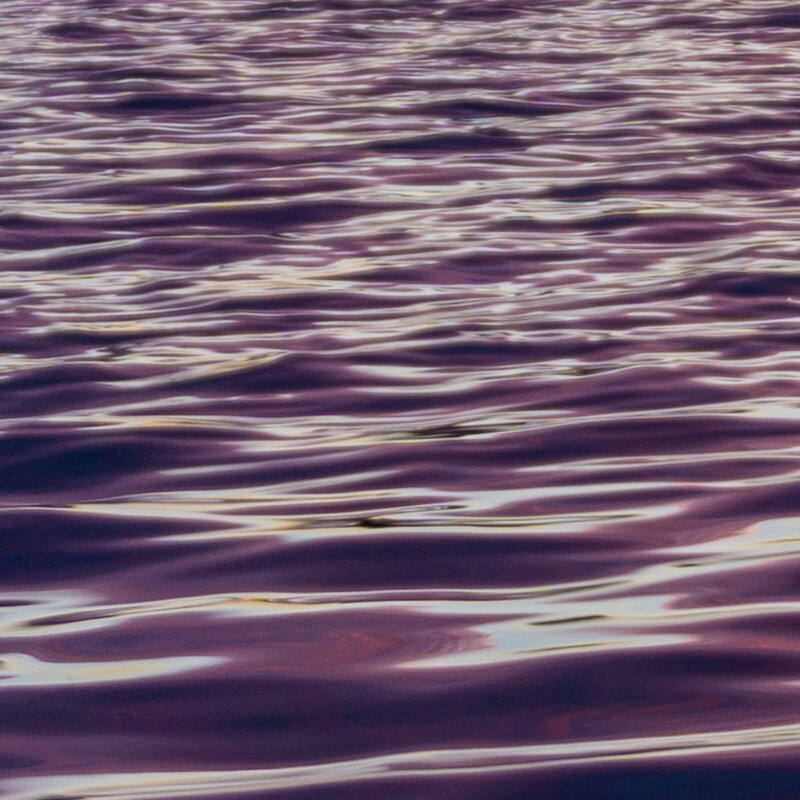
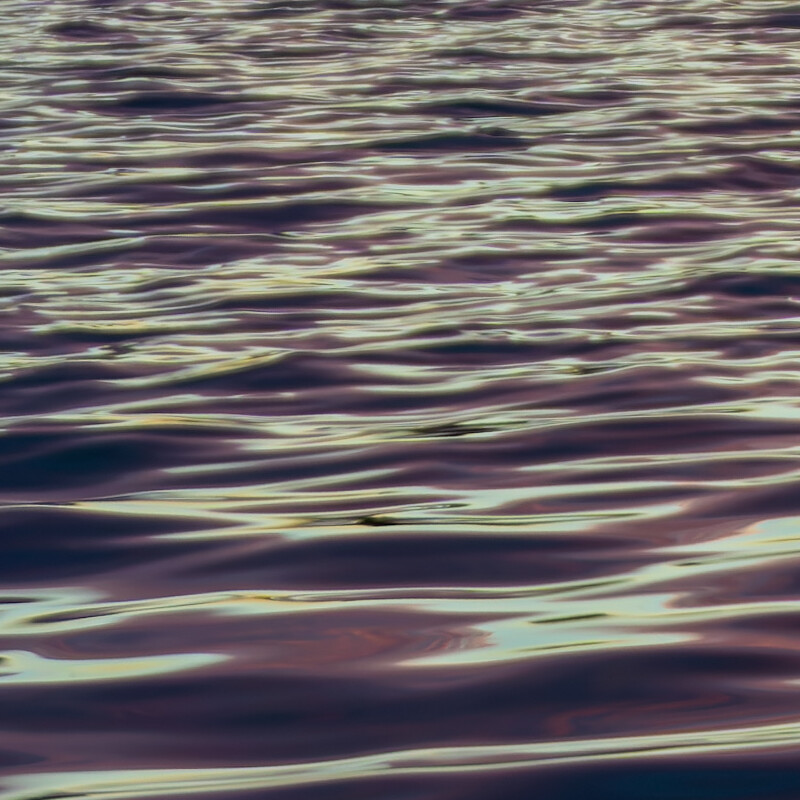
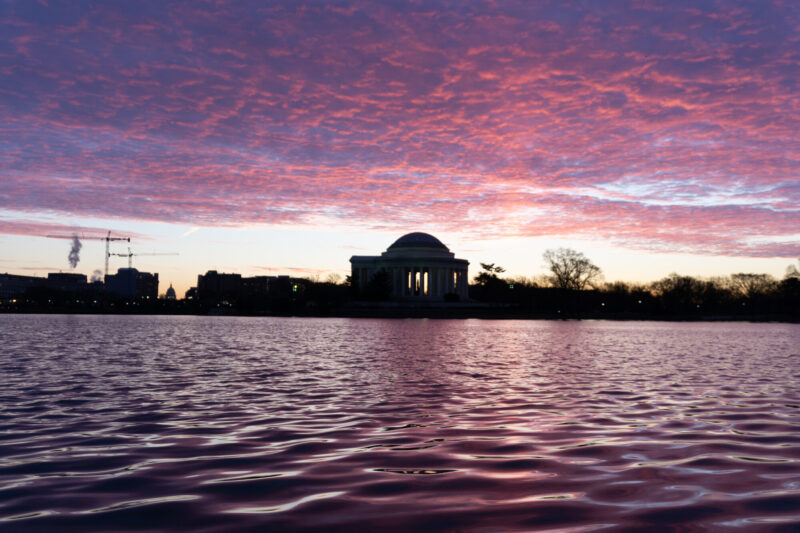
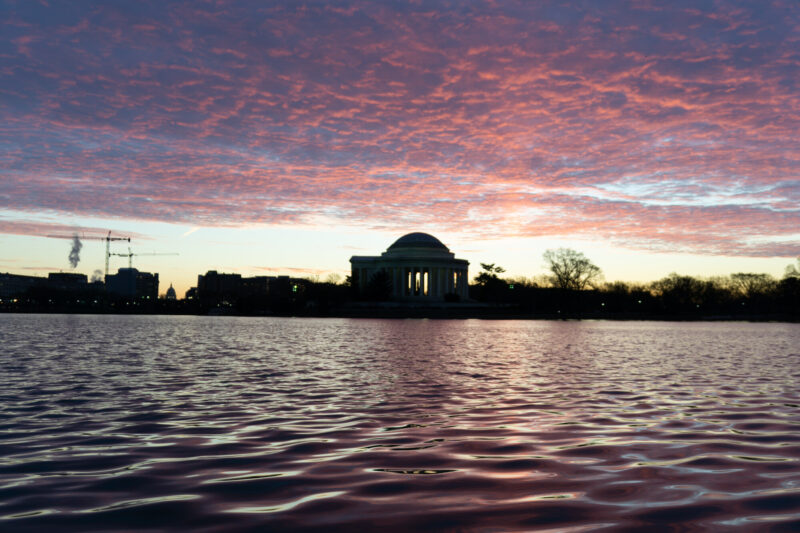
Shot 5: ISO 100
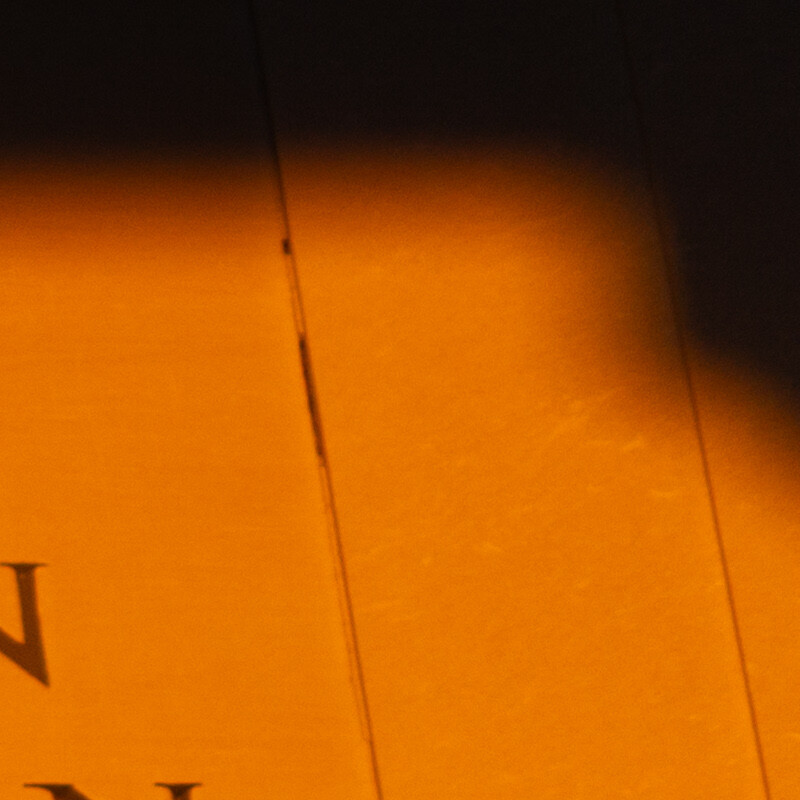
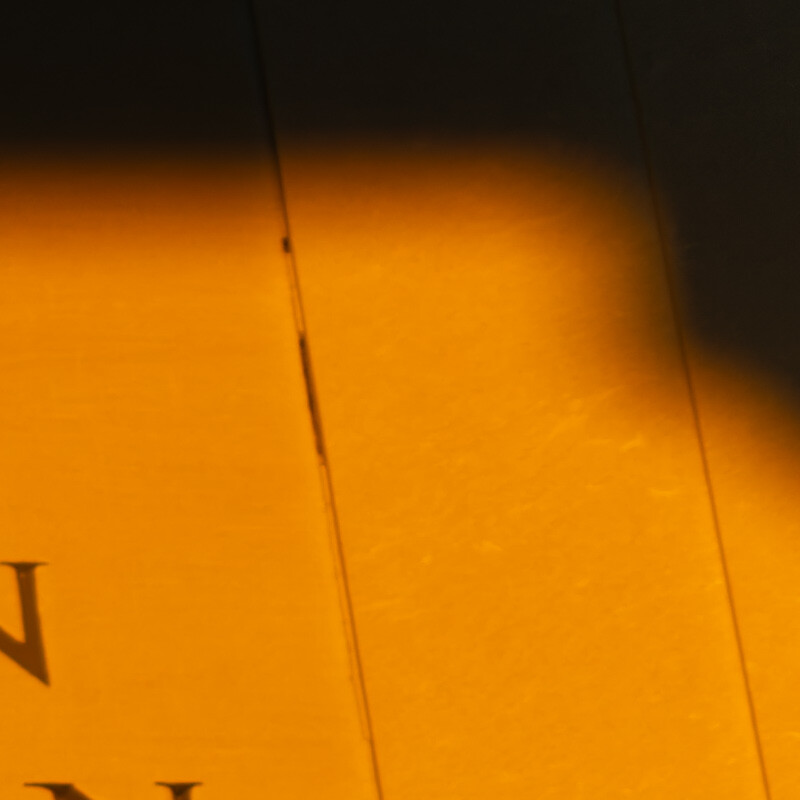
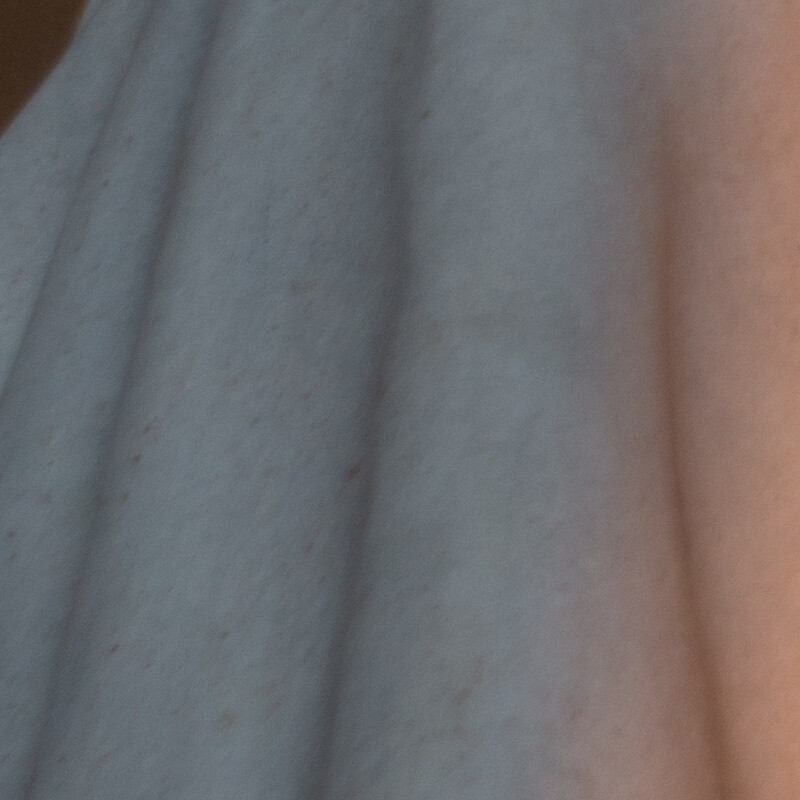
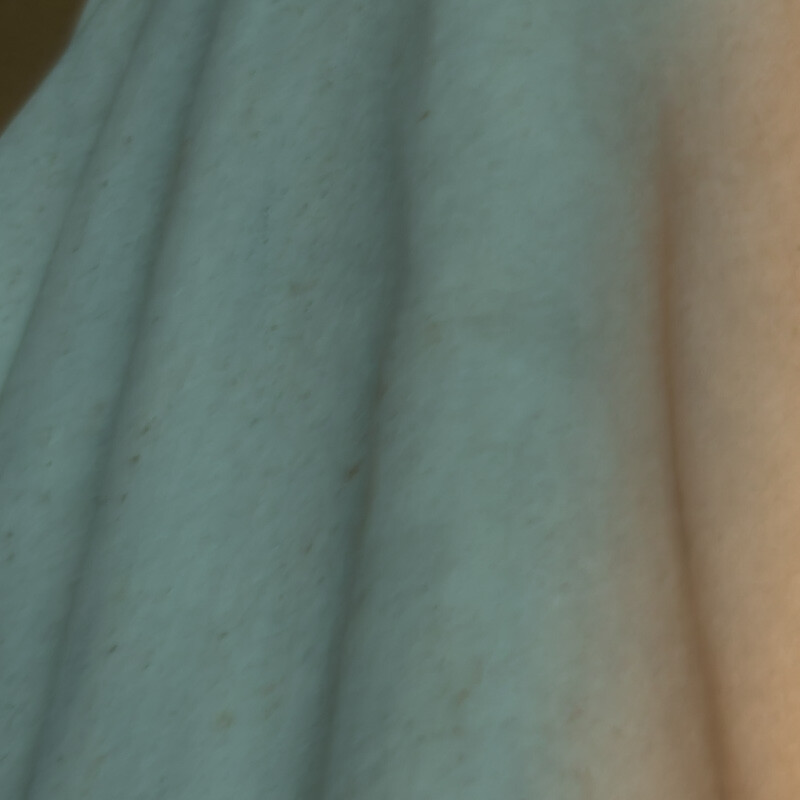
Verdict
There’s no question that PureRAW’s denoising works very well here on Sony a6000 files, especially at the higher end of the ISO range. You can see it clearly in the examples.


It also helps usefully with lens distortion and vignetting here, although how much of that is in the original image is going to depend on what lenses you’re putting on the camera (and what aperture you’re shooting at).
The green color shift is real and significant, and while correcting it is pretty straightforward, it’s a little tedious to do it on a per-image basis (I’ve found applying a global fix to be a good start but still imperfect).
So it really comes down to whether that extra workflow step negates the benefits of the denoising, especially. And that’s really something where each person will have their own opinion.
You can try it on your own images
I’ve found PureRAW to be very useful in my own workflow and have been a paying customer since version 3 in 2023.
But it’s all well and good to see how it works on a small sample of my images; the real test is what effect it’ll have on your images.
If you want to try it on your own files, DxO offers a free trial of PureRAW. Or, if you want a full RAW editor alternative to Lightroom, the same DeepPRIME engine is built into DxO PhotoLab.
How these examples were made
- Camera: Sony a6000 (firmware ILCE-6000 v3.20)
- Input image format: Sony ARW
- Lenses in this batch: E 55-210mm F4.5-6.3 OSS, E PZ 16-50mm F3.5-5.6 OSS
- ISO range: 100 – 2500
- DxO PureRAW (v. 6.5) — DeepPRIME XD3 (Luminance 40, Force Details 0) · Lens softness: ON · Chromatic aberration, vignetting, distortion: ON · Dust removal: OFF · DNG output (uncompressed)
- Rendering: Adobe Lightroom Classic 15.5, identical develop settings for each before/after pair, with the lens corrections handled by each side’s own engine: Lightroom’s lens profile (distortion + vignetting at default) and chromatic-aberration removal on the Lightroom side, DxO’s on the PureRAW DNG (Lightroom’s lens corrections switched off there so nothing is corrected twice); Lightroom’s sharpening and noise reduction switched off on the DNG (PureRAW already did those); no output sharpening
- Lightroom lens profile: Adobe (Sony E 55-210mm F4.5-6.3 OSS), Adobe (Sony E PZ 16-50mm F3.5-5.6 OSS) — used on the Lightroom side of every comparison (it lifts the corners by roughly 19 – 64% at these apertures)
These are all photos I shot myself, in ordinary shooting conditions, not test-chart frames.
Every before/after pair was rendered from the same file with the same settings; the only variable is whether the file went through PureRAW first.
PureRAW lets you dial each tool up or down. For the purposes here I’m using my standardized settings that amount to sensible defaults rather than chasing extremes: DeepPRIME XD3 noise reduction at its default strength, lens softness, chromatic aberration, vignetting and distortion corrections on, and dust removal off.
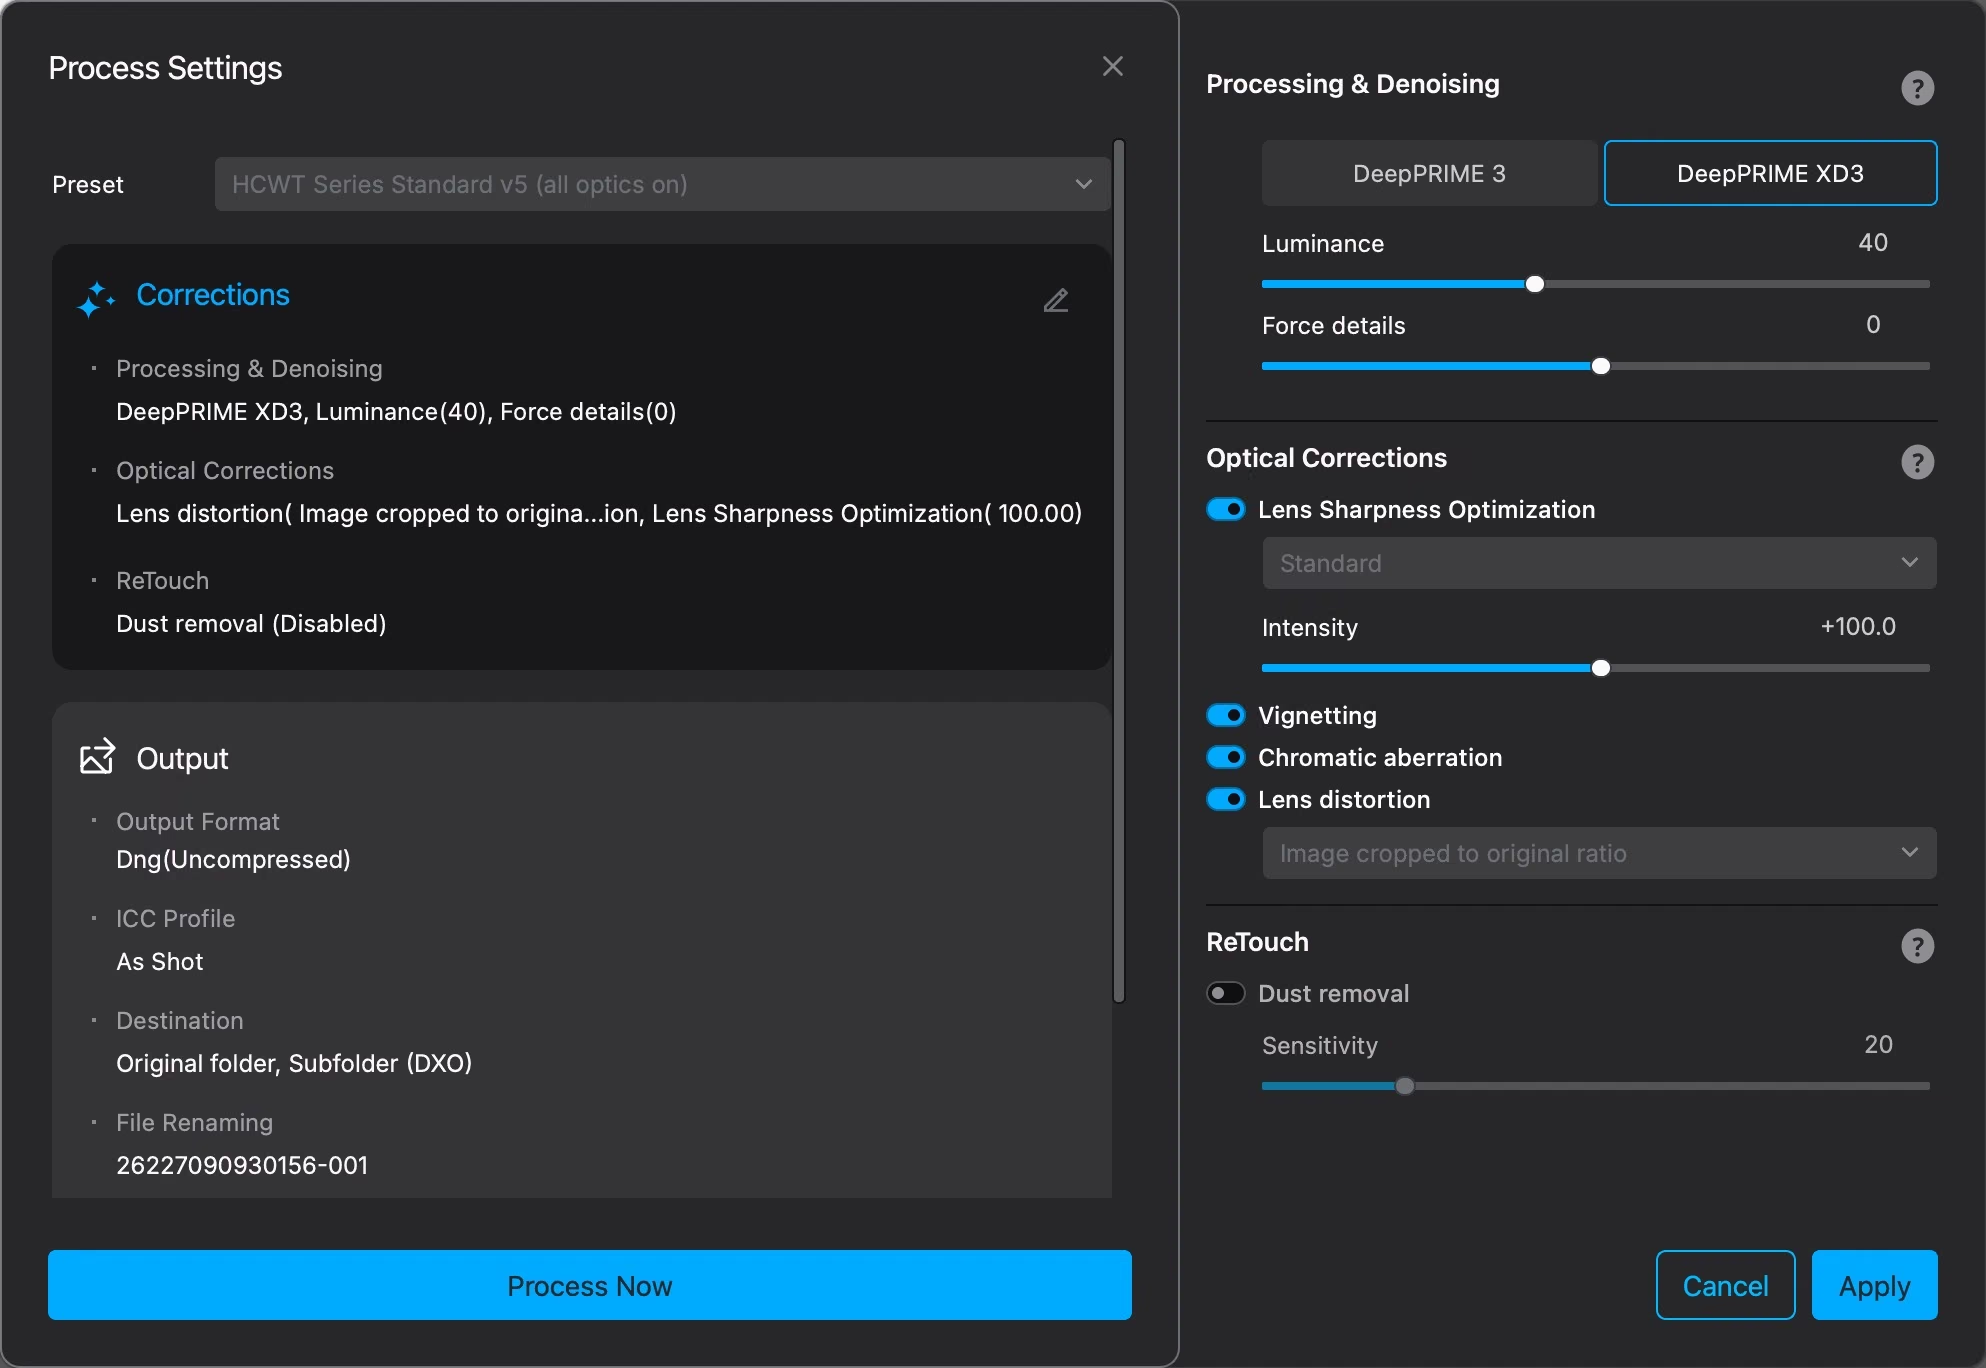
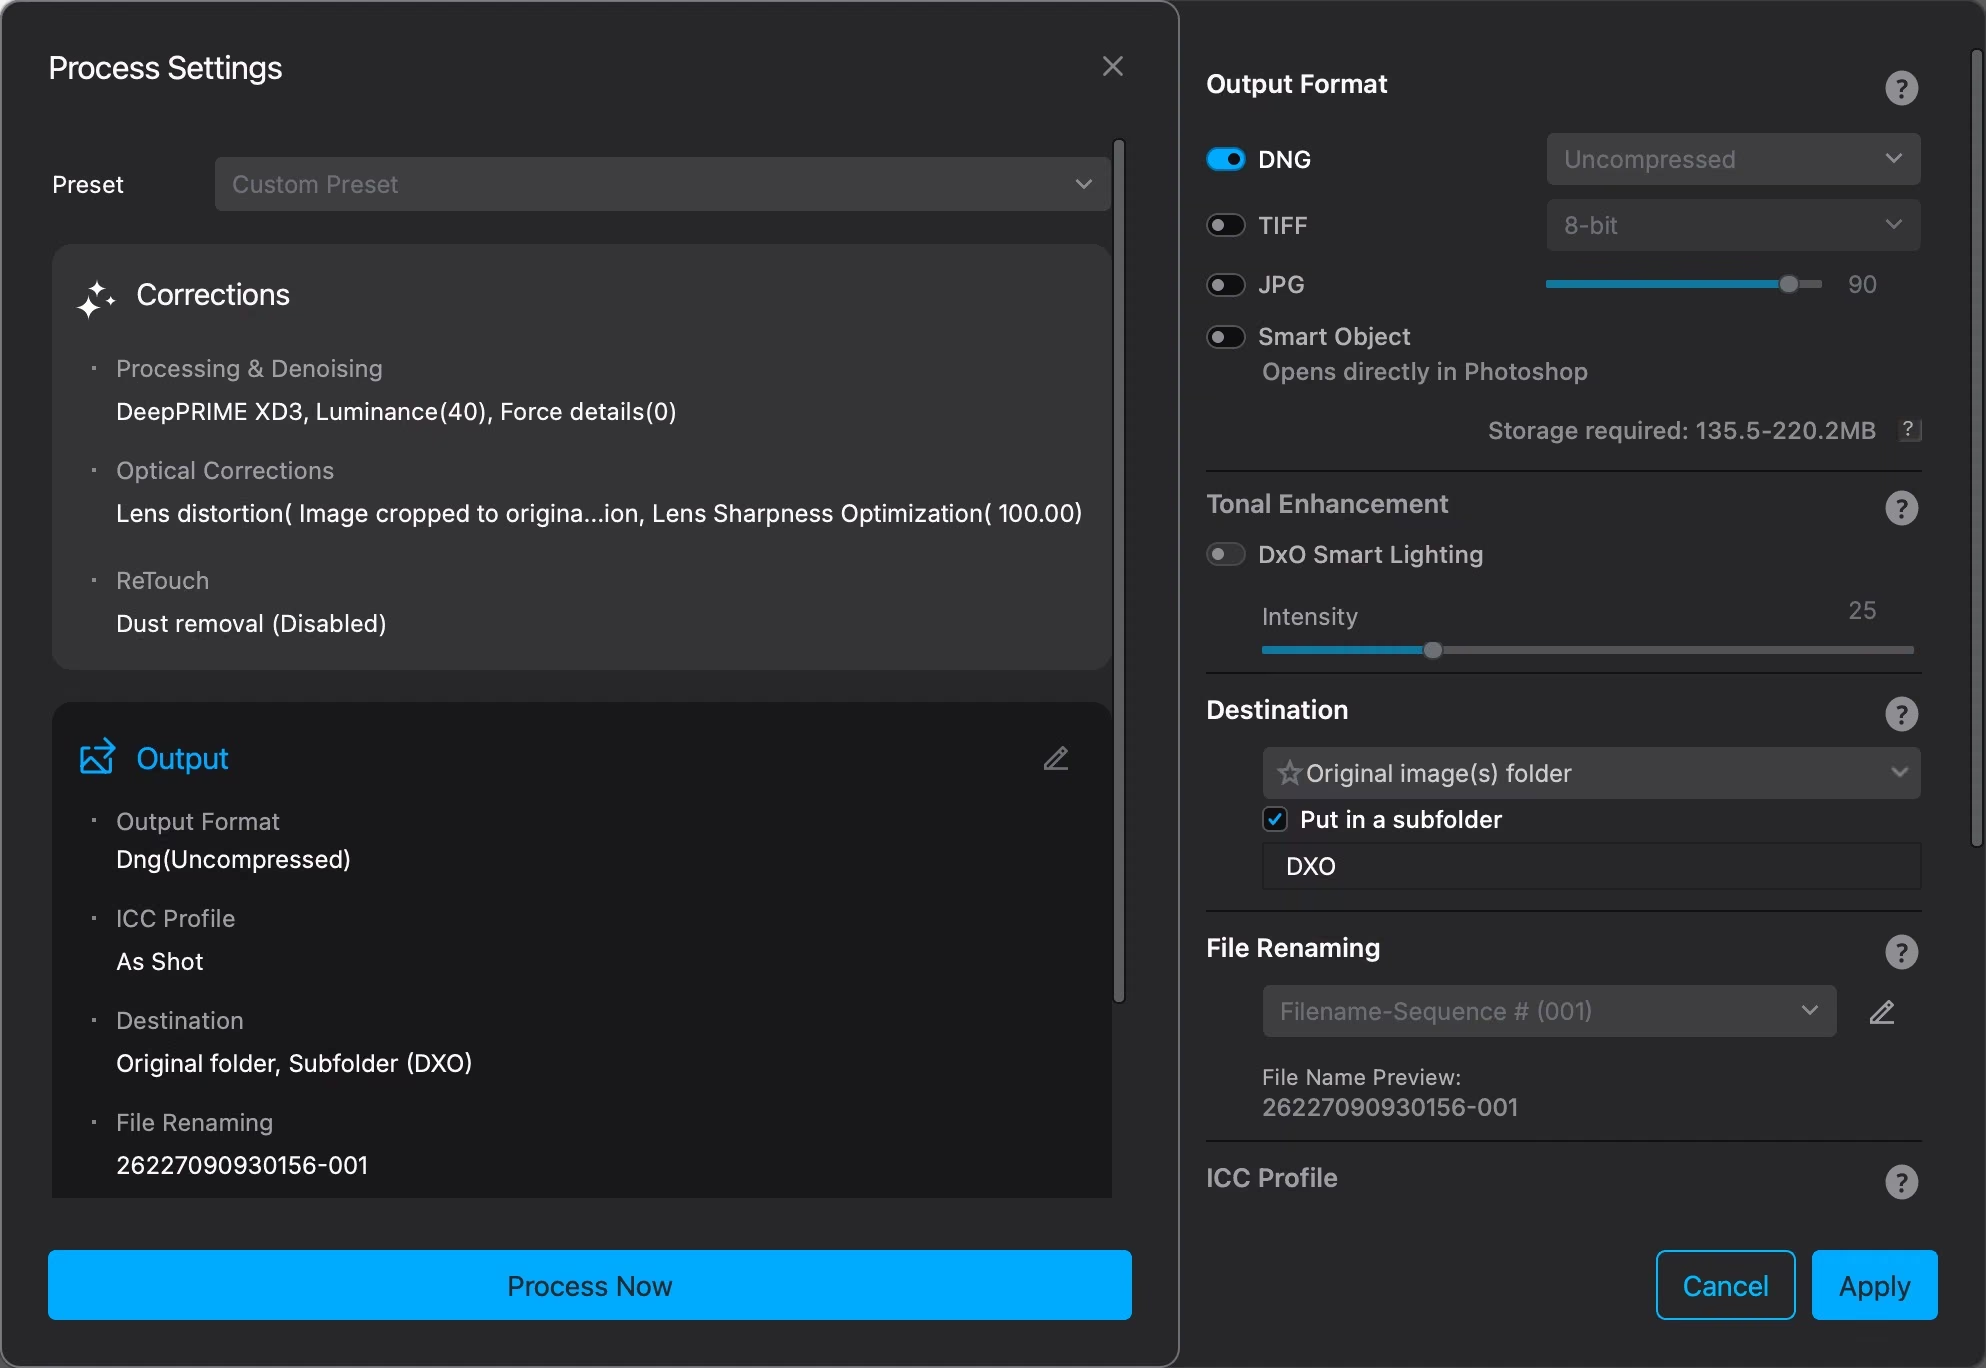
I’ve used the same settings for every frame, so the comparisons are apples-to-apples. And to keep it fair on the optics, the Lightroom side has Lightroom’s own lens profile switched on (distortion and vignetting corrections at their defaults) and chromatic aberration removal on in every comparison, so each side has its optics corrected by its own tools. I’ve also tried to include a variety of different ISO settings and scenes.
Why I’ve chosen these settings here
PureRAW does more than noise reduction. Its tools fall into two groups.
The sensor corrections — DeepPRIME’s noise reduction and demosaicing — work on what the sensor recorded.
The optical corrections — lens softness, chromatic aberration, vignetting, and distortion — fix what the lens did to the light on its way in. The sensor corrections are the main event in this post, but I’ve left DxO’s optical corrections on as well. I can’t really think of a good reason not to fix chromatic aberration in every photo (we’re not doing lomography here!), and it’s a setting I always enable by default on my own photos. For my own photos, I am, however, more choosy about when to apply vignetting and distortion fixes, because to my own eye, those optical “flaws” are sometimes positives and something that I want to retain. But for the purposes here of using a standard set of settings to make comparison easier, and because these types of optical profiles and corrections are defining strengths of DxO’s software, I’m applying those fixes in these side-by-side examples.
Lens softness correction is such an integral part of how PureRAW’s output looks that turning it off would misrepresent the tool. And DxO’s optical corrections — built on the enormous body of lens and camera test data that was their original claim to fame — are a genuine strength that separates PureRAW from Lightroom’s built-in tools.
One thing worth knowing if you shoot adapted or manual lenses on your a6000, which plenty of people do: DxO’s optical corrections come from a module built for a specific camera and lens combination, so a lens DxO has never tested doesn’t get them. Per DxO’s own support pages, if the camera body is supported but the lens isn’t, the file still goes through the denoising and demosaicing — you just lose the profile-based distortion, vignetting and lens softness corrections. If the camera body itself isn’t supported, the file won’t import at all. The a6000 and both kit-era zooms used here are covered, so all of it applies in these examples.
The images above
In the examples above, I’ve included two types of comparisons:
- My edit, upgraded: the before is my finished Lightroom edit, plus Lightroom’s own lens profile (distortion + vignetting at default) and chromatic-aberration removal, switched on for every comparison; the after is the same edit applied to the PureRAW DNG, with Lightroom’s sharpening and noise reduction — and its lens profile and chromatic-aberration removal — switched off on the DNG, because PureRAW has already done those jobs (leaving them on double-processes the file — the most common reason PureRAW output looks over-sharpened). So each side has its optics corrected by its own tools, and everything else is identical on both sides.
- Untouched: both files with no editing at all beyond those lens corrections, at Lightroom’s default settings, so you can see what PureRAW does on its own.
With distortion correction on both sides, each frame is shown as its engine renders it corrected — geometrically the same on both sides, so it doesn’t skew the comparison. On an ultra-wide the correction stretches the corners more than on other lenses, so that’s where any residual difference between the two engines shows up. Neither lens in this batch goes that wide, so there’s not much of it to see here.
There’s a technical note worth knowing: at identical settings, an unadjusted PureRAW DNG renders about 0.1 stop darker than the original in Lightroom. That’s because PureRAW writes its own baseline exposure into the DNG (here PureRAW’s DNG carries +0.35 EV; the camera’s file has no such tag, and Lightroom applies its own hidden baseline for this camera). So rather than trust the tags, I measured the difference for each pair (central area, linear light) and offset the DNG’s exposure by exactly that amount (-0.02 to +0.12 EV) — you’re seeing PureRAW’s processing, not an exposure difference.
Colour shift: significant. Measured over the central 60% of each pair in linear light, at identical Lightroom settings, PureRAW’s DNGs came out greener than the Sony a6000 originals: red-to-green -12.8% and blue-to-green -19.3% (median across the frames). Left uncorrected in every comparison on this page — see the note above the results. Because the DNG is still raw, a white balance adjustment fixes it without any quality cost; it’s an extra step per image, not a degradation.
How PureRAW fits into a real workflow
I’m using these with Lightroom Classic, but PureRAW isn’t limited to only Lightroom-centric workflows. You can use it as a standalone app, and the underlying DeepPRIME technology is also built into DxO’s own full-suite editor app PhotoLab (which is itself well worth a look if you’re after a Lightroom alternative).
In practice, PureRAW is a pre-processing step, not an editor. You can run it as a standalone app (just drop RAW files on it, pick a preset or adjust the settings, and run process) or straight from Lightroom Classic via its plug-in — select the photos, send them to PureRAW, and it hands back the processed versions reimported into Lightroom.
Either way, the output is a new DNG file for each RAW: PureRAW never touches your original. If you’re using Lightroom, the DNG is created next to the original with your existing edits carried across, so you’re not starting over — you just switch to the new file. (TIP: make sure to save any Lightroom develop settings to the file before sending it to PureRAW or the settings won’t be applied to the PureRAW version automatically.)
With this workflow, there are two key considerations to factor in:
- File storage: those DNGs are linear (already demosaiced) files, and they can be considerably larger than the RAWs they came from — the ones in this post average about 2.9× the size of the originals. If you run it across a whole archive, that adds up quickly. So I don’t run it across everything.
- Processing time. DeepPRIME is computationally heavy. So most of the time I’ll only apply it to selected images rather than everything. Running it across dozens or hundreds of images is entirely possible, and I’ll sometimes do that if I have the time, but it takes a while (depending on the speed of your computer) and eats storage space.
There is a way to take the edge off that. PureRAW 6 added a High-Fidelity DNG compression option that writes much smaller DNGs — DxO puts the saving at around 77 percent — with no visible difference in the image. The catch is that it only applies when you process an original RAW; it won’t shrink DNGs you’ve already made, so an archive of older PureRAW output stays the size it is. I’ve used uncompressed output for these examples so the file sizes above are the worst case.
What PureRAW doesn’t do
It’s also worth being clear about what this isn’t, because the marketing can blur the lines:
- It doesn’t add resolution. The DNG has exactly the same pixel dimensions as the RAW. It cleans up and sharpens what’s there; it doesn’t upscale. (That’s a separate job for tools like Lightroom’s Super Resolution or Topaz Gigapixel.)
- It doesn’t fix blur. Camera shake, motion blur, and missed focus stay exactly as they were. The “lens softness” correction is a profile-based sharpening for the lens’s known optical softness, not a deblurring tool.
- It doesn’t recover what was never captured. Blown highlights are still blown, and a badly underexposed frame gets cleaner, not correctly exposed — that part is still done in your editor.
A note on the “AI” label
PureRAW and its rivals describe themselves as AI-powered. Which is the marketing buzzword of the day. But it’s worth being precise about what that means here, because “AI” can be a double-edged sword, and the kind of AI we’re talking about here is a different thing from the AI most people now have in mind.
This is more accurately referred to as machine learning. What that means is that DxO trained a model on a very large set of paired examples — noisy sensor data and what the clean version should look like — and the software uses that training to make a better-informed guess about what each pixel really was.
It works from the data in your file and nothing else. It doesn’t invent content, it doesn’t pull in imagery from anywhere else, and it can’t invent a detail out of nothing — where the noise has genuinely destroyed information, you get softness or waxy texture, not made-up content (a good reason to not push those sliders all the way to the right). Push it hard enough on a truly ruined frame and you get mush or waxy textures, not fabrication.
That’s different to how generative AI works. Think ChatGPT or Claude or SeaDance or Nano Banana. That’s a fundamentally different type of technology, one that synthesizes new pixels. And that isn’t what PureRAW uses and isn’t what’s happening in any of the comparisons above. Your photo is still your photo.
Download the RAW and DNG files
If you want to take an even closer look at the results here, I’ve posted the full-size original RAW files and PureRAW’s DNG output for the examples above for subscribers to my newsletter. The download index is here: RAW file downloads for subscribers. The page is password-protected; the password is in the newsletter’s welcome email.


