
The Insta360 Ace and Ace Pro have the usual UltraWide perspective of a fisheye lens, just like GoPros and DJI Actions. That’s the default setting.
Dewarp straightens out the fisheye bulge. It’s a digital correction the camera applies as it saves the file, you switch it on from the shooting screen, and it costs you a little coverage at the edges. The manual is no help at all here — the only thing the Ace Pro manual says about it is that the Field of View setting changes the field of view. So here’s what it actually does, and where it trips people up.
What Dewarp does
What this does is basically unfisheye the fisheye lens.
Or, put more properly, it takes the warped and heavily distorted view of a fisheye lens, where straight lines become dramatically curved and bulging, and converts it to a rectilinear view where lines are straight (or at least mostly straight).
It’s important to get something clear here, though: this is a digital process, not an optical one. In other words, it’s the same optical lens being used; it’s not changing the lens itself. So both start out from the same fisheye perspective. The regular UltraWide is left as-is; the Dewarp version has electronic processing applied.
But Dewarp applies digital processing before outputting the file.
FOV stands for Field of View. It’s a common way of referring to the range of perspective offered by a lens.
Visual examples
Here are a couple of practical examples I’ve shot with my Insta360 Ace Pro to illustrate what it looks like in visual terms. I deliberately chose scenes that clearly show the difference between the distorted fisheye and the straightened rectilinear view. These are using the 4:3 aspect ratio; it will look a little different in other aspect ratios.
I’m using still photos here to illustrate the point, but Dewarp is also available when shooting video (more on that below).
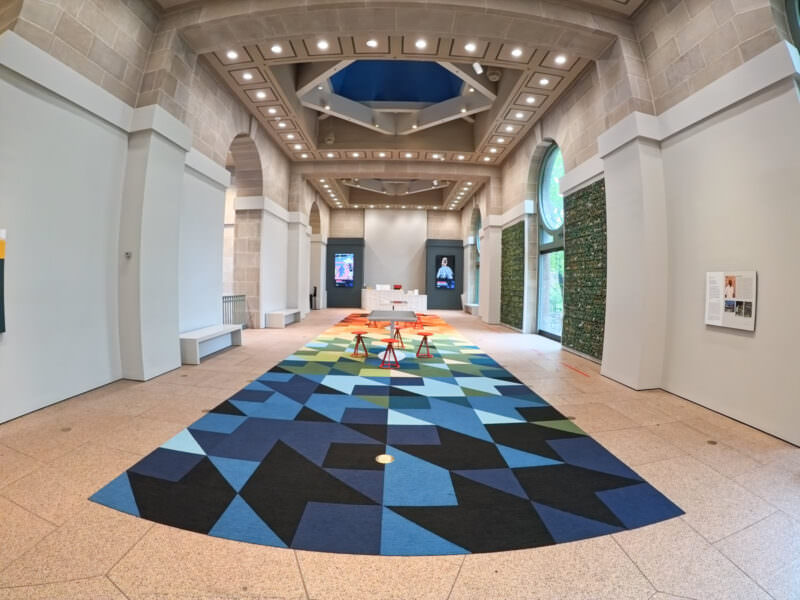
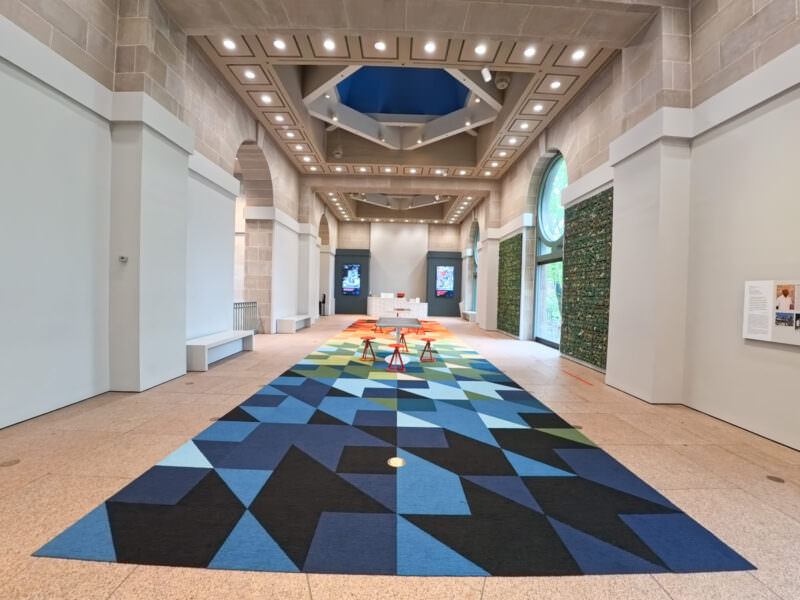
As you can see, the Dewarp version results in much straighter lines, although not all of them become perfectly straight still. But it’s unlikely that anyone would be using these cameras for high-end architectural photography, so that’s unlikely to be much of an issue most of the time.
One thing that’s easy to miss in that pair: Dewarp is also tighter. Look at the left wall — the framed artwork you can see in the UltraWide version is outside the Dewarp frame. That’s the trade. Straightening the image means cropping off the most-stretched parts at the edges, so you’re giving up some coverage to get straight lines. The camera’s own description calls Dewarp a wide field of view, and it is, just not as wide as UltraWide.
Here’s another example. In this case, the effect is a bit deceptive with the horizontal lines, because they are actually curved (it’s a rotunda, so by definition, it is circular). But you can clearly see the effect in the vertical columns, which are naturally straight.

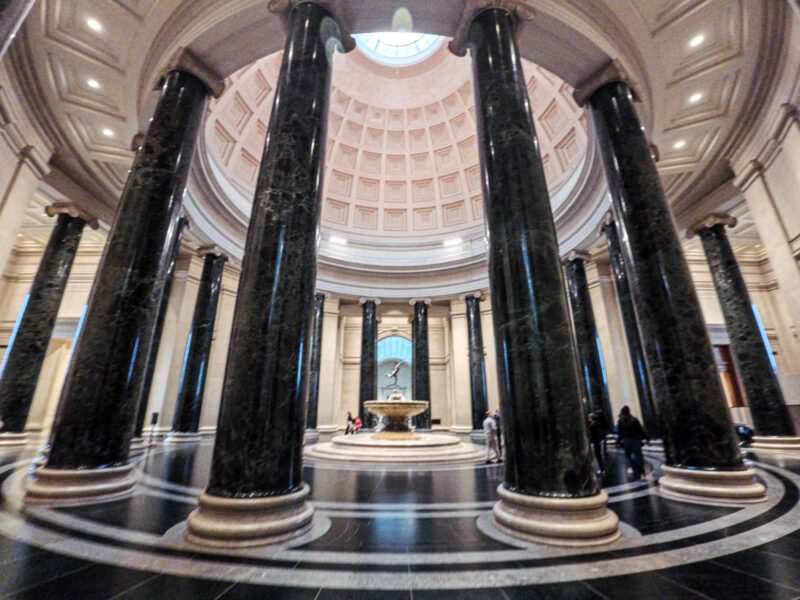
Apologies for the camera shake blurring the second image; that’s not from the Dewarp effect. I just wasn’t being as careful and still taking the shot as I should have been.

Have Camera Will Travel Newsletter
Practical field notes, hands-on gear tests, and the fun of exploring the world with a camera in hand.

How to use Dewarp
This falls under the Field of View features, and you can find the icon at the bottom right of the back screen.
Just tap on that to display the option.
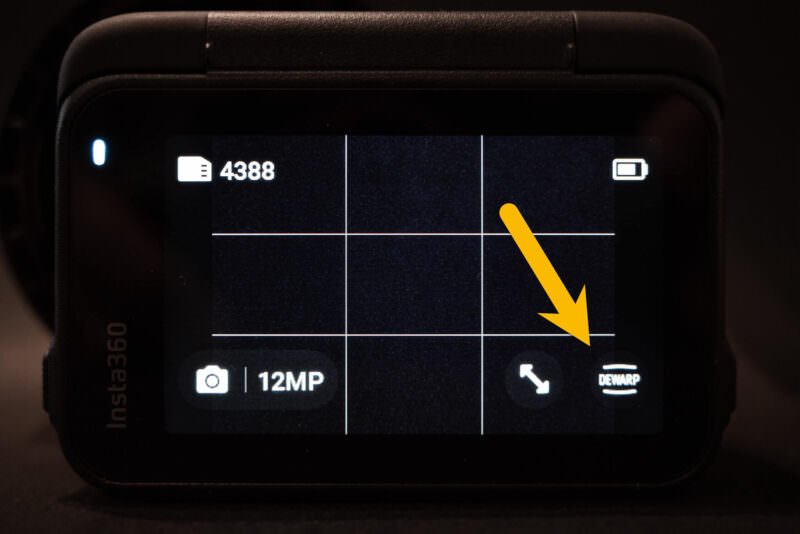
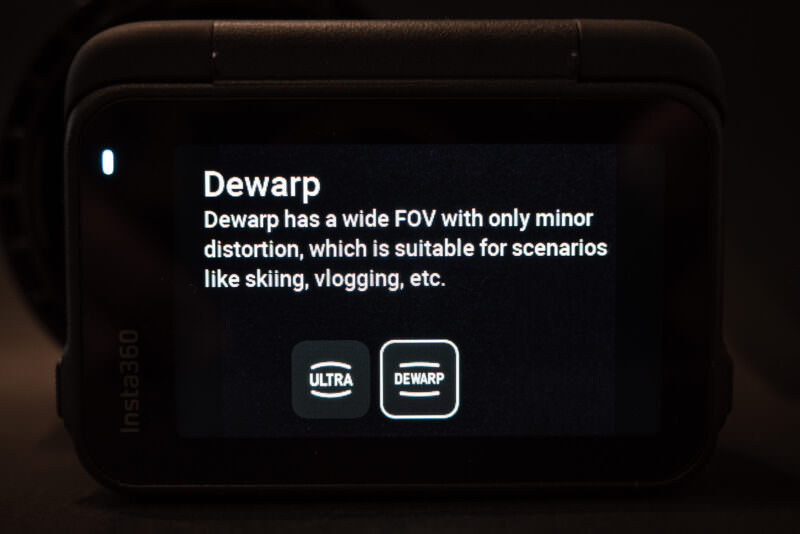
It immediately pulls up the choice between UltraWide and Dewarp, offering a brief explanation for each.

What’s different on the Ace Pro 2
The newer Ace Pro 2 handles this differently. Its Field of View selector offers three choices rather than two, listed on screen from top to bottom as Ultra, Dewarp, and Linear.
Insta360’s own on-screen description of the middle one reads: “Dewarp has a wide FOV with only minor distortion, which is suitable for scenarios like skiing, vlogging, etc.” So Dewarp is still the middle ground, and the camera now gives you a separate Linear option beyond it.
That’s worth knowing if you’re coming from a GoPro. On the Ace and Ace Pro, Dewarp is the setting that does roughly what GoPro’s Linear does. On the Ace Pro 2, Insta360 has both, as separate choices, so the two names no longer line up one-to-one.
In what shooting modes can Dewarp be used?
Dewarp is available in these shooting modes.
Photo shooting modes:
- HDR Photo
- Burst Photo
- Shooting RAW (but it only applies to the associated JPG file, not the DNG)
- Interval
If you’re shooting RAW, Dewarp applies to the JPG only, not the DNG. More on that below.
Video shooting modes:
- Starlapse
- Timelapse
- Timeshift
- Freeframe Video
- PureVideo
- Video
- Slow Motion
- Loop Recording
Compared to other action cams
This is not something that’s unique to the Insta360 Ace. Its main competitors also have the same kind of feature that unfisheye’s the fisheye view.
On GoPro cameras, it’s called the Linear lens setting.1
On the DJI Osmo Action 4, it’s known as Standard (Dewarp).
What I like about the Insta360 implementation is that the option is right there on the shooting screen. Tap the FOV icon, tap Dewarp, done — two taps. GoPro is just as quick, because the Digital Lens shortcut sits on its capture screen too. The DJI Osmo Action 4 buries it a level down, under the parameters icon.
Quirks & limitations of Dewarp
One thing that is a bit confusing about how this works on the Insta360 Ace when shooting photos is this: when shooting photos, Dewarp only works with JPGs.
That’s broadly consistent with how it works on other action cameras. That’s because it’s a processed image which, by definition, DNGs aren’t. But the Insta360 adds a layer of confusion.
The confusing part is that you can enable the Dewarp setting even if you have the output format set to PureShot+RAW. In that case, it produces both a DNG and a JPG of each image. The JPG version will have Dewarp applied, while the RAW file (DNG) won’t.
Other cameras handle that a bit differently and in ways that I think are clearer. On the GoPro HERO12 Black, for example, the Linear FOV option (which is that camera’s equivalent of the Dewarp setting) is disabled when shooting RAW. On the Insta360, Dewarp is enabled when shooting RAW, but it doesn’t actually apply to the DNG / RAW version, only the JPG that’s produced at the same time.
Notes & References:
- On GoPros, including the HERO12 Black, the Linear FOV is only available when using output formats of Standard (JPG), Superphoto, or HDR. If you choose the RAW option, the only FOV is Wide. [↩︎]


