The Feature: Large Indicators Mode
Menu Location: Setup > Screen Setting > Large Indicators Mode
Customization: Configurable slots (L1-L4 and R1-R4)
Trade-off: Hides smaller icons (Battery, Frames Remaining, etc.)
Best For: Glasses wearers or bright sunlight visibility
While I generally prefer a fairly minimalist display so I can focus on the image, there are some overlays I find very useful. Aperture and exposure compensation are top of that list.
But I find the default display of those in the Fujifilm X100VI‘s viewfinder to be a bit small. It’s not just for those with eyesight issues. I just don’t find it clear in bright conditions, especially through the viewfinder, which is my preferred way to compose the shot.
It’s made worse by the color choice of them — the pale blue just isn’t very contrasty or as clear as I’d like it. I sometimes don’t notice that I’m not using the aperture I expected or that the exposure compensation is not set where I’d like it for the shot.
You can’t do anything about the color, but you can make the displays larger, which makes it just that little bit easier to notice. And you can also customize to some extent what display is shown where to better suit your priorities and preferences.
There is one other setting in the same menu worth a look while you’re in there: Information Contrast Adj. It won’t change the color of the readouts, but it does let you adjust their contrast, and it includes an option tuned for dim ambient light. It’s a small thing, but combined with the larger indicators it can make the numbers easier to pick out.
Here’s how to do it.
Note: Turning on Large Indicators hides most of the smaller icons (like battery life and frames remaining) to declutter the view. You will need to map the most important ones to the L1-L4 or R1-R4 slots if you want to see them.
What the larger display indicators on the Fujifilm X100VI look like
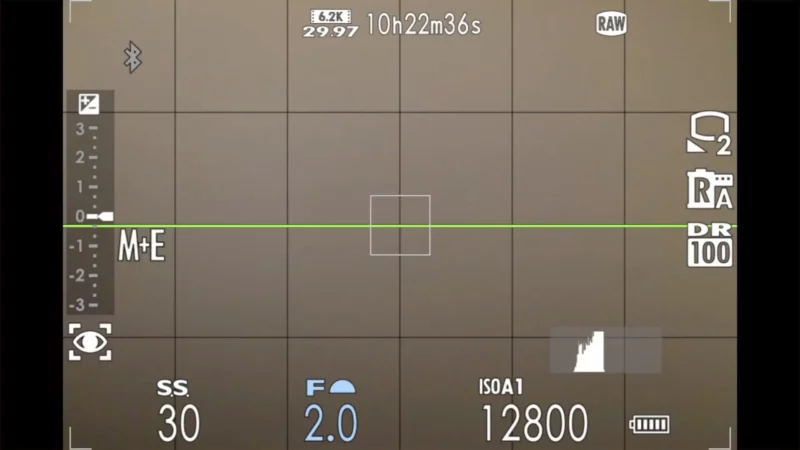
First, though, here’s an example of what I mean.
The first is an example of the default small size for the display. It will obviously vary a little based on what display settings you have set and what focus mode you’re using, and so on.
And the optical viewfinder looks a bit different (and simplified). But this gives you the general idea.
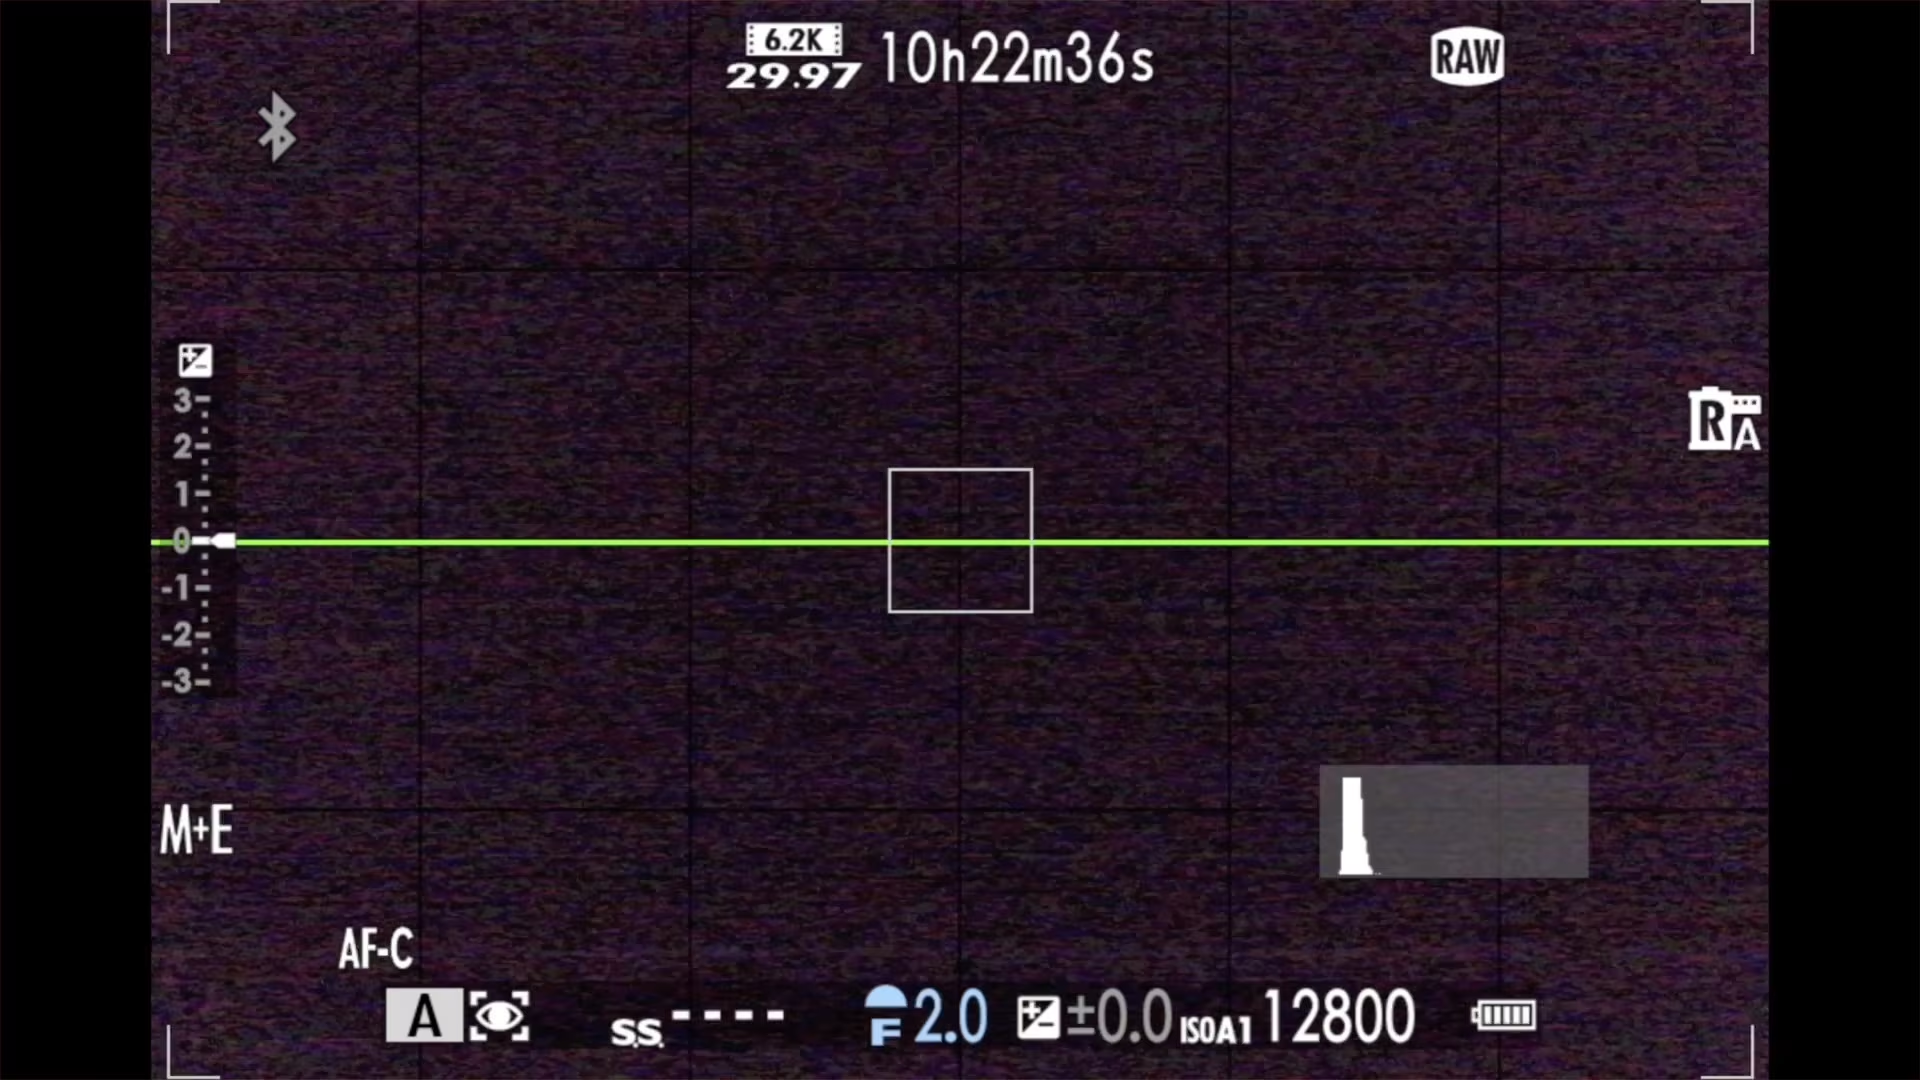
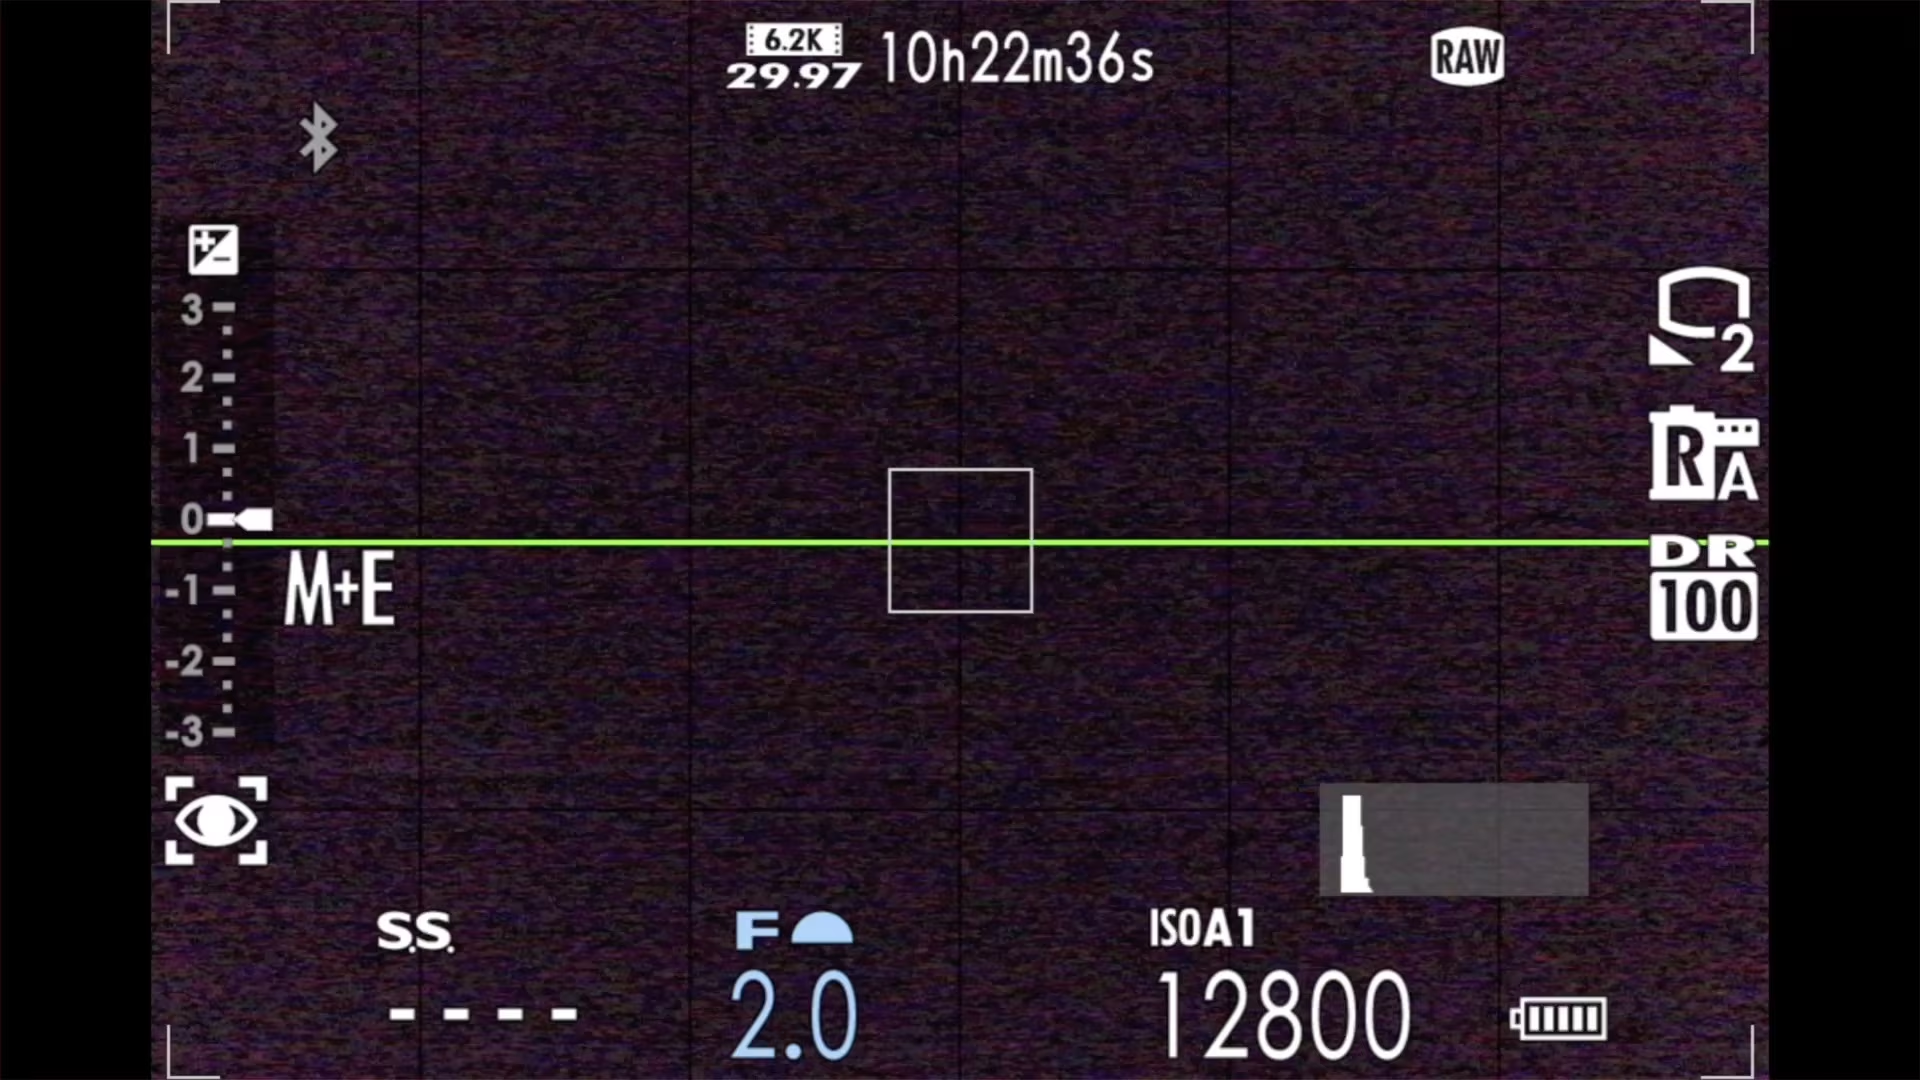
The second is the larger display. Everything else is the same — the only change in the settings is to enable the large display rather than the default smaller display.
As you can see, many of the core displays are larger, and some have been moved around.
For me, as I said, the ones that matter most are the aperture and exposure compensation scale, followed by the ISO and shutter speed (which is blank here because the black image wasn’t providing enough light upon which to base a meaningful auto exposure calculation).
How to turn on Large Indicators Mode on the X100VI
You can have different values here for the viewfinder (applies to both the optical viewfinder and the electronic viewfinder) and the back screen display. That is, you set each separately.
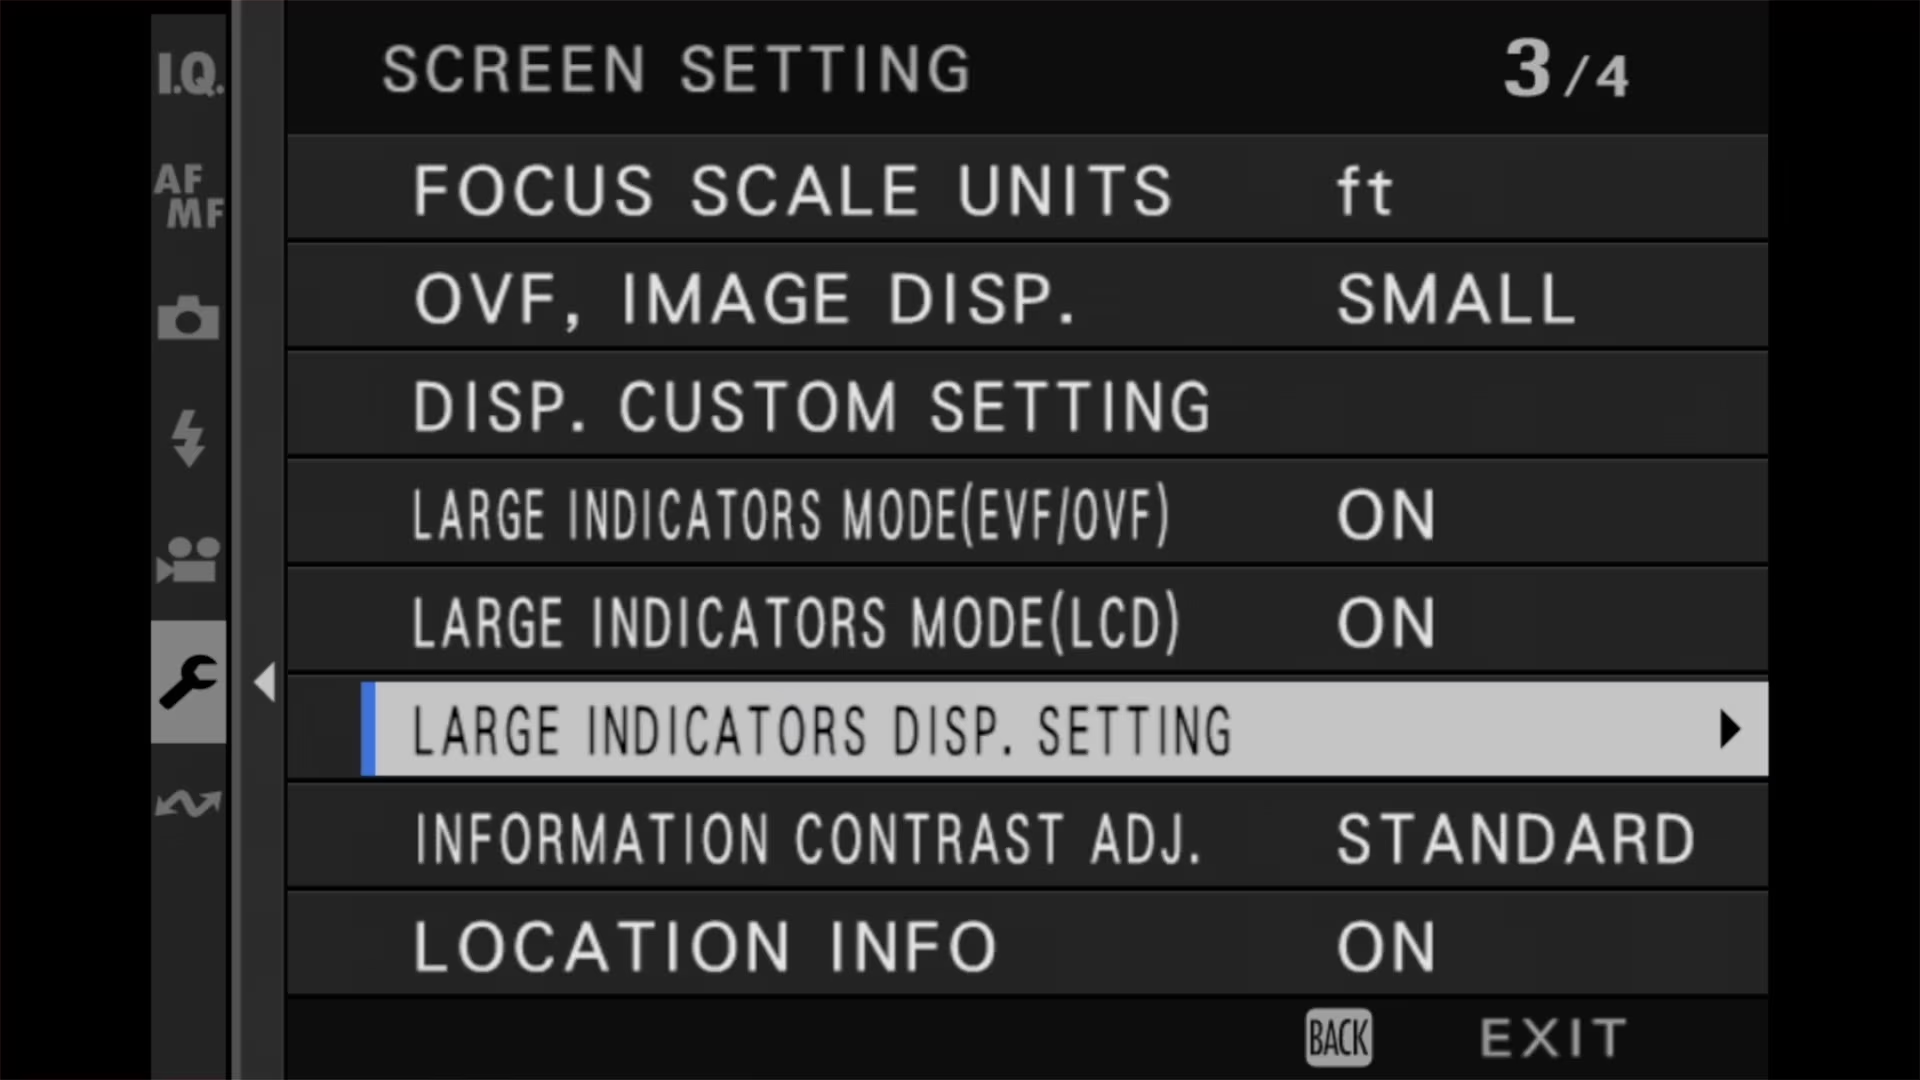
You can find this setting under:
SET UP > Screen Setting (page 3/4)You’ll see two items there for Large Indicators Mode. One is for the viewfinder (EVF/OVF); the other (LCD) is for the back-screen display.
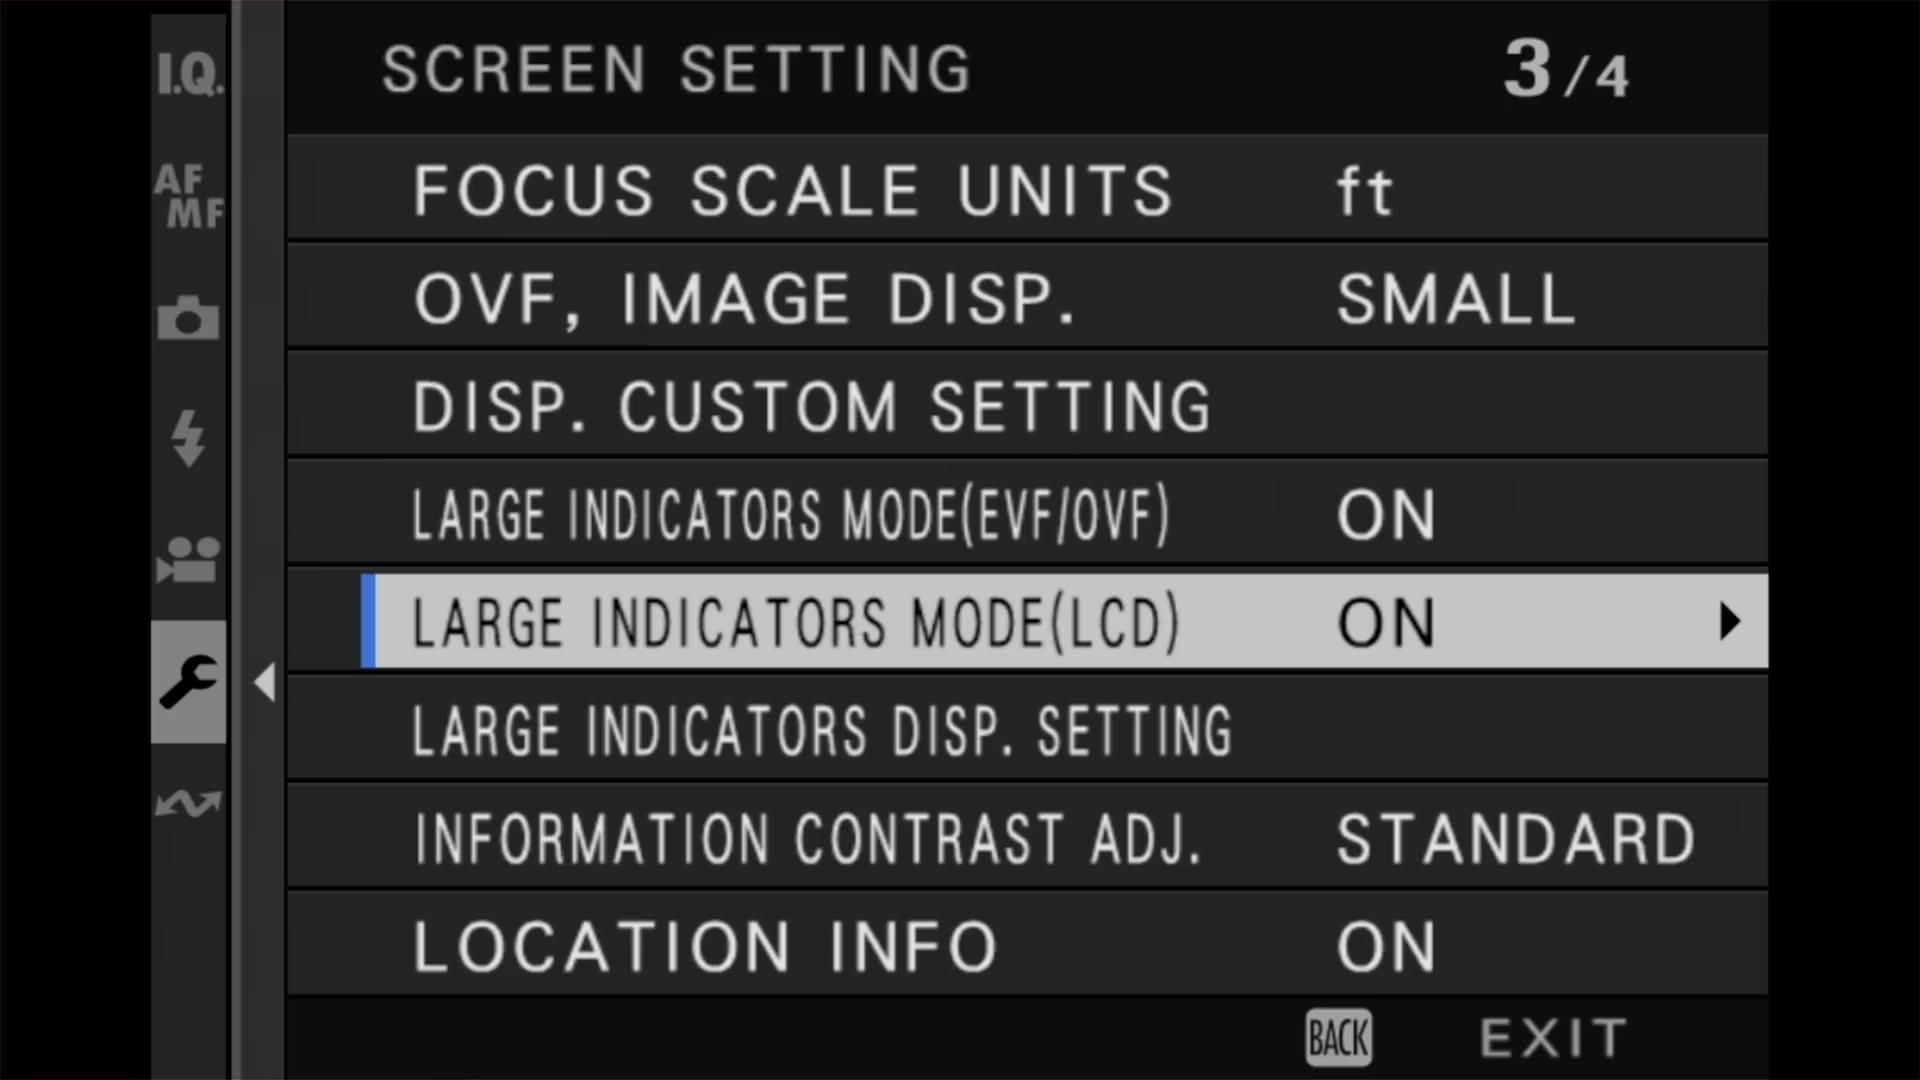
Instead of choosing between “large” or “small,” you choose between ON or OFF, referring to whether the feature is activated or not.
If you expect to switch it on and off — large indicators for bright daylight, the standard display the rest of the time — you don’t have to dig back into the menu each time. Large Indicators Mode can be assigned to a function button, and then that button toggles it on and off.
Customize the Large Indicators display
If you use Large Indicators, the standard ‘Disp. Custom Setting’ menu won’t change what you see. You must use the ‘Large Indicators Disp. Setting’ menu instead.
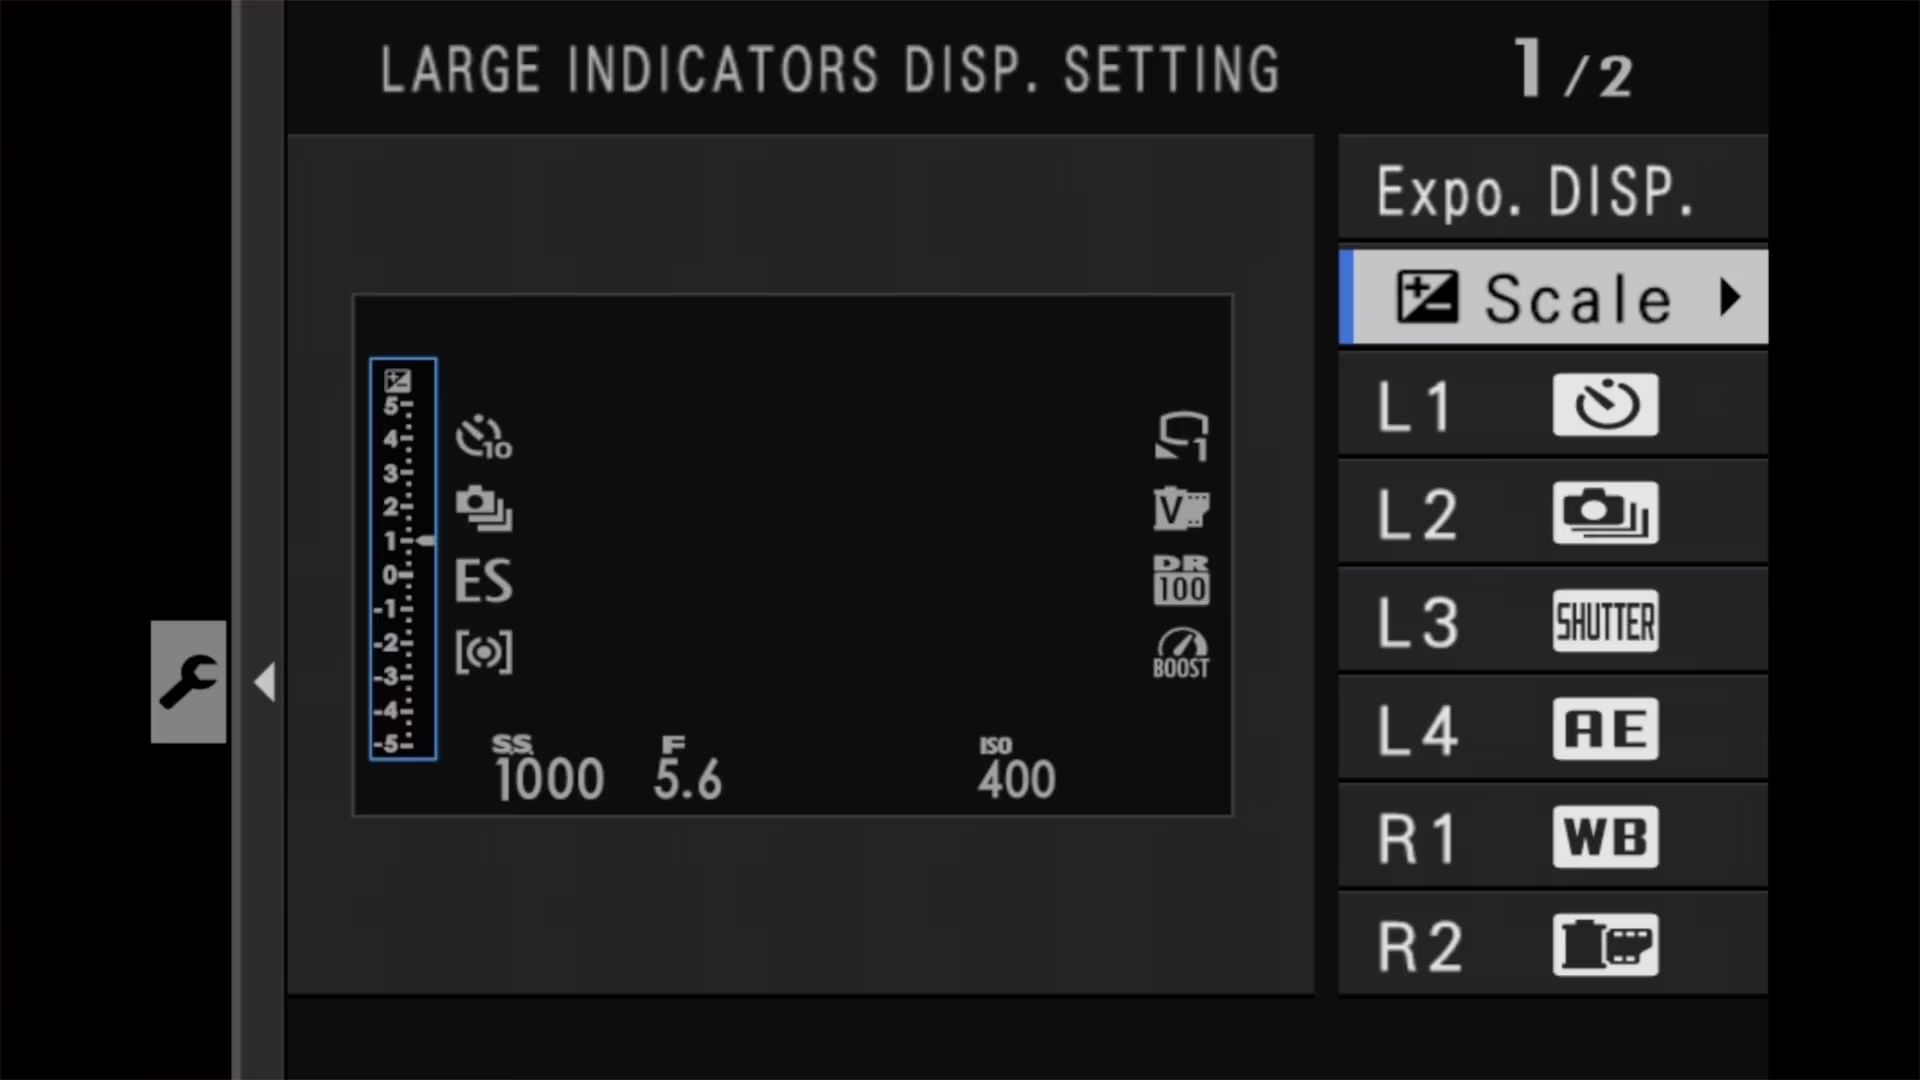
There’s a third “Large Indicators” setting under those. That’s where you have some control over what indicators are displayed on the screen and where.
When you drill down into that setting, you’ll get a preview screen on the left and the settings for each of the indicators on the right. Use that right panel to change what the indicator should be.
The ones starting with “L” are, of course, for the left side indicators; the “R” for those on the right. And you can turn off the exposure compensation scale if you want.
I find this to be a really helpful feature for just enabling the indicators that I find useful.
Explore the Fujifilm X100VI
Here’s a tool I created to help identify which buttons and dials are where — and what they’re called, because every brand has their own dialect and jargon.


