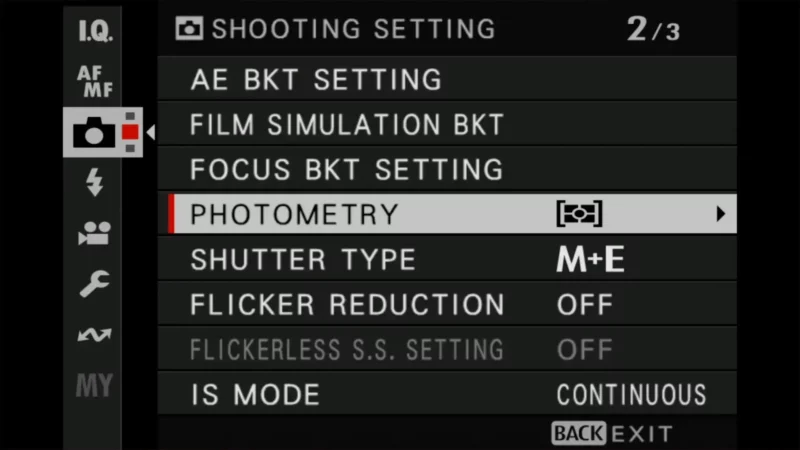
Hint: Look for “photometry.”
I’m posting this because I’ve personally wasted way too much time trying to find this setting. Maybe it’ll save someone else some time and effort trying to track it down.
The Term: “Photometry” = Metering
Menu Location: Shooting Setting > Photometry
Modes: Multi, Center-Weighted, Spot, Average
Important Note: Face/Eye Detection overrides your Photometry setting
Pro Tip: Enable “Interlock Spot AE & Focus Area” to make the spot meter follow your focus point
Fujifilm likes to do things differently
One of Fujifilm’s strengths is that they march to the beat of their own drum and don’t always do things the way others do.
But every now and then, that can lead to trip-ups. And in this case, the crux of the problem is Fujifilm’s contrariness in word choice.
Photometry, anyone? No, me neither. Fujifilm quite likes to be quirky, and this is one of the instances. If you’re coming from just about any other major camera brand, you’ll probably be used to the term “metering”.
But Fujifilm uses the term “Photometry” instead on many (perhaps all — I haven’t checked them all) of their cameras.
If you’re only using Fujifilm, this is probably a non-issue. But if you’re going back and forth between different cameras, like I do, you might get tripped up on it (like I do).
“Photometry” and “metering” refer to the same function. Photometry is a more precise and specific term because it only refers to measuring light, whereas metering could refer to just about anything (which is presumably why a light meter is known as a light meter…).
But fundamentally, it’s referring to the same thing — it’s just a matter of brand-specific language preferences and does not indicate a difference in functionality. Both terms refer to the camera’s method of measuring light to determine the optimal exposure settings.
So if you’re looking in the X100VI’s menu system for “metering,” it’s going to take more than a little while. Instead, look for Photometry.
Where to find the Photometry setting on the Fujifilm X100VI menu
You can find this setting under:
Shooting Setting 2/3 > PhotometryIt’s in the camera-icon (Shooting Setting) menu, not in the AF/MF section, which is where a lot of people go looking for anything exposure-related. Menu layouts do shift a little between firmware versions, so if it’s not on the page you expect, check the other pages of Shooting Setting.
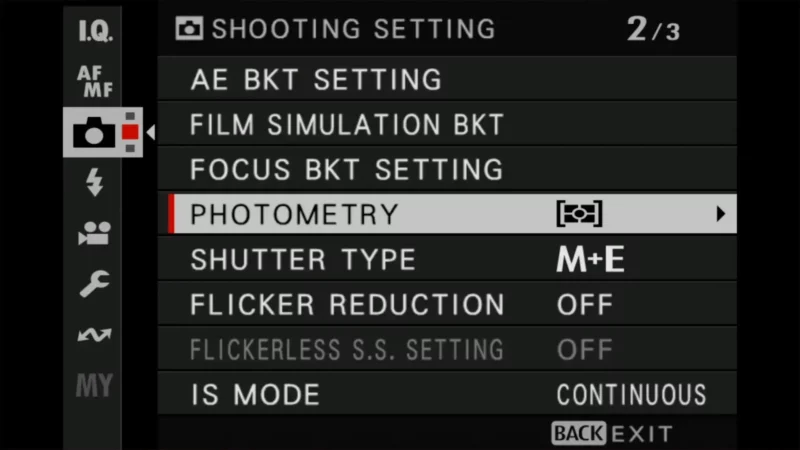
You have the choices of Multi, Center Weighted, Spot, or Average (alas, there’s not highlight metering, as much as I wish there was).
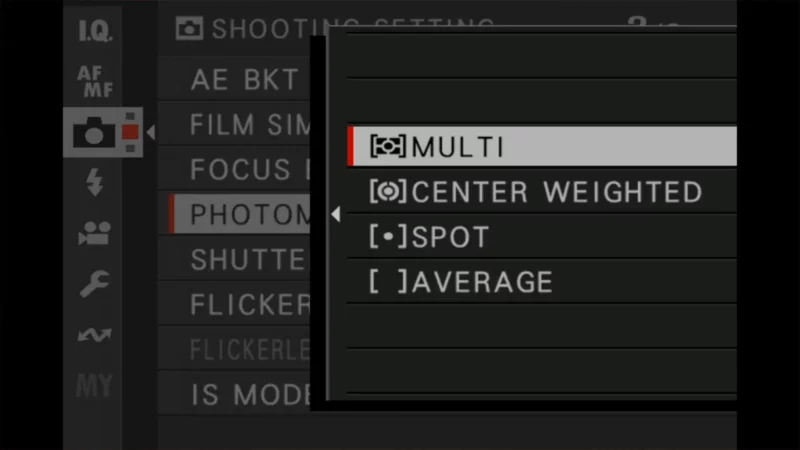
Fujifilm X100VI metering modes: Multi, Center-Weighted, Spot & Average
These are the metering modes available on the camera, and what each one actually does. Multi is the default and the one to leave on for general shooting. The camera reads the frame across its 256 metering segments, looks at how the light is distributed, and picks an exposure from that. It’s the mode least likely to be thrown off by an odd scene. Spot reads from a small area — roughly 2% of the frame — and ignores everything else. That’s the one for a backlit subject, where a reading off the whole frame would turn them into a silhouette. Out of the box it reads from the middle of the frame. Center-Weighted reads the whole frame but gives most of the weight to the middle, on the assumption that’s where your subject is. Average reads the whole frame and gives every part equal weight. It doesn’t adapt to the scene, which is the point — in even light it gives you the same reading frame to frame.
If you do use Spot, it’s worth turning on Interlock Spot AE & Focus Area in the AF/MF Setting menu. That ties the meter to your focus point, so it reads from wherever the subject is rather than always from the center. It works when you’re in Single Point AF.
| Mode | Description |
|---|---|
| MULTI | Determines exposure based on an analysis of composition, color, and brightness distribution. Recommended in most situations (except video; see Average below). |
| CENTER-WEIGHTED | Meters the entire frame but assigns the greatest weight to the area at the center. |
| SPOT | Meters lighting conditions in an area equivalent to 2% of the frame. Recommended with backlit subjects and in other cases in which the background is much brighter or darker than the main subject. You can move the spot — it doesn’t have to be centered. And you can lock the spot meter reading if you need to recompose the shot. By default, Spot Metering only measures the exact center of the frame. If you want the meter to follow your focus point (essential for off-center subjects), go to Button/Dial Setting > Interlock Spot AE & Focus Area and turn it ON. |
| AVERAGE | Exposure is set to the average for the entire frame. Provides consistent exposure across multiple shots with the same lighting, and is particularly effective for landscapes and portraits of subjects dressed in black or white. Average is often preferred by those shooting video because it prevents wildly shifting brightness (sometimes called exposure pumping) as you pan across a scene going from bright to dark areas (and vice versa). |
Assigning metering to a button or dial
In the default setup, Photometry isn’t assigned to a specific dial or button — you can access it through the main menu or the Quick Menu.
But the function is available if you want to set up a custom assignment. And there’s quite a lot of flexibility on where and how you set it up.
For instance:
- Function Buttons (Fn Buttons): You can assign “Photometry” to any of the customizable function buttons (Fn1, Fn2, etc.), allowing you to switch metering modes without navigating through the menu.
- Quick Menu (Q Button): Photometry can be added to the Quick Menu for easy access during shooting by customizing the items displayed.
- Touch Function Gestures: You can assign photometry to a touch-function gesture, such as flicking up, down, left, or right on the touchscreen.
- Control Ring: The one place you can’t put it is the control ring around the lens. Its list of roles covers things like white balance, film simulation, and the digital teleconverter — metering isn’t among them.
Assigning Photometry to the Quick Menu
Since the metering mode isn’t something I change often, my preferred method is through the Quick Menu. It’s generally included in the default Quick Menu setup, but it’s possible that it might change with firmware versions, and it’s possible you might have replaced it or want to move where it is.


So here’s how to do it:
- Enter Quick Menu Customization mode. Ensure you are not in the Quick Menu already. In other words, don’t press the Q button yet — this is where I often get tripped up, and it seems counterintuitive to me, but if you do the next step from within the Quick Menu, you actually end up doing something different. So from the regular shooting mode, press and hold the Q button for a few seconds while in the shooting screen.
- Select a slot to edit. Use the directional buttons, joystick, or touchscreen to navigate to the slot where you want to assign the Photometry option.
- Open the list of available settings. Press the OK button to open the list of assignable settings. Scroll through the list until you find Photometry — it’s on page 4. Select it by pressing OK, and then press the Back button to save and exit the customization screen.
Things worth knowing
The metering options are only active if face detection and subject detection are turned off. If either is enabled, the exposure is calculated for the detected face or subject instead — and Photometry will often show up greyed out in the Quick Menu, which is the usual reason it looks broken or disabled. Turn Face/Eye Detection and Subject Detection off in the AF/MF Setting menu and the Photometry options will be available again.




