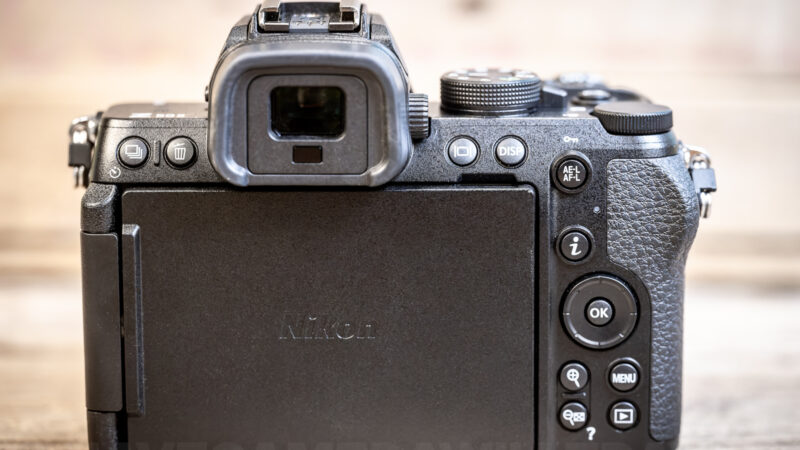
Back button focus is a convenience thing, and it’s one I nearly always set up on any camera I’m using.
It allows you to separate the focus and the shutter by turning one of the buttons on the back top right of the camera (which you can easily reach with your right thumb in a normal shooting grip) into the focus button. That way, your focus won’t shift when you press the shutter button.
It’s especially useful in situations from tracking a moving subject like wildlife or sports or if you tend to put the subject in focus off-center in the frame. And especially if you like to use fast primes at large apertures, as I do.
Most cameras don’t come with back-button focus set up by default, and that’s true of the Nikon Z50 II. But you can turn the AE-L/AF-L button into the focus button.
It’s easy to do, but it takes two settings, not only the one you might expect:
MENU > CUSTOM SETTINGS MENU > a6 AF activation > AF-ON onlyMENU > CUSTOM SETTINGS MENU > f2 Custom controls (shooting) > AE-L/AF-L button > AF-ON
After that, the shutter button only takes pictures, and your thumb on the AE-L/AF-L button does the focusing.
What back-button focus does
Out of the box, the shutter button does two jobs. Half-press it and the camera focuses; press it all the way and it takes the picture.
Back-button focus splits those jobs between two buttons. That sounds like a small change, but it solves a few real problems:
- You can focus once and keep shooting. Focus, lift your thumb, and the focus stays put while you take as many shots as you like. The camera won’t refocus every time you press the shutter.
- You don’t have to switch focus modes. Leave the camera in AF-C (continuous autofocus). Hold your thumb down and it tracks a moving subject. Let go and it acts like single-shot focus.
- It fixes the focus-and-recompose problem in AF-C. In AF-C, a half-press doesn’t lock focus. Nikon says as much in the Z50 II’s own troubleshooting section. With back-button focus, you just take your thumb off the button.
It takes a little getting used to, and it isn’t a matter of being better or worse — it’s just a personal preference thing. But if you shoot kids, pets, sports, or wildlife, it’s worth a try. You’ll find pretty quickly that it becomes intuitive (although it might confuse someone you hand the camera to!).
Step 1: Stop the shutter button from focusing
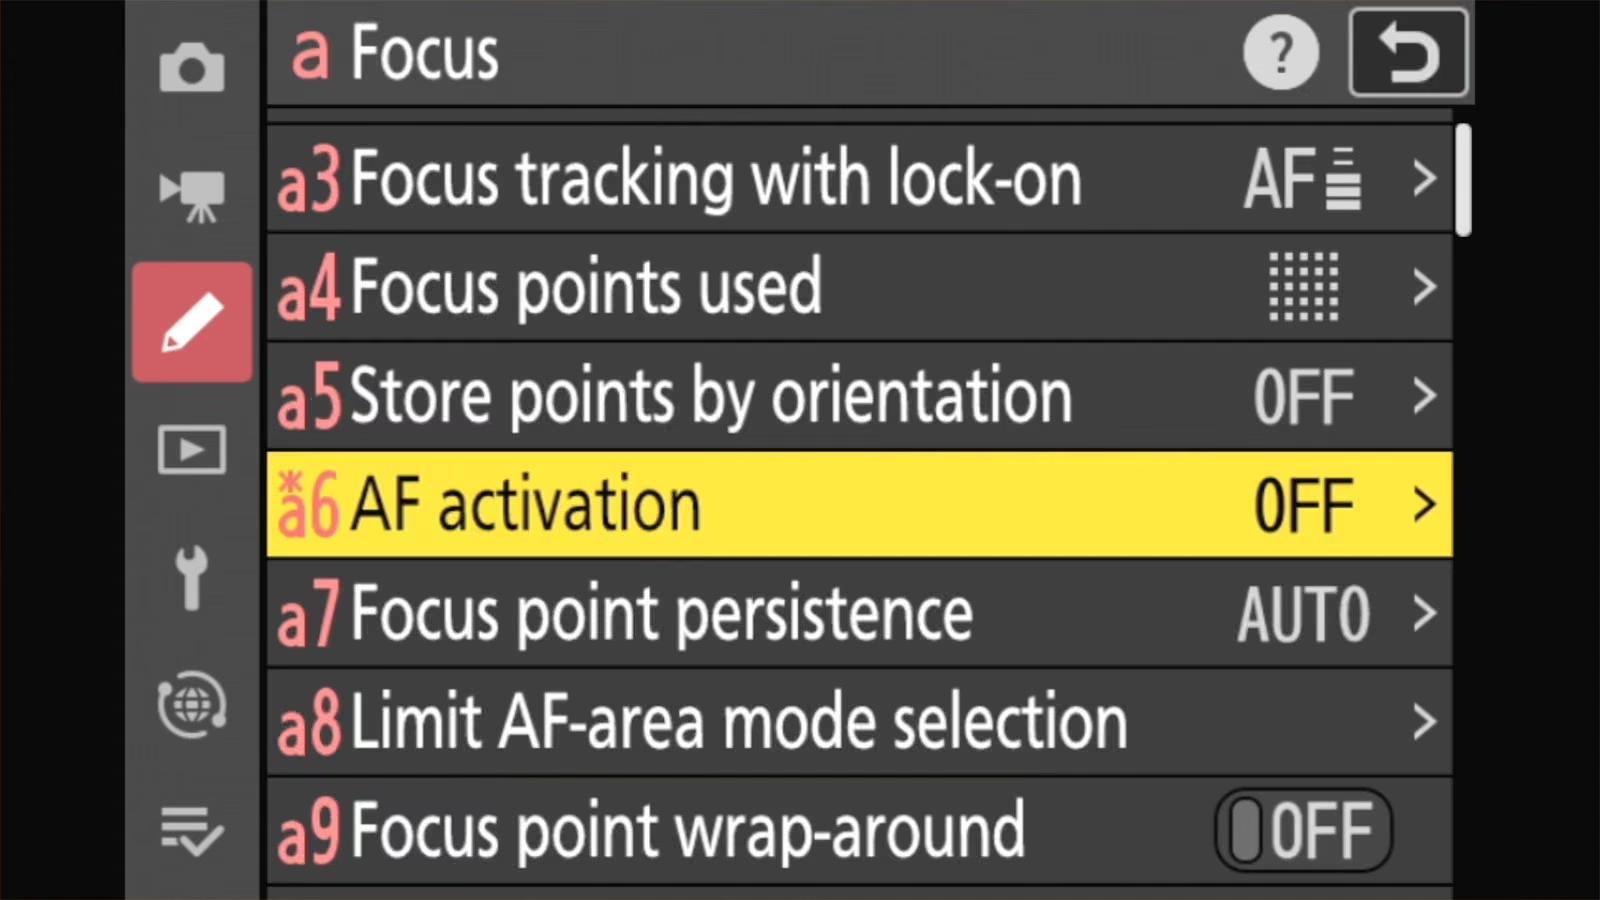
The first step is to prevent the shutter button from focusing when you half-press it. Go to:
MENU > CUSTOM SETTINGS MENU > a6 AF activation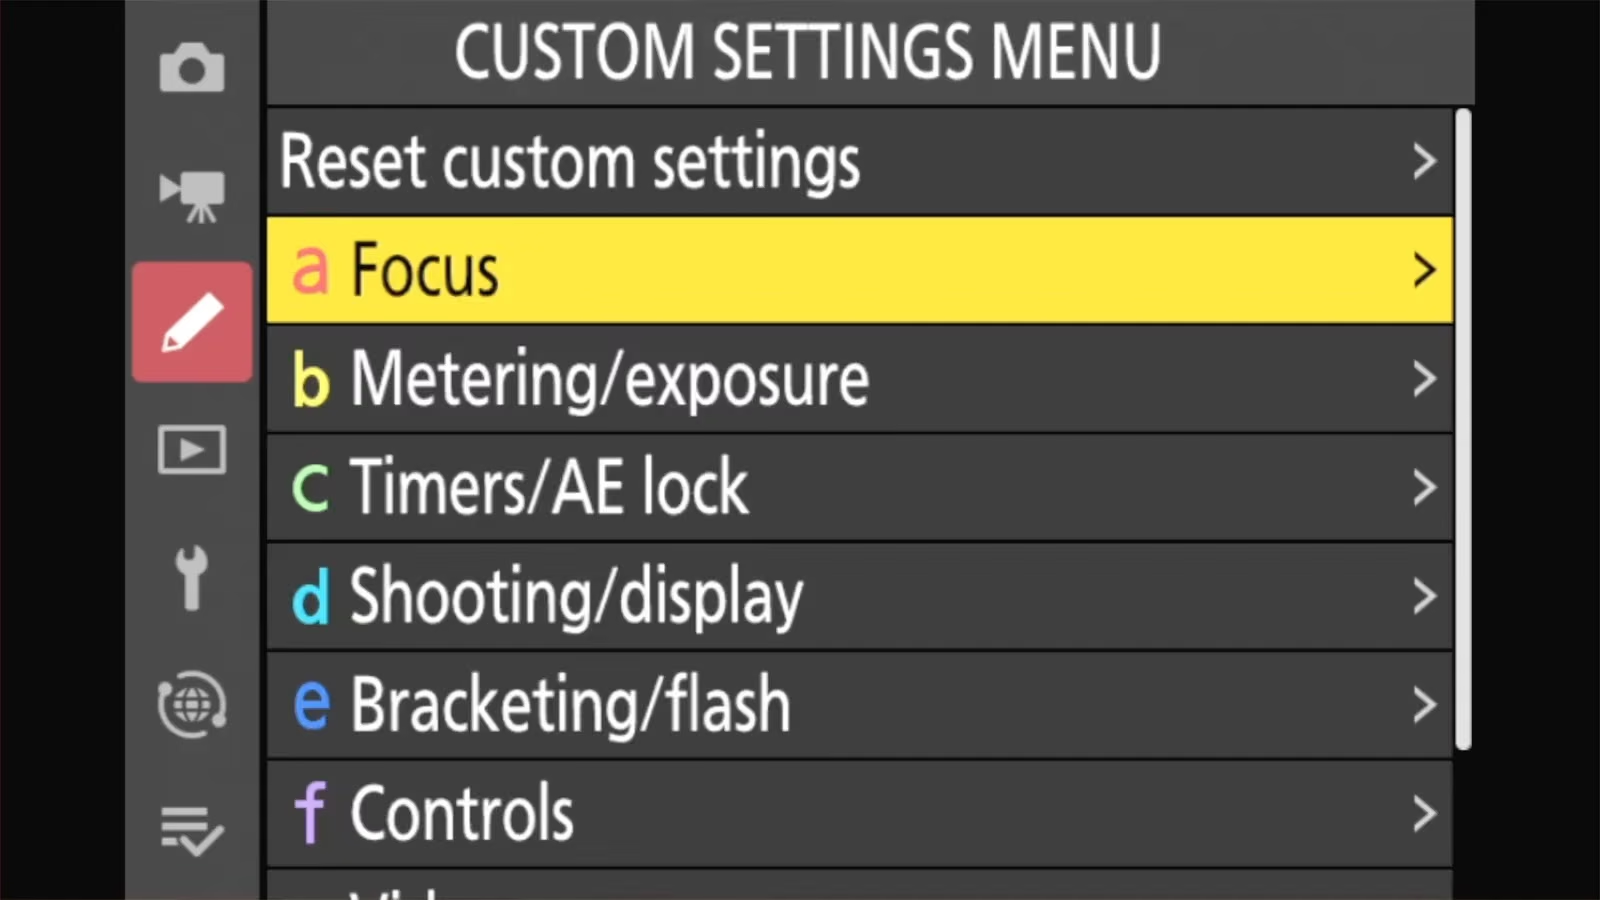
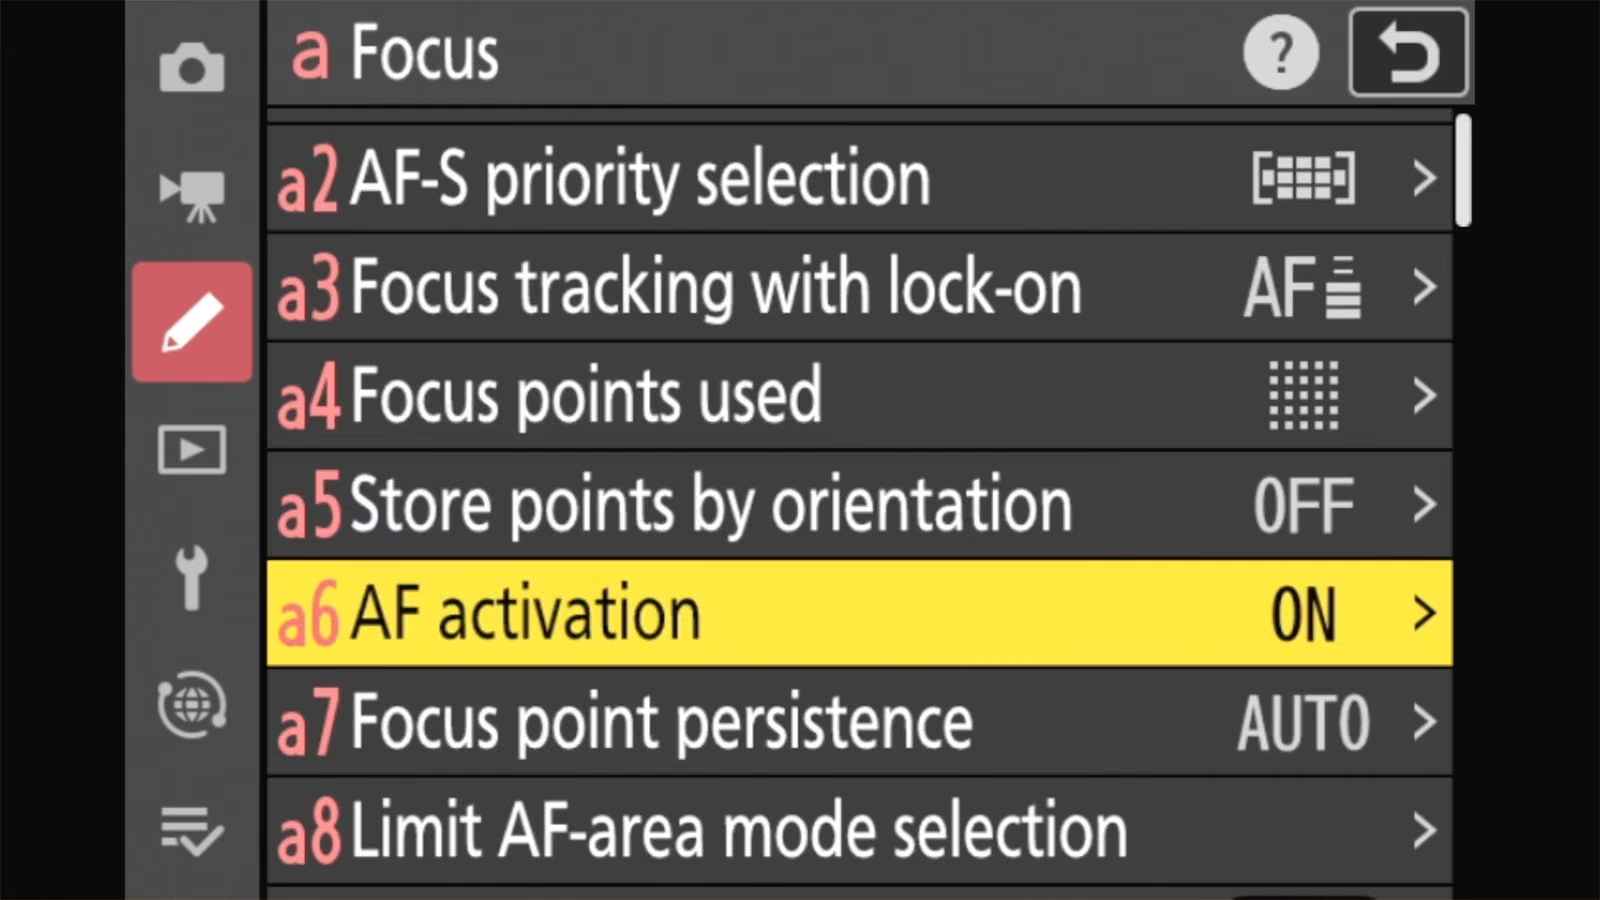
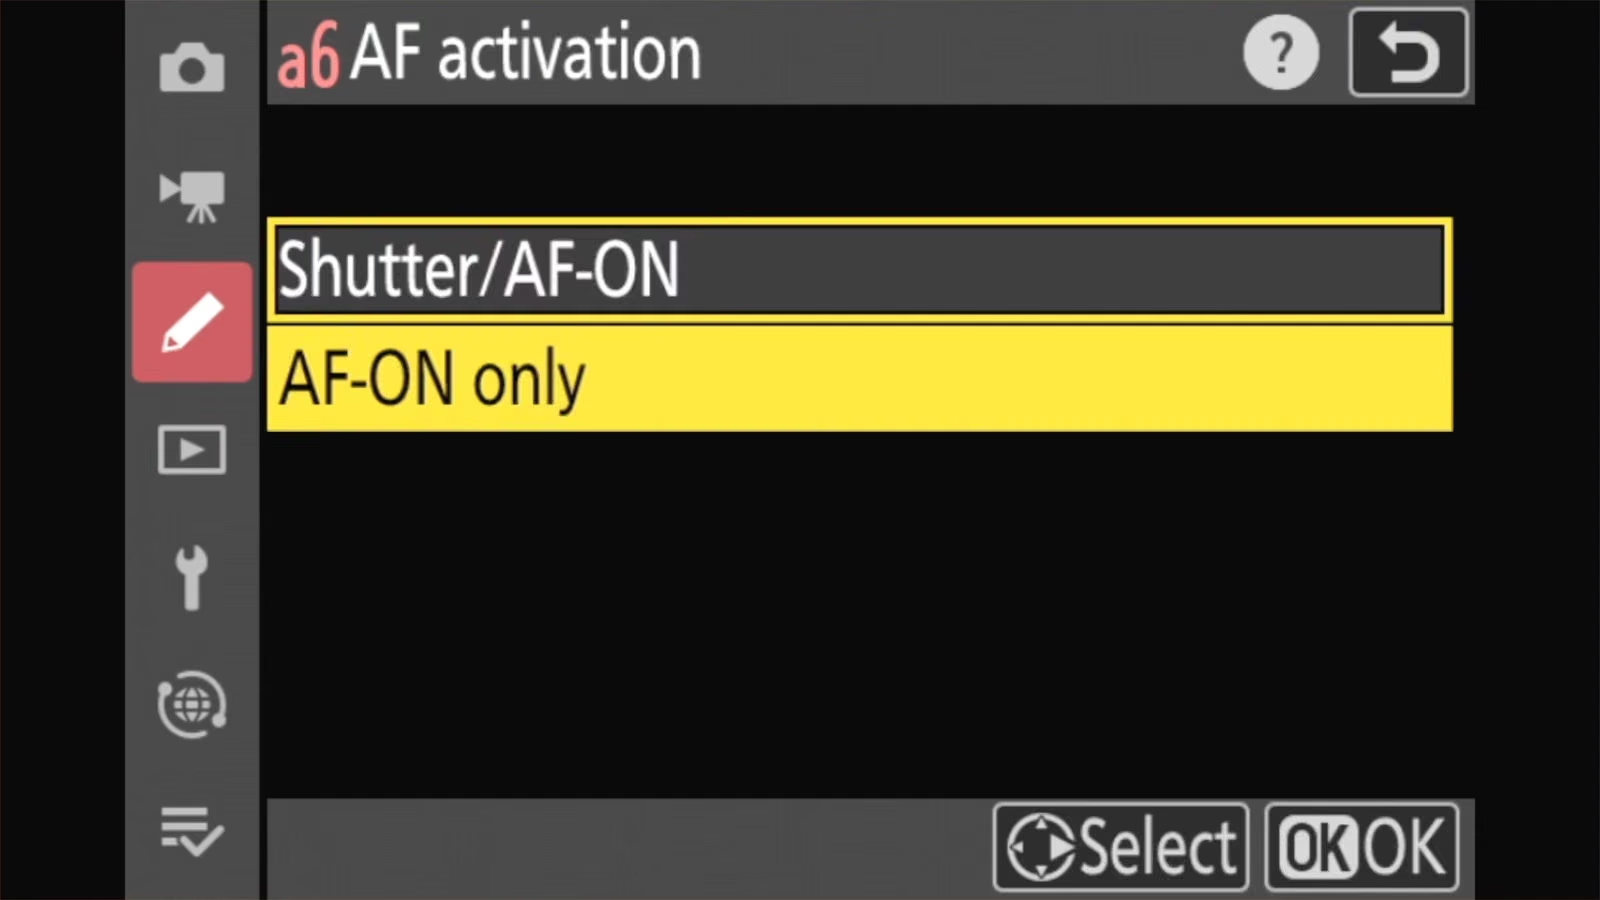
Choose AF-ON only.
The default, Shutter/AF-ON, lets both the shutter button and any AF-ON button focus. AF-ON only takes the shutter button out of the equation completely and turns it into just a shutter release.
The out-of-focus release option
With AF-ON only highlighted, press right on the multi selector on the back of the camera to get to the sub-option called Out-of-focus release. Note that on the screen with AF-ON only highlighted, there isn’t an obvious indicator showing that there’s a submenu; there’s no arrow or icon. But press right and you’ll see it.
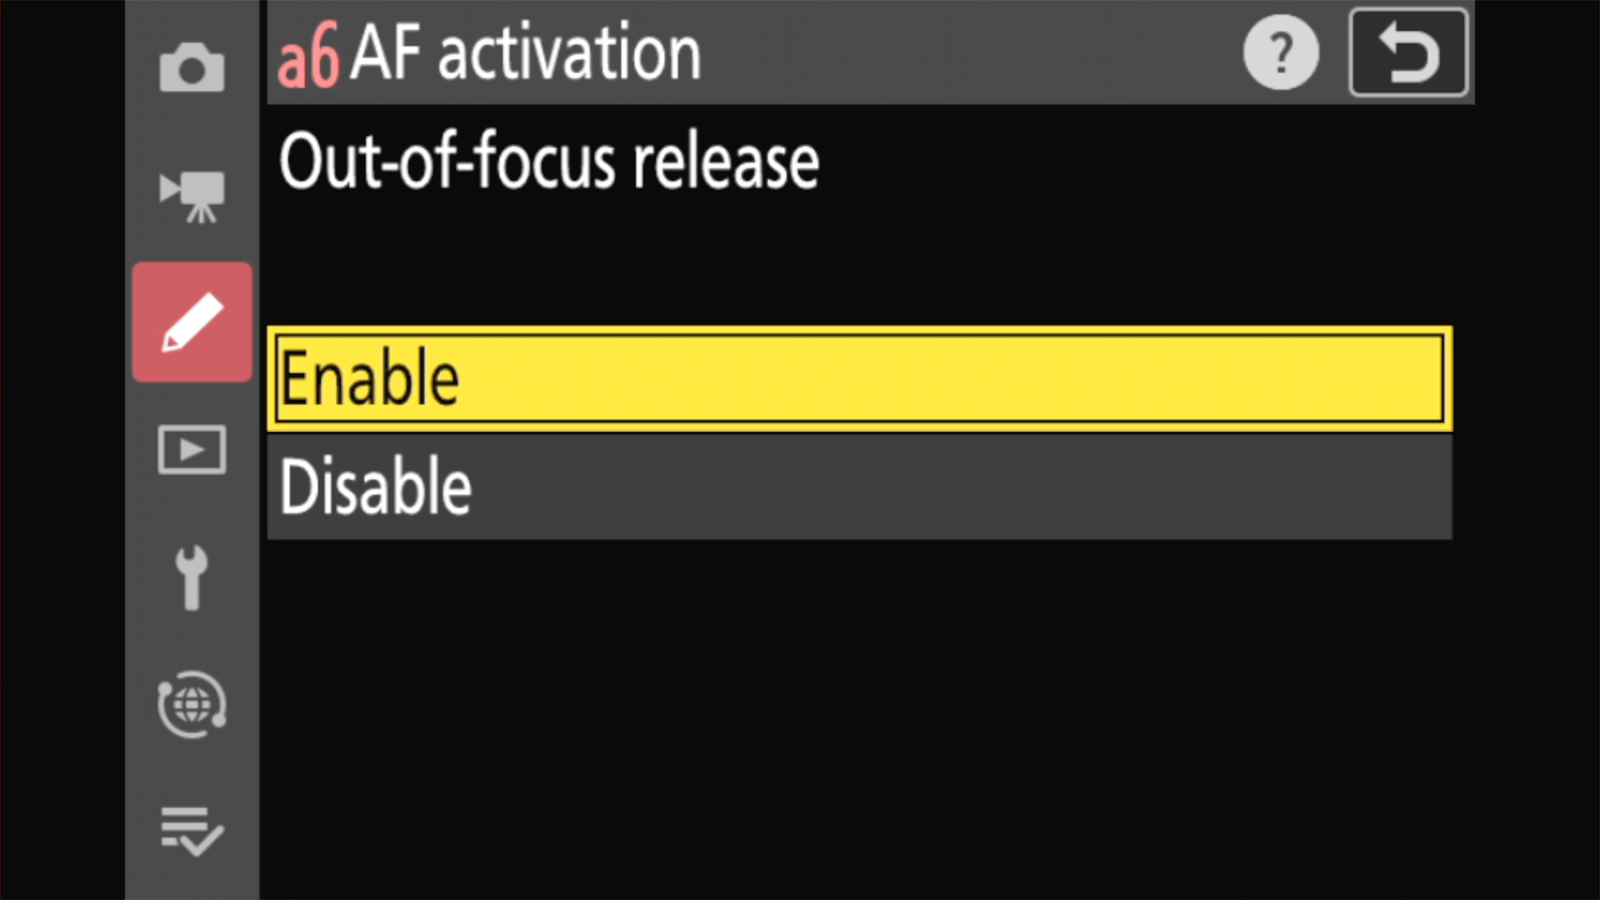
Enablelets the camera take a picture whenever you press the shutter, whether or not it’s in focus. Nikon calls this release priority. It’s the usual back-button setup, because the whole point is that you decide when focus is done. But bear in mind, the camera isn’t backstopping you on focus here.Disableonly lets the camera take a picture once it’s in focus. Nikon calls this focus priority. You focus with your thumb, then press the shutter all the way down.
Step 2: Turn the AE-L/AF-L button into an AF-ON button
The next step is to assign the focusing to a button your thumb can reach. The Z50 II doesn’t have a dedicated AF-ON button, but it does have the AE-L/AF-L button that can be reassigned.
MENU > CUSTOM SETTINGS MENU > f2 Custom controls (shooting)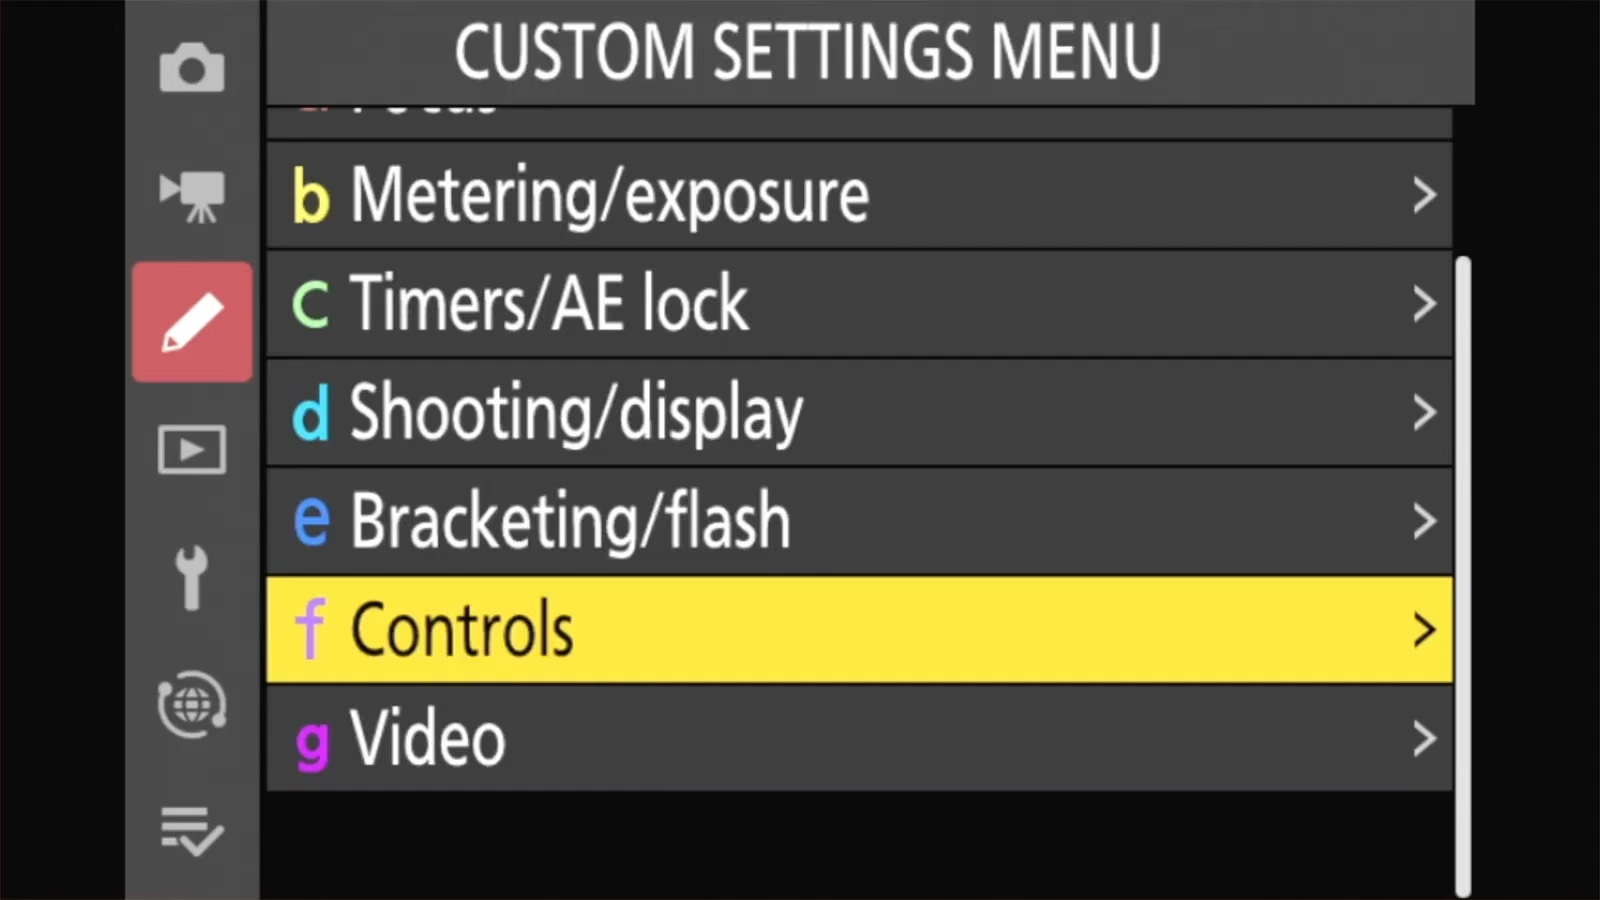
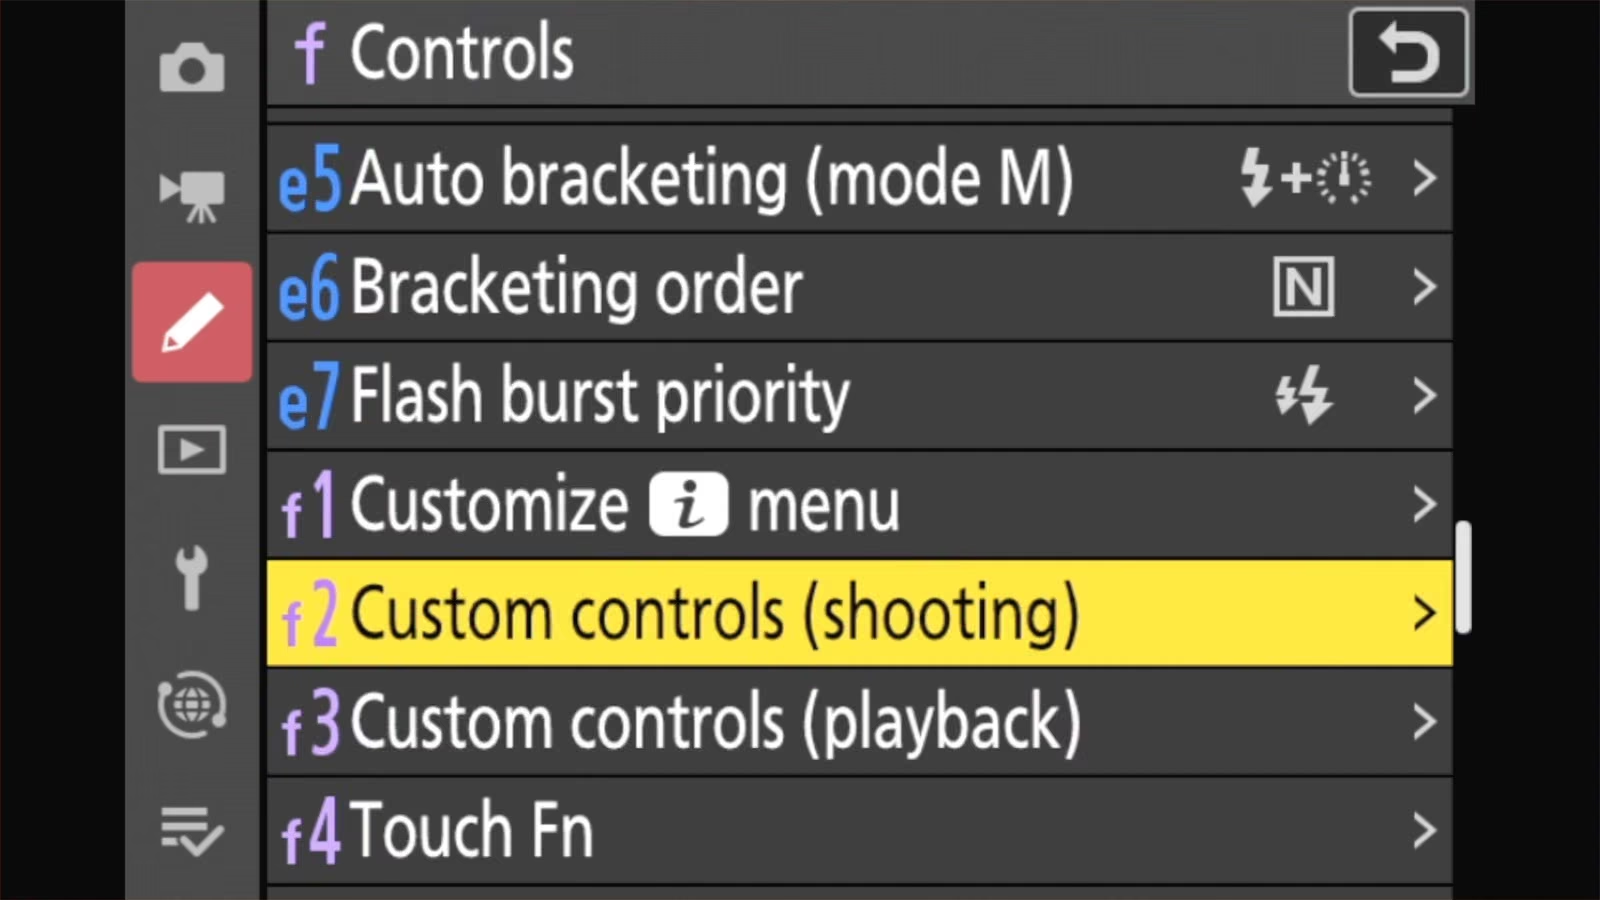
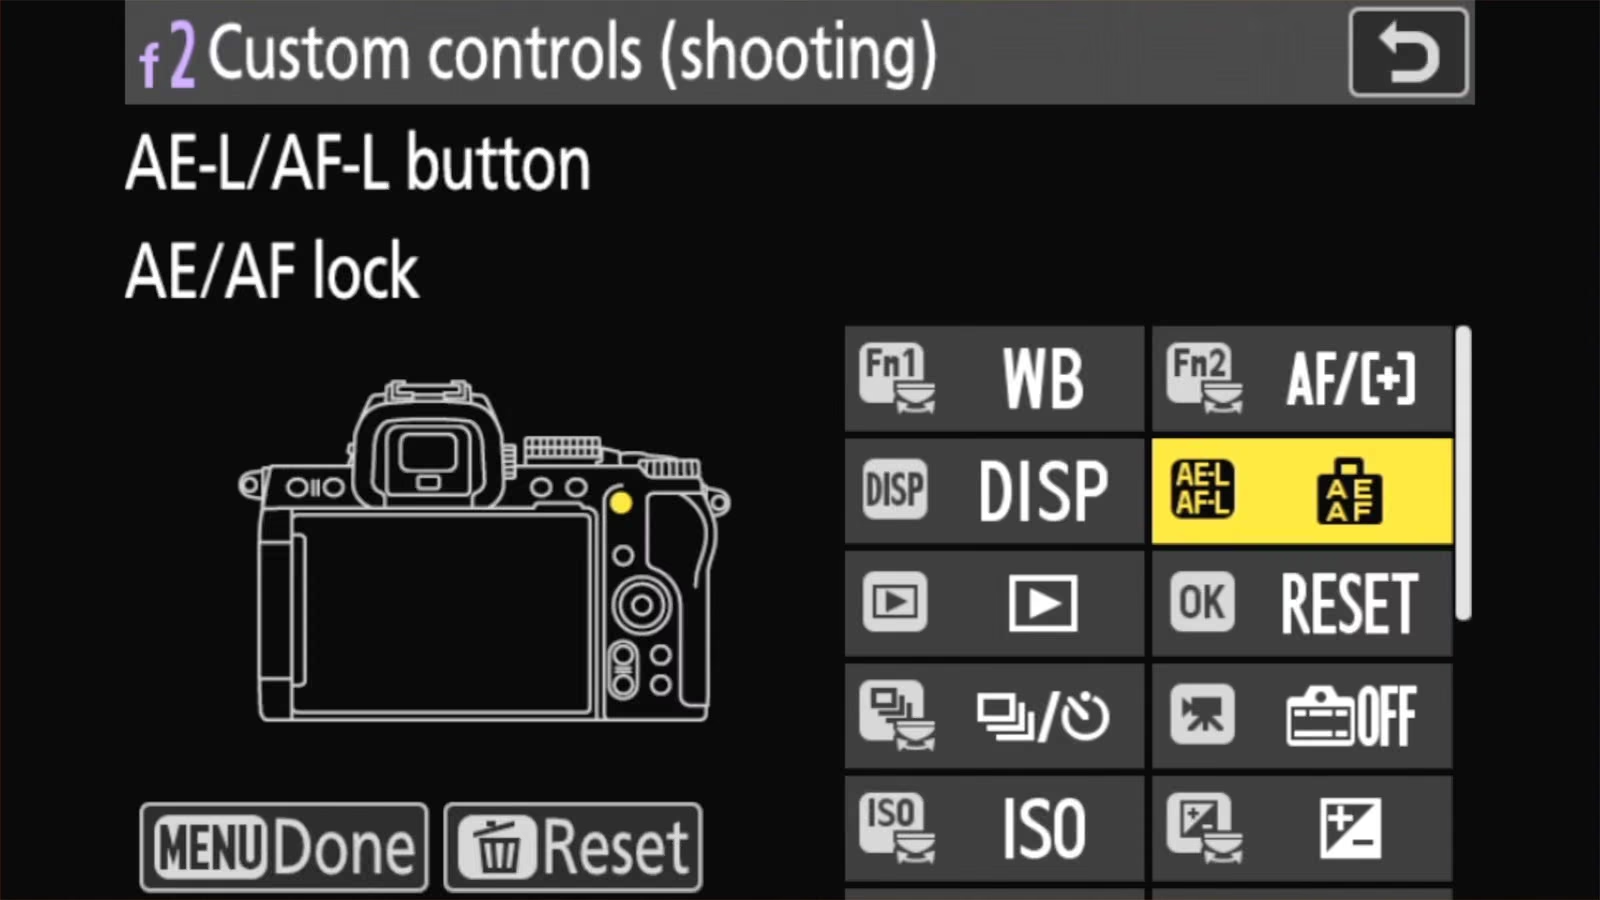
Highlight AE-L/AF-L button, press OK, and choose AF-ON.
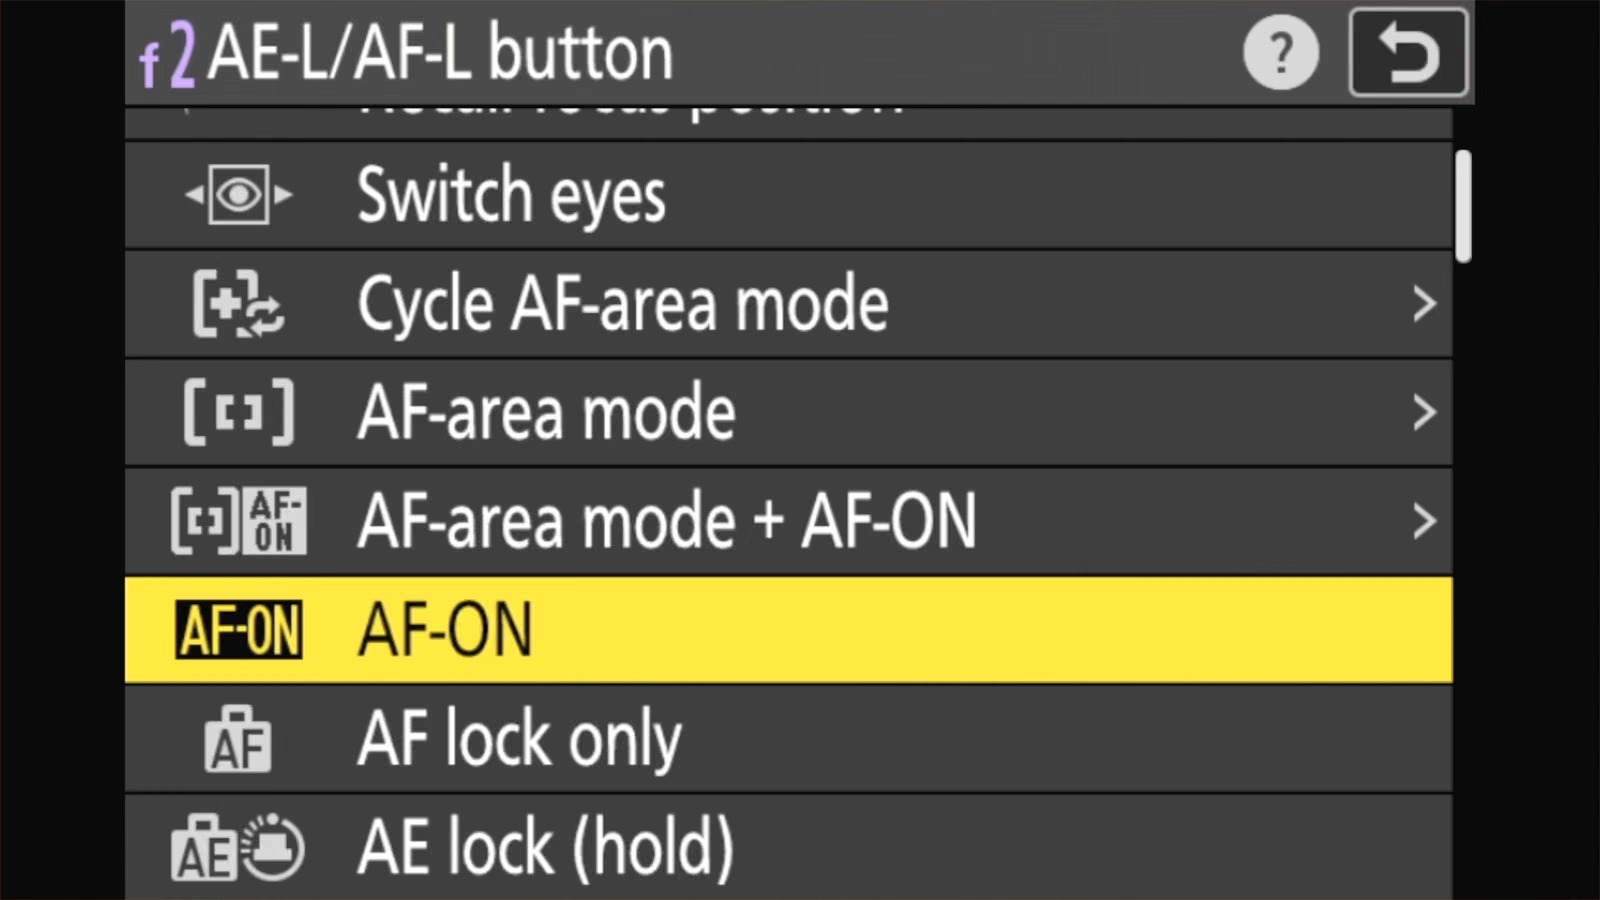
That’s it. Pressing the AE-L/AF-L button now starts autofocus, and the shutter button just takes pictures.
One catch if you use the U1, U2, or U3 positions on the mode dial: make these changes in P, S, A, or M. Changes made while the dial is on a U mode aren’t kept. They go back to what was saved for that position. To have back-button focus in a U mode, set it up there and then save it with SETUP MENU > Save user settings.
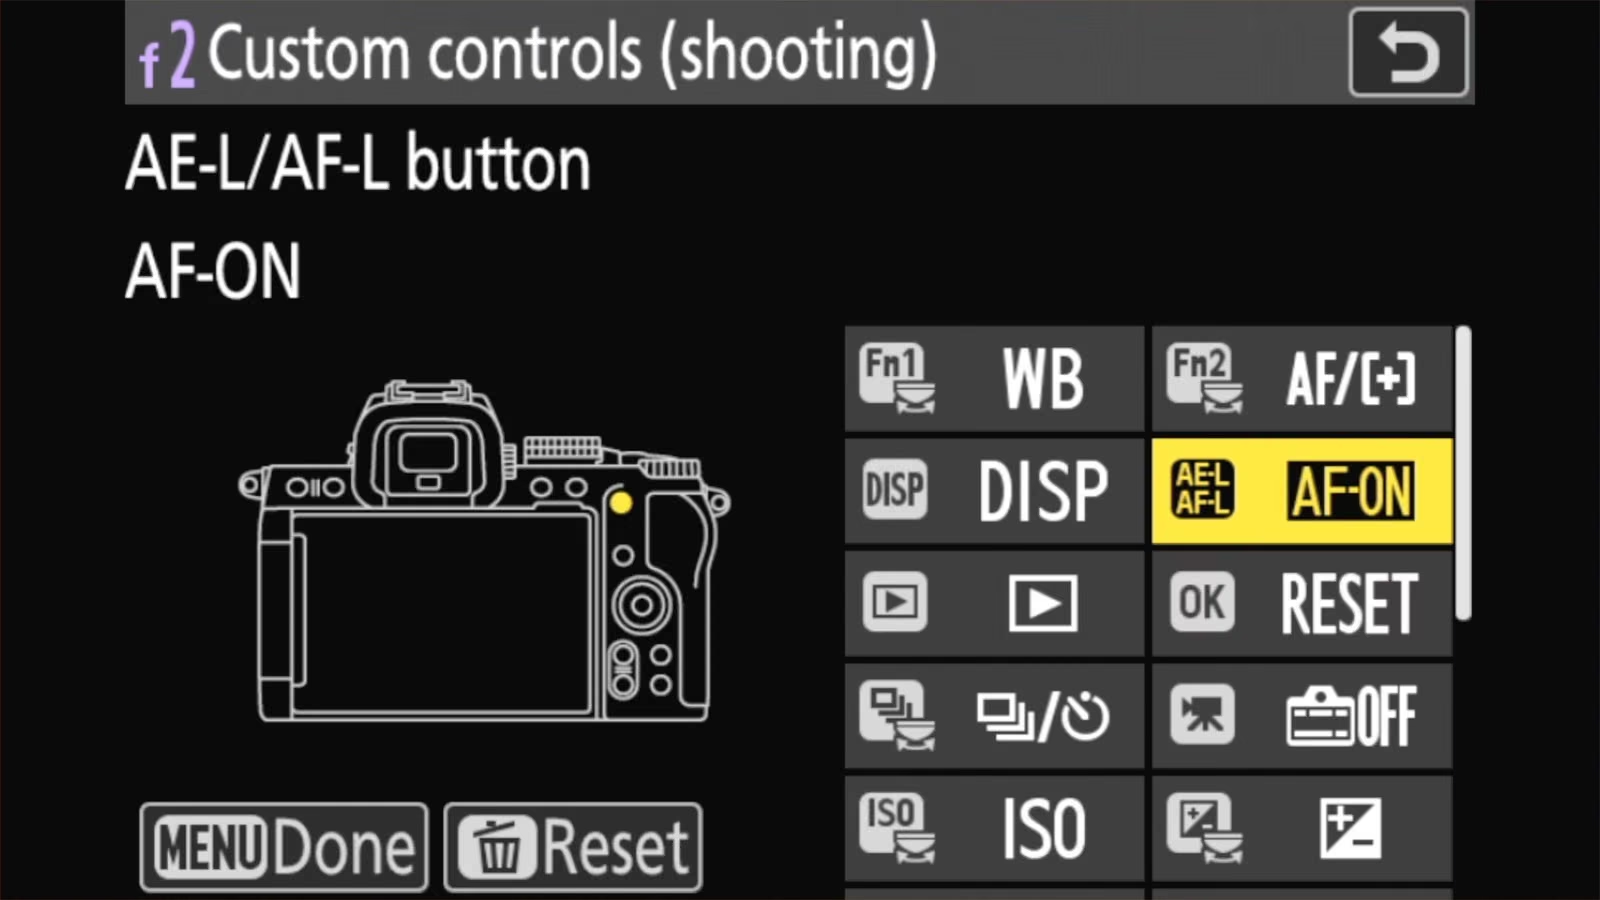
You can put AF-ON on a different button instead, if you prefer. The same f2 menu lists the Fn1 and Fn2 buttons, the DISP button, and others. But those are less convenient and don’t fit the traditional ‘back-button’ aspect.

In use
How you use it depends on the focus mode.
In AF-C (continuous): hold the AE-L/AF-L button down and the camera keeps adjusting focus as your subject moves. Press the shutter whenever you want a shot. Let go of the button and focus stays where it was, which is how you lock focus and recompose.
In AF-S (single): press the AE-L/AF-L button once and the camera focuses and stops. You can then take as many pictures as you like at that focus distance without the camera refocusing.
I just leave it set to AF-C all the time, because holding or releasing the button gives you both behaviors.
What about exposure lock?
By default, the AE-L/AF-L button locks both focus and exposure while you hold it. Once it’s an AF-ON button, you lose the exposure-lock part.
If you never used it, there’s nothing to do. If you did, there are two easy ways to get it back.
Lock exposure with a half-press. The shutter button isn’t focusing anymore, so it’s free to lock exposure instead:
MENU > CUSTOM SETTINGS MENU > c1 Shutter-release button AE-L > On (half press)
MENU > CUSTOM SETTINGS MENU > c1 Shutter-release button AE-L > On (half press)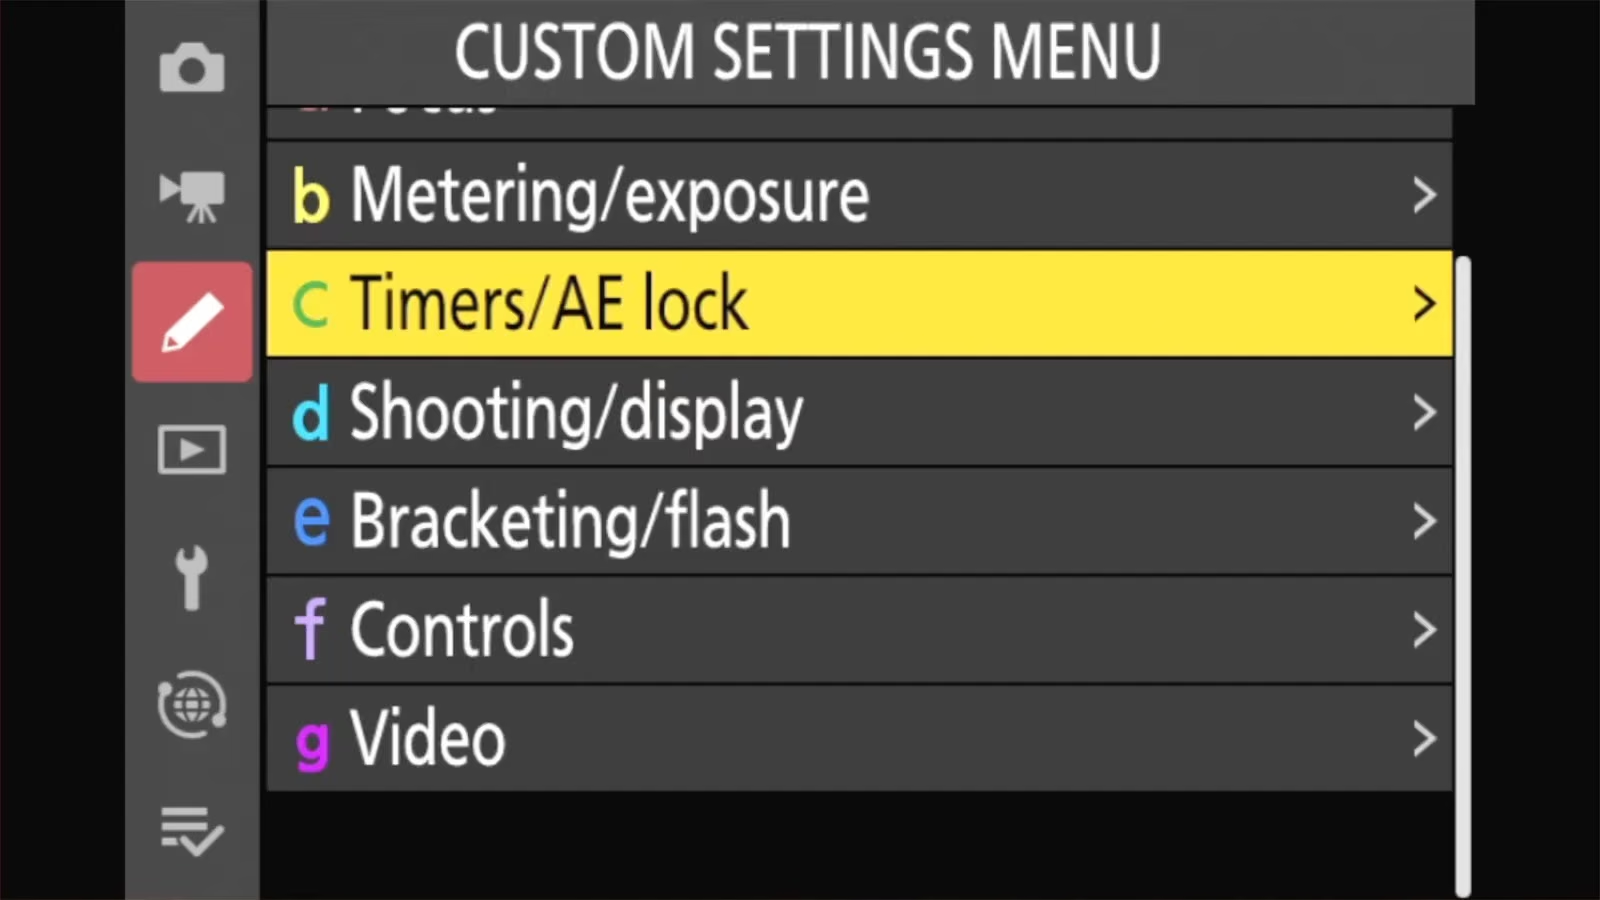
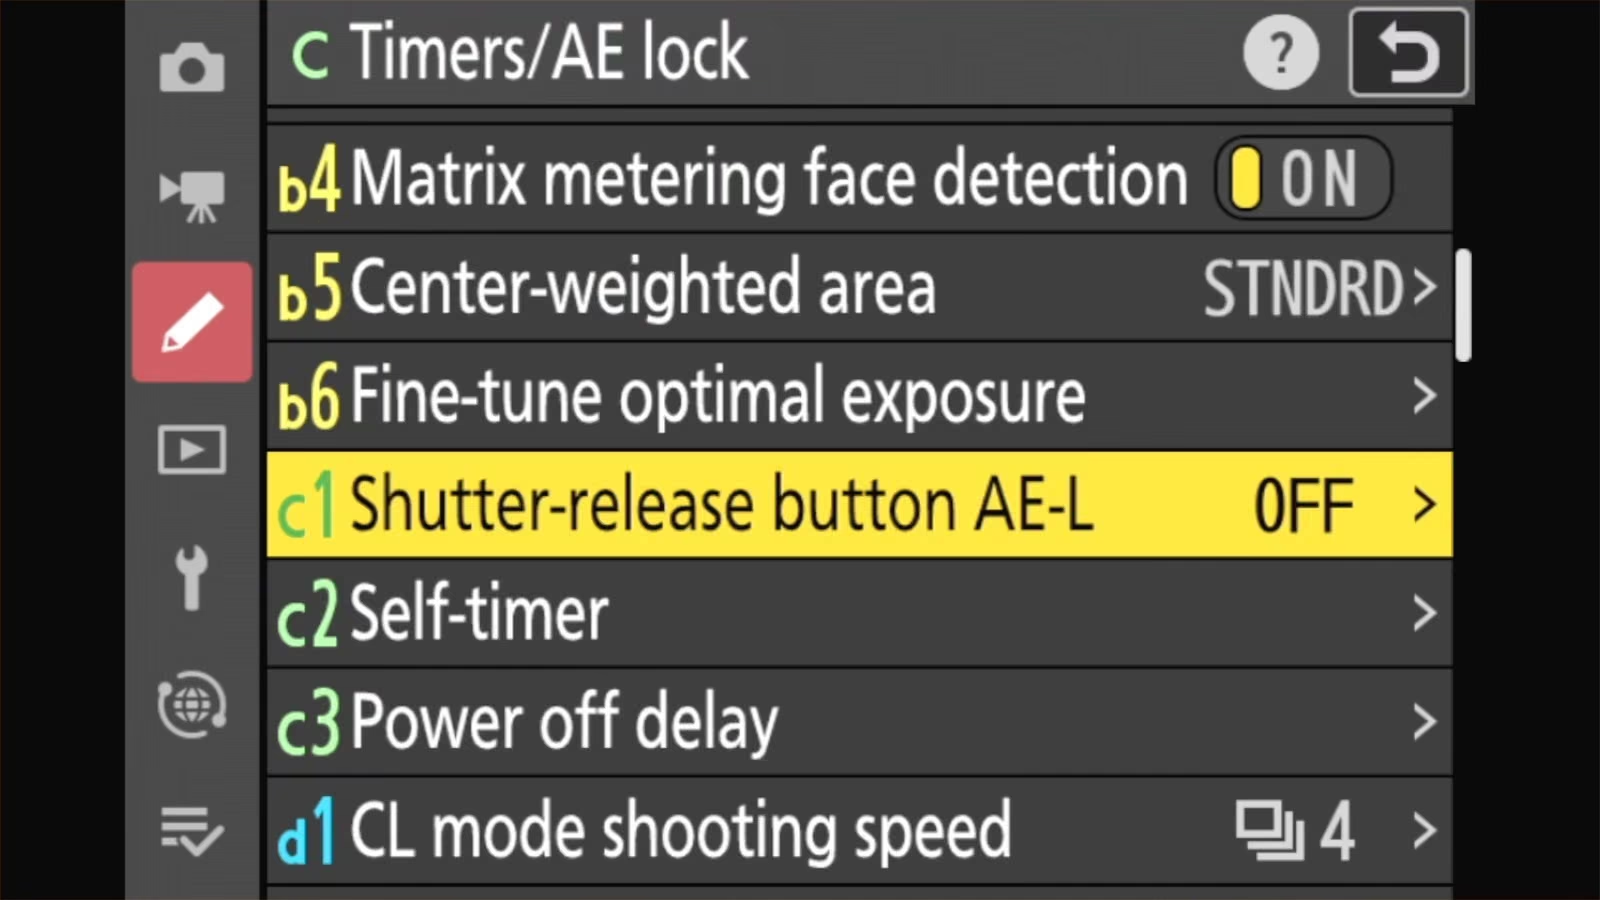
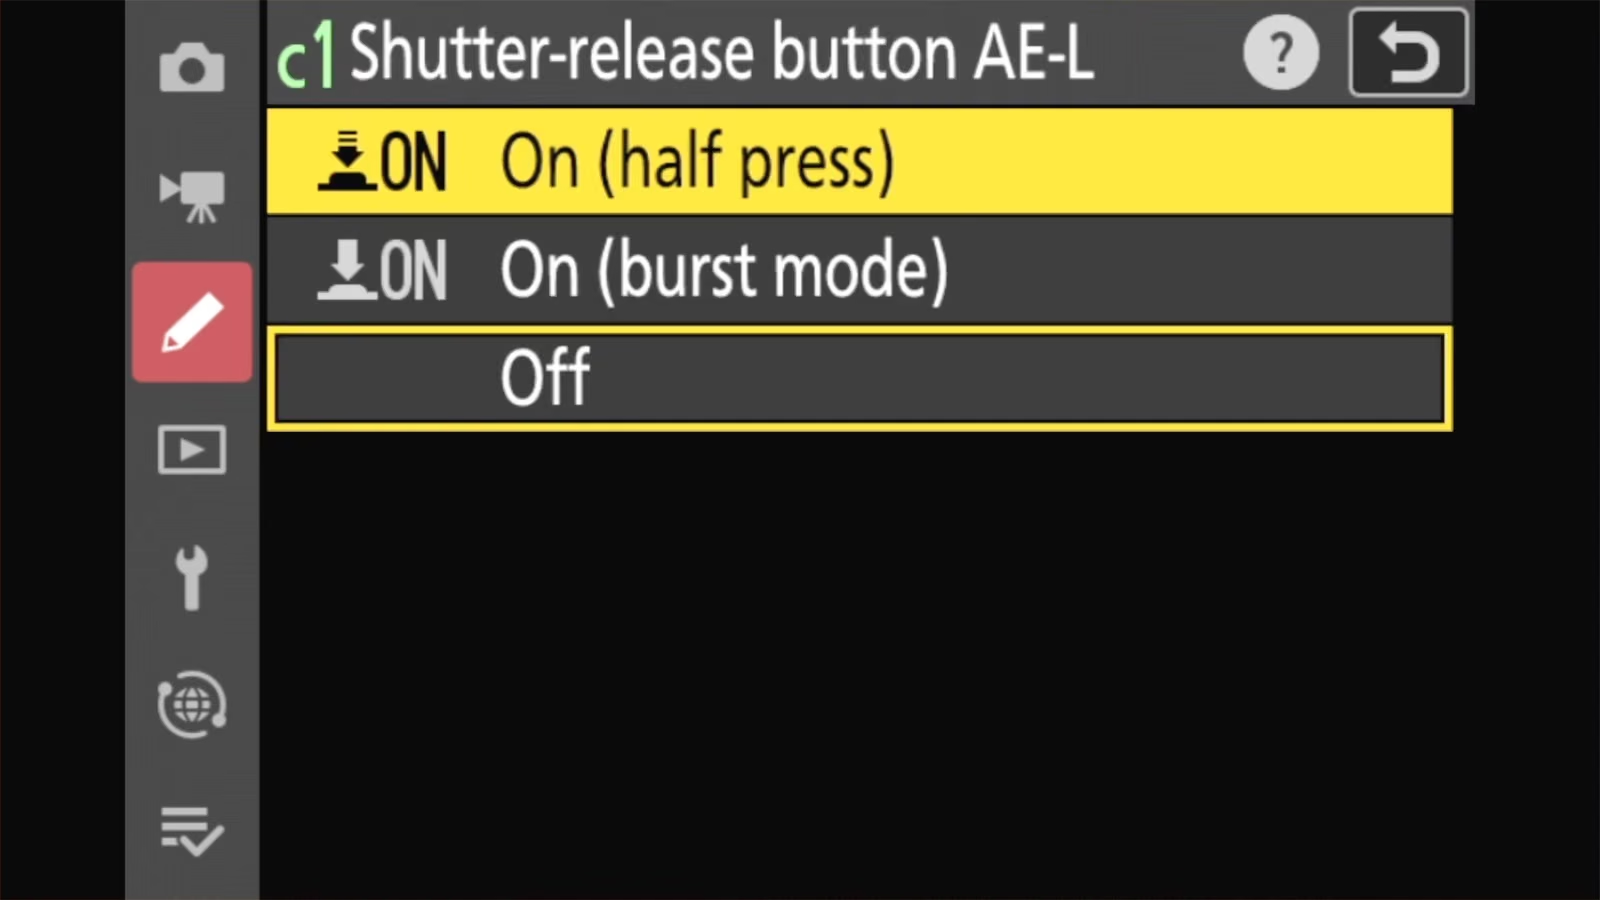
Now a half-press locks the exposure, and a full press takes the picture.
Put exposure lock on another button. In f2, assign AE lock only to one of the Fn buttons. At default settings, Fn1 sets white balance and Fn2 sets focus mode and AF-area mode, so give up whichever one you use less. This is what I do, and I find it more convenient than the shutter method for the main situation I use exposure lock: when shooting panorama tiles.
Video mode is set up separately
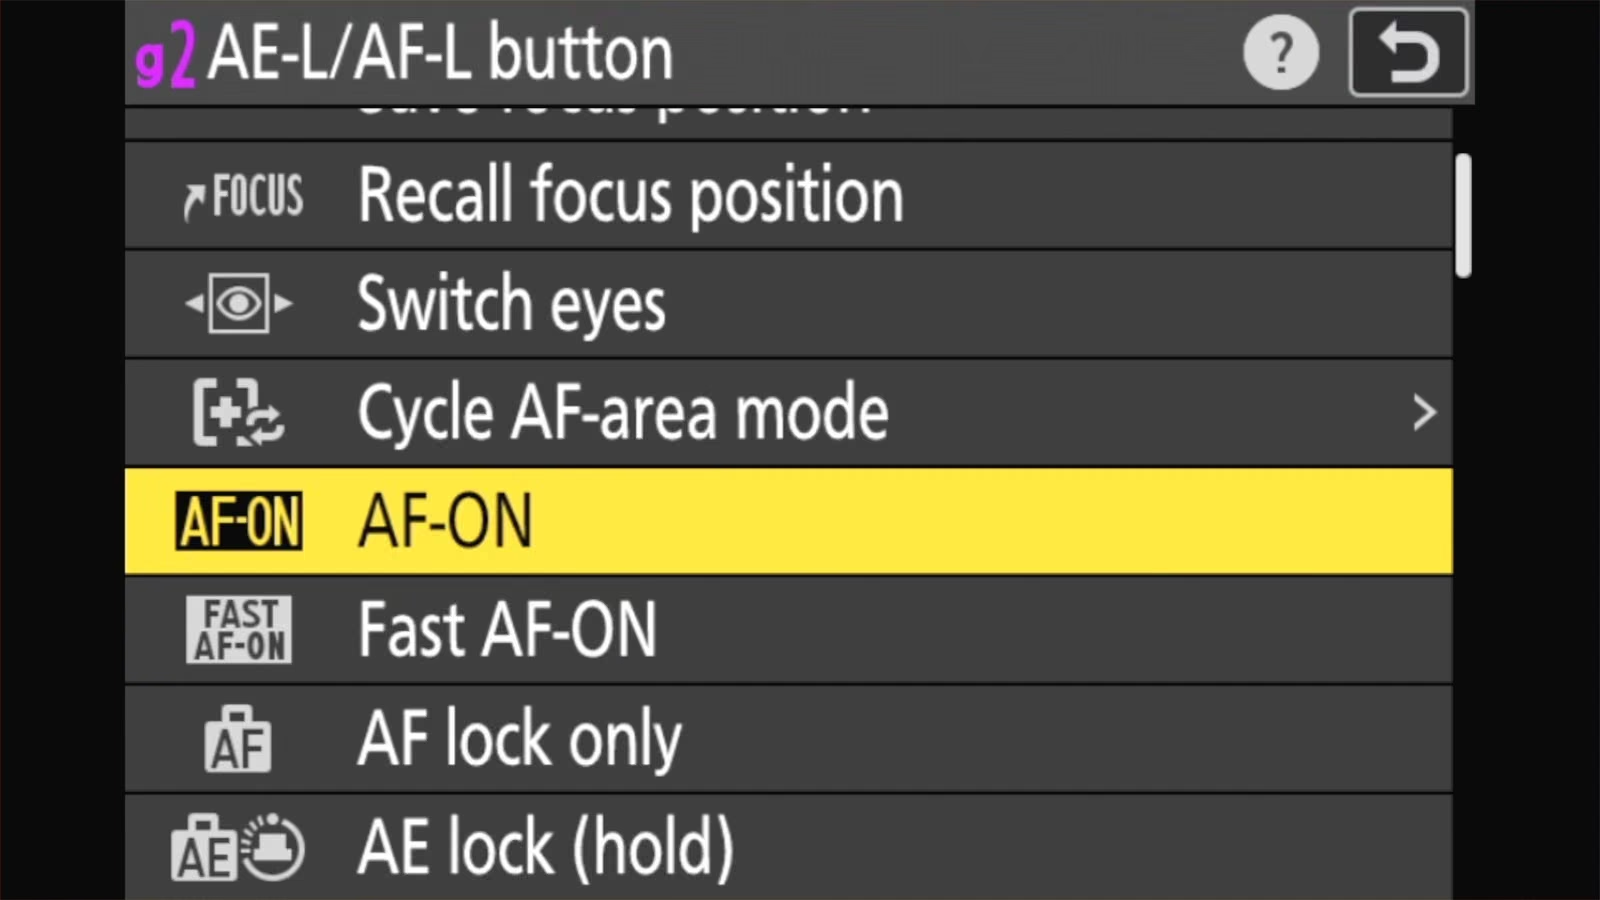
Those steps take care of the stills photos side of things, but if you want it to also apply to shooting video, there’s a separate menu bank of video button assignments. Find them under g2:
MENU > CUSTOM SETTINGS MENU > g2 Custom controls > AE-L/AF-L button > AF-ON
MENU > CUSTOM SETTINGS MENU > g2 Custom controls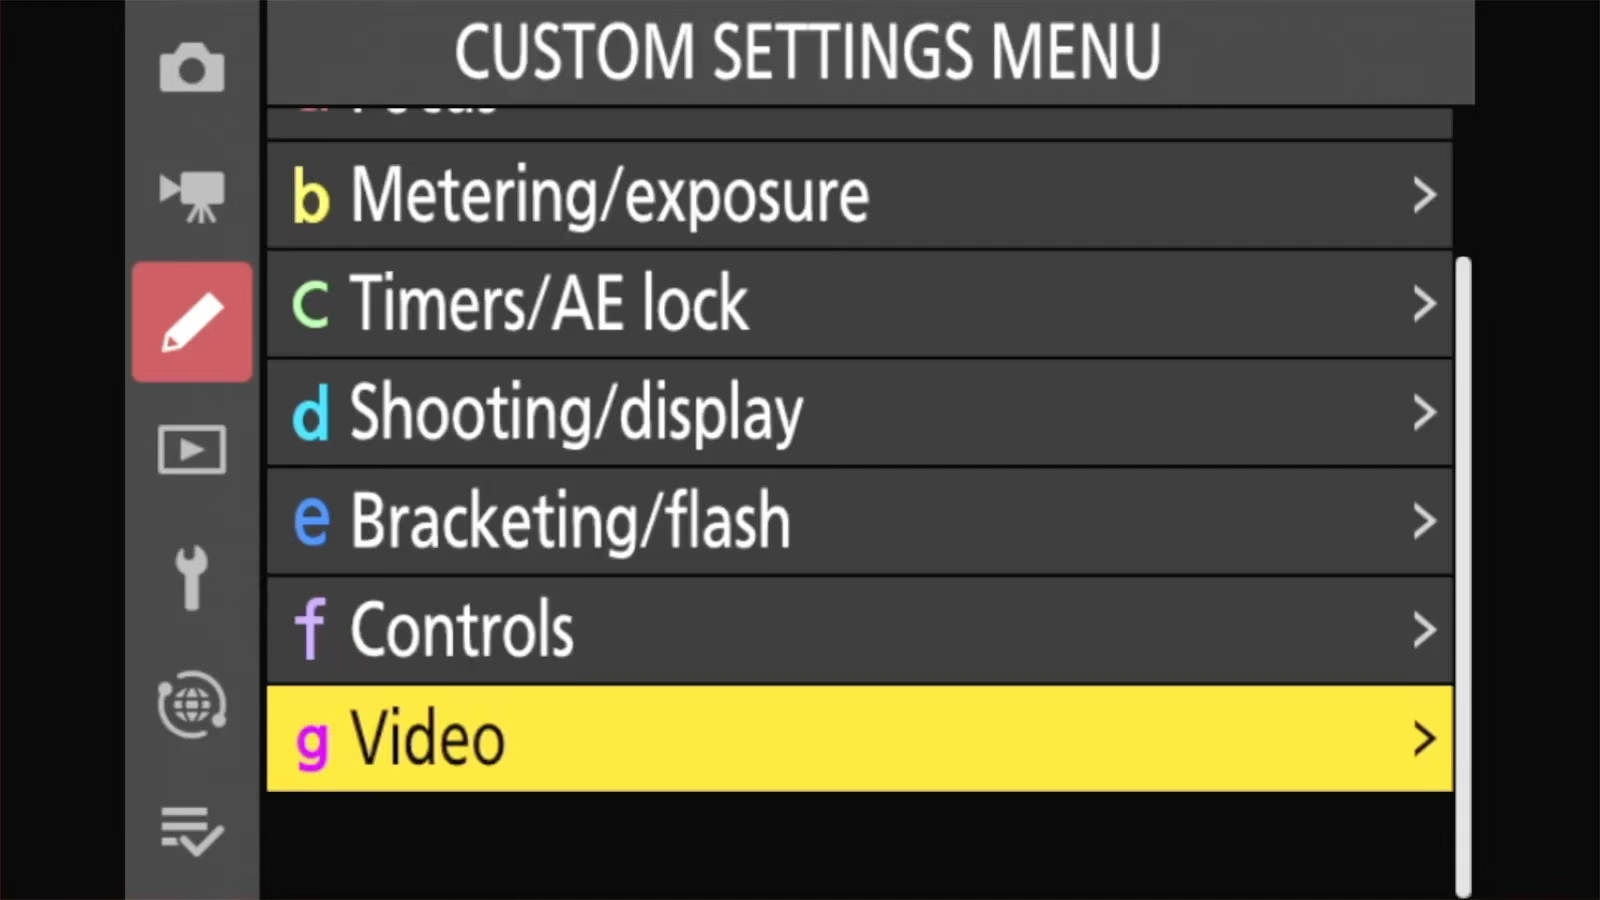
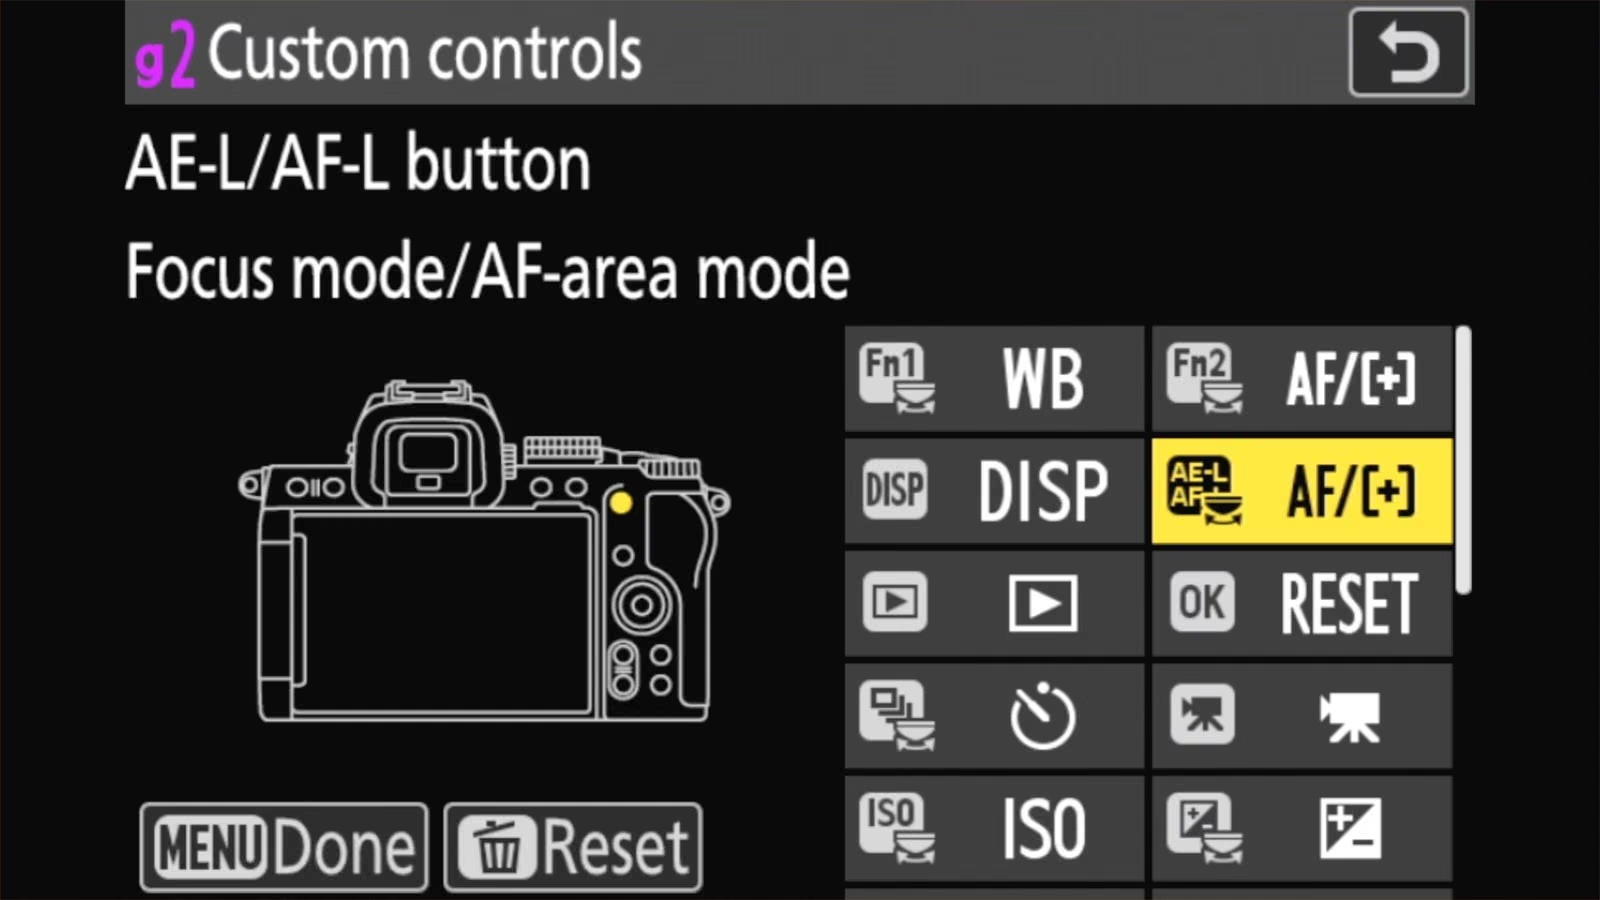
There you’ll find AF-ON for the AE-L/AF-L button, plus a Fast AF-ON, a video-only option that focuses at maximum speed regardless of the AF speed setting. You can choose one or the other (or assign each to different buttons).
How to switch it off again
To go back to the factory defaults, you can reverse the two steps:
- a6 AF activation → Shutter/AF-ON
- f2 Custom controls (shooting) → AE-L/AF-L button → AE/AF lock
There’s also a shortcut in the f2 control list. Highlight a button, press the delete button, and confirm to put just that button back to its default. Hold the delete button for about three seconds instead and it resets all the buttons.
Frequently asked questions
Why doesn’t focus lock when I half-press the shutter on my Z50 II?
In AF-C, the camera keeps adjusting focus the whole time you hold the shutter halfway. It doesn’t lock. To lock it, press and hold the AE-L/AF-L button, or set up back-button focus as above and just lift your thumb.
Does the Z50 II have an AF-ON button?
No. Nikon’s higher-end Z bodies like the Z8 have a dedicated AF-ON button, but the Z50 II doesn’t. You can give any of several buttons the AF-ON job in f2, and the AE-L/AF-L button is the best placed.
Will back-button focus stop the camera from taking blurry photos?
Not by itself. With Out-of-focus release set to Enable, the camera fires whenever you press the shutter, focused or not. That’s deliberate, because it puts you in charge. If you’d rather the camera refuse to fire until it’s focused, set it to Disable.
Explore the Nikon Z50 II
Here’s a fun tool I created to help identify which buttons and dials are where — and what they’re called, because every brand has their own dialect and jargon.


