
Quick Summary
- The Ricoh GR III has a fixed 18mm prime lens, equivalent to around 28mm on a full-frame camera.
- Ricoh offers a GW-4 0.75 Wide Conversion Lens for the GR III, converting the view to approximately 21mm.
- The GW-4 lens attaches to the front of the camera and requires the GA-1 adapter, sold separately.
- The lens is priced at $250, with the adapter costing an additional $50.
- Benefits:
- Provides a wider perspective.
- Maintains good optical quality with minimal distortion and chromatic aberration.
- Drawbacks:
- Adds significant size and weight to the GR III.
- The camera becomes less pocketable.
- The GA-1 adapter is essential but sold separately.
- The lens is best for those who prefer a wider perspective but are willing to compromise the portability of the GR III.
The Ricoh GR III is legendary for its fixed 18.3mm prime lens. On the GR III’s APS-C sensor, that translates to a 28mm full-frame equivalent — a classic, medium-wide focal length revered by street and documentary photographers.
While you cannot swap lenses on the GR III, there is a way to force a wider perspective. Ricoh makes a dedicated conversion lens that mounts directly over the front of the built-in optics. A few years ago, I reviewed the previous model for the GR II.
There’s a new model specifically engineered to match the GR III’s sensor: the GW-4 0.75 Wide Conversion Lens.
A Note for Ricoh GR IV Shooters
If you are upgrading to the newly released Ricoh GR IV, hold onto your GW-4.
The wide conversion lens itself is fully compatible with the new camera and delivers the exact same 21mm equivalent field of view.
However, the physical mounting process has changed. Because Ricoh redesigned the GR IV’s lens barrel, the older GA-1 adapter covered in this review will no longer fit. To mount the GW-4 to the GR IV body, you must purchase the newly designed Ricoh GA-3 Lens Adapter.
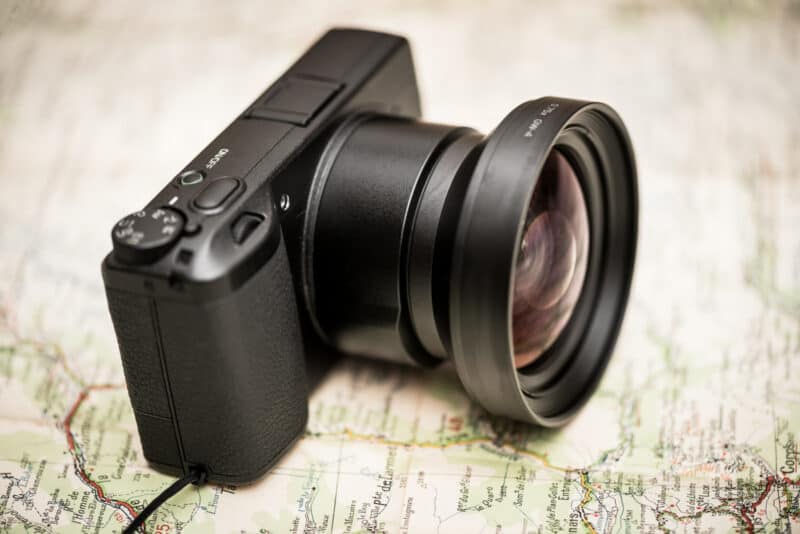
This isn’t one of those cheap, screw-on wide-angle adapters that heavily distort your corners and turn your photos to mush. It’s basically a solid hunk of high-quality glass — there are no aperture blades, focusing motors, or other controls inside. It simply acts as an optical modifier. Priced at $250 (plus an additional $50 for the required adapter ring), it is a serious piece of glass that takes the camera’s standard 28mm perspective to a sweeping 21mm field of view.
It takes the camera’s standard 28mm perspective to a significantly wider 21mm perspective. I have some examples below on what that translates to in visual terms.
Pros
- Surprisingly good optics
- Useful wide focal length if you like wide-angle perspective
- Reasonably priced
Cons
- Adds significant bulk and weight compared to the size of the camera. It’ll no longer fit in your pocket.
- Have to buy the GA-1 adapter separately
It just clips on the front of the camera. It adds quite a bit of size and weight to the GR III, so you’re probably not going to be able to just slip the camera into your pocket anymore. To switch between the 28mm and 21mm perspectives, you remove the lens; there’s not a more convenient way to switch between them.
I’ve been pleasantly surprised at the quality. Adding a thick layer of glass to the lens will undoubtedly have an effect — and typically a negative one — but the engineers at Ricoh have done a good job with this lens to make sure that the negative effects are minimized. The quality remains very good, and there’s a minimal amount of light dropoff. There’s not much in the way of lens distortion or bowing, the edges and corners are still quite sharp, and there’s not much in the way of chromatic aberration (purple fringing). I’ve included some practical examples below.
My biggest complaint is with its size. Well, not really a complaint, since it’s due to optical physics. The effect on the overall size and weight of the package is exaggerated on such a small camera. And it means that adding the GW-4 will mean that the GR III won’t fit in your pocket anymore.
Essential accessory: Ricoh GA-1 lens adapter
If you’re going to buy the GW-4, make sure you also buy the GA-1 lens adapter as well. You won’t be able to mount the GW-4 lens to the camera without it.
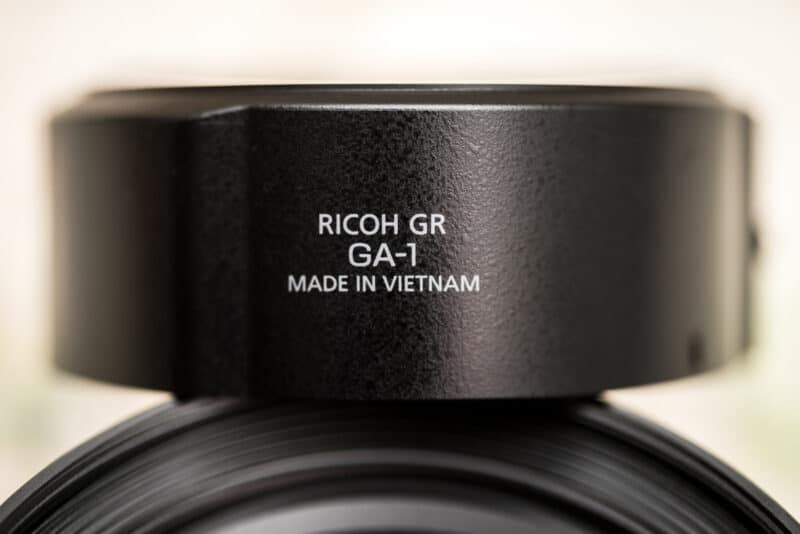
Unlike the heavy glass of the GW-4, the GA-1 is a lightweight plastic barrel. It acts as a spacer and mounting point. One side latches onto the GR III’s body ring, and the other side provides the metal contacts and threading for the GW-4. It also features a 49mm internal filter thread, meaning you can use the GA-1 by itself to mount standard circular polarizers or ND filters to the GR III. Photo by David Coleman / Have Camera Will Travel

Those metal contacts are crucial. They tell the camera’s brain that the adapter is attached. This doesn’t just write the 21mm focal length into your RAW EXIF data; it actually tells the camera to adjust its In-Body Image Stabilization (IBIS) to account for the wider field of view.
My main grievance here isn’t the function, it’s the packaging. I don’t understand why Ricoh doesn’t include the GA-1 in the box with the GW-4. Offering it as a standalone accessory makes sense for photographers who just want to use 49mm filters, but charging $50 for a flimsy plastic spacer that is absolutely required to use a $250 conversion lens feels a bit like a gouge.

21mm vs 28mm on the Ricoh GR III / with and without GW-4 wide-angle conversion lens
Here are some side-by-side examples without and with the GW-4 lens.
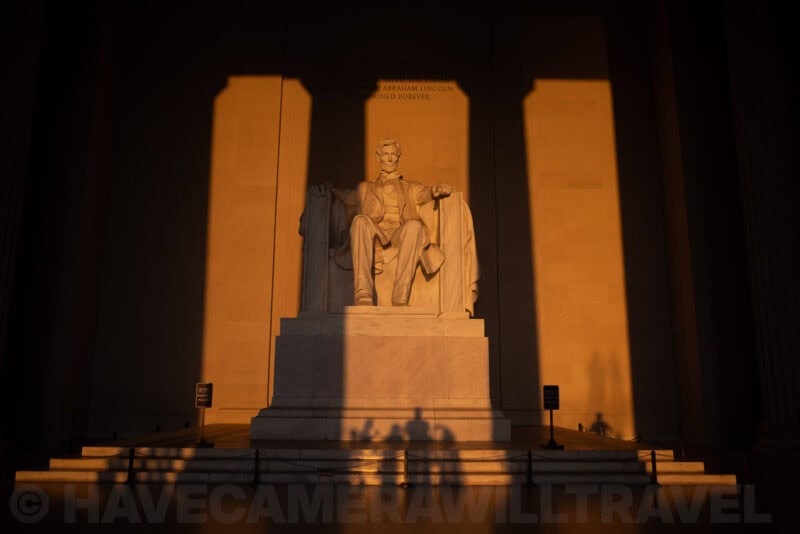
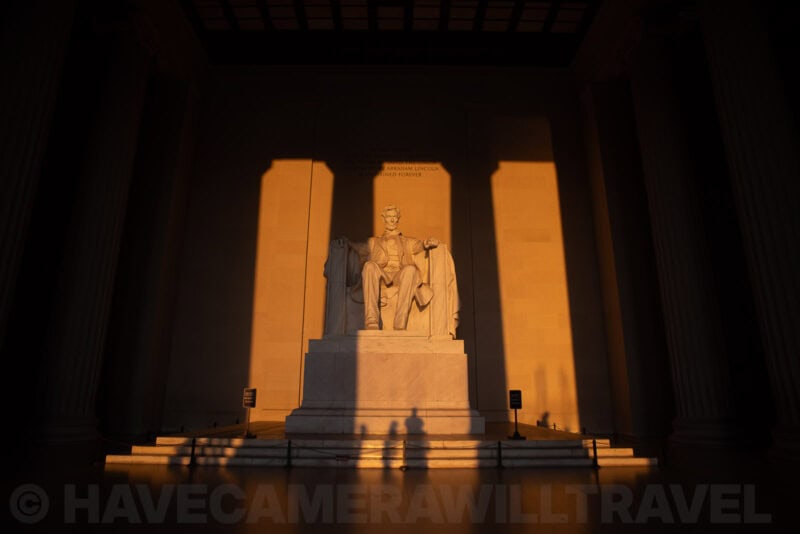

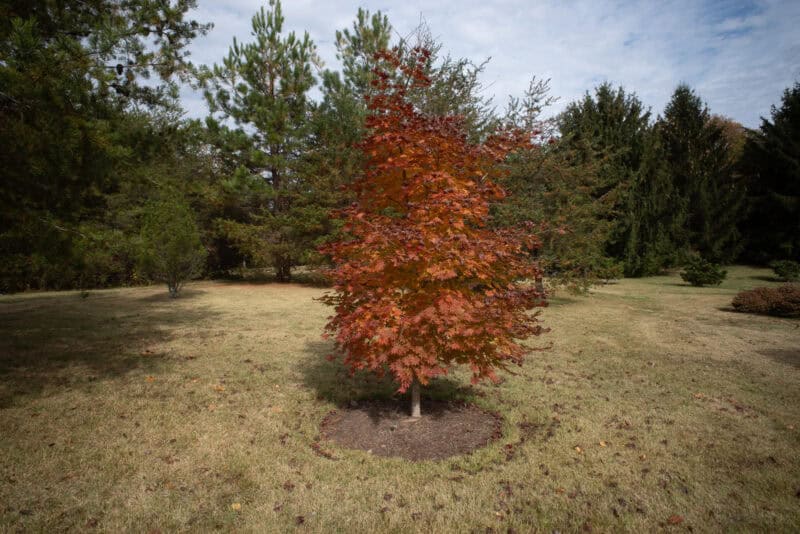


Photos taken with the GW-4 wide-angle lens on Ricoh GR III
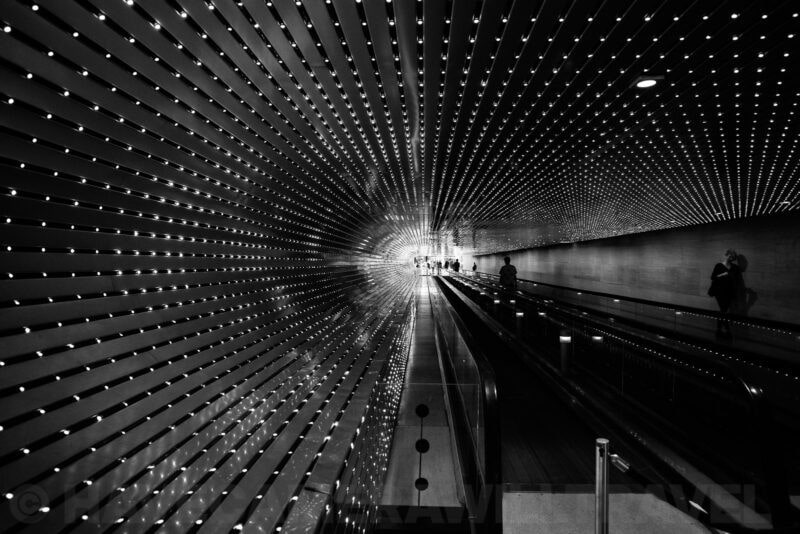
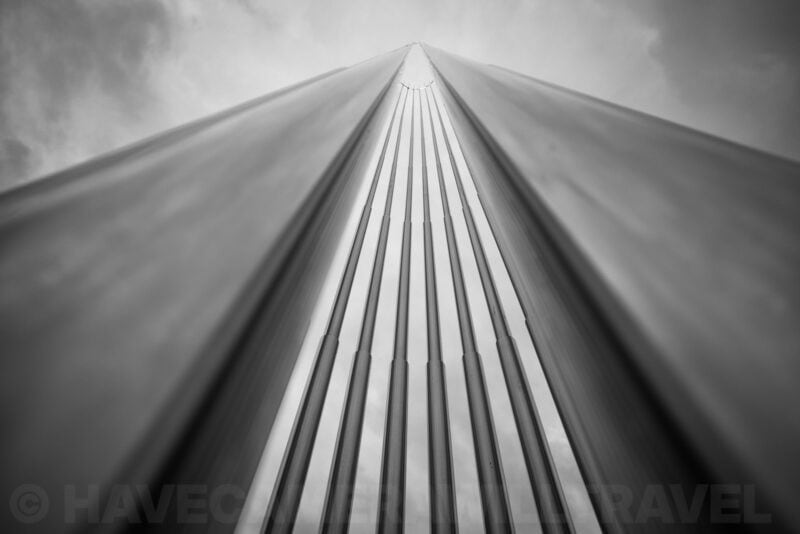
Slapping a massive, thick layer of glass over an already highly-corrected prime lens usually introduces a host of negative optical effects — smearing in the corners, heavy vignetting, and purple fringing.
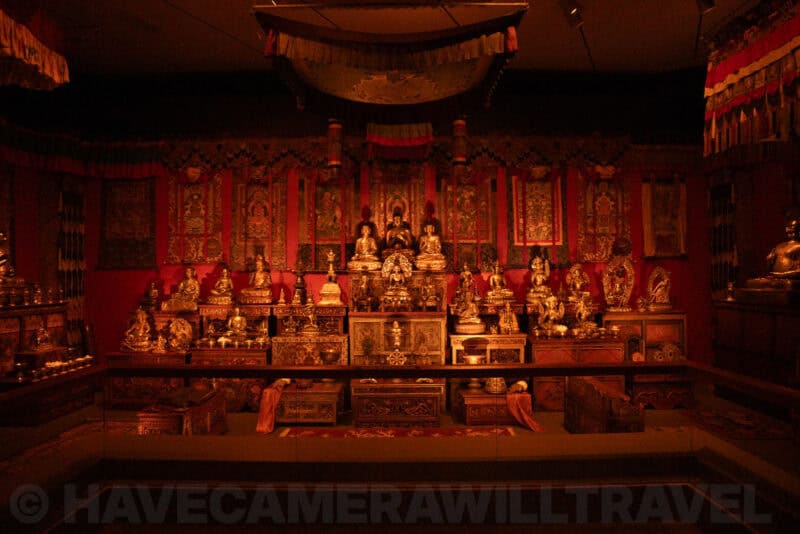
But I’ve been very impressed with how well Ricoh’s engineers mitigated these issues. The optical penalty is practically zero. The edges and corners remain razor-sharp, light falloff is minimal, and the rectilinear correction keeps architectural lines surprisingly straight.
Here are some real-world examples taken in and around Washington D.C. These were all shot in RAW (.dng) and processed in Lightroom, but I have specifically disabled all software lens corrections, distortion fixes, and chromatic aberration removal so you can see the true optical performance. You can click on each image for a full-size version for a closer look.






Things worth knowing about the Ricoh GW-4 wide-angle lens adapter
- Filter Threads: The front of the GW-4 lens features a massive 72mm filter thread, allowing you to attach standard 72mm screw-on filters or step-up rings.
- The Lens Hood: It comes with a soft rubber slip-on lens hood. Frankly, I leave it in the box. While it’s somewhat useful for blocking stray light, it doesn’t lock into place, constantly needs adjusting, and gets in the way if you are trying to rotate a circular polarizer.
Key specifications
| Model | GW-4 |
|---|---|
| Compatibility | For the Ricoh GR III and Ricoh GR IV cameras. On the Ricoh GR III, it requires Ricoh GA-1 lens adapter. On the Ricoh GR IV, requires the GA-3 lens adapter. (NB. The GA-1 and GA-3 are sold separately.) |
| Magnification | For the Ricoh GR III camera. Requires Ricoh GA-1 lens adapter. (NB. The GA-1 is sold separately) |
| Angle of View | Approx. 90 degrees (diagonal) |
| Lens Construction | 4 elements in 3 groups |
| Weight | Approx. 8.5 oz / 256 grams |
| Filter Diameter | 72mm |
| Filter Type | Screw-on threaded |
| Lens Hood | Soft rubber slip-on lens hood included. |
| Zoom? | No. It’s fixed magnification. |
| Autofocus Compatible? | Yes. Focusing is handled by the GR III’s built-in lens as normal. |
| Manual Focus Ring? | No. Focusing is handled by the GR III’s built-in lens. |
| Aperture Ring? | No. Aperture is handled by the usual in-camera controls. |
| Model | GA-1 |
|---|---|
| Compatibility | For Ricoh GR III camera. Required for using GW-4 Wide-Angle Lens (but sold separately). |
| Filter Size | 49mm |
| Filter Type | Screw-on threaded |
| Weight | 0.4 ounces / 11 grams |
Wrap up
I’m a bit of two minds about the GW-4 and tend to go back and forth about it. Over the years, I’ve bought one, sold it, and bought another.
On the one hand, I love the wider perspective. I’m impressed with the optics. And the pricing is reasonable.
But the big stumbling block for me is its size and weight. Because it basically changes the nature of the GR III from a take-anywhere pocketable camera that I can slip in my pocket anywhere I go to something that is much closer to a small mirrorless camera (something like the Sony a6700 and similar, for example). It’s still quite small, but it’s not nearly as convenient to carry around just in case. Put another way, it raises the bar on whether I take the GR III with me. If I’m going out to take photos, then a larger camera isn’t a problem. But if I’m just heading out to do other stuff and taking a camera just in case, then I want maximum portability and convenience.
And that’s especially true when there’s already another very capable camera with a wide-angle lens in my pocket: my iPhone. Don’t get me wrong, as impressive as the iPhone cameras are these days, I much prefer to shoot with the GR III. But the GW-4 certainly adds a convenience cost that can tilt the decision much more towards the iPhone.
All of that said, if you’re less bothered by the portability aspect and prefer a wider perspective, the GW-4 is well worth a look. I’ve been pleased with how well it performs.
Price & availability of Ricoh GW-4 wide conversion lens
When I bought mine, the GW-4 was a new product. Since then, they’ve been turning up on the used market as well, so I’ve included some good places to try below.
But wherever you buy it, don’t forget that you need to get the GA-1 lens adapter as well (or the GA-3 if you’re using it on the Ricoh GR IV).
Buy new
I’ve actually bought two of these over the course of a few years. I bought one at Amazon and the other at B&H Photo.
Ricoh GR III accessories & replacement parts
Here are the model numbers of some of the core accessories and replacement parts for the Ricoh GR III.
Lens ring cap
- Ring Cap: GN-1
The lens ring cap is the small plastic ring that attaches around the lens port. To the extent it’s a functional part of the camera, it’s mostly there to protect against grit getting into the attachment thread around the lens port. But it’s also largely decorative. Chances are, it’s fallen off. While you do have to remove it to attach the lens adapter for using filters or the wide-angle conversion lens, it’s a poor design that tends to fall off and get lost far too often. I’ve lost a couple of them now.
The camera will work just fine without it. But that will leave some contacts exposed around the lens barrel, which isn’t ideal.
The official replacement part is overpriced, but if you want to get the genuine replacement part, it’s model GN-1. But you can also pick up much less expensive aftermarket versions. They’re also available in different colors, so you can bling up your camera with a personal touch — or make it look like the Street Edition.
USB cable
The GR III has a USB Type-C connector port. When you get a cable, you can get them with another USB Type-C connector on the other end or a more traditional USB Type-A connector. Which you choose depends entirely on what you’re plugging into. For example, some newer laptops only have USB-C, while most other computers have USB-A.
Not all USB-C cables support data transfer, though. That’s often something you’ll run into with USB-C cables designed for fast charging. So it’s worth checking the product description and specs first.
Battery & charger
- Battery: DB-110
The Ricoh GR III takes battery model DB-110. It’s a rechargeable lithium-ion battery rated at 3.6V 1350mAh 4.9Wh.
There are some other cameras that also use the same battery — notably, some Olympus cameras (the Olympus model number for the same battery is LI-90B). So they’re quite widely available. You can get the official Ricoh version. There are also aftermarket versions that can be much better value but work just as well.
- Charger: BJ-11
You can charge the battery in the camera (using a USB-C cable). There are also external battery chargers available. They’re especially useful if you’re using spare batteries, so you can charge and shoot simultaneously.
- AC Adapter: K-AC166
This is used to power the camera for longer shoots, such as time-lapse, or if you happen to be using the camera for live streaming as a webcam. It connects via the camera’s USB-C port.
Wide-angle conversion lens
Ricoh has produced a wide-angle conversion lens that takes the standard 28mm view down to a 21mm (in 35mm equivalent). While it does add some extra bulk to an otherwise small camera, it works well and adds a more dramatic, wider view. I have an in-depth review of it separately.
Something to be aware of, though, is that you will also need to pick up the GA-1 lens adapter separately. For reasons I really don’t understand, the wide-angle conversion lens doesn’t come with the adapter, and both are required to make it work. So make sure you pick up one of those at the same time.
Remote shutter releases
- Wired Shutter Release: CA-3
This is the official Ricoh remote shutter. It connects to the camera via a USB cable, and it’s a simple shutter release (i.e., there’s no timer or intervalometer).
You can also find aftermarket shutter releases for the GR III.
External viewfinders
- Standard External Viewfinder: GV-1
- Mini External Viewfinder: GB-2
The Ricoh GR III doesn’t have a built-in viewfinder. But they make two versions of an external viewfinder that slides into the camera’s hot shoe. It covers both the standard 28mm view as well as the 21mm view if you’re using the wide-angle conversion lens. There’s also a mini viewfinder; that model seems to be hard to find.
Screen protector
The back screen of the GR III is quite exposed, and if you lie the camera on its back, the screen comes in contact with the surface. Even if you’re putting the camera in your pocket, there’s a risk of keys or coins scratching the screen.
There’s no official screen protector, but there are good aftermarket versions. The one I use is this one. It’s essentially a consumable that protects the screen. If you scratch the protector, you can quickly and easily replace it with another from the pack.
Carrying & protection
- Soft Case: GC-11 (replaces the GC-9)
You can, of course, use the GR III with just about any camera case or bag. But Ricoh does make a dedicated soft case that fits snugly around the camera and offers some protection even if you’re toting the camera around in your pocket. I’ve been using one for a couple of years, and it’s held up very well, and it keeps my camera safer from bumps and scratches.
- Neck Strap: GS-3
Again, there’s no particular reason you have to use the official GR neck strap, but there is one. The main part is leather, and it even has a discreet, embossed “GR”.
If you do use a different strap, be aware that the strap loops on the camera are very small and won’t take thicker (i.e., stronger) attachment loops. So you might need to use some D-rings as well.
- Hand Strap: GS-2
There’s even an official “GR” leather hand strap! But, again, aside from the branding, there’s no special reason to use the official strap. If you do use a different one, you might need D-rings if the thread doesn’t go through the camera’s small attachment loops.
External flash
Unlike some of its predecessors, the GR III doesn’t have a built-in flash. It supports the Pentax P-TTL flash protocol.
Pentax External Flashes:
Ricoh GR III manual
You can find it here.
Something to be aware of is that if you do a web search for the manual, you’ll often end up at the manual for the Ricoh Digital III manual, which is a different, and older, camera.



I use the NISI 49mm adapter for the GW-4 lens instead of the Ricoh GA-1 adapter. It’s made of metal instead of plastic and costs $20, not $50. It has no electronic connectors and not barrel lock.
PQ is fine, but no 18.3 EXIF data. I use a small piece of tape to secure the adapter to the camera body just in case.
Everything works great.
Great tip–thanks!
THank you for this exceptional review! It was so helpful for me. Great examples – I loved the ability to drag and compare the two focal lengths.
Glad it’s helpful!
Hello David,
I am happy that it works and that you proofed it with a 72mm filter.
That’s fun,
thank you very much,
regards,
Andreas
Hi David,
what size is the filter thread on the GW-4 or is it any filterscrew on it.
Or say it so: Is it possible to put a filter on it. I love using black pro mist filters:-)
Thanks
Andreas
Hi Andreas. You can’t attach a standard screw-on filter onto the lens itself. While they look like threads on the front of the lens ring, they’re not. And the glass has a convex front that protrudes out and would prevent a flat filter from going on. You could probably find a way to attach an external filter holder, but I haven’t tried any with this lens. The GA-1 adapter can be used to attach 49mm screw-on filters without using the wide-angle lens.
thank you,
I read on B & H in a review on the GW-4 Adapter that we could now! use a 72mm filter thread in front of the lens. No idea how this works.
regards,
Andreas
I stand corrected. Now that I’ve got it in front of me I’ve taken a closer look and it does indeed have a filter thread as well (just not the more obvious rings). And it is indeed 72mm–I’ve just screwed one on. So my apologies for my error, but thanks for the correction.