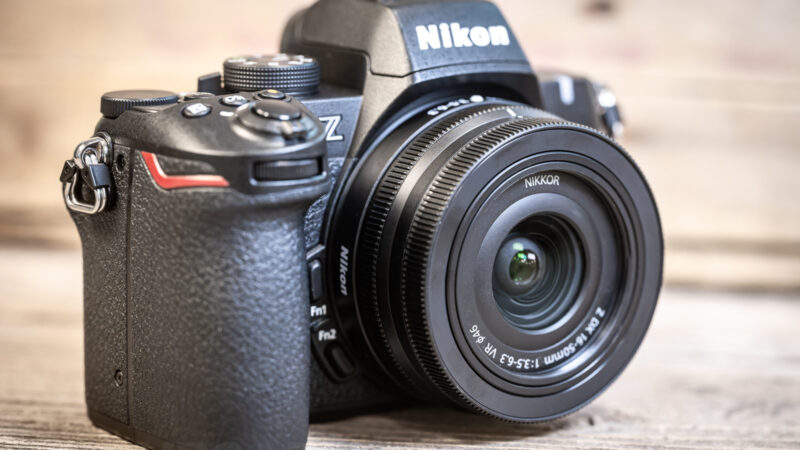
For many people, the best image quality setting on the Nikon Z50 II is JPEG fine at Large size. That’s one step up from the camera’s default settings out of the box.
The default is set to JPEG normal. That compresses the images more to save space. Switching to fine costs some space on your SD card but gives you better image quality to work with.
But you have options. And better yet, if you’d like to edit your photos, or just keep that option open, choose RAW + JPEG fine and set RAW recording to Lossless compression.
Here’s my rundown of what each option is and when to choose it.
Quick picks
| If you… | Image quality | RAW recording | Image size |
|---|---|---|---|
| Want great photos straight from the camera and don’t plan to edit | JPEG/HEIF fine | (not used) | Large |
| Want to edit, or keep the option open | RAW + JPEG/HEIF fine | Lossless compression | Large |
| Edit everything and don’t need a ready-made JPEG | RAW | Lossless compression | (RAW is always Large) |
| Shoot long bursts and want files to take less space | RAW, or RAW + JPEG/HEIF fine | High efficiency★ | Large |
Leave Tone mode on SDR (aka, Standard Dynamic Range), Choose image area on DX, and Color space on sRGB unless you have a specific reason to change them. I explain each of these in more detail below.
You’ll find all of these in the PHOTO SHOOTING MENU. Image quality, Image size, and Tone mode are also in the i menu, so you can change them without digging.
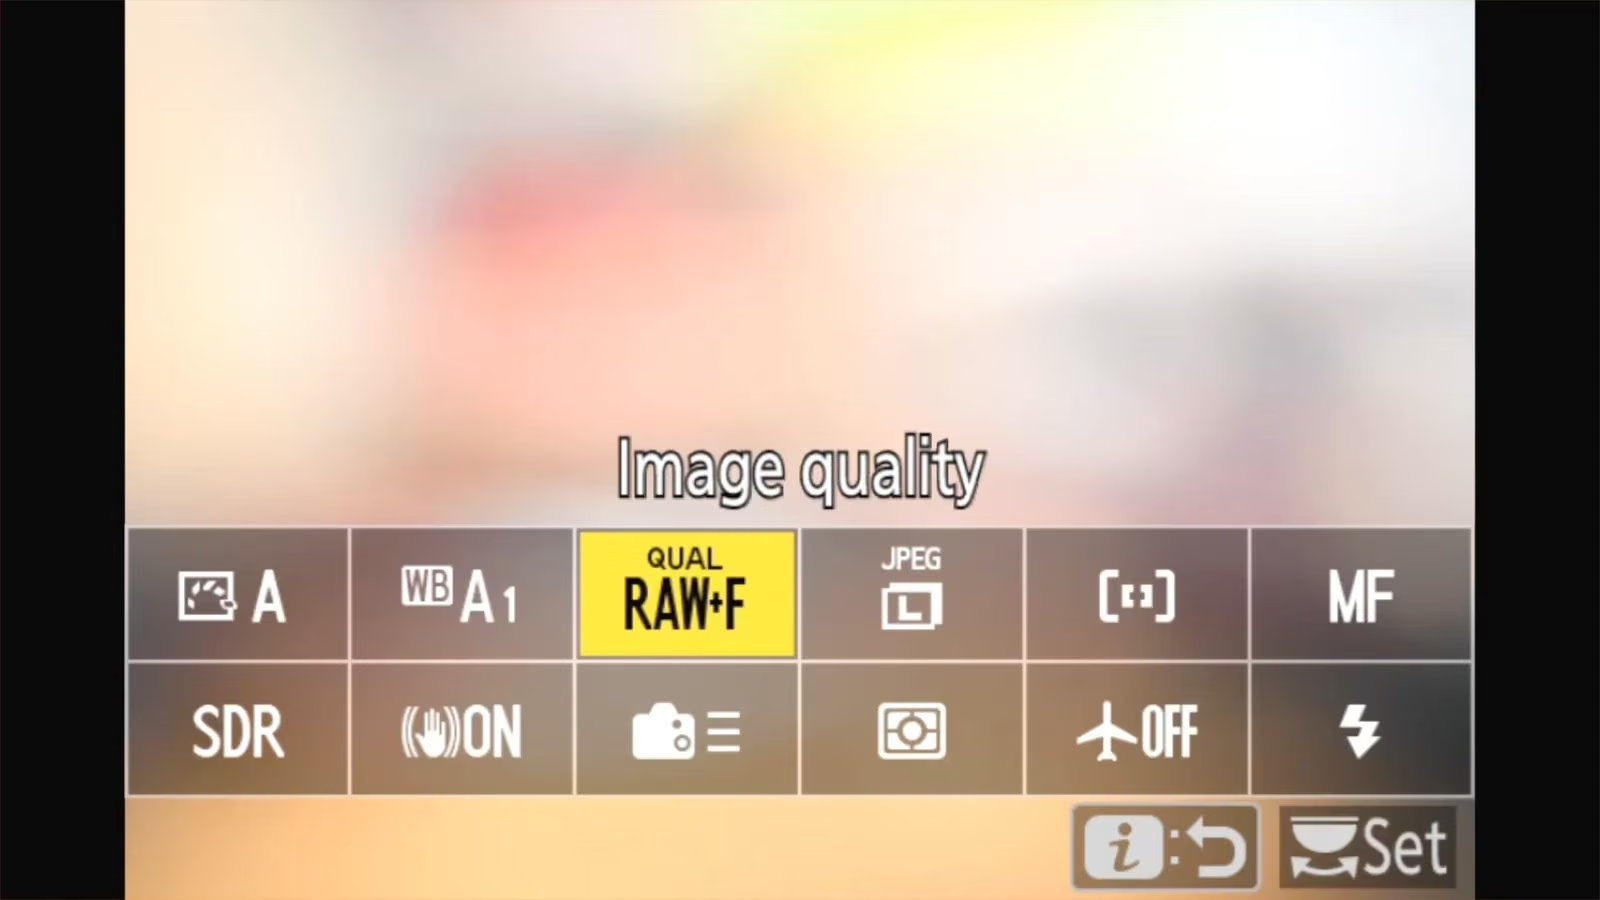
Image quality: RAW, JPEG, or both
MENU > PHOTO SHOOTING MENU > Image quality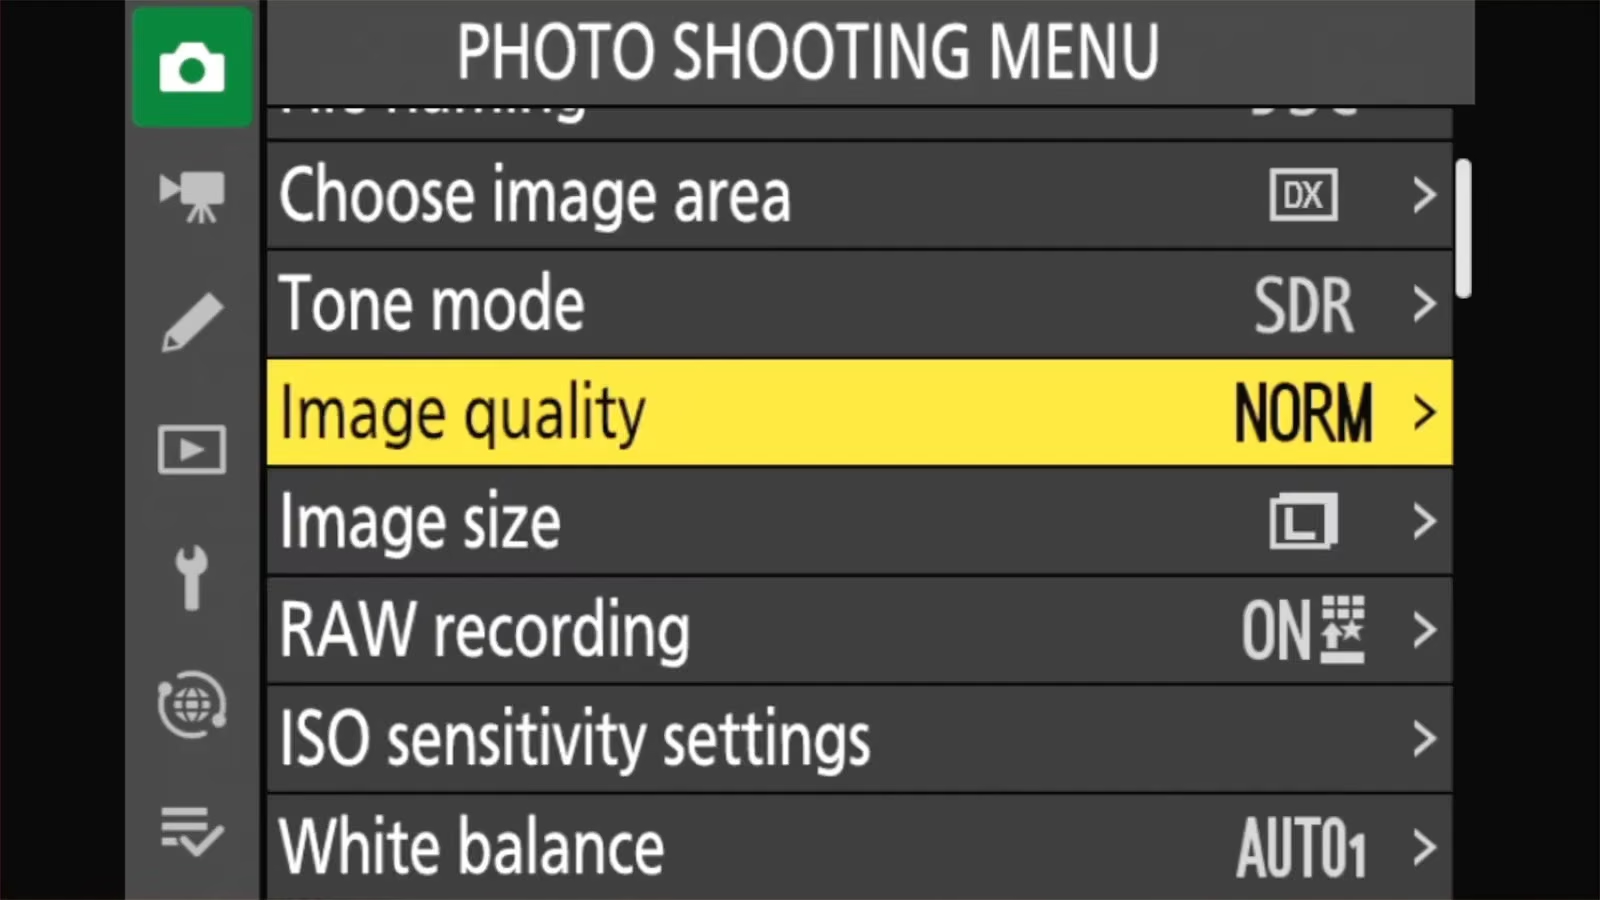
This setting determines what kind of files your photos are saved as.
JPEG is a finished photo. The camera has already decided the color, contrast, brightness, and sharpening, and it throws away the sensor data it didn’t use. JPEGs are small and open anywhere, from your phone to a web browser. That makes them ideal if you want to share photos straight away. You can still edit them later, although it’s not ideal because you’re working with a rendered file with the color and tone information already baked in.
RAW keeps everything the sensor recorded, before those decisions are made. Nikon’s RAW files are called NEF files (the name ends in .nef). It’s ideal if you’re planning to edit the files, because it provides far more information for the editor to work with. And you can make changes to things like color tones and white balance without intensifying layers of editing. That makes it much easier to rescue a sky that came out too bright, lift dark shadows, or fix colors that look off. The downsides are that you get much larger file sizes to work with and store, and you need software to turn a RAW into a shareable photo.
RAW + JPEG saves both at once, a best-of-both-worlds approach. You get a JPEG that’s shareable immediately as well as a RAW to go back to if a photo needs more work. Of course, saving both formats means that each shot takes up more space on your memory card.
The options
| Option | What you get |
|---|---|
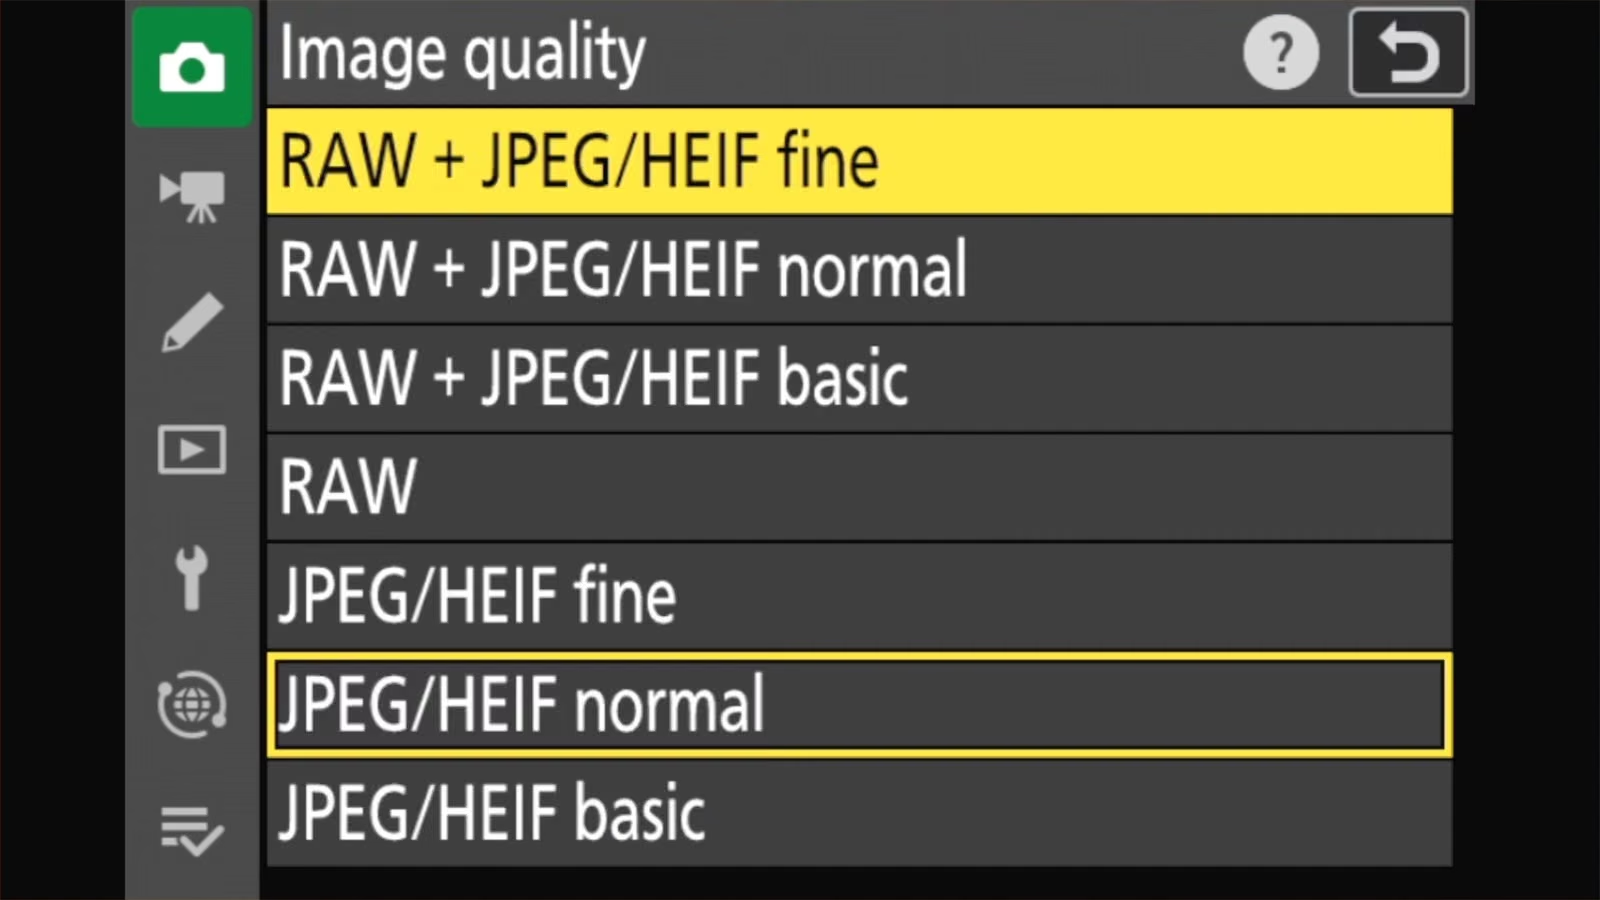
| RAW + JPEG/HEIF fine | A RAW file plus a high-quality JPEG (or HEIF) |
| RAW + JPEG/HEIF normal | A RAW file plus a medium-quality JPEG (or HEIF) |
| RAW + JPEG/HEIF basic | A RAW file plus a lower-quality JPEG (or HEIF) |
| RAW | A RAW file only |
| JPEG/HEIF fine | A high-quality JPEG (or HEIF) only |
| JPEG/HEIF normal | A medium-quality JPEG (or HEIF) only |
| JPEG/HEIF basic | A lower-quality JPEG (or HEIF) only |
“JPEG/HEIF” means the camera saves a JPEG normally, or a HEIF when Tone mode is set to HLG. I have more detail on that below, but basically you’re choosing either JPEG or HEIF — it will use whichever is appropriate for the shooting mode (usually JPEG).
Fine, normal, and basic set how much the camera compresses the JPEG to save space. Fine compresses least, at about 1:4. Normal is about 1:8, and basic about 1:16. Fine files are bigger, but they hold up better if you crop or edit. Memory cards aren’t particularly expensive these days, so it’s well worth getting a larger-storage SD card and putting the compression amount to Fine — it’ll give you much better quality to work with in the future.
Two things to know about RAW + JPEG
The camera shows you only the JPEG. When you play back a RAW + JPEG photo on the camera, you’re looking at the JPEG copy.
Deleting on the camera deletes both. If you delete a RAW + JPEG photo on the camera, the RAW file is deleted too. Nikon’s manual is clear about this. It’s another reason to review and cull on a computer rather than on the back of the camera.
RAW + JPEG vs RAW (with embedded JPEG preview)
It’s also worth clarifying a potential point of confusion here. When the camera saves its RAW file, it also embeds a JPEG preview within the RAW file. That is, it’s not a separate file. The camera uses that embedded JPEG to display the photo on the back of the camera, and many apps use it when you first open the image on a computer. On Nikon cameras, that preview is usually full size in pixels but more heavily compressed, because its purpose is speed and convenience. It’s not intended to be used by itself, though it can be extracted from the RAW file if you need an emergency salvage.
The RAW + JPEG mode is different. It saves two files of the same capture: a RAW file and a JPEG file, either of which can be used as a standalone file.
RAW recording: lossless or high efficiency
MENU > PHOTO SHOOTING MENU > RAW recording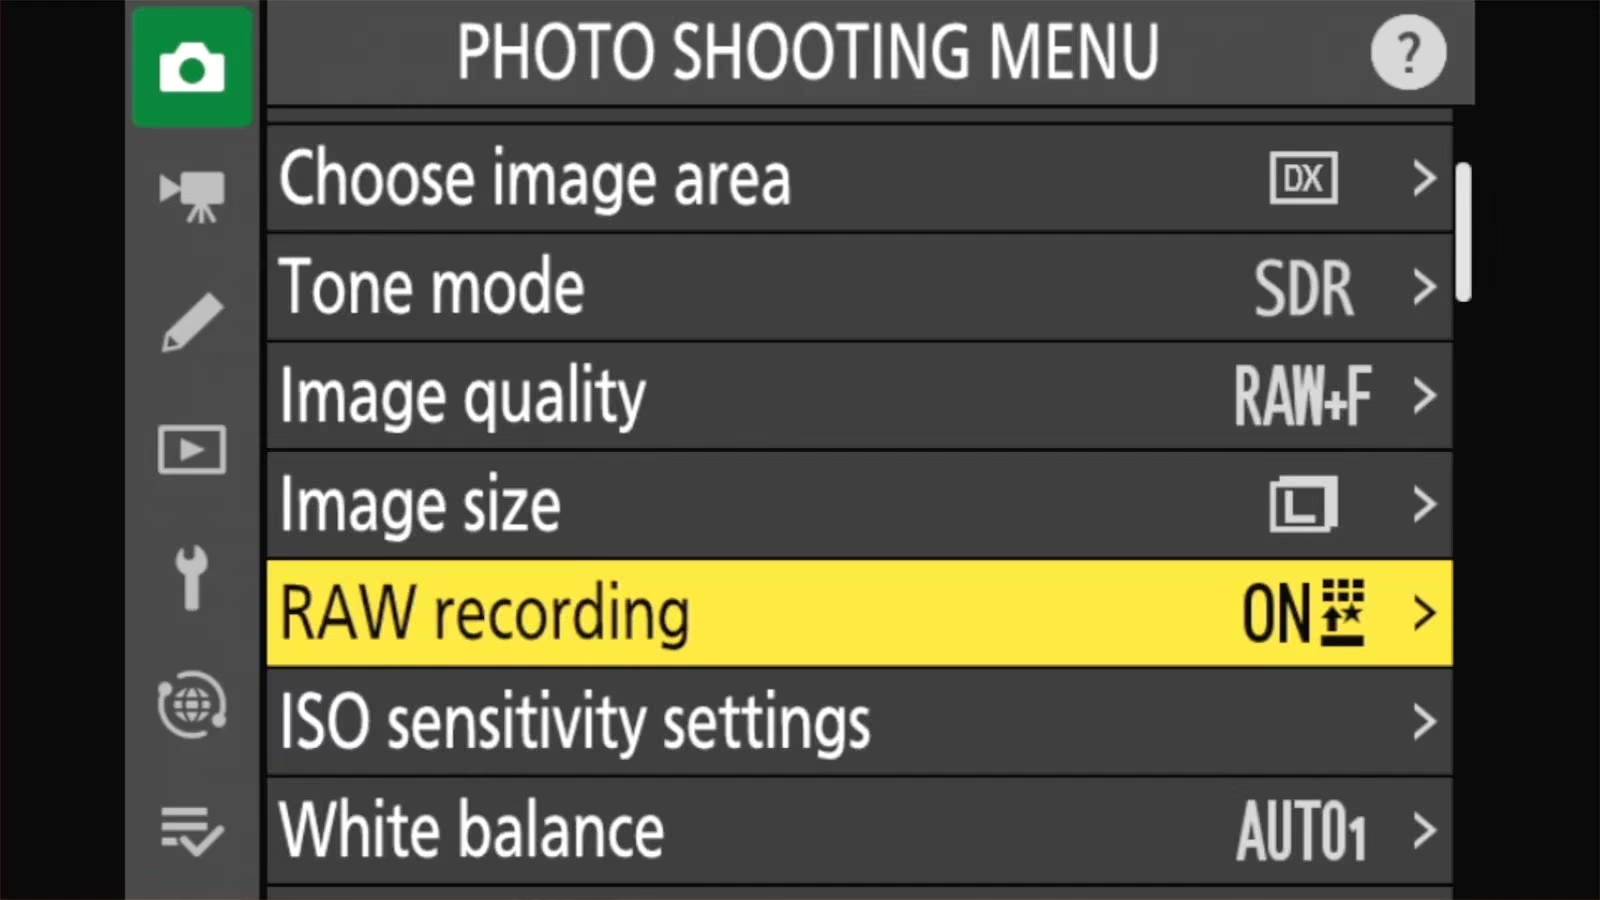
If you shoot RAW, there are some further options that you can choose from.
They control how much the RAW files are compressed. All three options record 14-bit RAW files, which is the most color and tone information this camera captures. Only the amount and type of compression changes. ((If you’re coming from the original Z50: the RAW setting there chose between 12-bit and 14-bit. On the Z50 II, it’s always 14-bit, and the setting chooses compression instead.))
The two key considerations here are file size/storage space and image quality. The less compression applied, the higher the image quality but also the larger the file sizes. A third consideration is how many shots fit on a card. The High efficiency options make smaller files, so you get more photos per card. They don’t give you longer bursts, though. Nikon rates the buffer at over 200 frames for all three options.
| RAW recording | File size (approx.) | Photos on a 128 GB card (approx.) |
|---|---|---|
| Lossless compression | 24.4 MB | 3,050 |
| High efficiency★ | 15.6 MB | 6,800 |
| High efficiency | 10.6 MB | 9,600 |
File sizes and counts are derived from Nikon’s figures for a 32 GB card, with the DX image area and SDR tone mode. Real numbers vary with the scene because of the way that compression works.
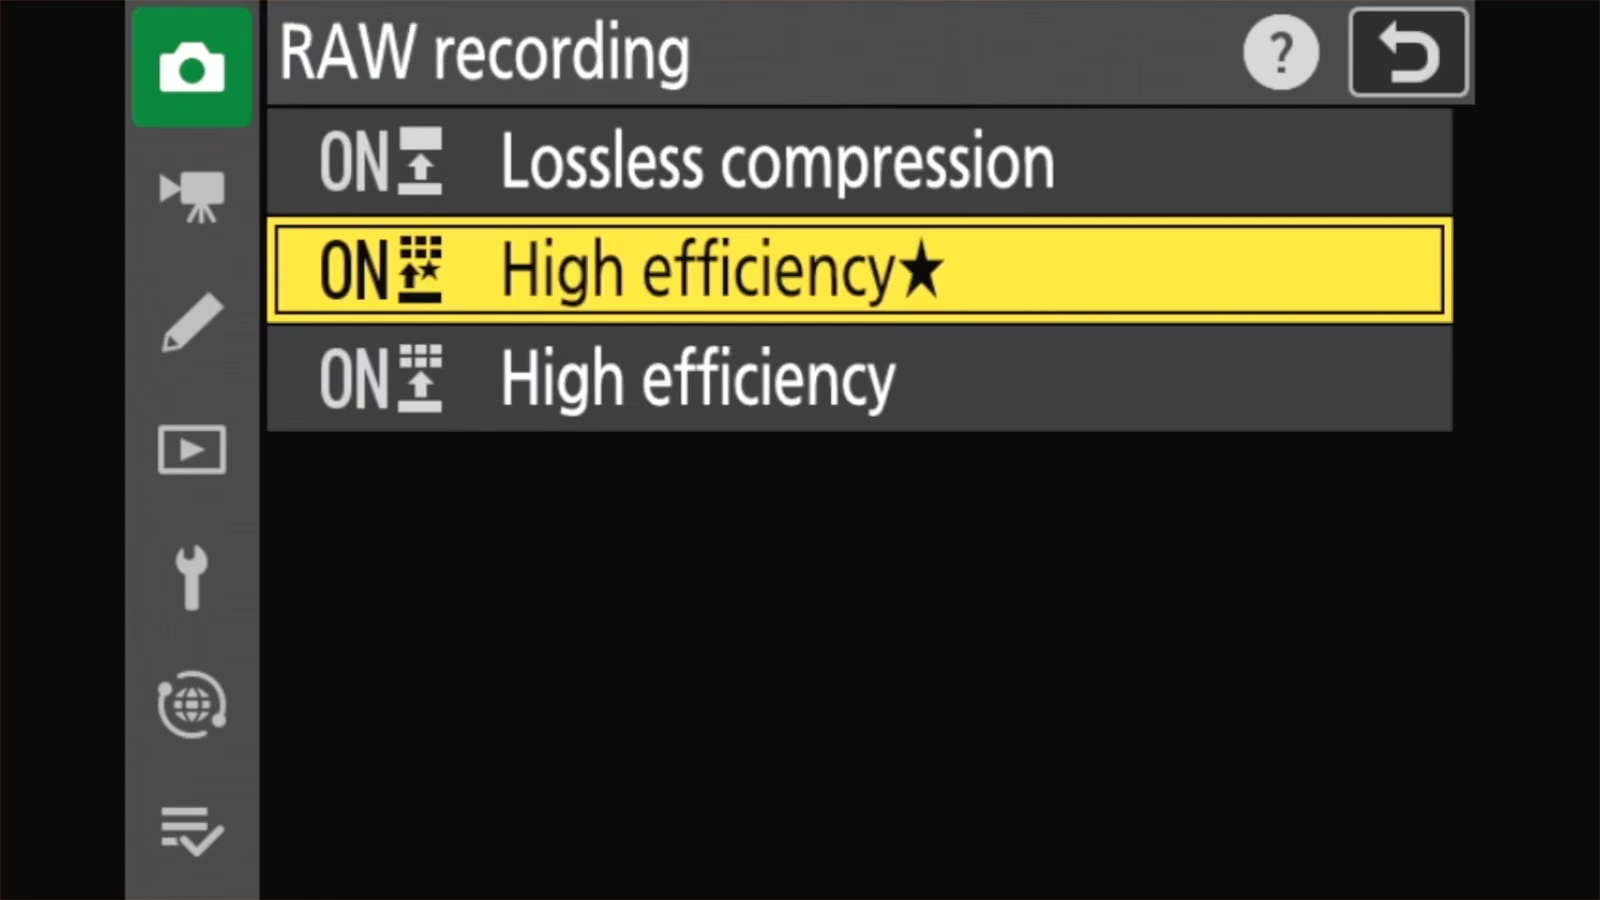
Lossless compression shrinks the file without throwing anything away. When you open it, you get back exactly what the sensor recorded. It makes the biggest files of the three.
High efficiency★ (the star is part of the name) uses a smarter compression method that does discard a little data. Nikon says its quality “compares favorably” with lossless compression, at about two-thirds of the file size.
High efficiency compresses harder still. Files are smaller again and quality is a step below High efficiency★. You’ll start to notice the difference when editing and trying to bring out details in shadows.
Which should you pick? Lossless compression is the safe choice and the one I nearly always use. It works in every piece of software that supports the Z50 II. High efficiency★ is a sensible trade if you shoot lots of bursts or want more photos per card, as long as your editing software reads it, which is the real catch.
Out of the box, the camera is set to High efficiency★, not Lossless compression. If you switch Image quality to RAW and don’t touch this setting, High efficiency★ is what you’ll get. That default is behind most of the reports of Z50 II RAW files not opening.
If your software won’t open your RAW files
The High efficiency options use a newer compression method that some software couldn’t read at first, or reads only in newer versions. Adobe added Z50 II support in Lightroom Classic 14.1 and Camera Raw 17.1 in December 2024. Nikon’s free NX Studio reads all three options. Apple is the other one to watch: on macOS Sequoia and iOS 18, Photos and Preview read Z50 II files in Lossless compression only. That restriction was lifted in macOS 26 and iOS 26. If an app won’t open your NEF files, updating it or switching RAW recording to Lossless compression usually fixes it. I go into more detail in Z50 II RAW files won’t open in Lightroom or Photos.
Image size: large, medium, or small
MENU > PHOTO SHOOTING MENU > Image size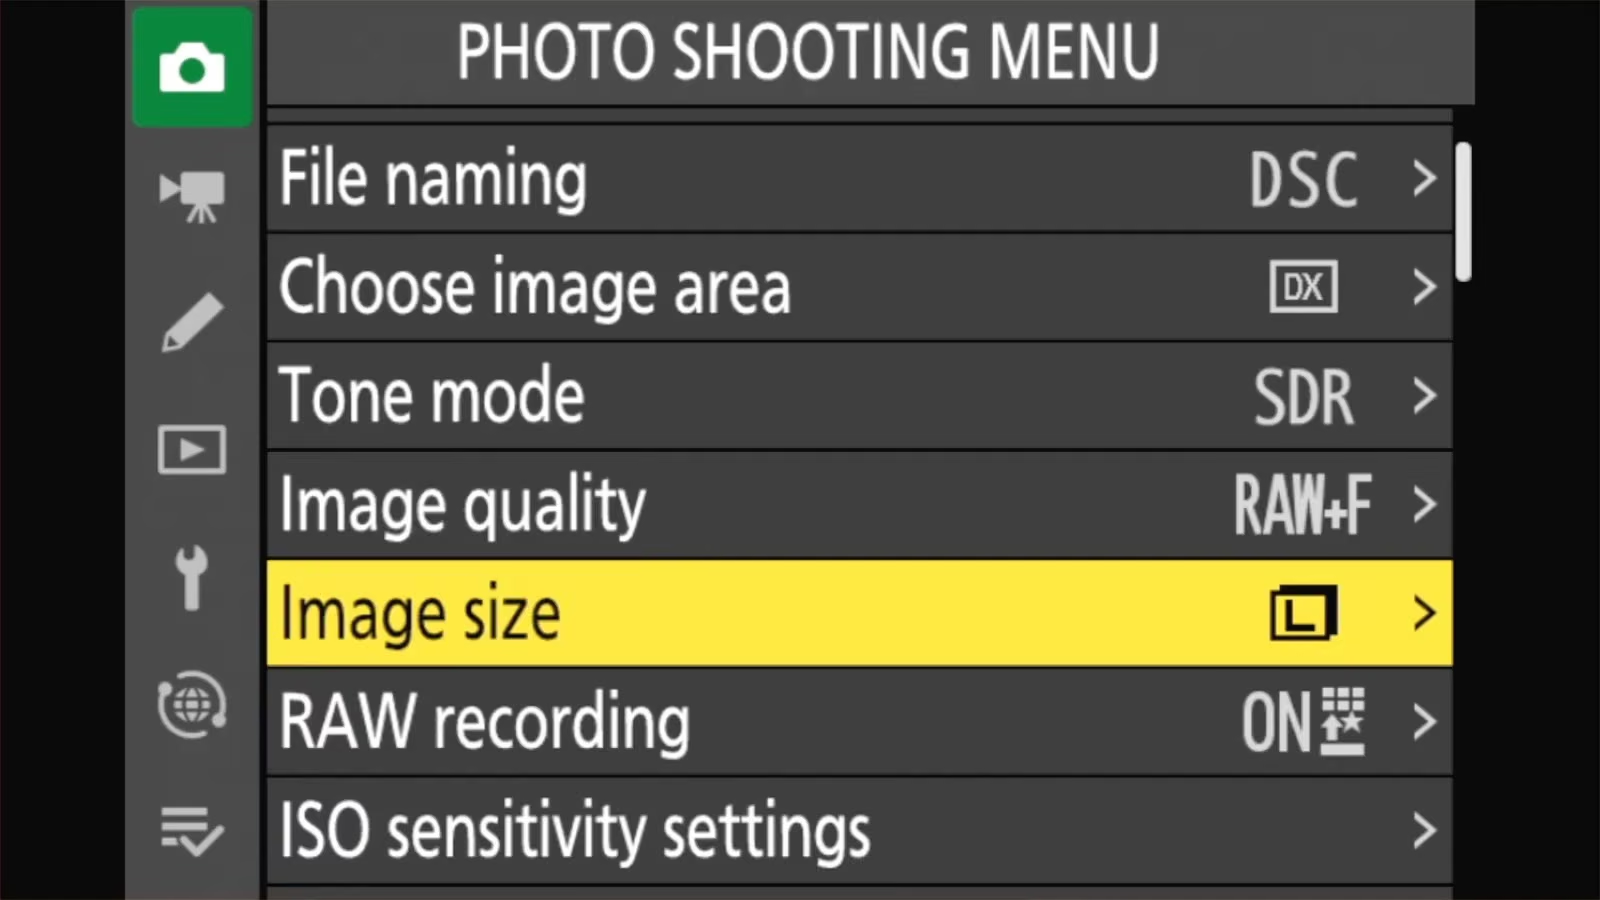
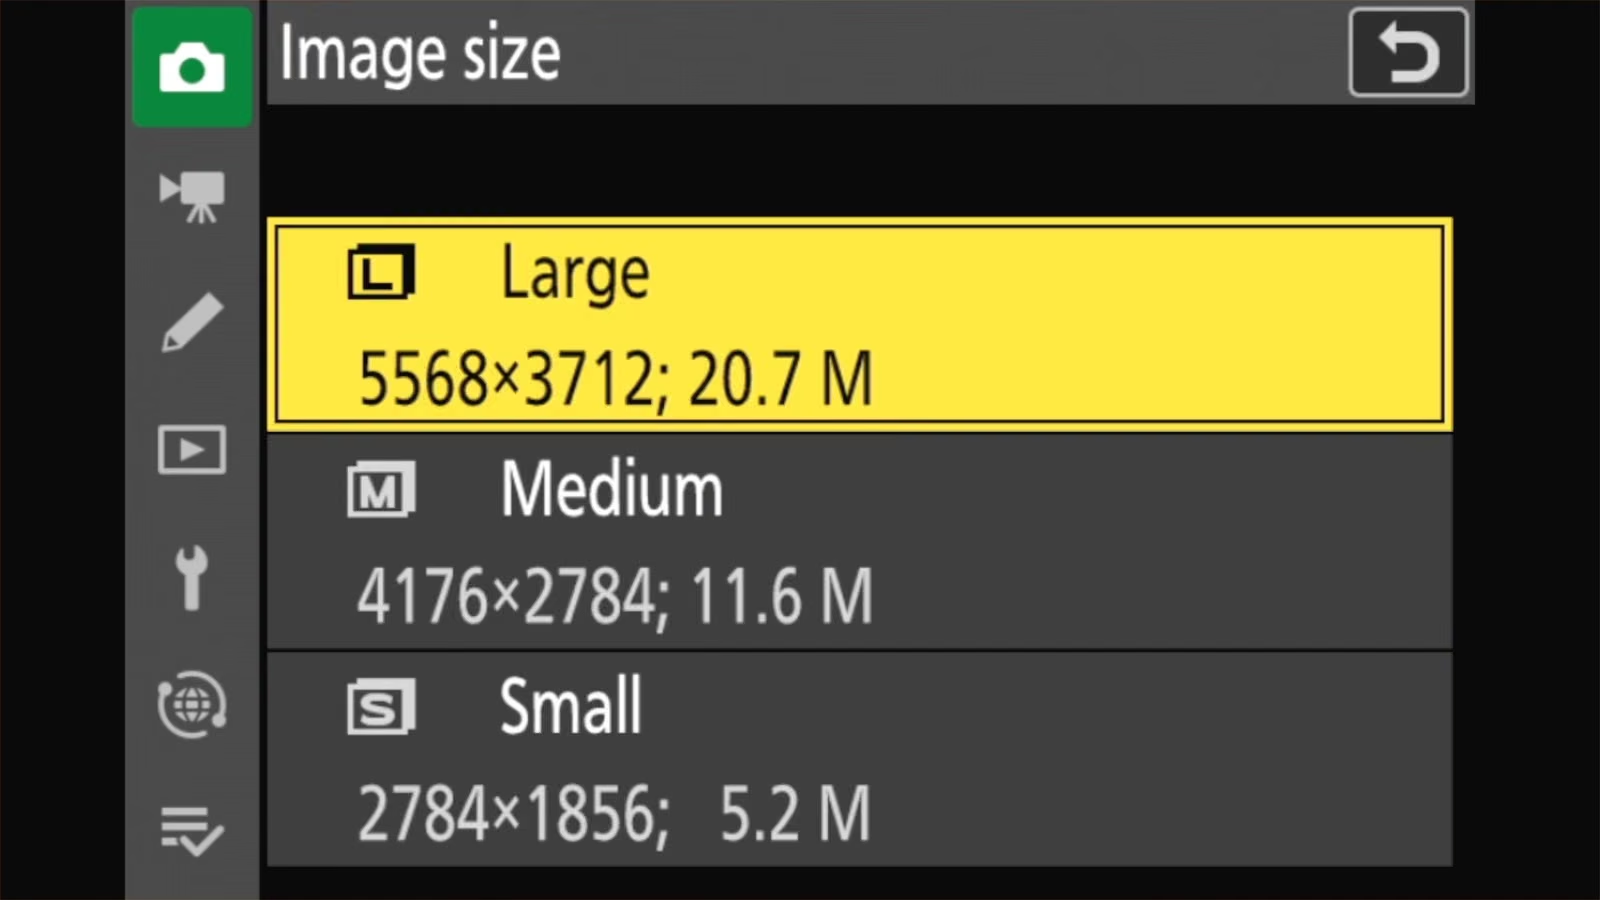
Image size sets how many pixels are in each JPEG or HEIF. Leave it on Large. You can always make a copy smaller later, but you can’t add pixels back. And you’ll be grateful for the larger files in years’ time when you revisit some of the photos you’re taking now.

RAW files are always recorded at Large, whatever this is set to.
| Image area | Size | Pixels | Prints at 300 dpi |
|---|---|---|---|
| DX (24×16) | Large | 5568 × 3712 | 18.5 × 12.4 in (47.1 × 31.4 cm) |
| Medium | 4176 × 2784 | 13.9 × 9.3 in (35.4 × 23.6 cm) | |
| Small | 2784 × 1856 | 9.3 × 6.2 in (23.6 × 15.7 cm) | |
| 1:1 (16×16) | Large | 3712 × 3712 | 12.4 × 12.4 in (31.4 × 31.4 cm) |
| Medium | 2784 × 2784 | 9.3 × 9.3 in (23.6 × 23.6 cm) | |
| Small | 1856 × 1856 | 6.2 × 6.2 in (15.7 × 15.7 cm) | |
| 16:9 (24×14) | Large | 5568 × 3128 | 18.6 × 10.4 in (47.1 × 26.5 cm) |
| Medium | 4176 × 2344 | 13.9 × 7.8 in (35.4 × 19.8 cm) | |
| Small | 2784 × 1560 | 9.3 × 5.2 in (23.6 × 13.2 cm) |
300 dots per inch is a common standard for high-quality prints, but it’s not always necessary to go that high, especially when printing larger images that are designed for large viewing distances. For something viewed across a room, 200dpi is also often completely acceptable.
How many photos fit on a card
These are extrapolated from Nikon’s figures for a 32 GB card, using the DX image area:
| Image quality | Size | File size (approx.) | Photos on a 128 GB card (approx.) |
|---|---|---|---|
| JPEG fine | Large | 10.0 MB | 8,400 |
| Medium | 6.8 MB | 13,600 | |
| Small | 3.7 MB | 25,600 | |
| JPEG normal | Large | 5.7 MB | 16,800 |
| Medium | 3.5 MB | 26,800 | |
| Small | 2.0 MB | 48,800 | |
| JPEG basic | Large | 2.3 MB | 32,000 |
| Medium | 1.7 MB | 51,200 | |
| Small | 1.1 MB | 88,800 |
In terms of what size card to get, it really depends on what you shoot. For wildlife and sports action shooting in burst mode, it’s pretty easy to run up 1000 frames very quickly. For a portrait session, you’re probably not going to get anywhere near that. For which cards to buy, see my Nikon Z50 II memory card recommendations.
Tone mode: SDR or HLG (and where HEIF comes from)
MENU > PHOTO SHOOTING MENU > Tone mode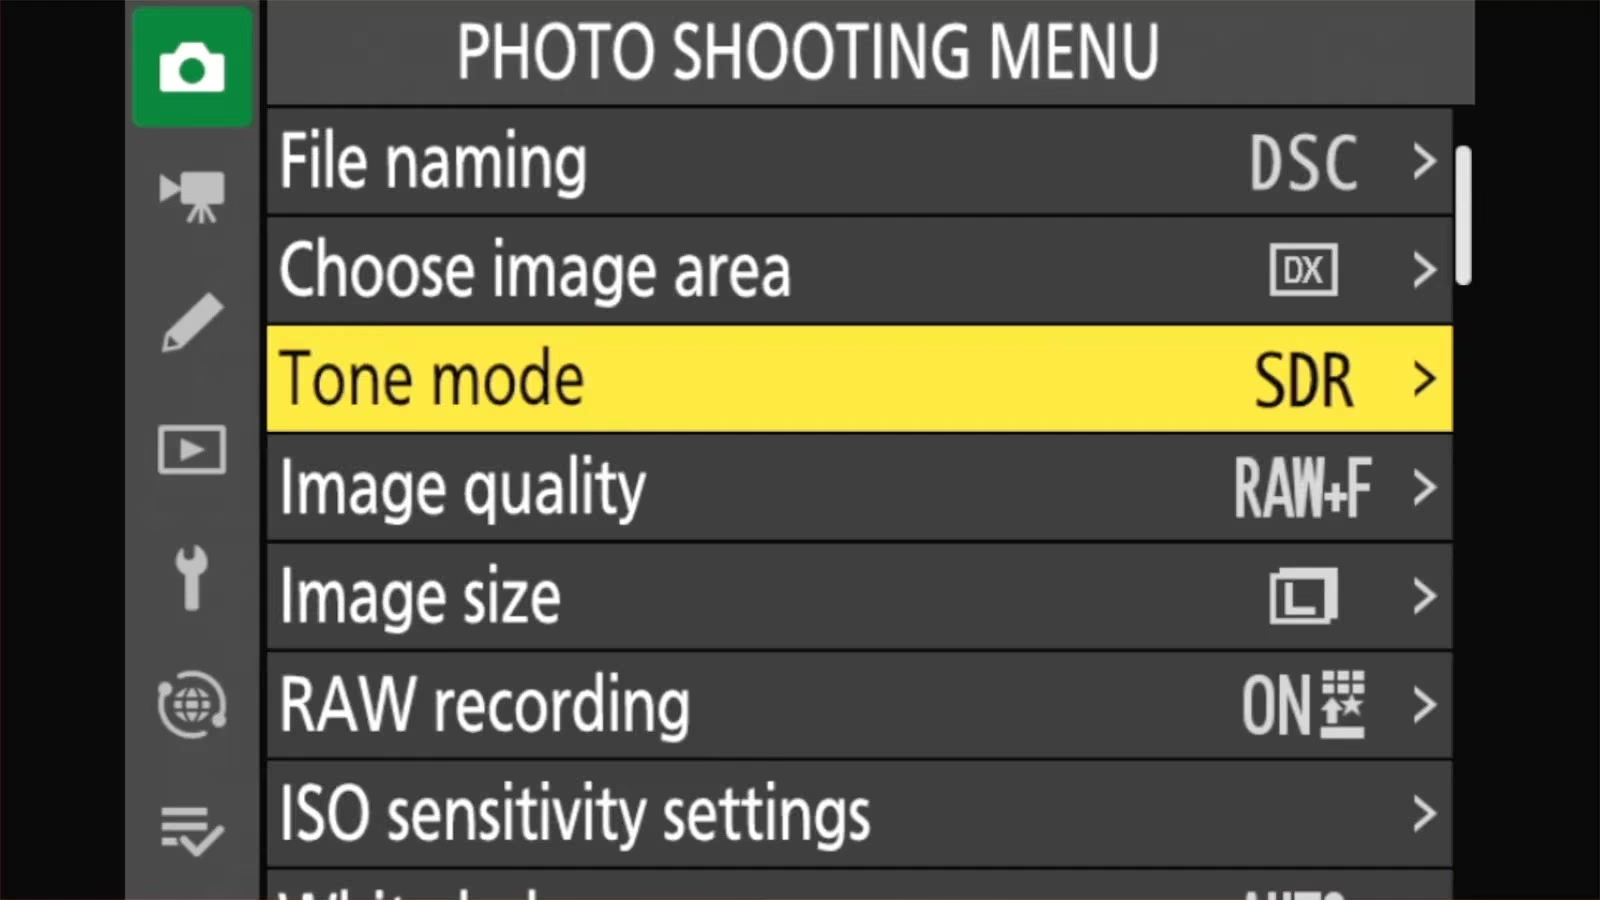
This is one of those settings that you probably will never need to touch. But it’s there if you need it.
If you’ve been looking for a HEIF option under Image quality, this is why you couldn’t find it. Unlike on some cameras, you’re not choosing between JPEG and HEIF. The camera switches based on what kind of Tone mode you’re using.
- SDR (standard dynamic range) saves JPEG files. It’s the right choice for nearly everyone, and it’s what every screen, app, and printer expects. It has maximum compatibility and convenience.
- HLG saves HEIF files (the name ends in .HIF). HLG is a high dynamic range (HDR) format that blends a wider range of brightness, from deep shadows to bright highlights, and it’s designed to be viewed on HDR-capable screens. HEIF is a newer image format that supports this extra depth, which is why the camera automatically switches to it when shooting in HLG.
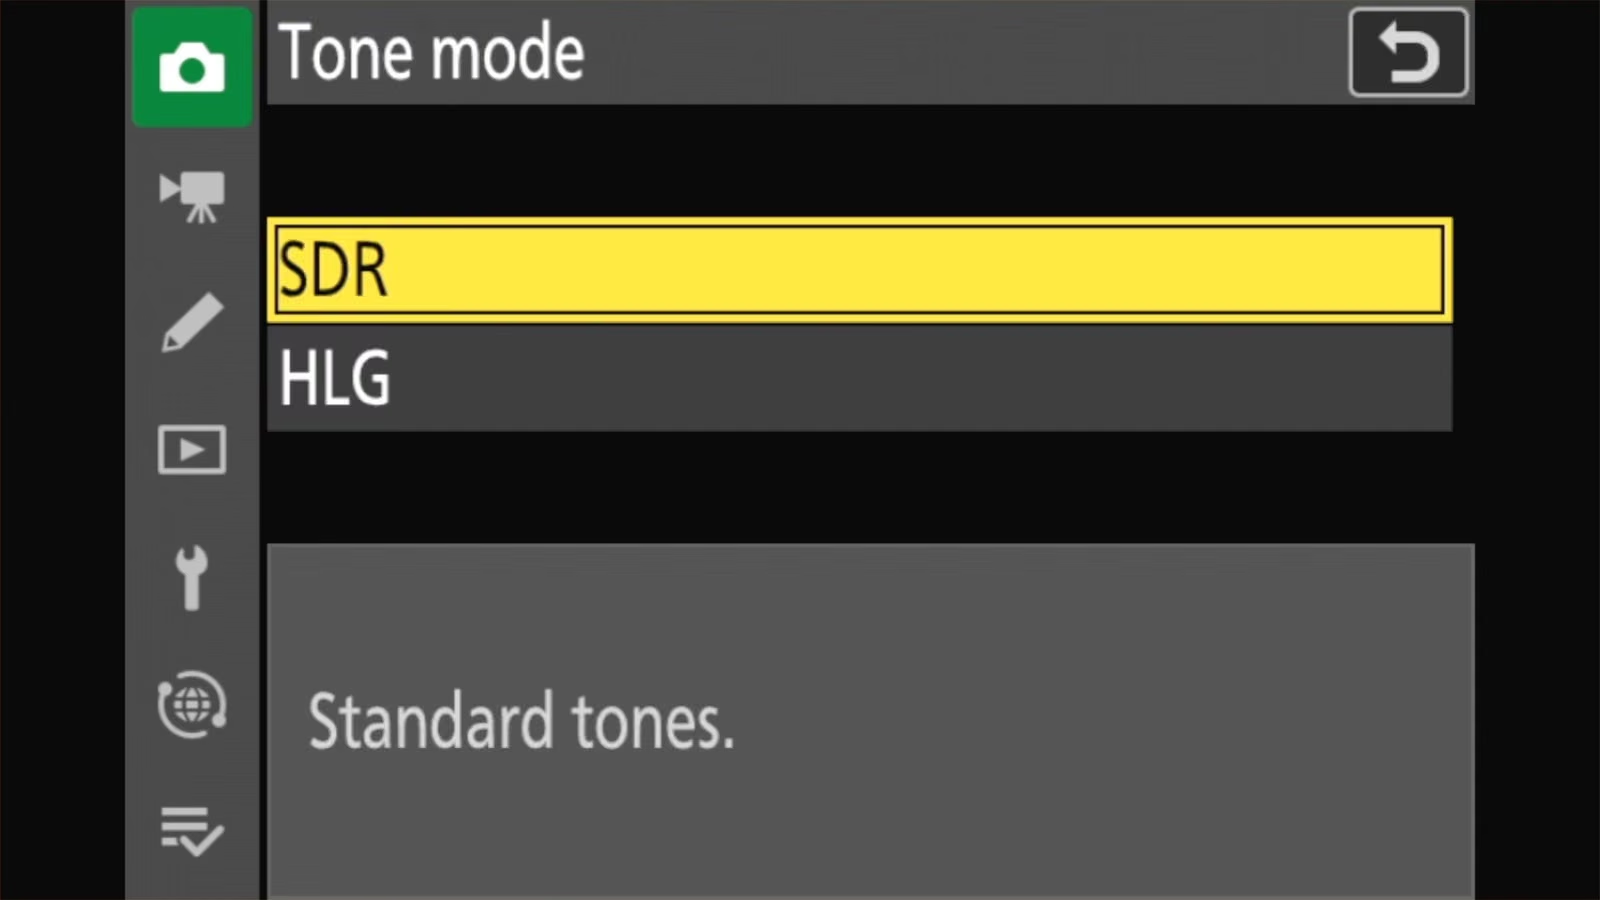
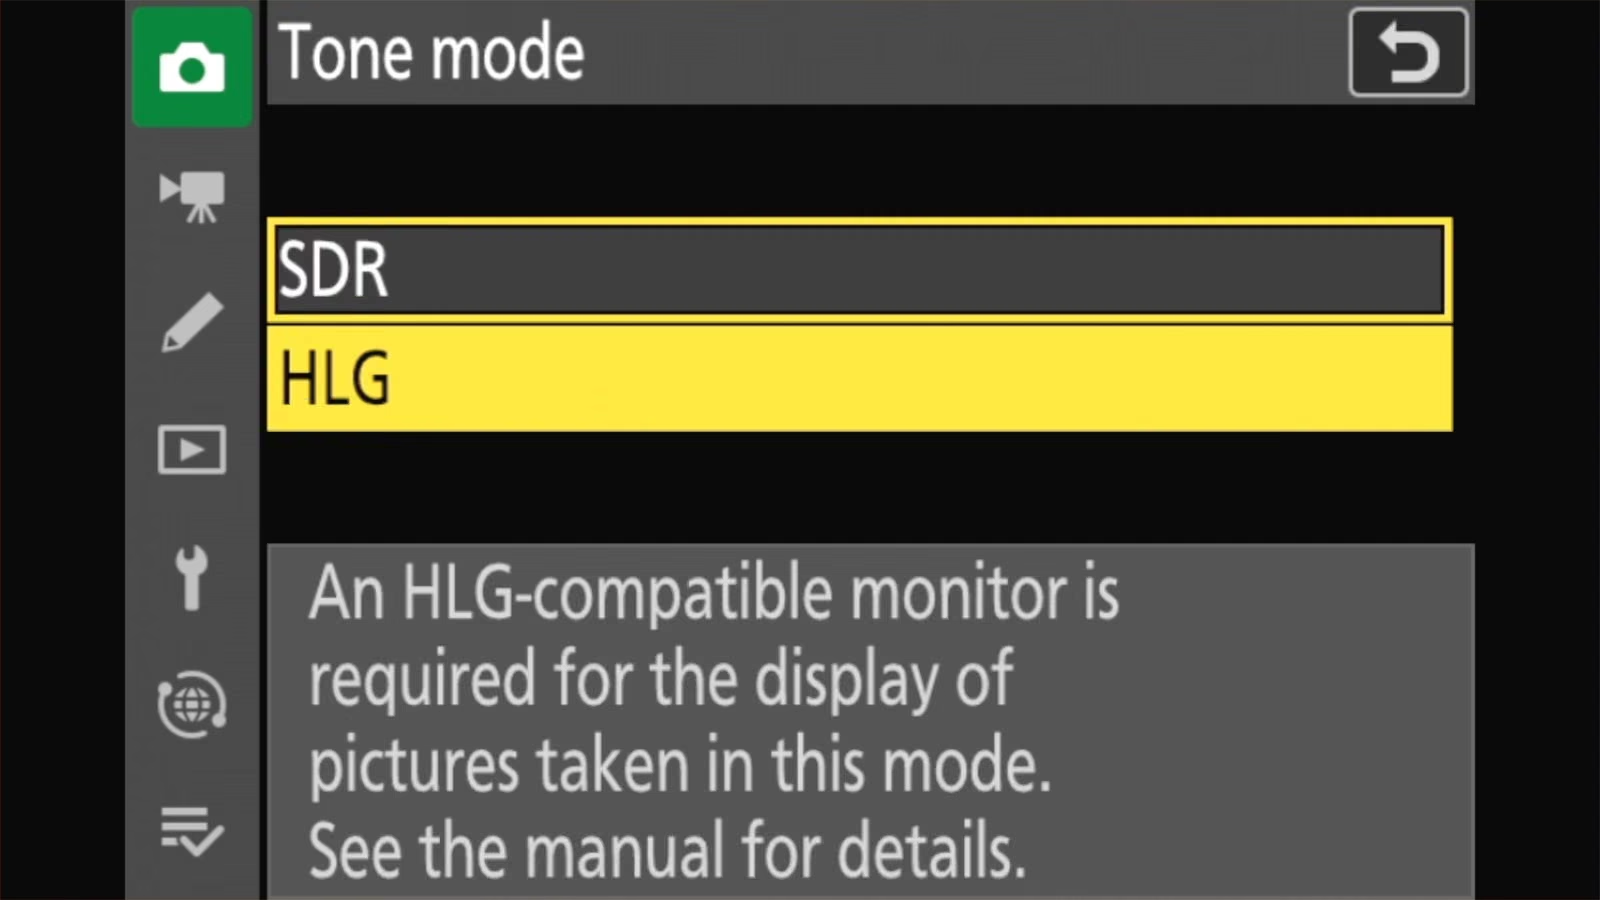
HLG sounds like an upgrade — who doesn’t want more detail in highlights and shadows? But it comes with downsides and restrictions, and it’s something I rarely use.
With HLG photos:
- There’s more visible noise than with SDR.
- The extended ISO settings above ISO 51200 (Hi 0.3 to Hi 2.0) aren’t available.
- The lowest maximum you can set for Auto ISO is ISO 800.
- Color space is locked to an HDR standard (BT.2100).
- Active D-Lighting, Multiple exposure, and HDR overlay aren’t available.
- The C15 and C30 high-speed burst modes and Pre-Release Capture aren’t available.
The lowest ISO rises from 100 to 400.
Picture Controls are limited to Standard, Monochrome, and Flat.
HLG photos can also look dull or odd on screens and in apps that don’t support HDR. Unless you know you specifically want HDR stills and have the screens to show them, my recommendation is to leave Tone mode on SDR. For more on HEIF and how it compares to JPEG, see image file formats explained.
Choose image area: DX, 1:1, or 16:9
MENU > PHOTO SHOOTING MENU > Choose image area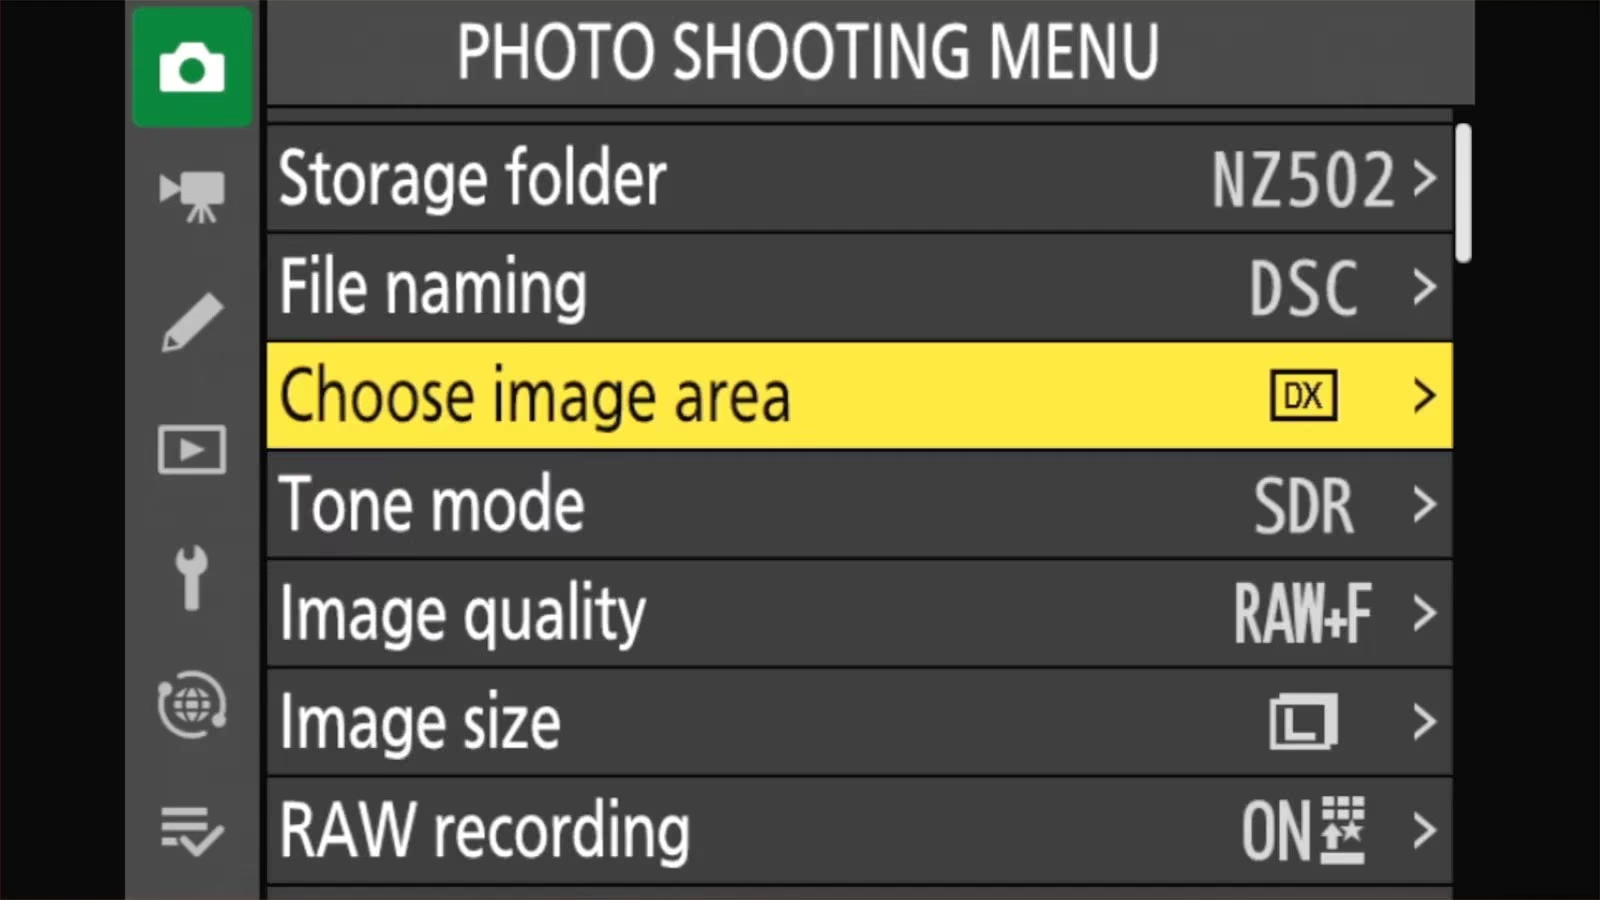
This crops the photo to a different shape as you shoot. Unlike Image size, this applies to RAW files too. A RAW file shot at 1:1 is square, and the pixels outside that crop aren’t recorded.
- DX (24×16) uses the whole sensor, in the traditional 3:2 photo shape. This gives you the most pixels.
- 1:1 (16×16) is square, handy if you like composing for Instagram in the viewfinder.
- 16:9 (24×14) is widescreen, the same shape as a TV.
There’s no FX (full-frame) option, because the Z50 II’s sensor is DX size. ((DX is Nikon’s code for APS-C cropped sensor size. Their code for full-frame sensors (ie. 35mm equivalent) is FX.))
The 1:1 and 16:9 options throw away part of the frame. If you’re not sure, shoot DX and crop to square or widescreen later. Choose 1:1 or 16:9 in the camera only when seeing that shape in the viewfinder helps you compose.
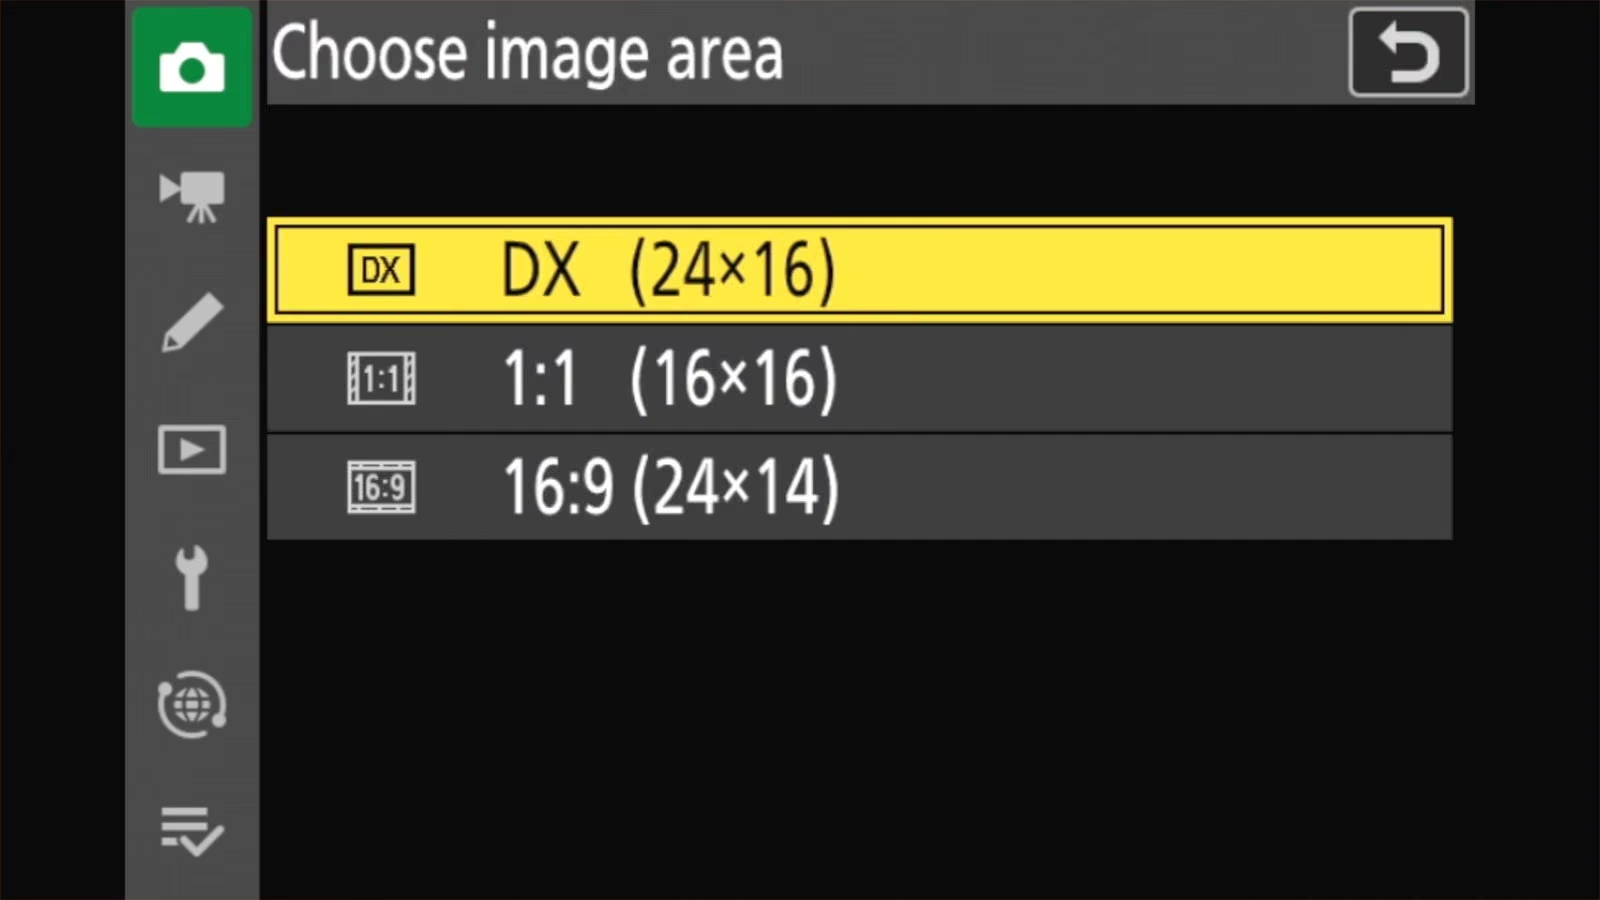
If you’d like to limit which shapes are available when you change image area with a dial, Custom Setting d8 [Limit selectable image area] does that.
Color space: sRGB or Adobe RGB
MENU > PHOTO SHOOTING MENU > Color space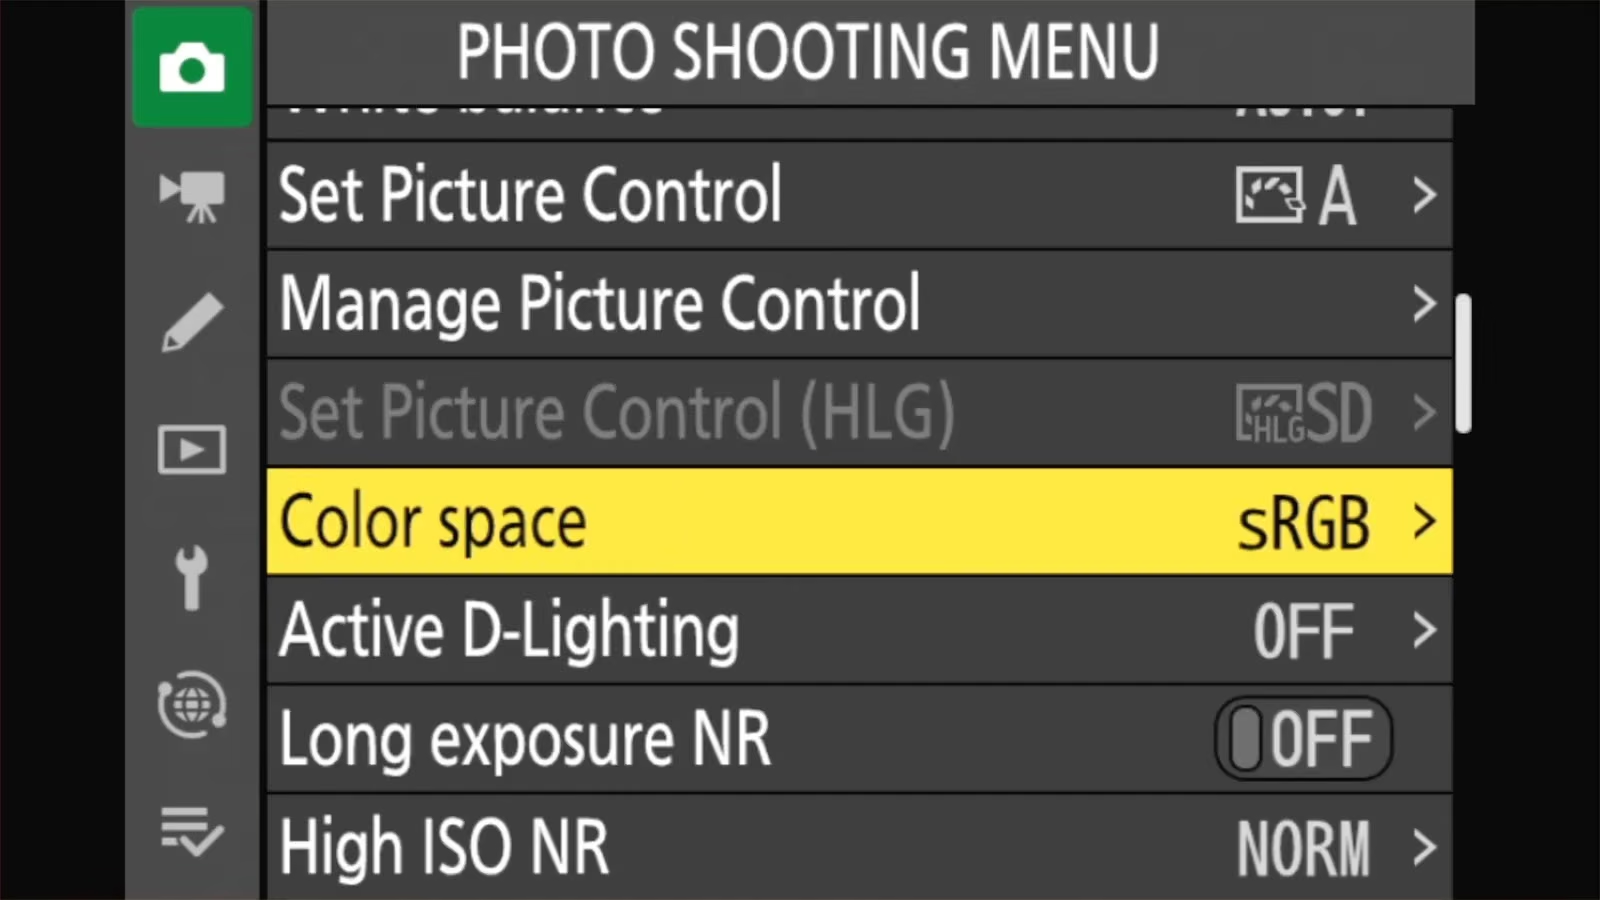
This one only affects JPEGs. RAW files keep all their color, whichever you choose.
Color space sets the range of colors a JPEG can contain. Nikon recommends sRGB for general printing and display, and it’s what phones, web browsers, and social media expect. Adobe RGB covers a wider range of colors and suits professional printing. But it only helps if every step, from your editing software to the printer, is set up for it. Otherwise colors can look flat.
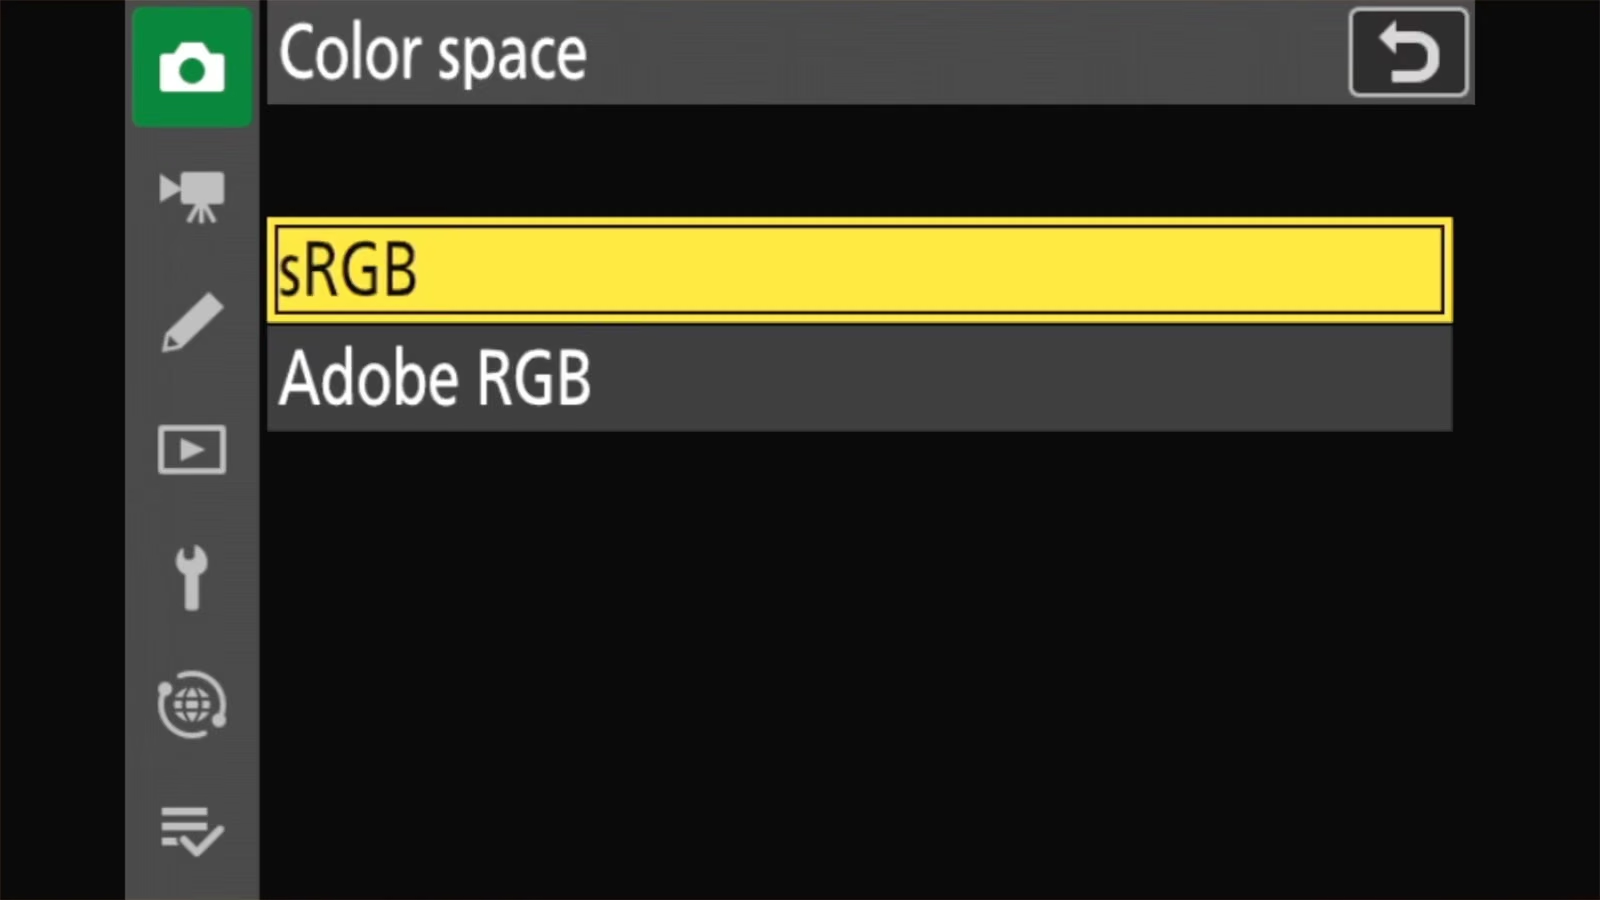
Stick with sRGB. If you shoot RAW, you can still choose a different color space when you edit (eg. ProPhoto) and then export with sRGB for sharing and displaying (and usually printing).
A simple setup to start with
- Image quality: RAW + JPEG/HEIF fine. (Or JPEG/HEIF fine if you’re sure you won’t edit.)
- RAW recording: Lossless compression.
- Image size: Large.
- Tone mode: SDR.
- Choose image area: DX (24×16).
- Color space: sRGB.
Then go and take pictures. None of these settings affect how the camera focuses or exposes. They only decide what gets saved.
Frequently asked questions
Does Image size change my RAW files?
No. RAW files are always recorded at Large (5568 × 3712 pixels in DX). Image size only applies to JPEG and HEIF files.
Why can’t I find HEIF in Image quality?
The camera saves HEIF only when Tone mode is set to HLG. With Tone mode on SDR, it saves JPEG.
Is JPEG fine noticeably better than normal?
At normal viewing sizes the difference is small. It shows up more when you crop heavily or edit the JPEG. Since cards are inexpensive, fine is the better default.
Why won’t my software open my Z50 II RAW files?
It’s usually either an older version of the software or the High efficiency compression options. Update the app, or switch RAW recording to Lossless compression. Nikon’s free NX Studio opens all of them.
Explore the Nikon Z50 II
Here’s a fun tool I created to help identify which buttons and dials are where — and what they’re called, because every brand has their own dialect and jargon.


